A Letter Shelf
How to build a giant letter A Shelf from
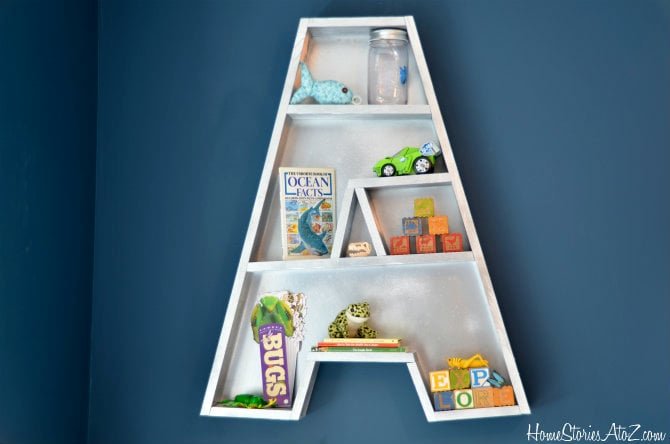
Specifications
| Project type | shelves |
|---|---|
| Room | Kids and Toys |
| Style | Children's and Kid's Room Furniture and Toy Plans |
| Difficulty | Intermediate |
| Estimated cost | $20 - $50 |
Dimensions
Use the size-specific shopping and cut lists below.
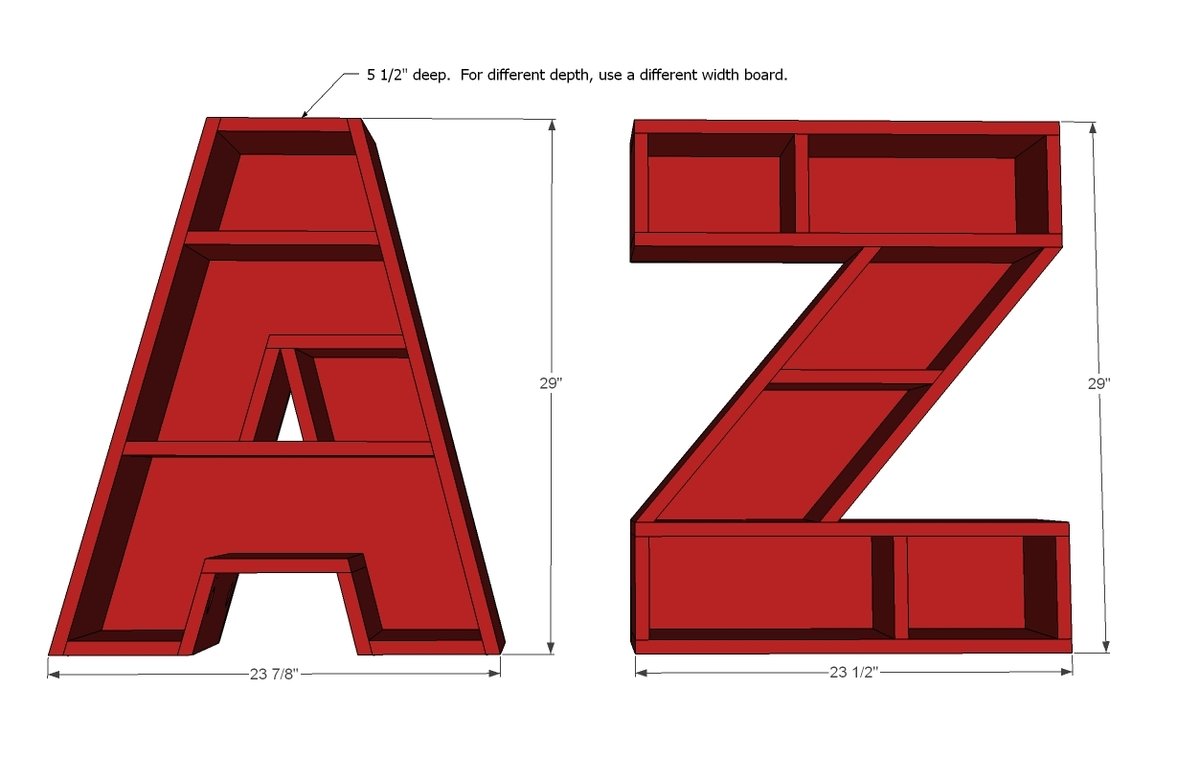
Shopping List
2 – 1x6 @ 8 feet long
1 – 1/4” plywood 23 ½” x 29”
(for both A and Z letters buy a 1/2 sheet of 1/4" plywood)
1 1/4" Pocket Hole Screws
2” (could get away with smaller) finish nails and wood glue
Hanging Bracket/Hardware that attaches to back (try heavy duty hooks)
Cut List
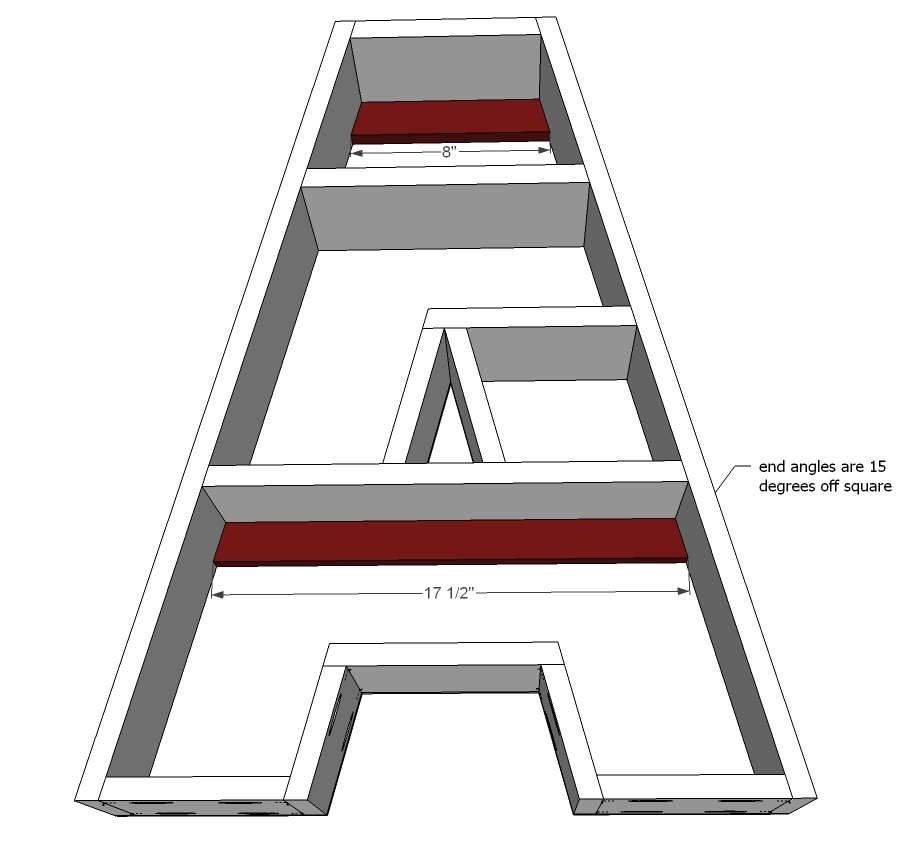
1 – 1x6 @ 8” (long point to long point, both ends cut at 15 degrees off square, ends NOT parallel)
2 – 1x6 @ 4 1/2” (long point to short point, both ends cut at 15 degrees off square, ends ARE parallel)
2 – 1x6 @ 6” (long point to short point, both ends cut at 15 degrees off square, ends ARE parallel)
2 – 1x6 @ 30” (long point to short point, both ends cut at 15 degrees off square, ends ARE parallel)
1 – 1x6 @ 7 1/4” (long point to long point, both ends cut at 15 degrees off square, ends NOT parallel)
1 – 1x6 @ 10 5/8” (long point to long point, both ends cut at 15 degrees off square, ends NOT parallel)
1 – 1x6 @ 16 3/4” (long point to long point, both ends cut at 15 degrees off square, ends NOT parallel)
2 – 1x6 @ 5 1/4” (long point to short point, both ends cut at 15 degrees off square, ends ARE parallel)
1 – 1x6 @ 7 5/8” (long point to long point, both ends cut at 15 degrees off square, ends NOT parallel)
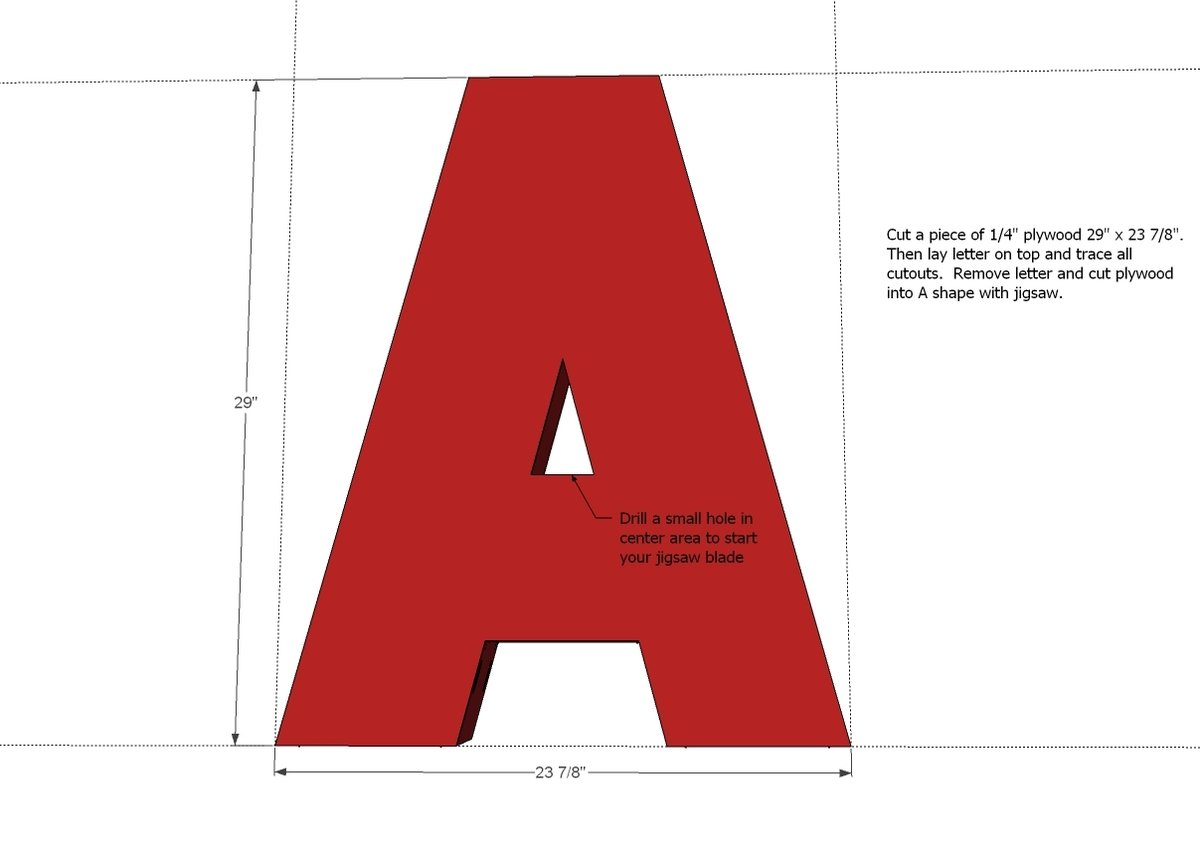
1 – 1/4" Plywood @ 29” x 23 7/8”
Tools
- measuring tape
- square
- pencil
- safety glasses
- hearing protection
- kreg-jig
- drill
- compound miter saw
- level
- countersink drill bit
Step-by-step Instructions
Step 1
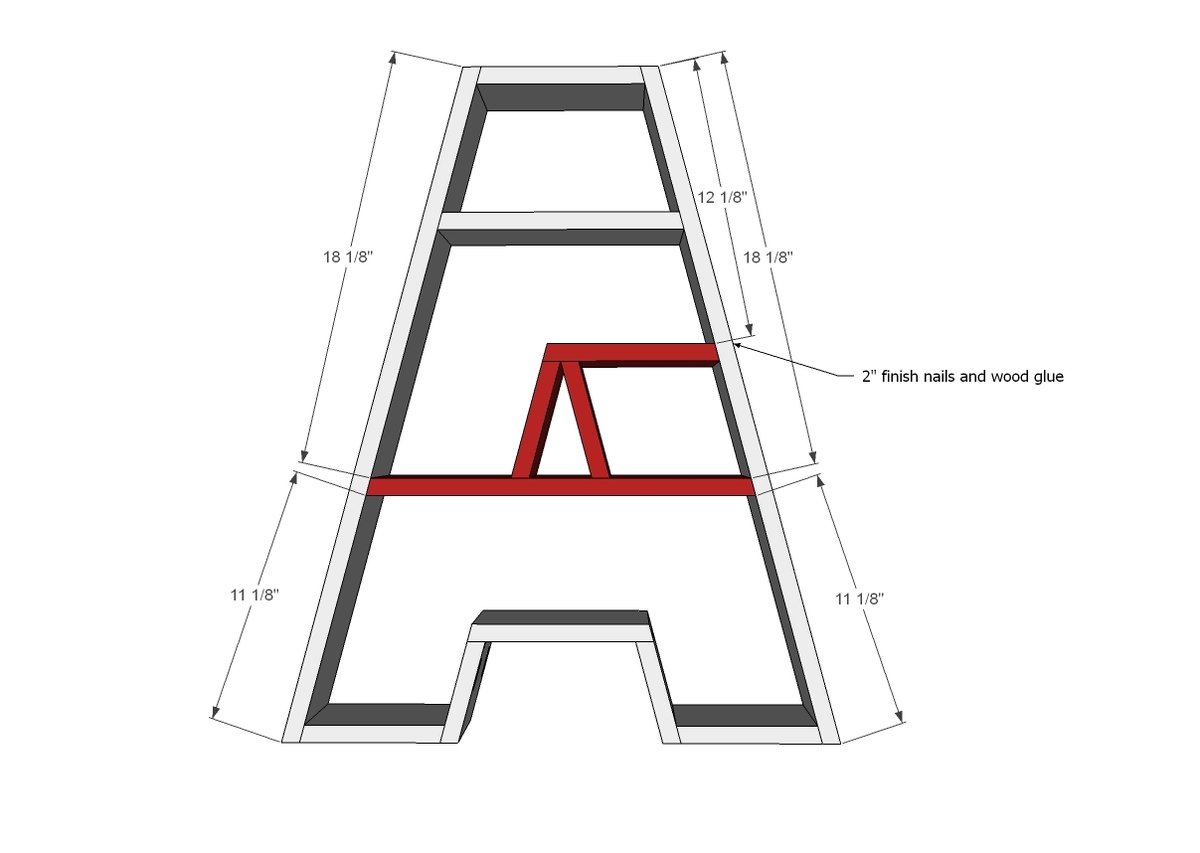
TIP - If you cut your back plywood first, you can use it as a template for assembling all the pieces! So lay the back plywood down, and then build on top of it - just be careful not to drip glue and stay inside the rectangle. I'd suggest marking centers as well to keep everything square and symmetrical. Start by attaching the center to the two short legs.
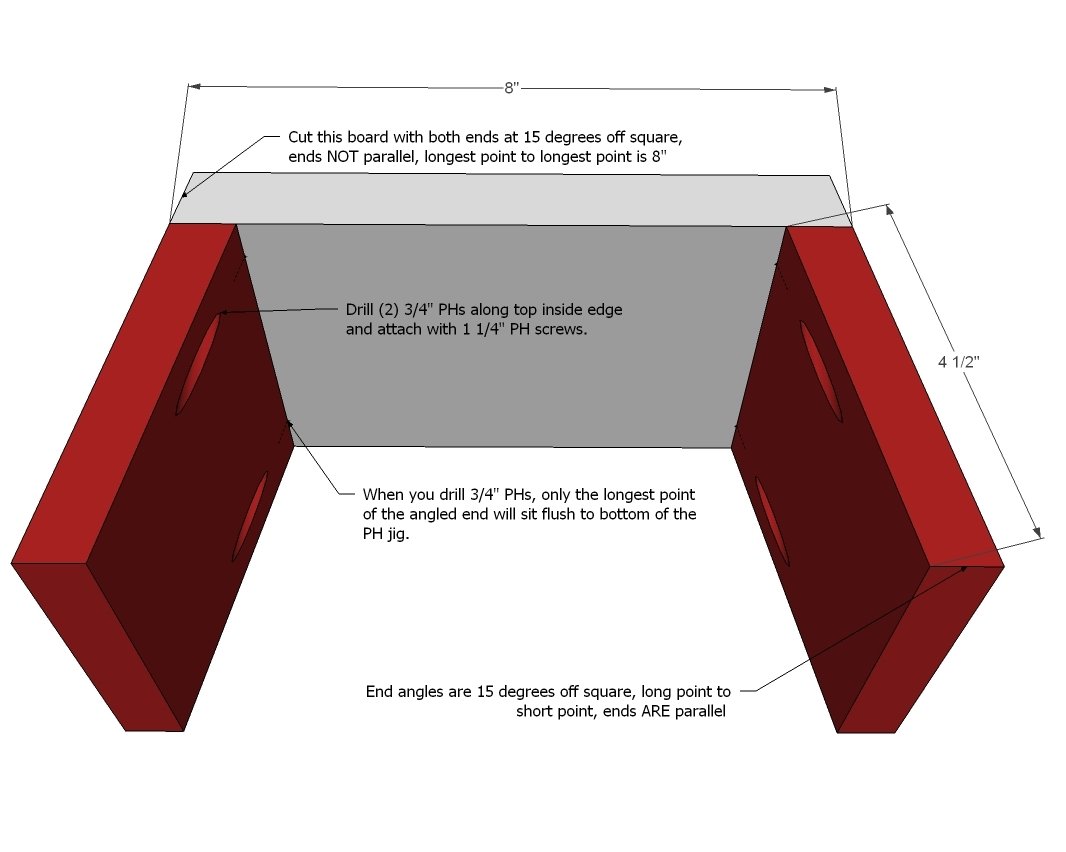
Step 2
And now the leg bottoms - we are just working our way outward.
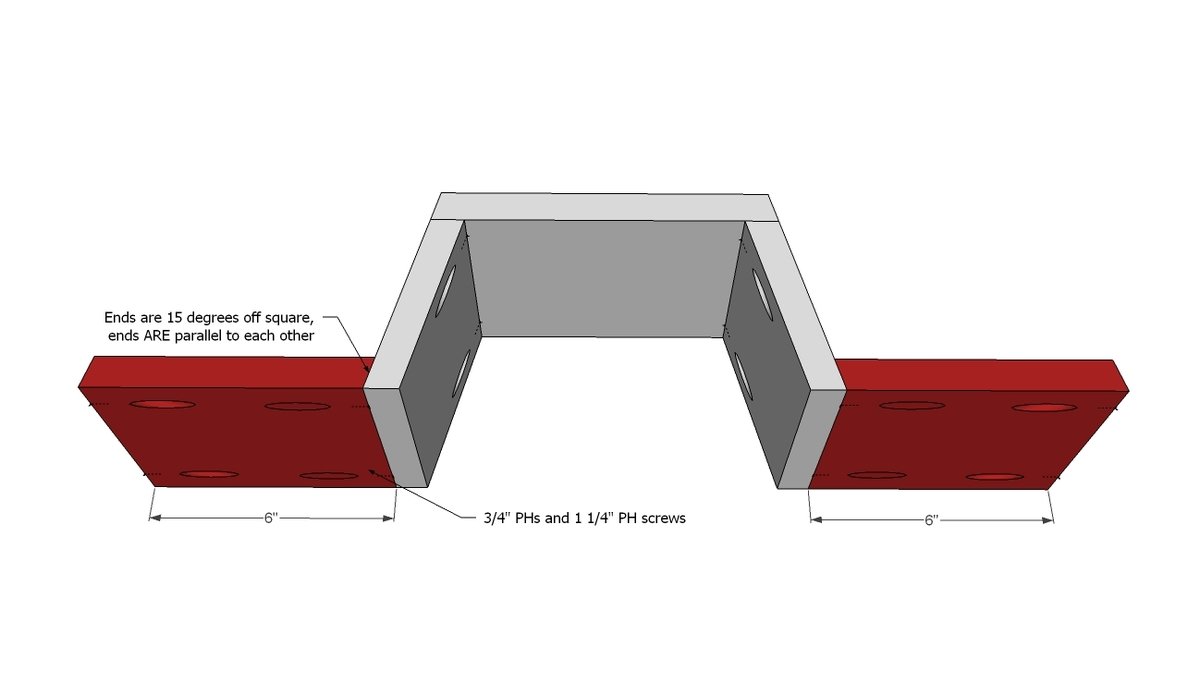
Step 3
And now the sides.
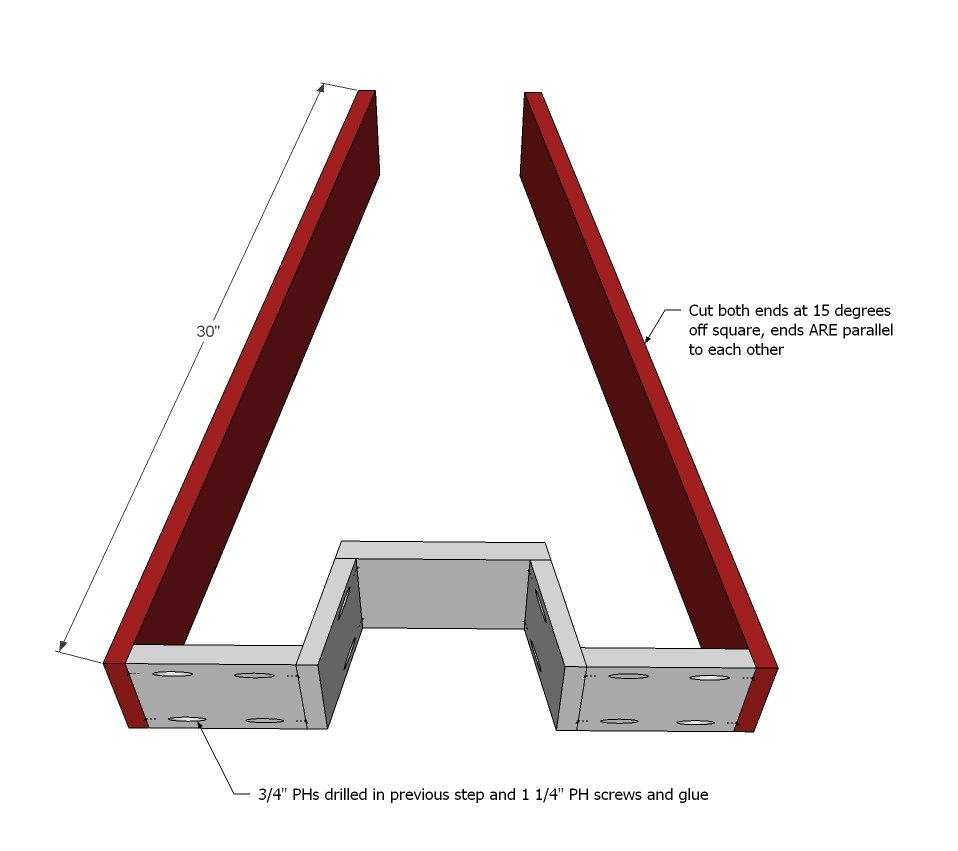
Step 4
And finally the top. Adjust here for square.
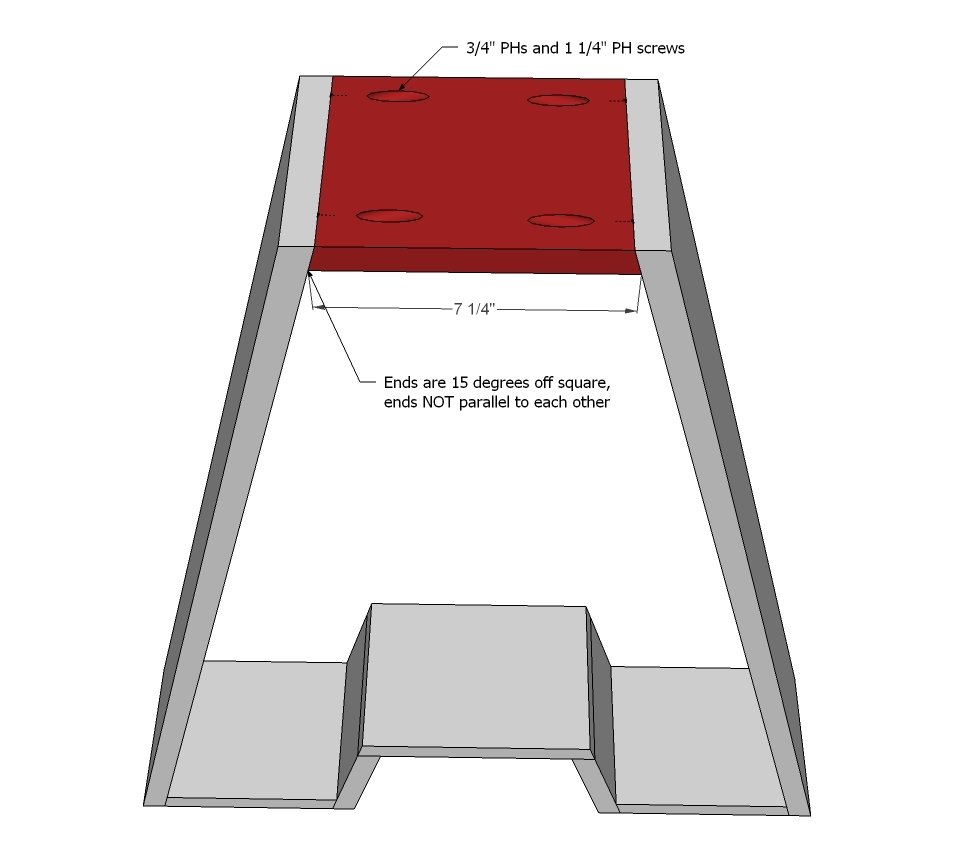
Step 5
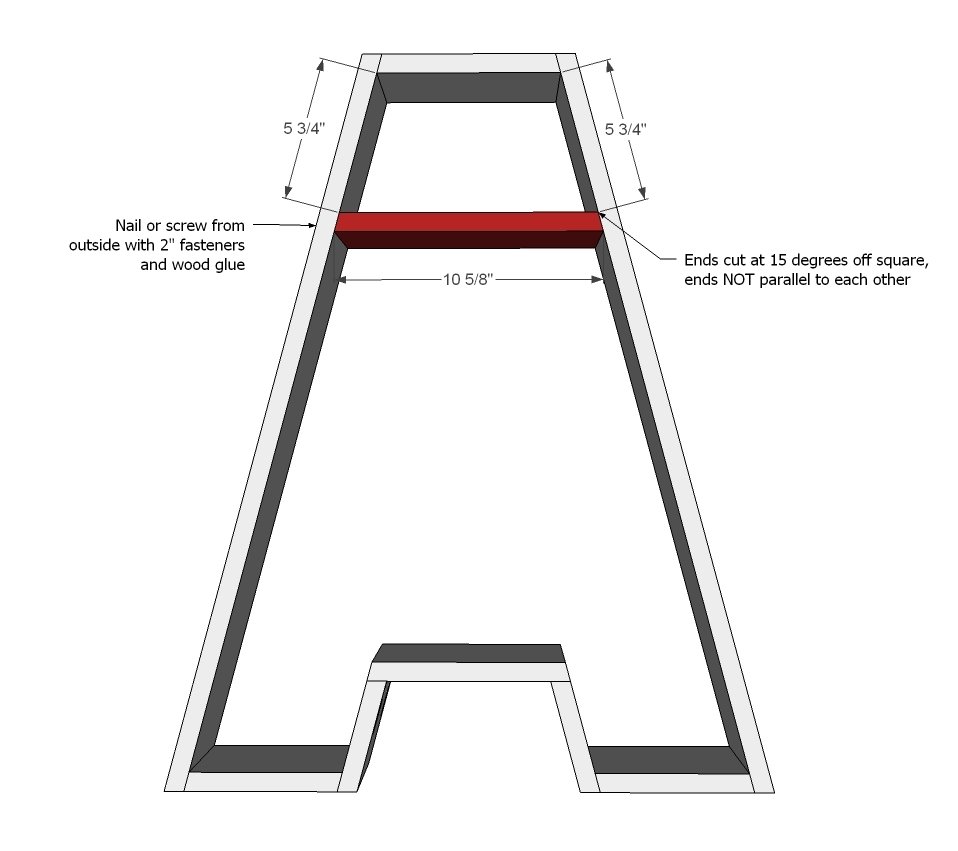
Step 6
Now build the center piece.
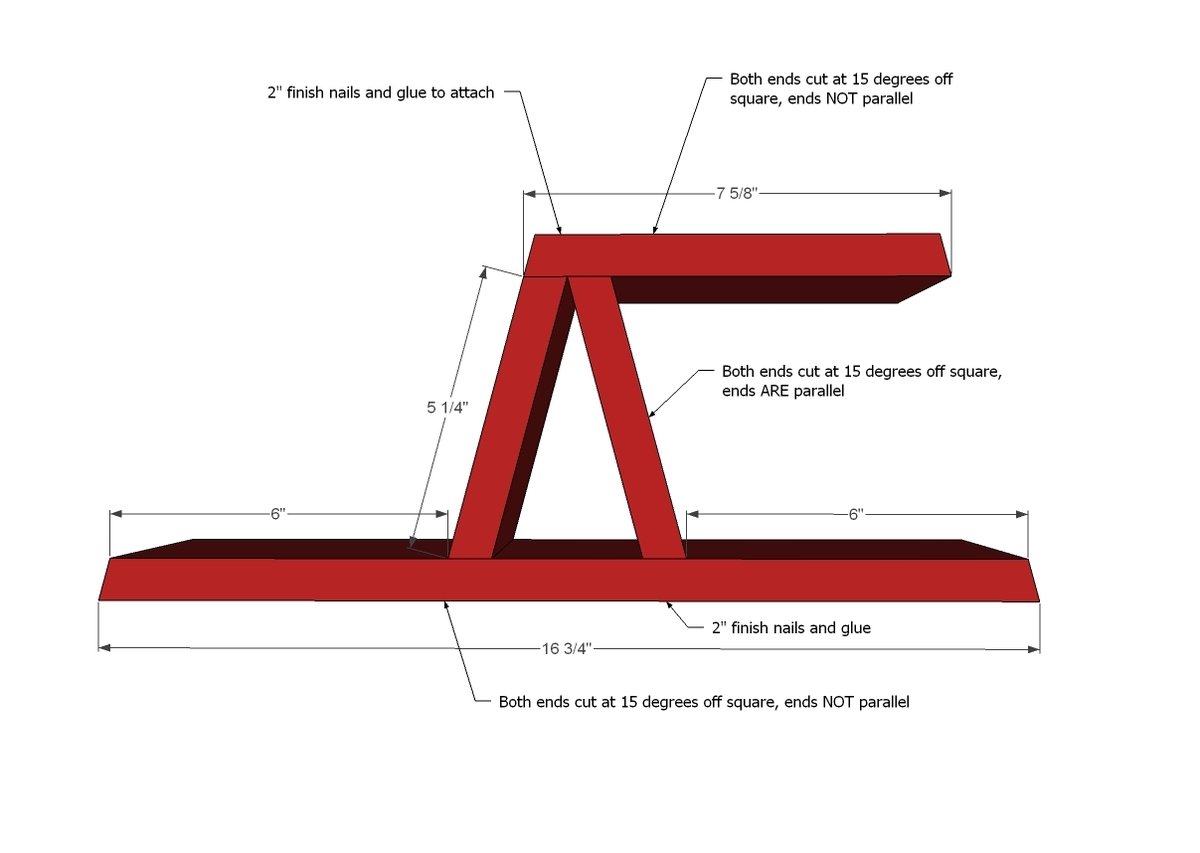
Step 7
And attach it in place.
Trace the letter on your plywood and cut out with a jigsaw. Attach to back.
Shelf will be heavy, so make sure you attach to a stud in the wall. My recommendation would be to add an additional 1x2 support at the very top and also very bottom, and screw directly into the wall.
Step 9
For hanging the shelves, I highly recommend adding some 1x2s inside the letter to give you something to screw directly into the wall into a stud in the wall. These shelves will be very very heavy and we don't want them falling off the wall! When you do hang it, it is very important to secure the structure of the letter (the 1x6s or the added 1x2 cleats) into a stud in the wall and use the appropriate hanging system for the weight of your shelf. Also consider added weight of shelf objects in hanging this shelf. DISCLAIMER: This shelf will be heavy. Hang and use at your own risk.
Finishing
Sand all surfaces, starting with a medium grit and finishing with fine. Wipe off the dust, fill any holes or gaps with wood filler, and sand smooth once dry. Apply primer if you're painting, then finish with your choice of paint or stain and seal with a durable clear topcoat. For outdoor projects, use exterior-rated primer, paint or stain, and sealer so the piece stands up to the weather.
Source (temporary): https://www.ana-white.com/woodworking-projects/letter-shelf