Letters to Santa Bin
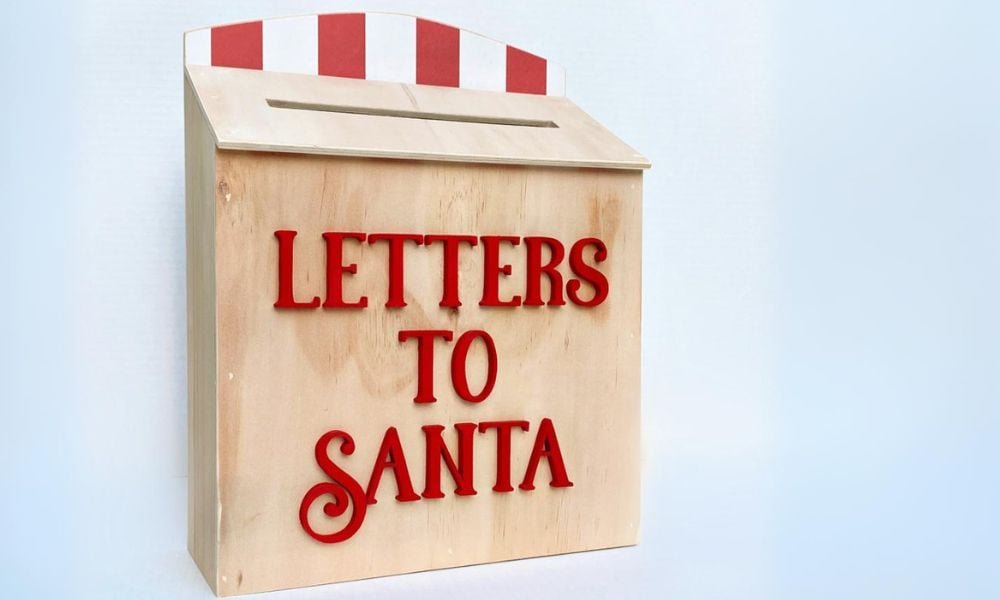
This is a quick and easy diy project to make a letters to Santa bin out of scrap wood! You can hang on the wall or set on a flat surface. Free
Specifications
| Project type | Home Decor |
|---|---|
| Room | living room |
| Difficulty | Beginner Projects |
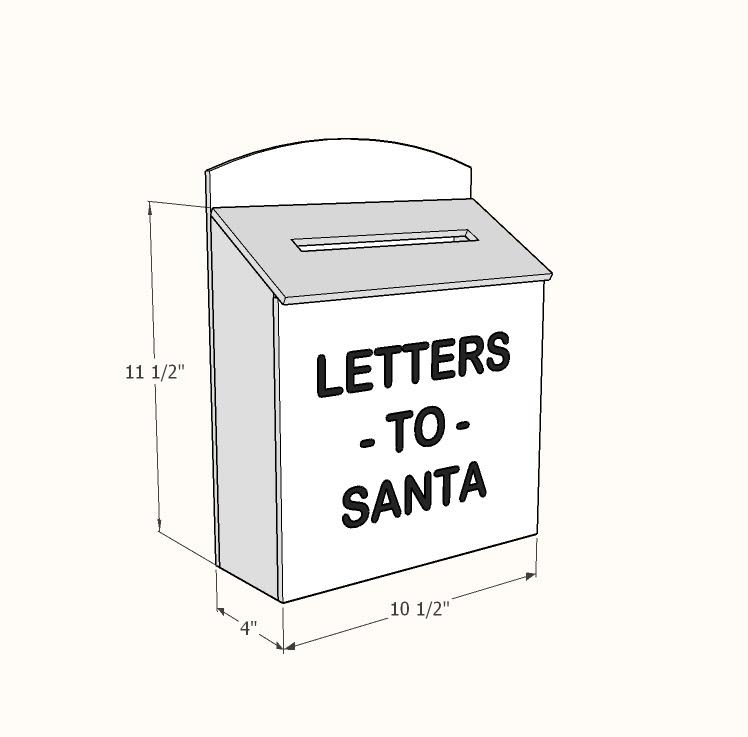
Dimensions
Use the size-specific shopping and cut lists below.
Shopping List
36” of 1x4 boards
1/4” plywood, 10-1/2” x 30”
1-1/4” and 5/8” brad nails
wood glue
small set of hinges for jewelry box
Cut List
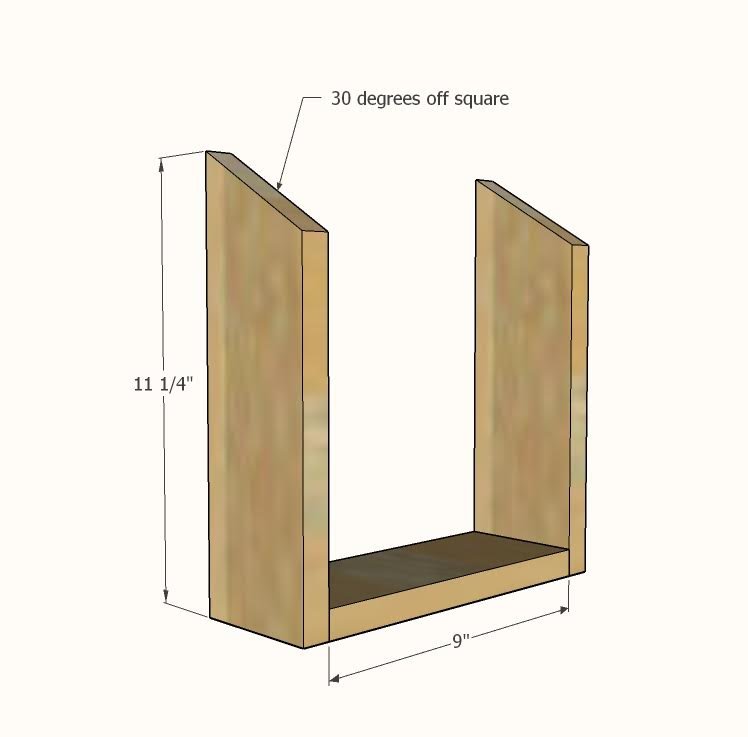
2 - 1x4 @ 11-1/4" - long point measurement, one end at 30 degrees off square
1 - 1x4 @ 9"
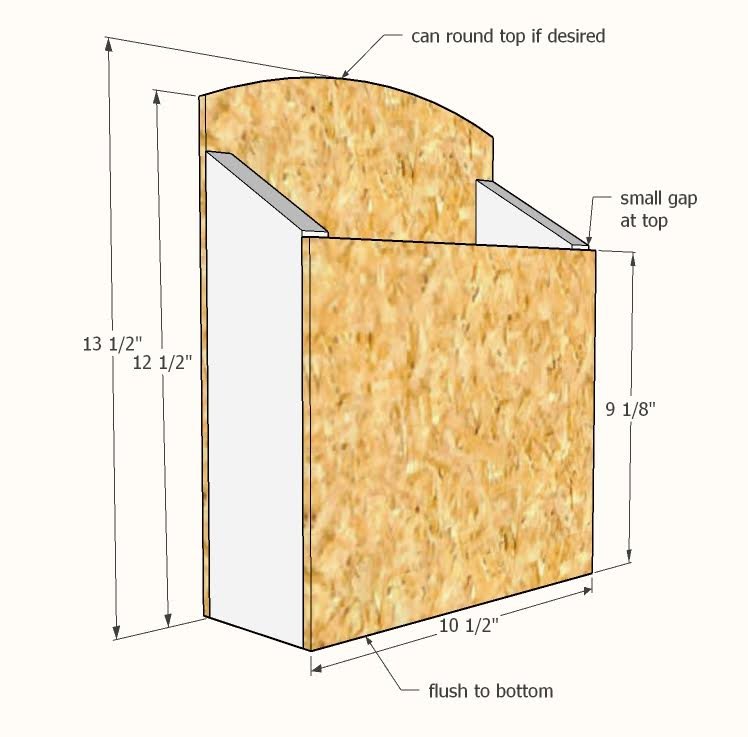
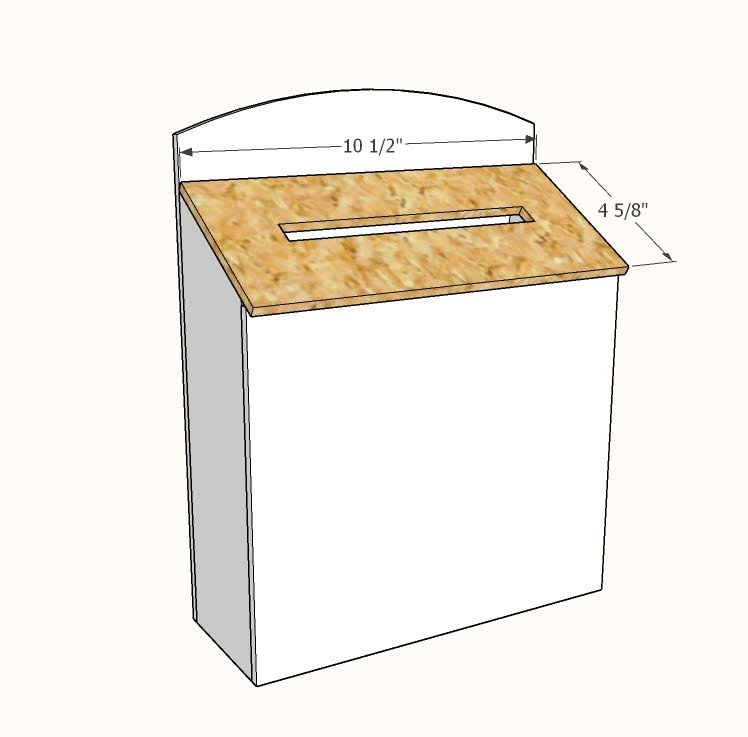
1 - 1/4" plywood @ 10-1/2" x 9-1/8"
1 - 1/4" plywood @ 10-1/2" x 13-1/2"
1 - 1/4" plywood @ 10-1/2" x 4-5/8"
Tools
- measuring tape
- pencil
- safety glasses
- drill
- circular saw
- jigsaw
- compound miter saw
- nailer
Step-by-step Instructions
Cut 1x4 boards to cut list, angle side boards cut on a miter saw.
Attach 1x4 boards together with the longer nails and glue.
Step 2
Attach plywood to the front and back with the shorter nails and wood glue.
Drill holes in the top and use a jigsaw to cut between the holes to create the letter slot
Attach with hinges to the back. The top can also be attached fixed with nails and glue.
Finishing
Sand all surfaces, starting with a medium grit and finishing with fine. Wipe off the dust, fill any holes or gaps with wood filler, and sand smooth once dry. Apply primer if you're painting, then finish with your choice of paint or stain and seal with a durable clear topcoat. For outdoor projects, use exterior-rated primer, paint or stain, and sealer so the piece stands up to the weather.
Source (temporary): https://www.ana-white.com/woodworking-projects/letters-santa-bin