Library Console Table
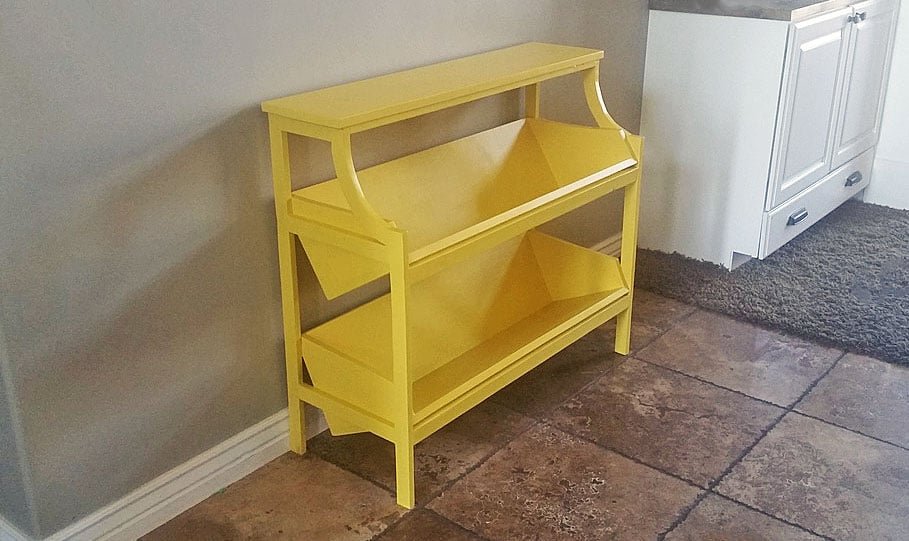
This library console table features two large shelves that are angled to keep books easily in place. Features a top shelf and curved sides perfect for cookbooks, magazines or children's books! Step by step plans with full diagrams from
Specifications
| Project type | Bookshelf and Bookcase Plans |
|---|---|
| Room | Storage Solutions |
| Style | Cottage Style Furniture Plans |
| Difficulty | Intermediate |
| Estimated cost | $20 - $50 |
Dimensions
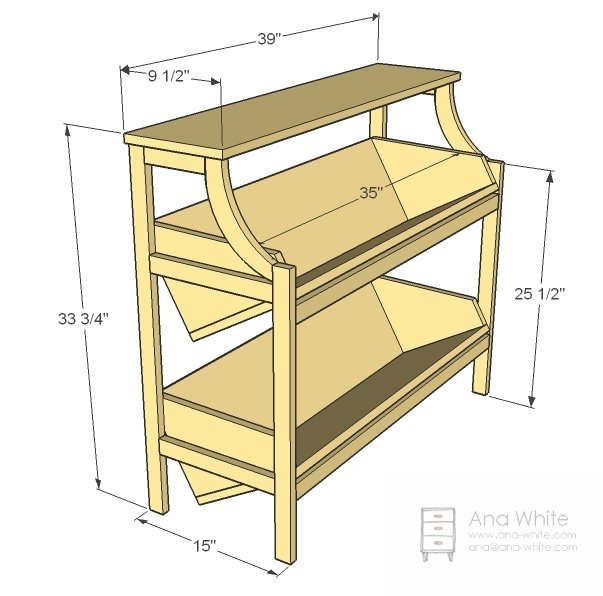
Use the size-specific shopping and cut lists below.
Shopping List
- 1 – 1×12 @ 8 feet long
- 2 – 1×10 @ 8 feet long
- 4 – 1×2 @ 8 feet long
- 1 1/4″ self tapping wood screws or 1-1/4" brad nails and glue
- 1 1/4″ Pocket Hole Screws or 2 5/8″ Trim Screws
- Wood Glue, Wood filler and other finishing supplies
Cut List
- 2 – 1×10 @ 6″ (Curved Fronts)
- 2 – 1×2 @ 33″ (Back Legs)
- 2 – 1×2@ 25″ (Front Legs)
- 4 – 1×2 @ 12″ (Sides)
- 2 – 1×2 @ 6″ (Top Sides)
- 4 – 1×2 @ 36 1/2″ (Front/Top Supports)
- 1 – 1×10 @ 39″ (Top)
- 2 – 1×10 @ 35″ (Backs of Shelves)
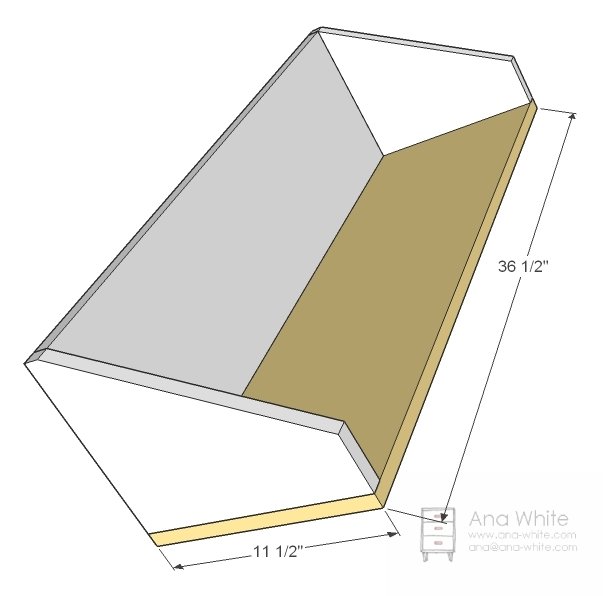
- 2 – 1×10 @ 11 1/2″ (Sides of shelves, cut to the width of your 1×12 boards)
- 2 – 1×12 @ 36 1/2″ (Shelf Bottoms)
Tools
- measuring tape
- square
- pencil
- safety glasses
- hearing protection
- kreg-jig
- drill
- circular saw
- sander
Step-by-step Instructions
Curved Fronts
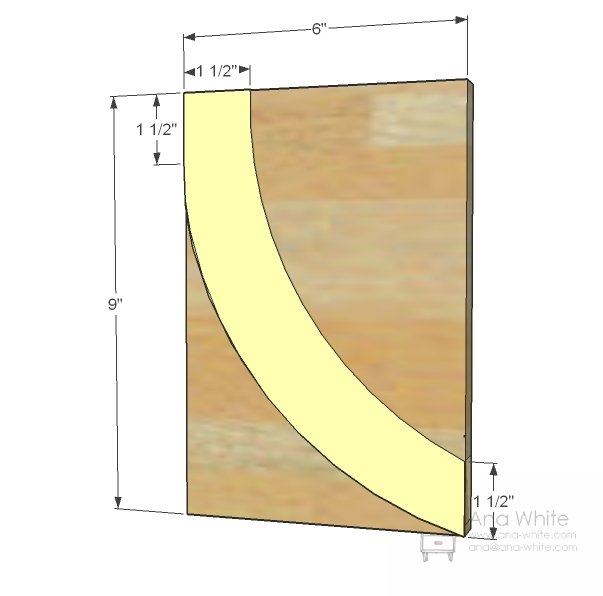
From the 2 1×10 pieces 6″ long, draw out a pattern as shown above and carefully cut out with a jigsaw. It’s a good idea to use the first one you cut out as a pattern for the second. Clamp the two cut pieces together and sand the cut edges until the two pieces match.
Ends
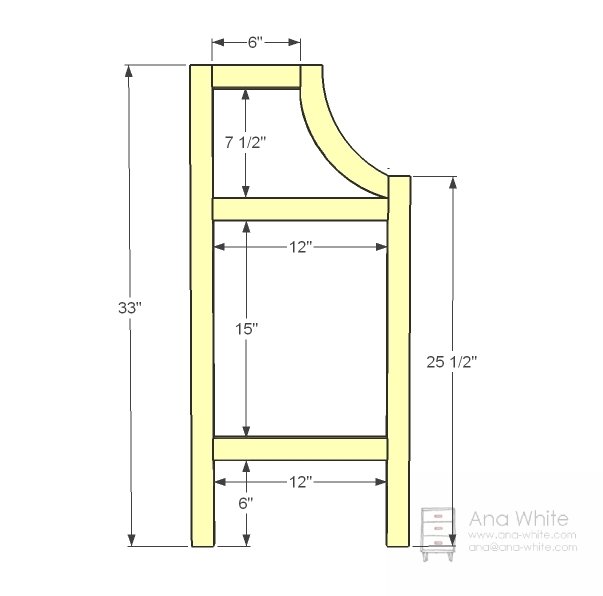
Once your curved ends are cut out and sanded, lay out the end pieces as shown above. If you have a Kreg Jig™, predrill pocket holes. Otherwise, carefully glue and predrill holes with a countersink bit, and attach with 2 5/8″ trim screws. Clamps will really help out during this stage. You will need to build two of these. Make sure the two ends that you build match and are square.
Top Supports
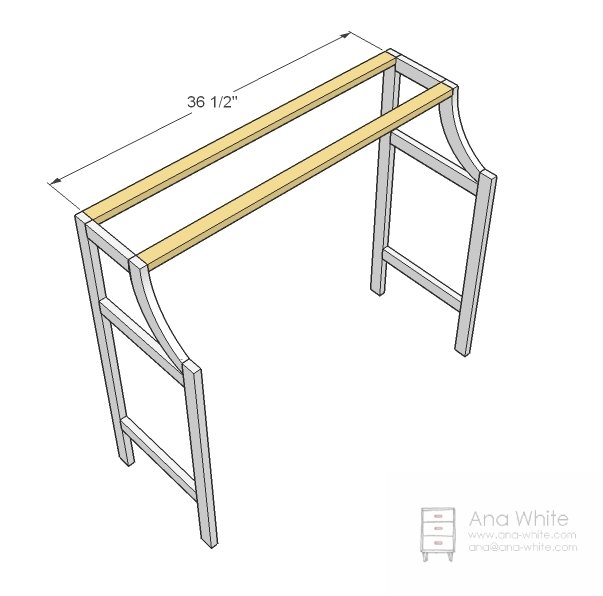
Attach the two legs together with the top supports as shown here. Use either pocket holes or the trim screws countersunk and glue.
Top
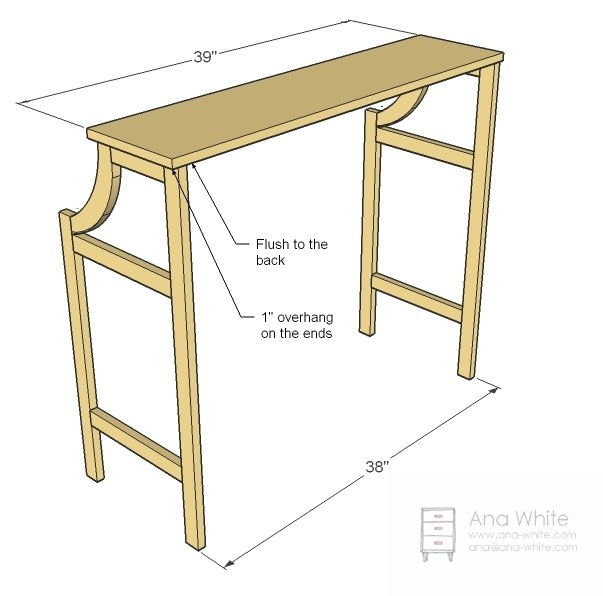
Now attach the top to the sides as shown above. Simply screw through the top supports (not shown in diagram) into the underside of the top. Use 1 1/4″ screws and glue.
Step 5
Shelf Sides and Back
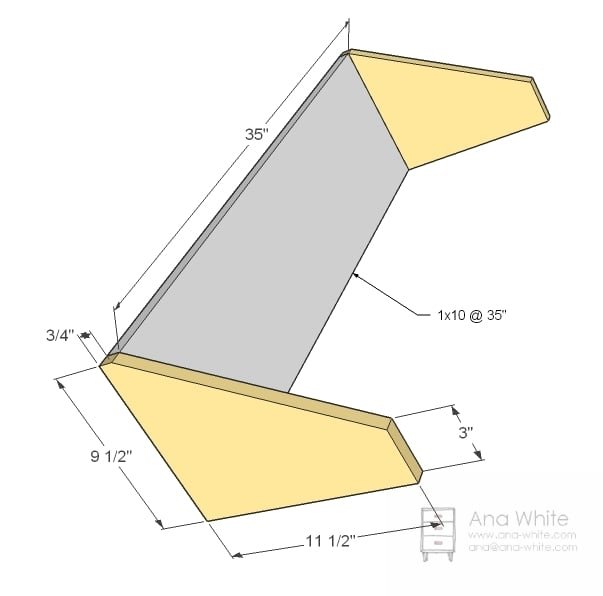
On this step you need to measure the width of your 1×12 and adjust the cuts on the sides (the triangular shaped pieces) so the bottom (measurement shown at 11 1/2″) is the same as your 1×12 width. Cut the end pieces from a 1×10, with 9 1/2″ shown as the width of the 1×10. If your 1x10s are slightly less, it will not matter, as the back is also a 1×10. Attach with screws and glue.
Shelf Bottom
Attach the shelf bottom shelf sides and back with screws and glue. Outside edges should be flush.
Shelf Assembly
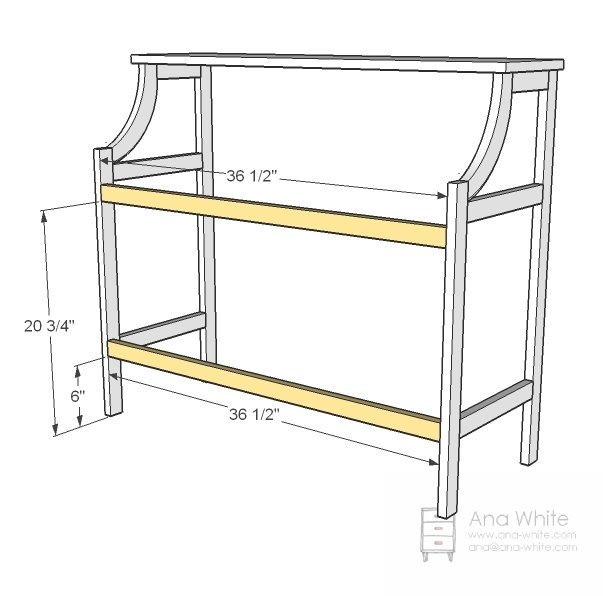
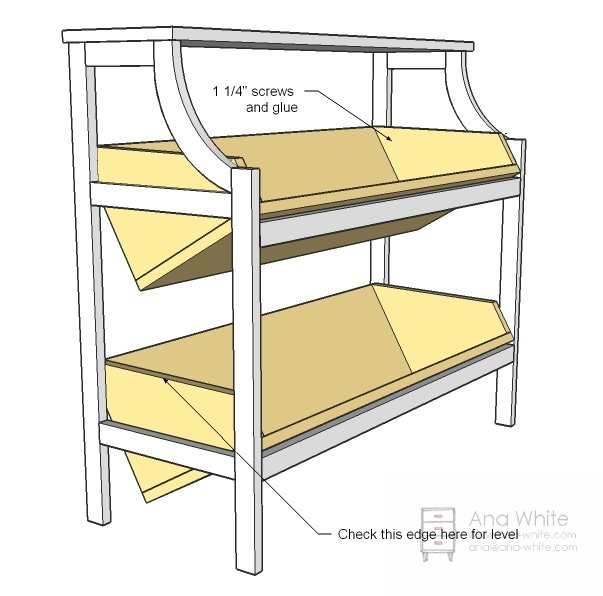
Position the shelves inside the frame. The front can rest on the front supports. Use a level to ensure that the sides are level. Use 1 1/4″ screws and glue to attach the shelves to the sides. Fill all of your exposed holes with wood filler and let dry. Apply a second coat as needed. Sand with 120 grit sandpaper. Remove all sanding residue with a vacuum followed with a damp cloth. Apply primer (for painting) or wood conditioner (for staining) as instructed by the manufacturer, followed with paint or stain and a top coat as needed. Thank you MIZZFRIZZ and everyone else who takes their time to request plans. I am listening, and hopefully, will be able to tackle lots more reader requests in the next bit. Have a great day, appreciate your support!
Finishing
Sand all surfaces, starting with a medium grit and finishing with fine. Wipe off the dust, fill any holes or gaps with wood filler, and sand smooth once dry. Apply primer if you're painting, then finish with your choice of paint or stain and seal with a durable clear topcoat. For outdoor projects, use exterior-rated primer, paint or stain, and sealer so the piece stands up to the weather.
Source (temporary): https://www.ana-white.com/woodworking-projects/library-console-table