Lighted Holiday Chalkboard Sign "All is Calm, All is Bright"
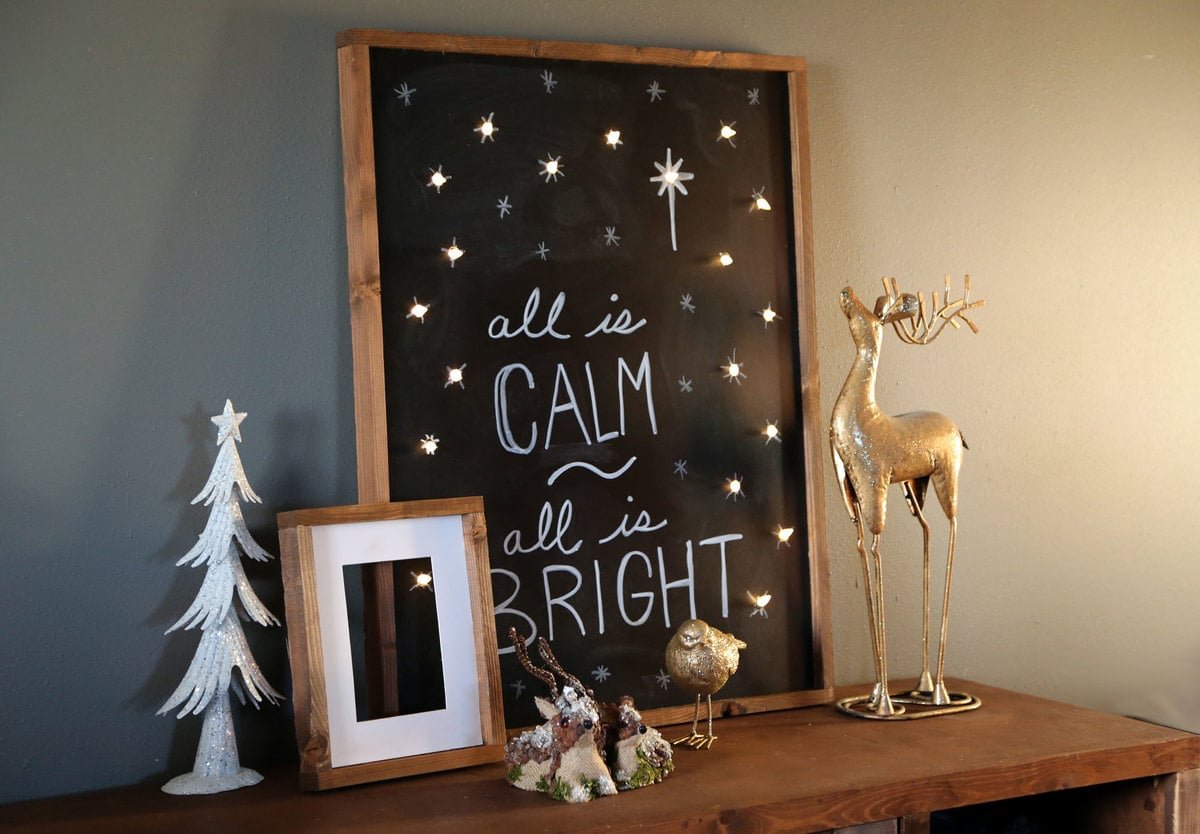
DIY lighted holiday chalkboard sign, "All is calm, all is bright" tutorial by
Specifications
| Project type | frames |
|---|---|
| Room | Teens |
| Style | Farmhouse Furniture |
| Difficulty | Beginner Projects |
| Estimated cost | $20 - $50 |
Dimensions
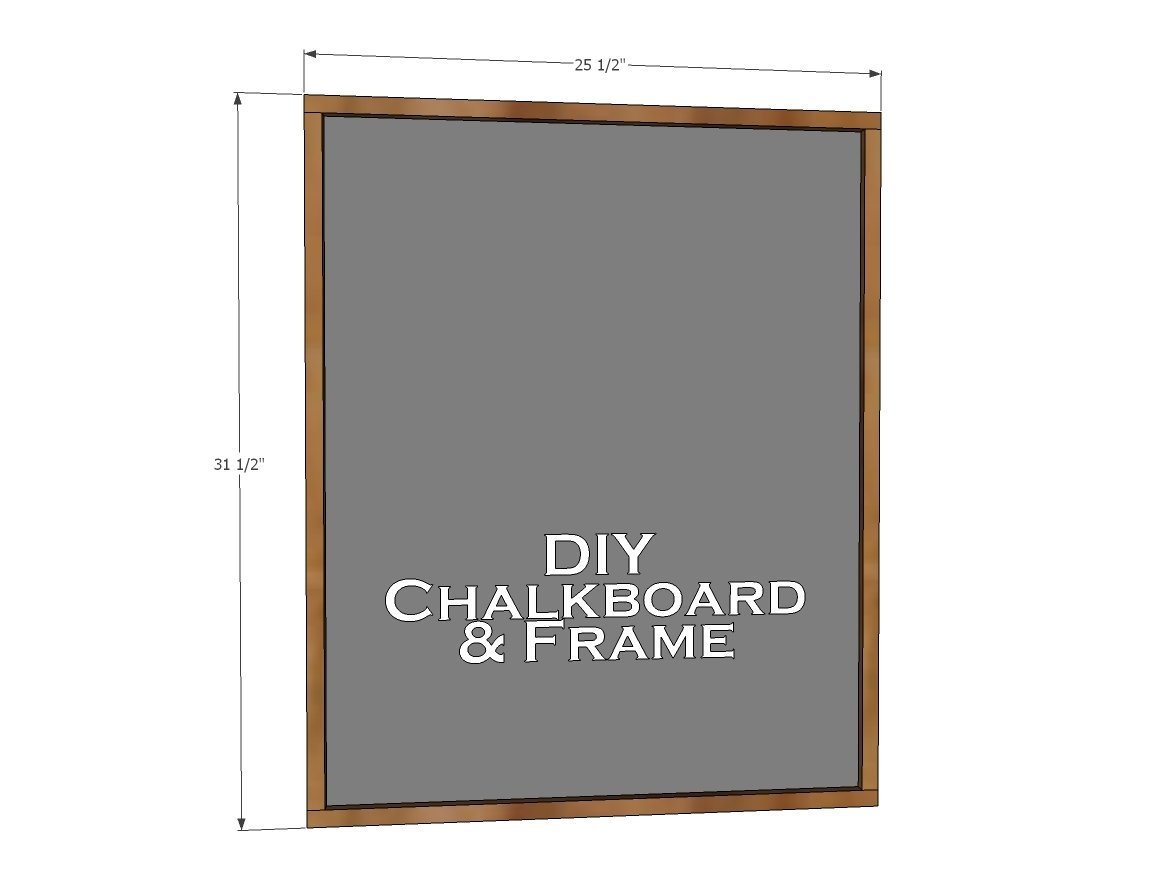
Use the size-specific shopping and cut lists below.
Shopping List
3 - 1x2 @ 8 feet long
1 - 24x30" chalkboard panel (I purchased a 24x48" one and cut it down to size)
1 pack of cordless LED christmas lights (I used a 20 pack but 30 might have been nicer)
Cut List
4 - 1x2 @ 24"
2 - 1x2 @ 30"
2 - 1x2 @ 25-1/2" (cut these to fit)
1 - 24" x 30" chalkboard panel
Tools
- measuring tape
- square
- pencil
- safety glasses
- hearing protection
- drill
- circular saw
- nailer
Step-by-step Instructions
Step 1
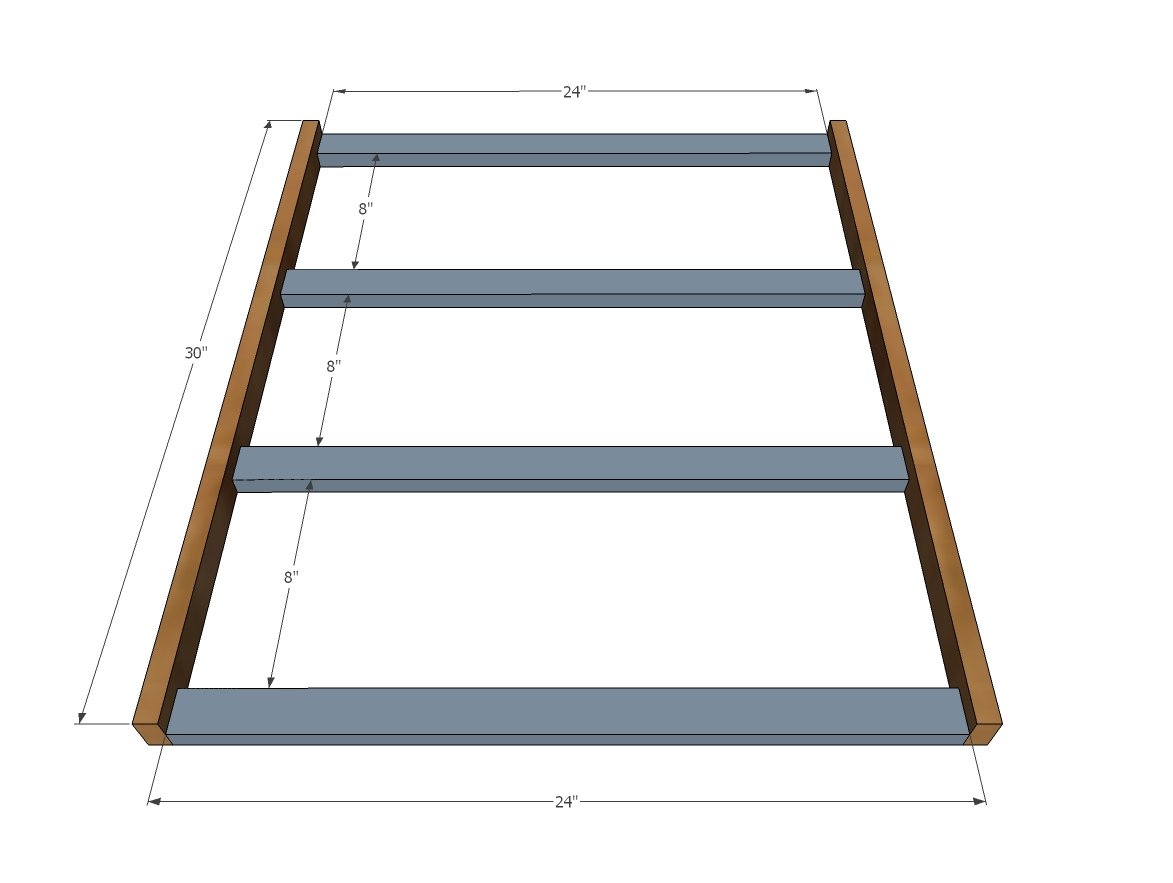
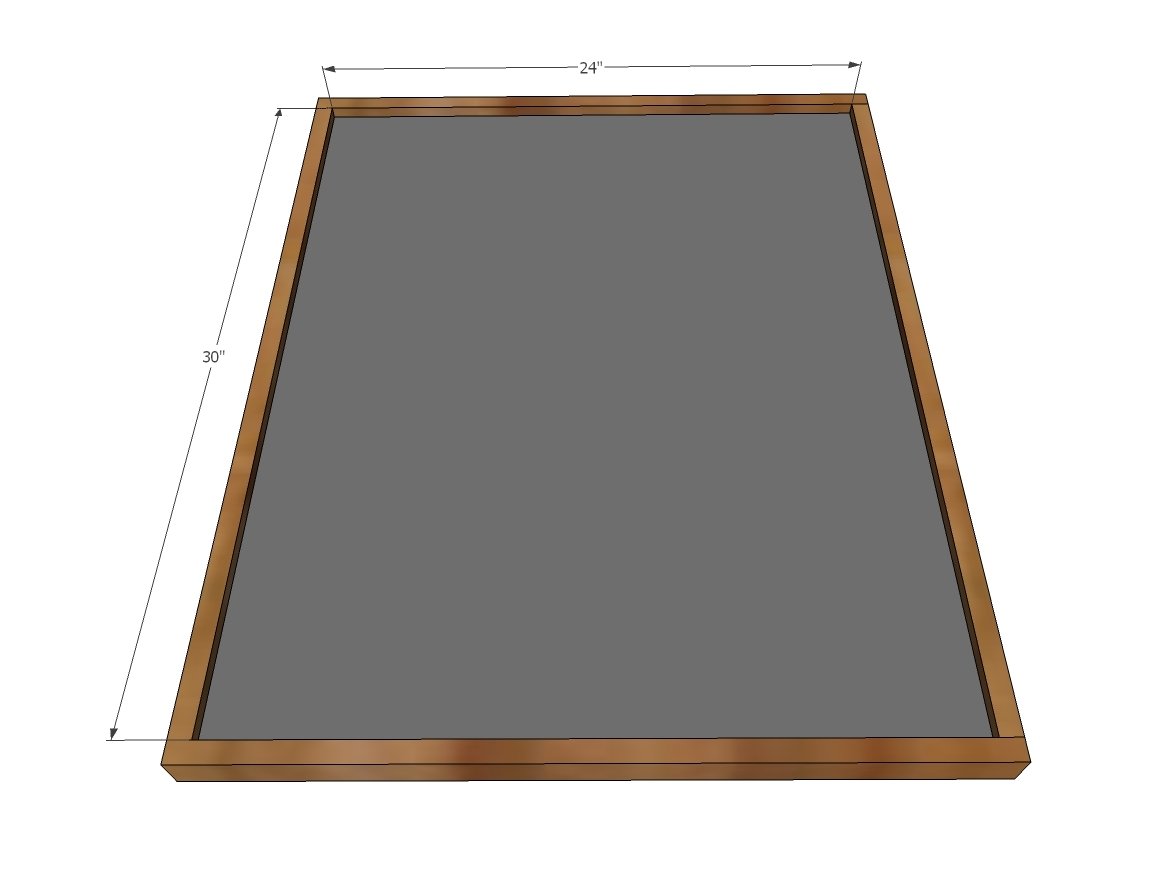
Attach the 30" long 1x2s to the 24" long 1x2s, with the 24" long 1x2s laying flat. Leave about 8" spacing in between. Use glue and 1-1/4" finish nails.
Step 2
Measure the remaining frame side and cut a board to fit (will be around 25-1/2" long). Attach with glue and 1-1/4" finish nails.
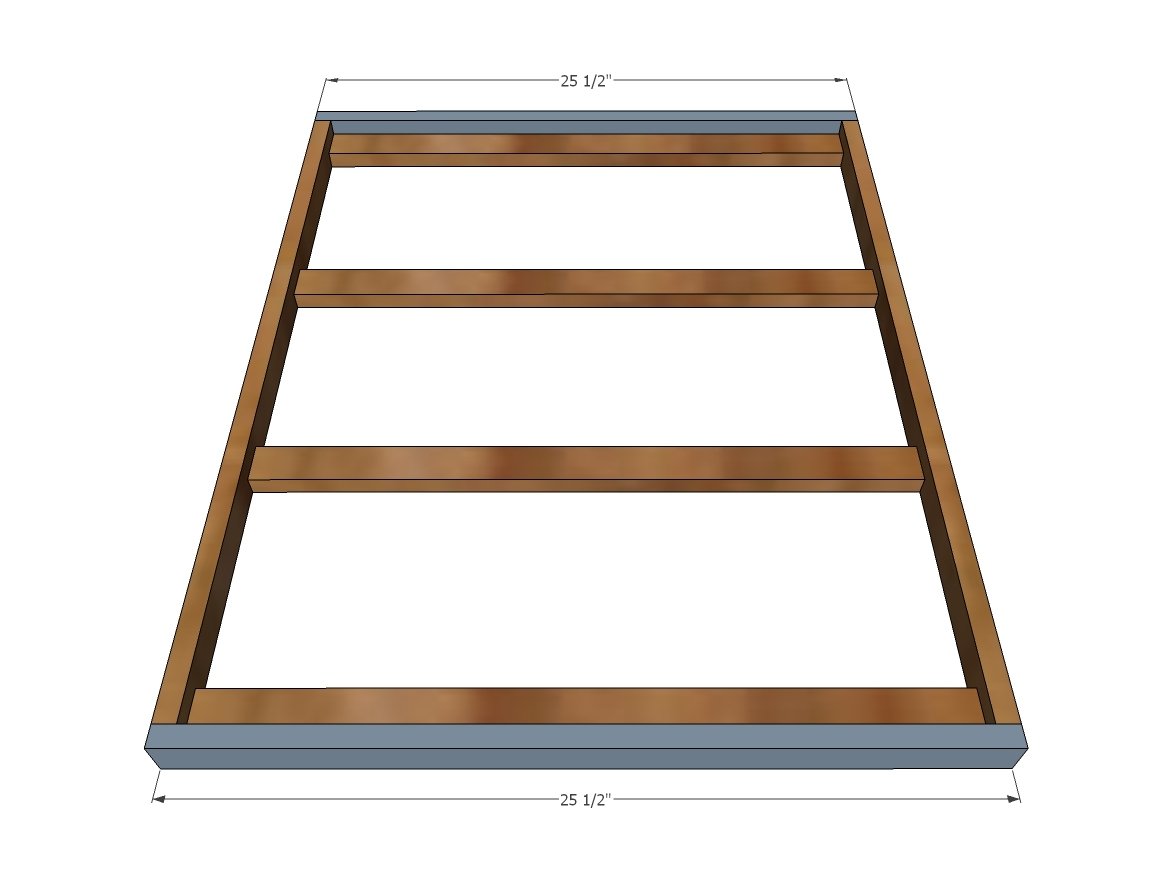
Insert the chalkboard panel inside the frame.
Draw the words out in chalk (I used a chalkboard marker) and space stars close enough together that your string lights can hop between the stars. Drill out the stars with a spade bit sized big enough for the lights to pass through. Secure lights to back with tape. I acknowledge that The Home Depot is partnering with me to participate in this DIH Workshop program (the “Program”). As a part of the Program, I am receiving compensation in the form of products and services, for the purpose of promoting The Home Depot. All expressed opinions and experiences are my own words. My post complies with the Word Of Mouth Marketing Association (WOMMA) Ethics Code and applicable Federal Trade Commission guidelines. - See more at:
Finishing
Sand all surfaces, starting with a medium grit and finishing with fine. Wipe off the dust, fill any holes or gaps with wood filler, and sand smooth once dry. Apply primer if you're painting, then finish with your choice of paint or stain and seal with a durable clear topcoat. For outdoor projects, use exterior-rated primer, paint or stain, and sealer so the piece stands up to the weather.
Source (temporary): https://www.ana-white.com/woodworking-projects/lighted-holiday-chalkboard-sign-all-calm-all-bright