Lightweight Instant Closet Rack or Entryway Organizer
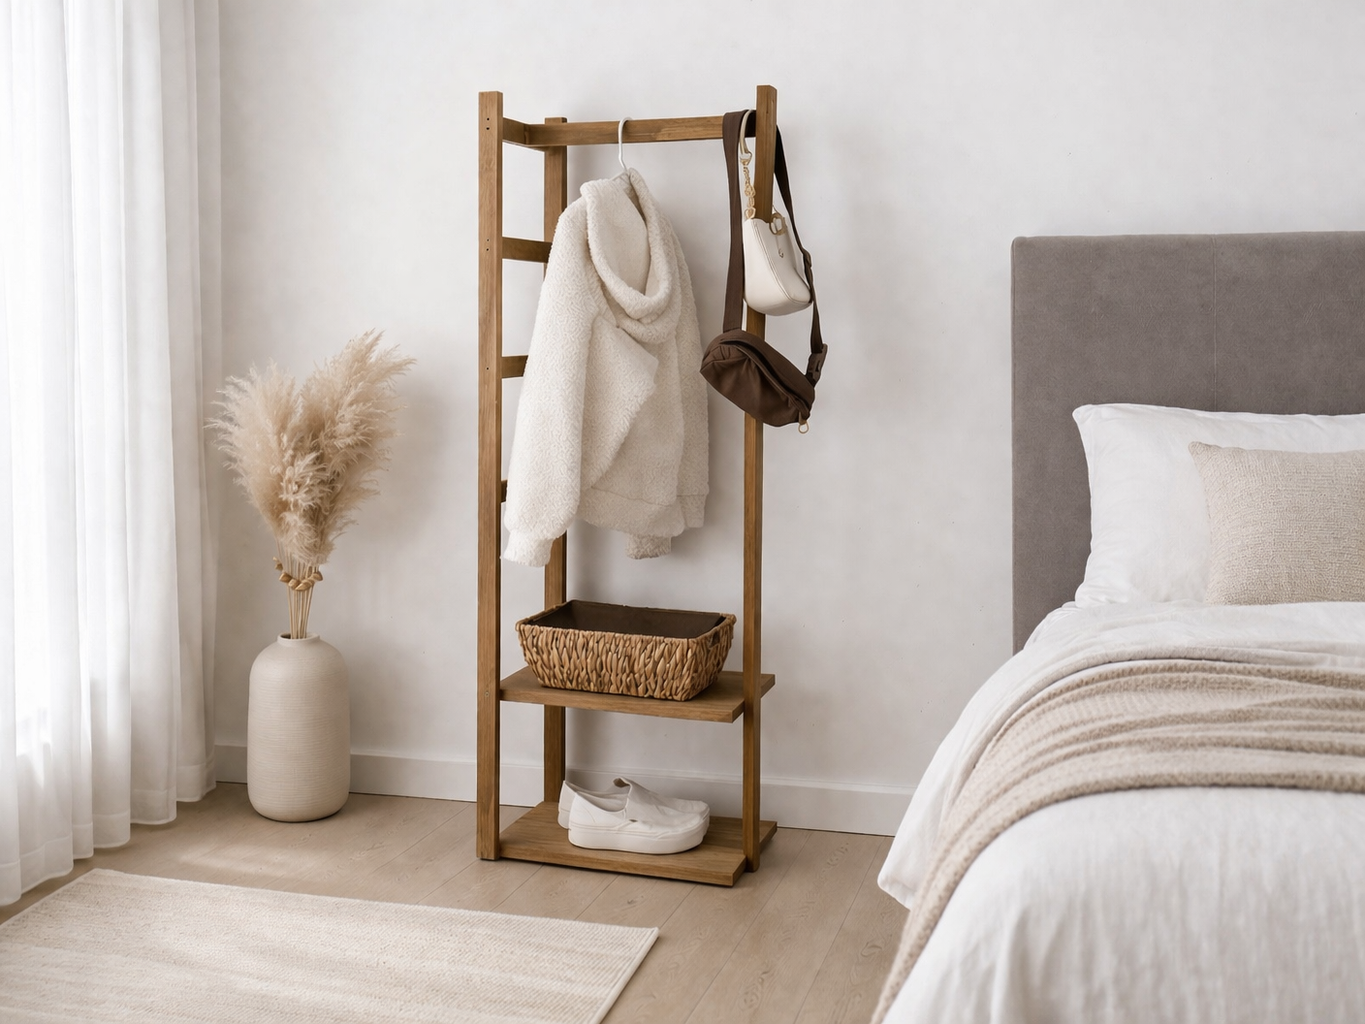
Create storage and organization without drilling holes in the wall or lugging heavy furniture around - this instant lightweight rack just sets in place and starts serving you! Lower shelves for shoes and baskets, ladder side for S hooks or hanging, and hanging space in the center. All three legs can also serve as hanging spots. You can add hooks - but we love it just like this to keep it simple and inexpensive. This is a free project plan, you can build it with just three 1x2 boards and three feet of 1x12 boards and some screws. Check out the with step by step diagrams, shopping list, cut list, video and more! This post is made possible by the generous sponsorship of Kreg Tools.
Specifications
| Project type | Entryway Furniture |
|---|---|
| Room | Closets |
| Difficulty | Beginner Projects |
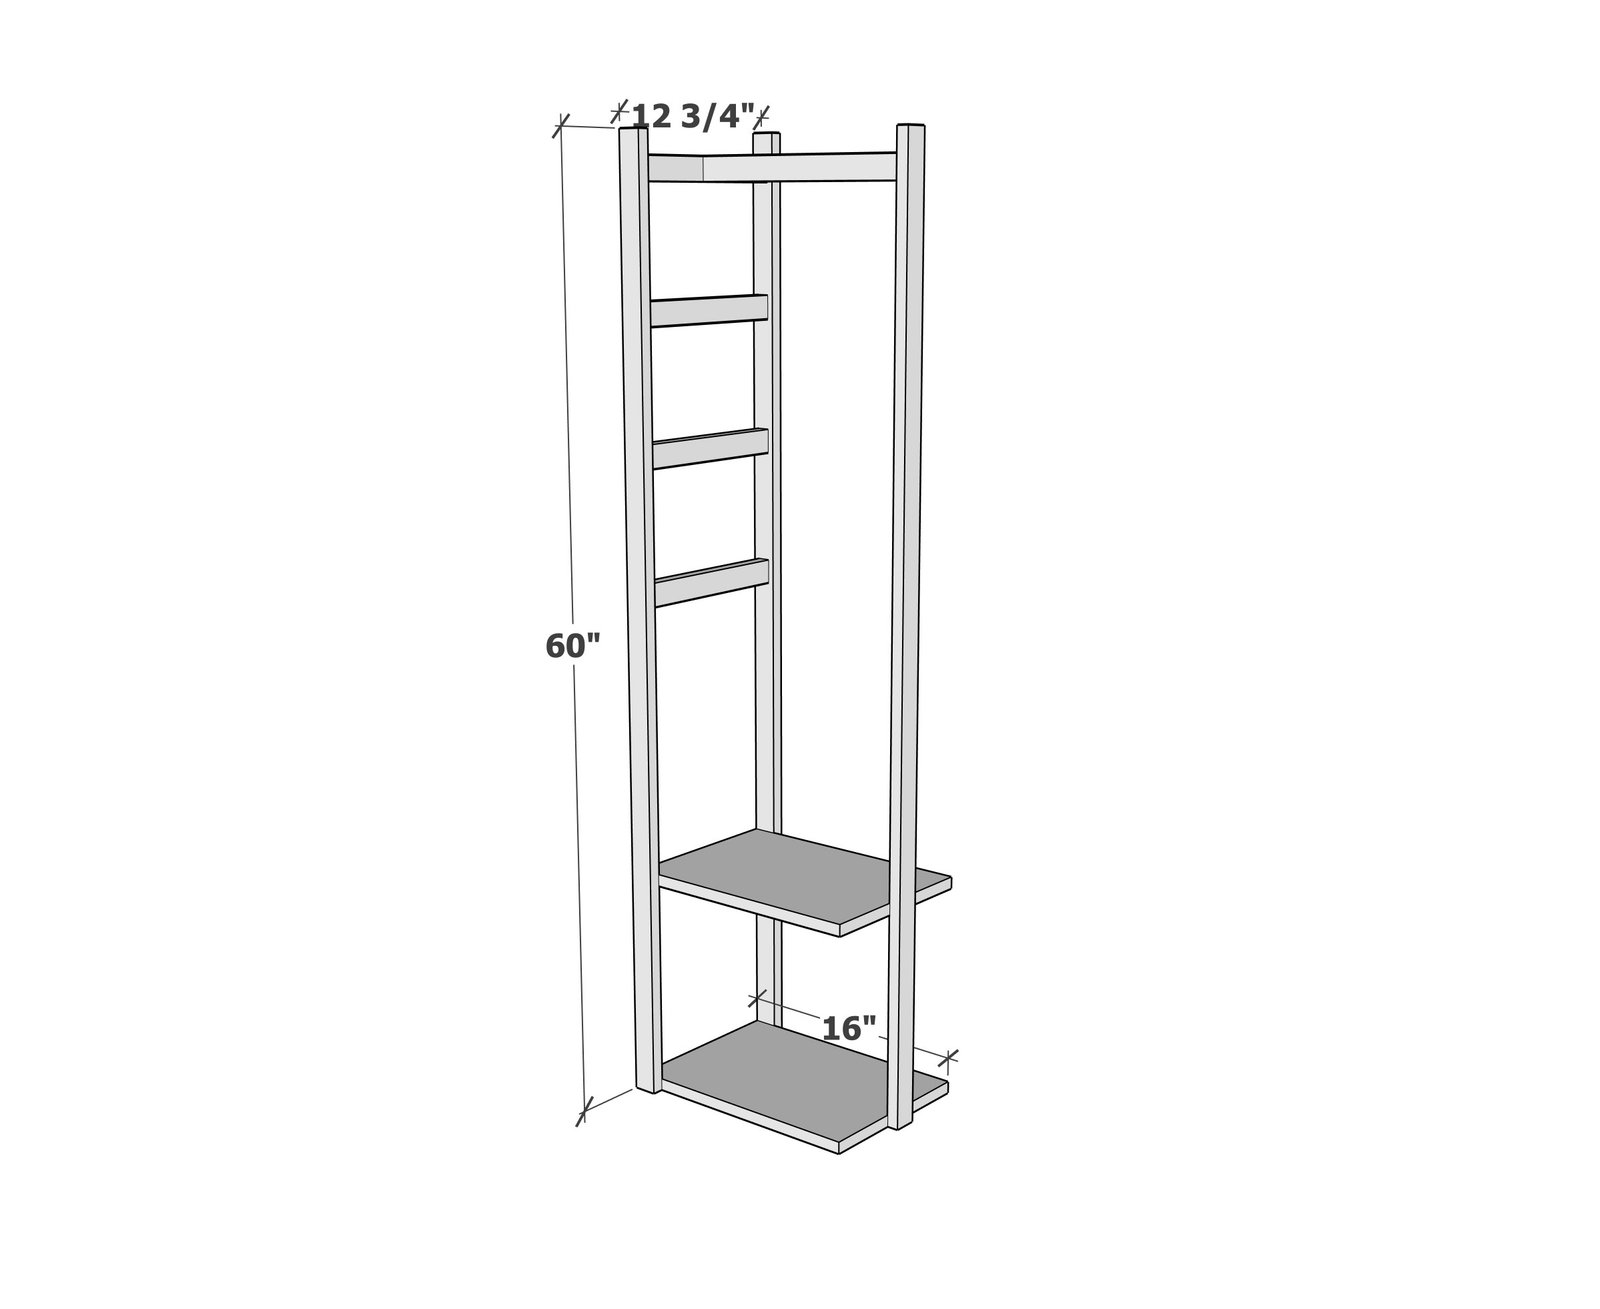
Dimensions
Use the size-specific shopping and cut lists below.
Shopping List
- 3 - 1x2 boards @ 8 feet long
- 1 - 1x12 board @ 3 feet long
- wood glue
- 1-5/8" long trim screws (about 20)
- Rubber furniture pads
- wood stain
Cut List
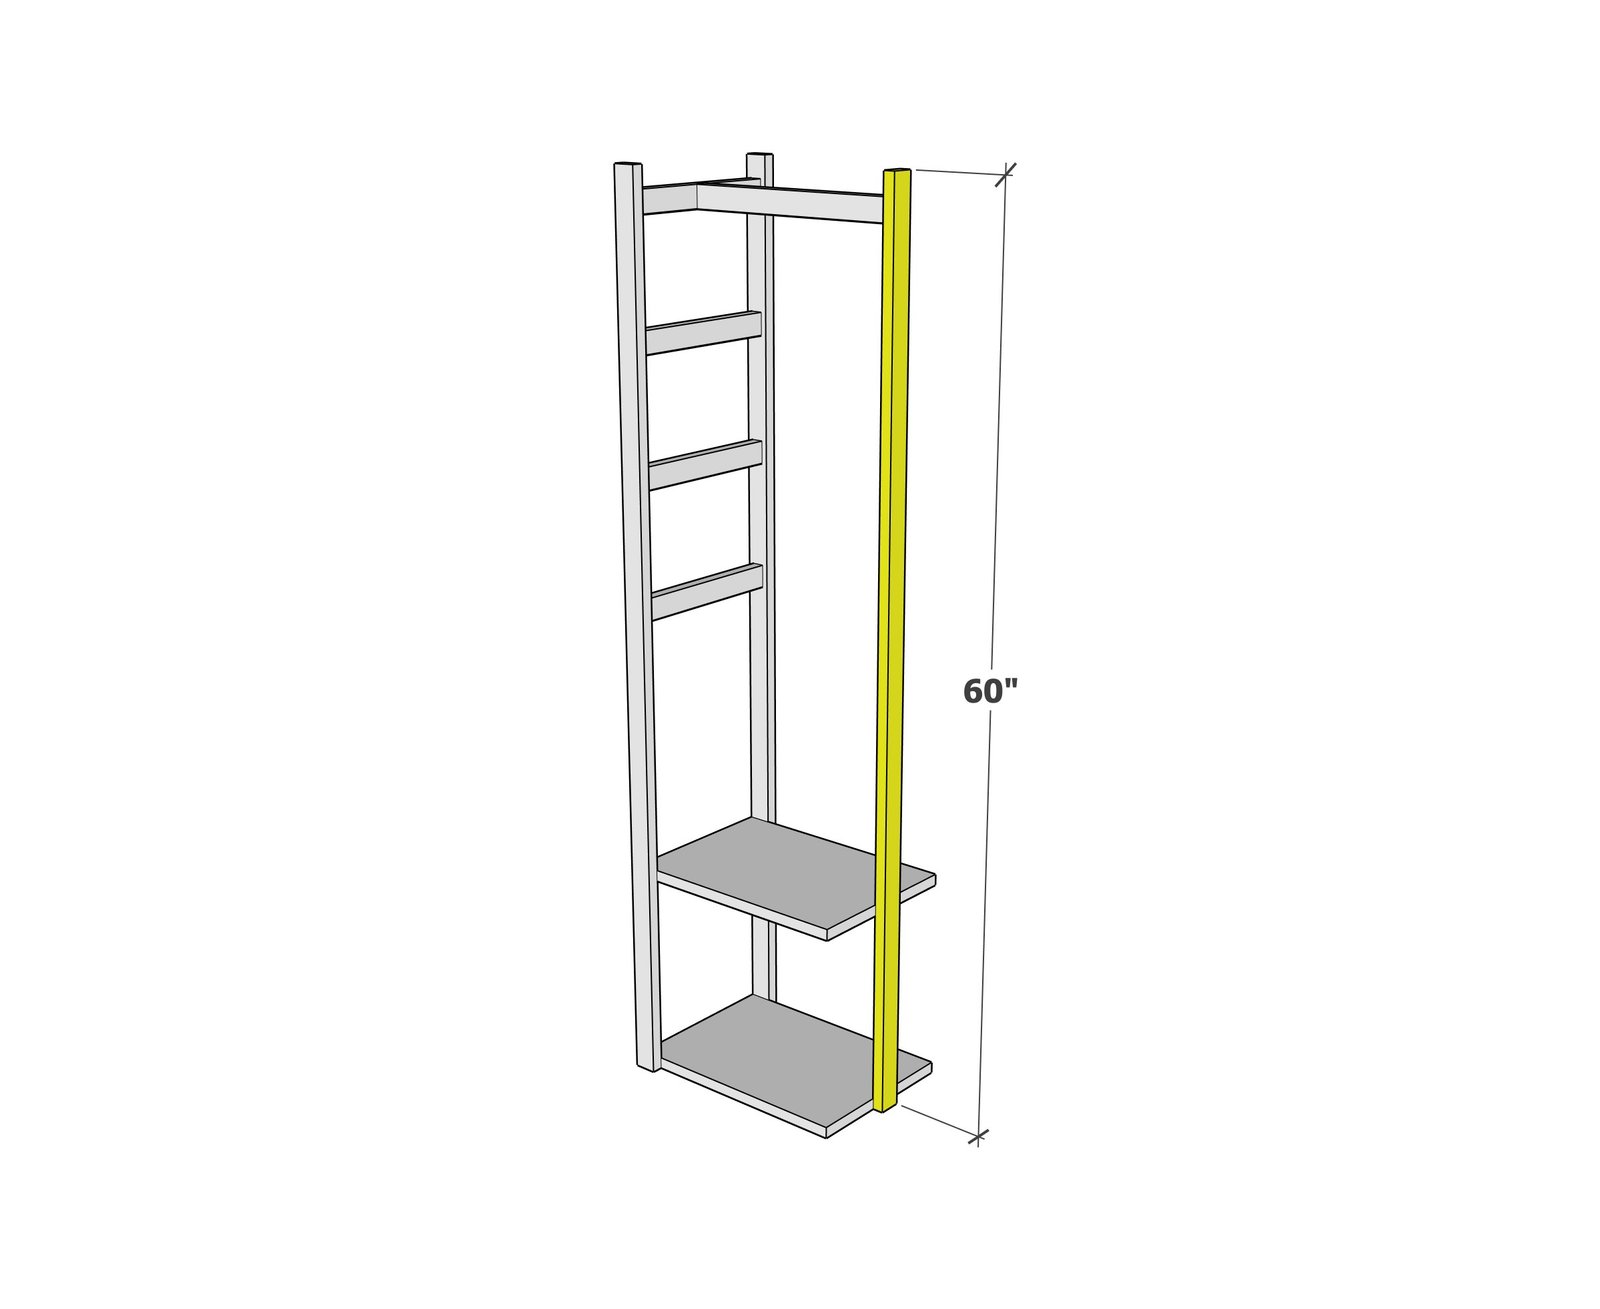
- 3 - 1x2 @ 60"
- 4 - 1x2 @ 11.25" (matches width of 1x12 boards)
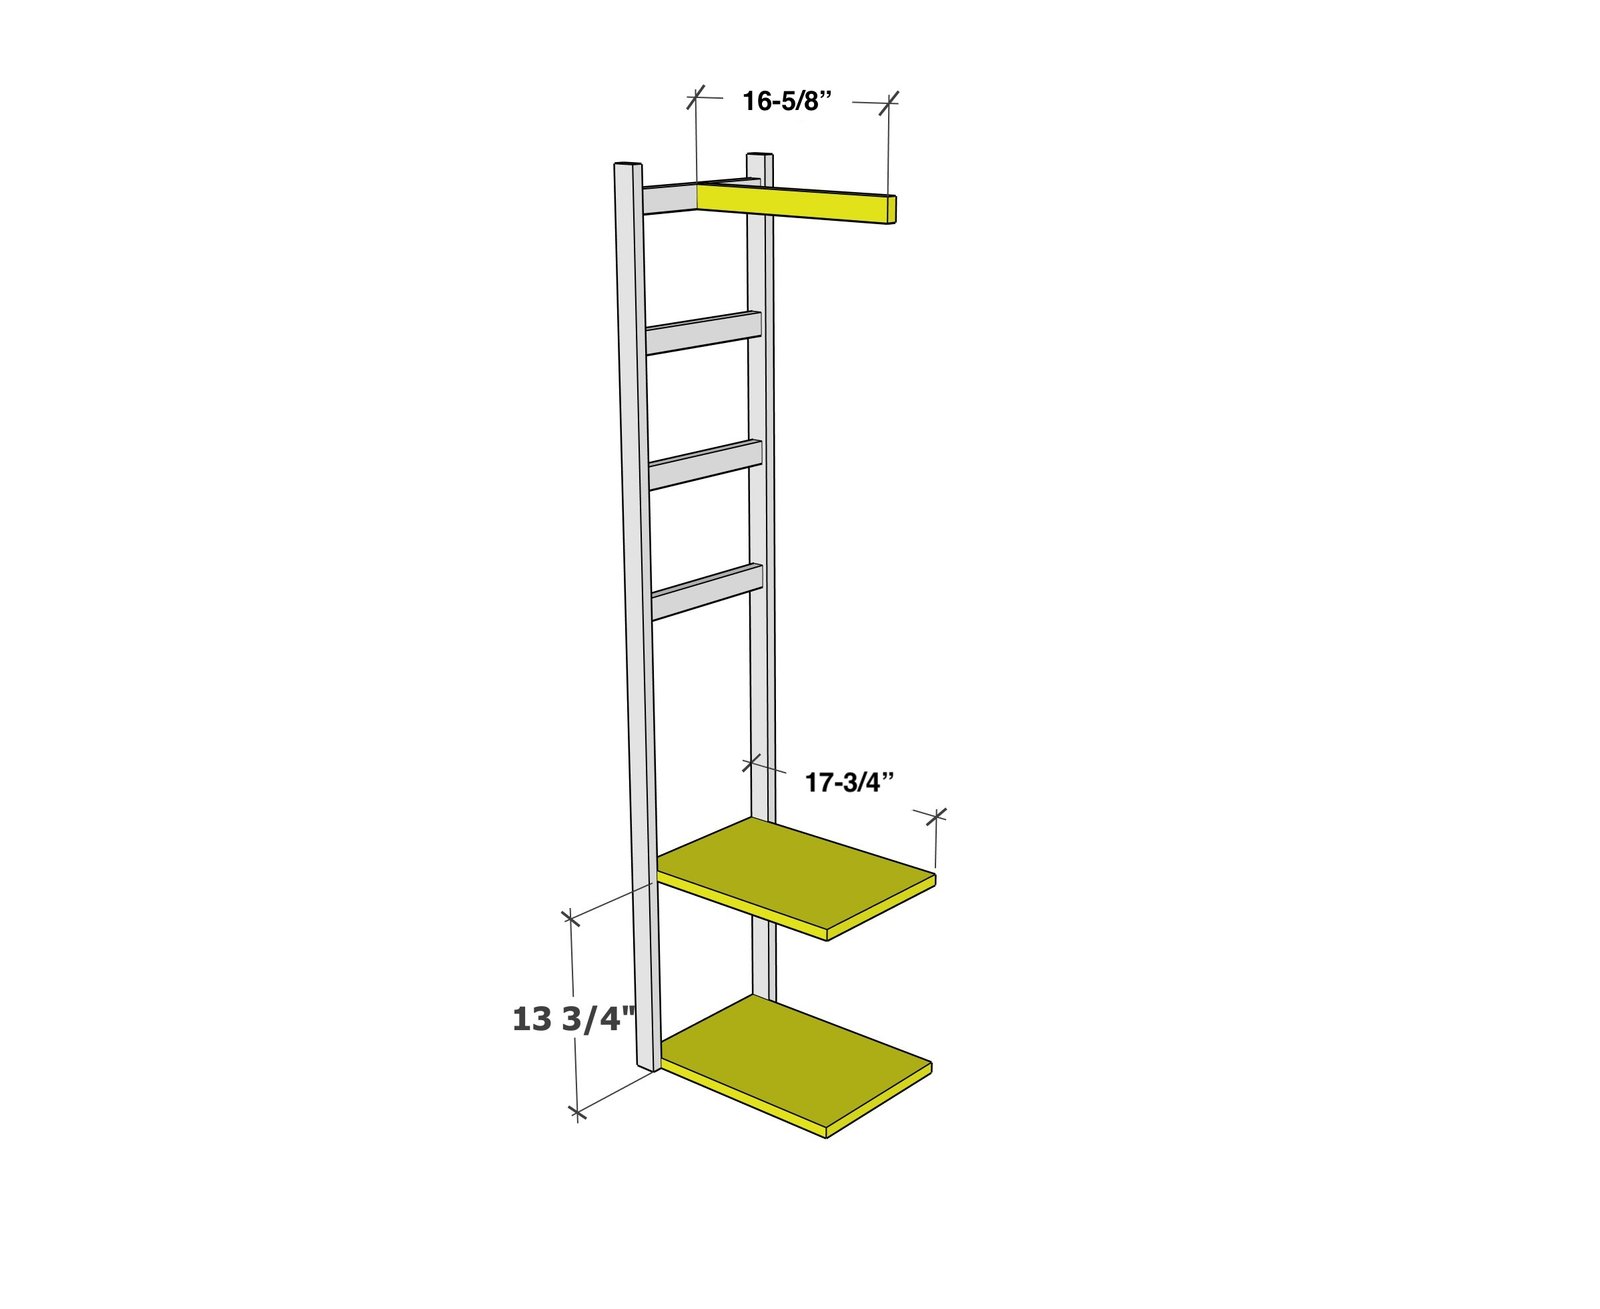
- 2 - 1x12 @ 17-3/4"
- 1 - 1x2 @ 16-5/8"
Tools
- measuring tape
- square
- pencil
- safety glasses
- drill
- circular saw
Step-by-step Instructions
Step 1
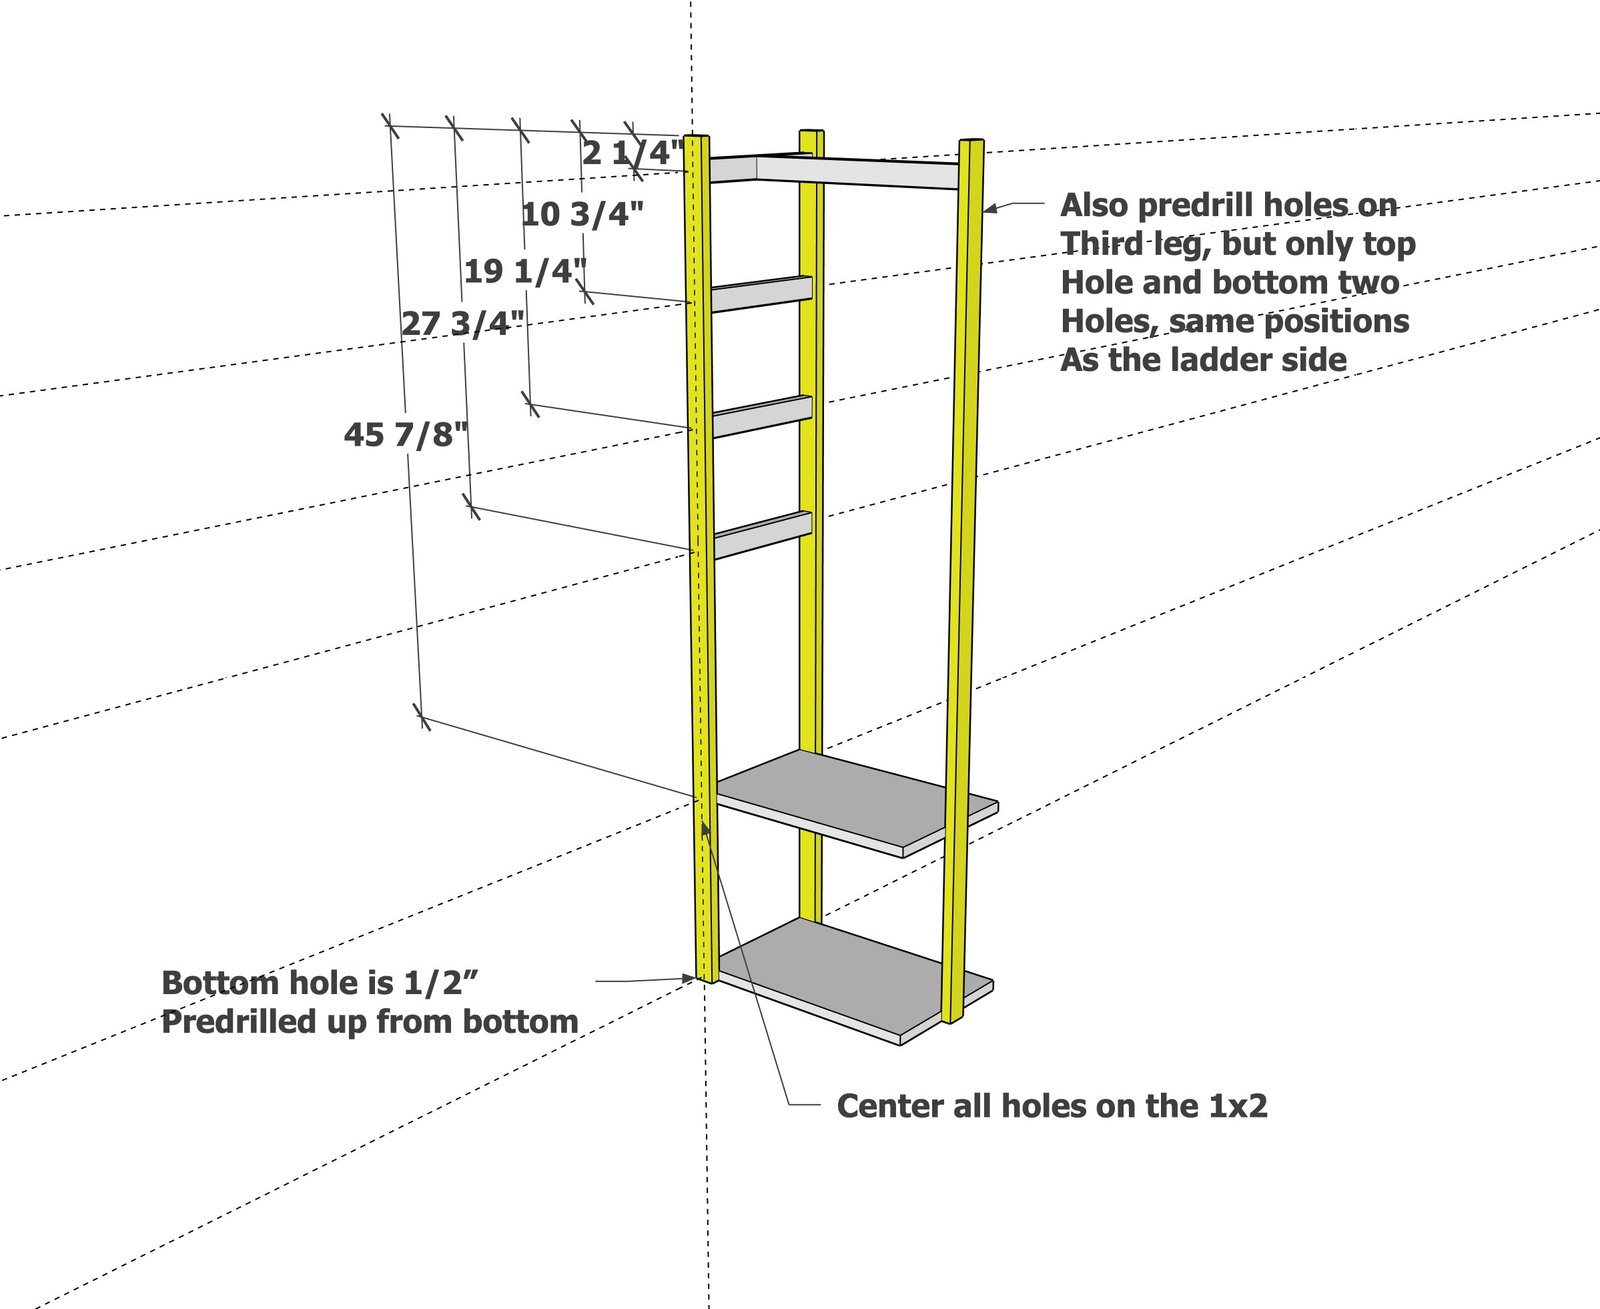
PREDRILL - After cutting all your boards, layout the legs and predrill the holes for screws as shown. I used one screw per joint with glue. The holes drilled should be slightly smaller than the screws and go all the way through the 1x2s, this will make construction easier and reduce wood splitting.
Step 2
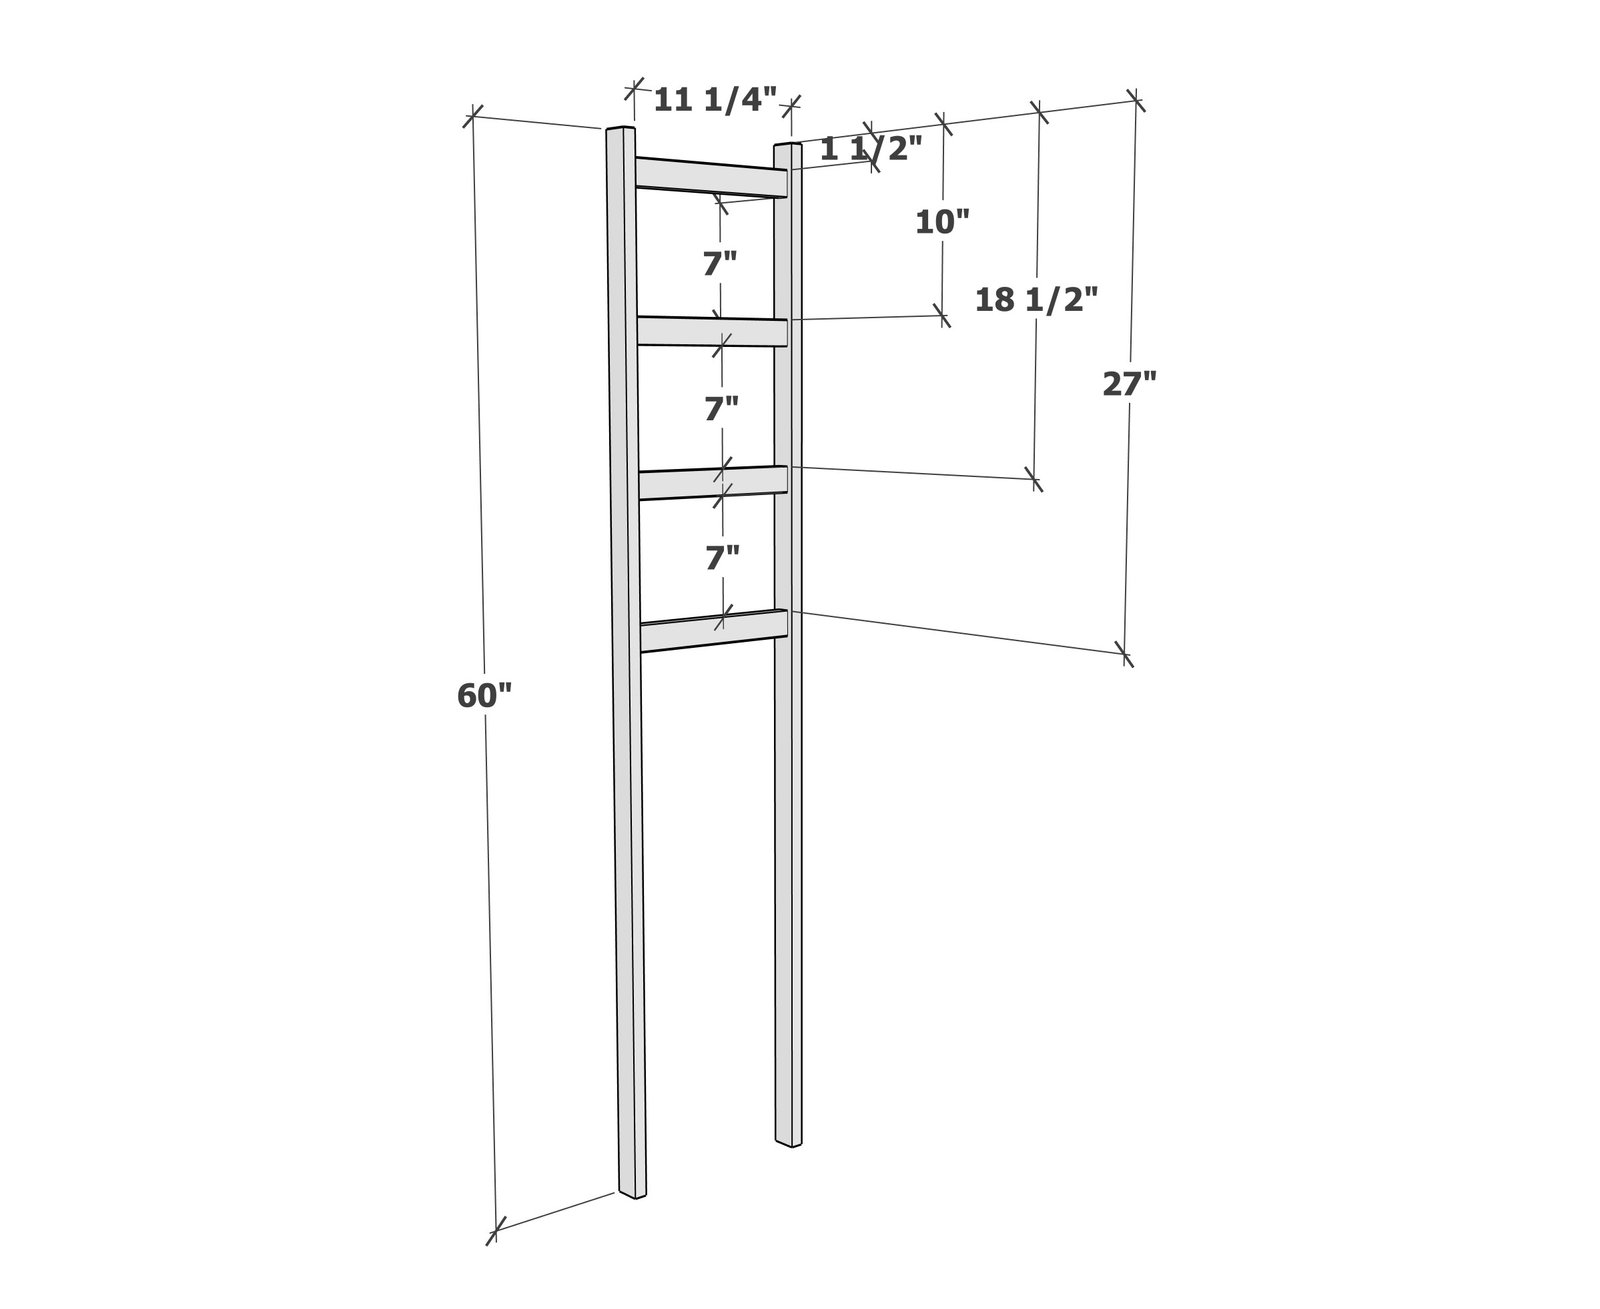
Build the ladder side, placing the shorter 1x2s centered on the legs (I used a 3/8" scrap plywood to elevate the wood in the right spot) TIP: If you have a brad nailer, nailing the joints before screwing will help make building easier. Use glue at all joints.
Step 3
Attach the 1x12s and remaining 1x2s to the ladder side.
Place the final leg and attach h to the 1x12s and top 1x2.
TIP: After completing the finish, add rubber stopper pads to the bottoms to protect your floor, under the 1x2s.
Finishing
Sand all surfaces, starting with a medium grit and finishing with fine. Wipe off the dust, fill any holes or gaps with wood filler, and sand smooth once dry. Apply primer if you're painting, then finish with your choice of paint or stain and seal with a durable clear topcoat. For outdoor projects, use exterior-rated primer, paint or stain, and sealer so the piece stands up to the weather.
Source (temporary): https://www.ana-white.com/woodworking-projects/lightweight-instant-closet-rack-or-entryway-organizer