Little Kids Picnic Table
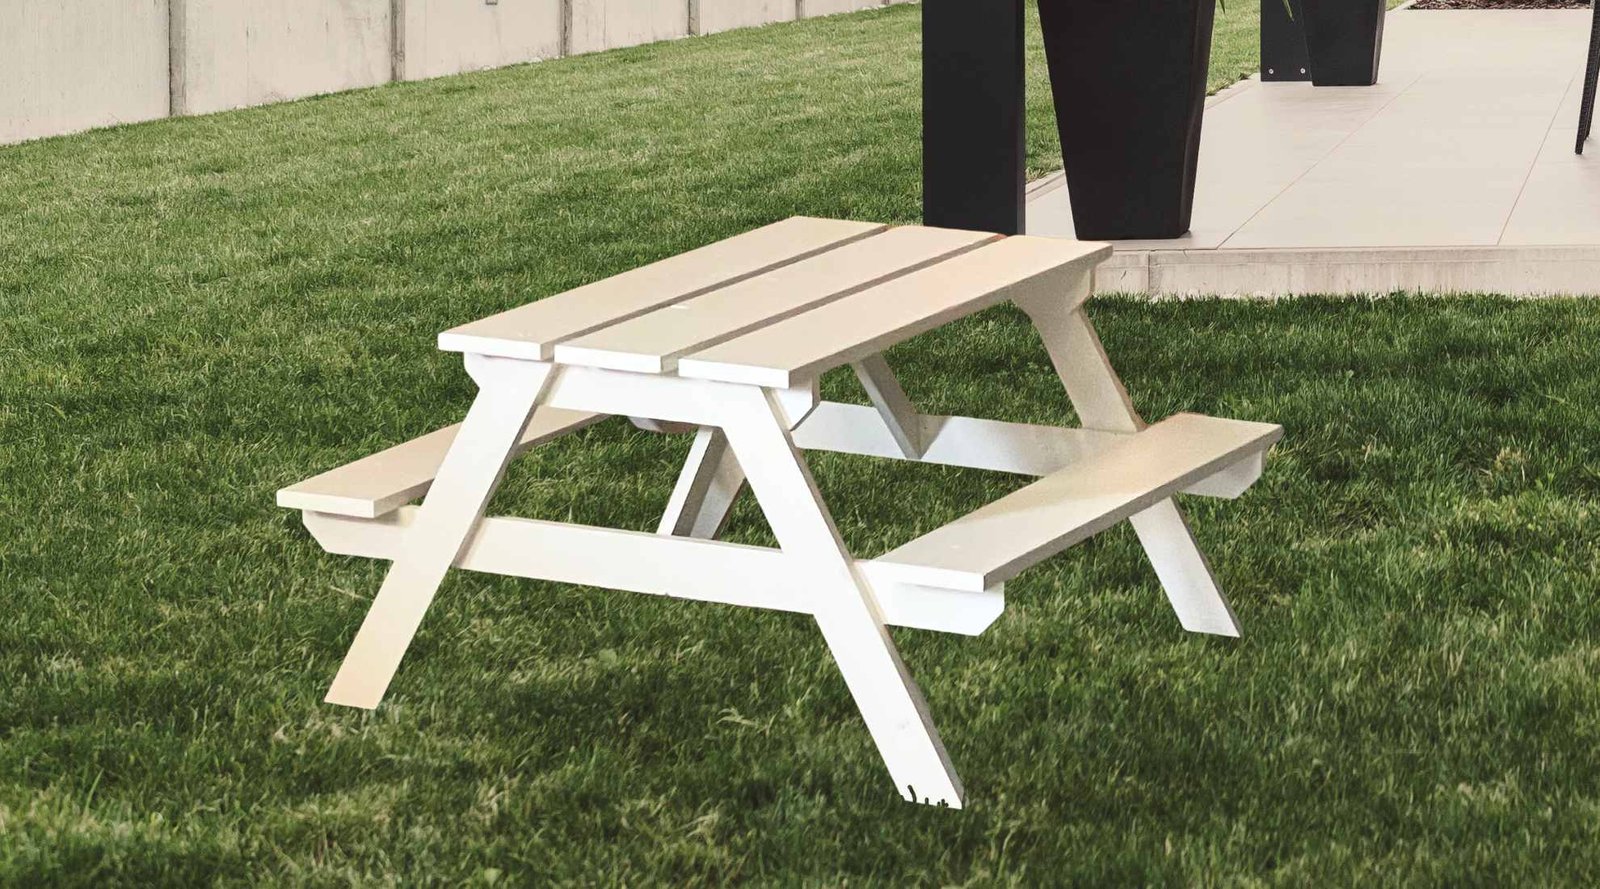
Build your own mini sized picnic table with. This toddler or preschool sized picnic table is one of the most popular plans. Due to the simple design, easy building instructions, and perfect sizing for littles, thousands of these tables have been built! We love this table as a gift too! RELATED: We also have a big kids picnic table plan, and an adult sized one too!
Specifications
| Project type | Picnic Tables and Outdoor Dining |
|---|---|
| Room | Outdoor |
| Style | Children's and Kid's Room Furniture and Toy Plans |
| Difficulty | Intermediate |
| Estimated cost | Under $20 |
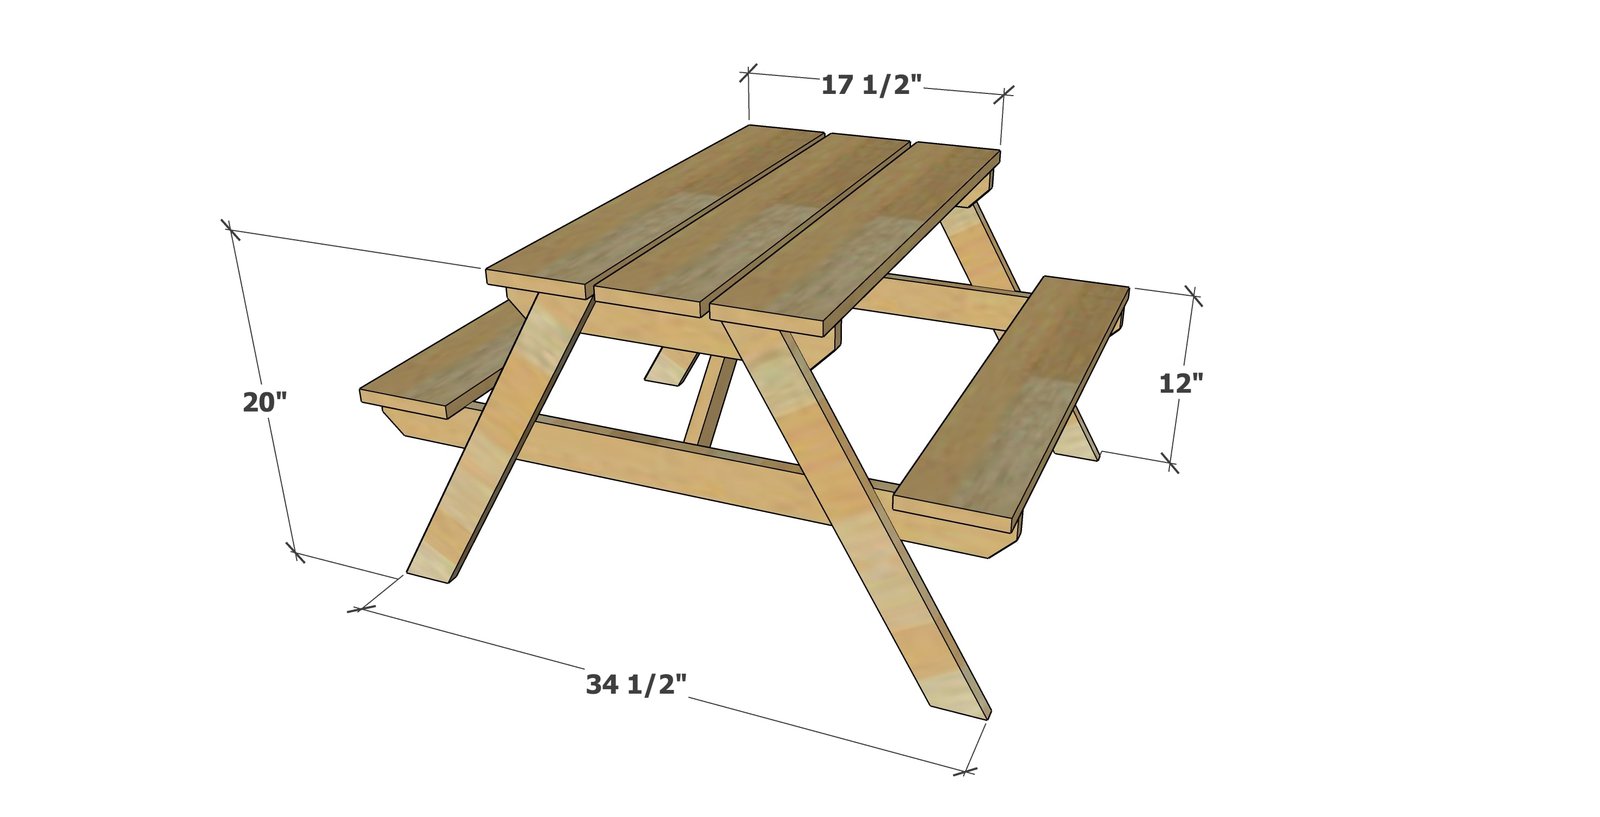
Dimensions
Use the size-specific shopping and cut lists below.
Shopping List
- 1 - 1x6 @ 8 feet long
- 1 - 1x6 @ 6 feet long
- 3 - 1x3 @ 8 feet long
- 1 - 1x2 @ 3 feet long
- 1 1/4″ self tapping star bit screws (about 50)
- interior/exterior wood filler
- 120 grit sandpaper
- exterior appropriate wood stain
Cut List
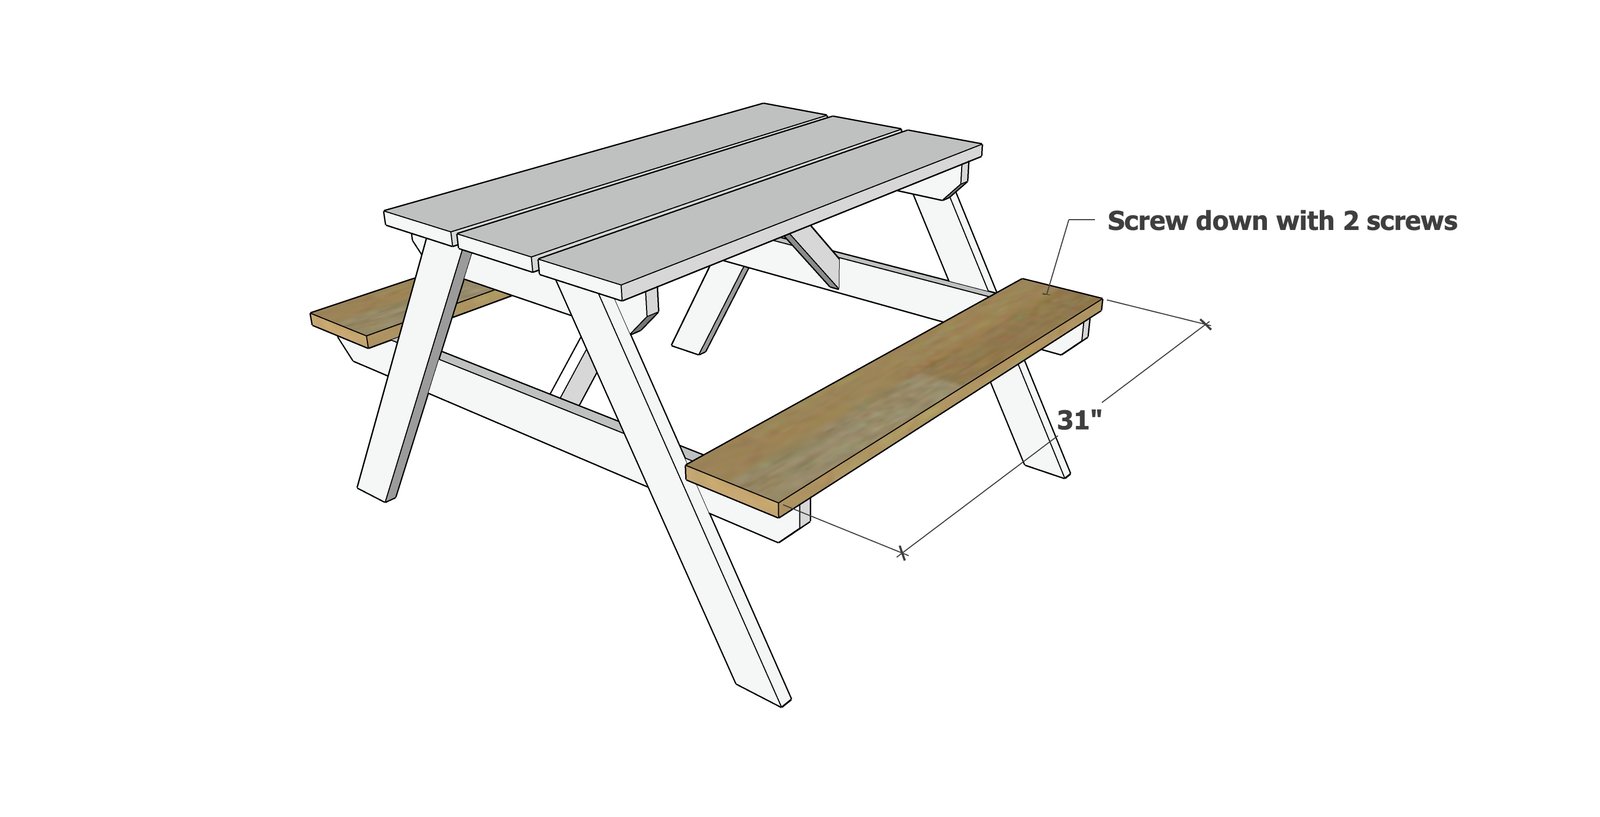
- 5 – 1×6 @ 31″ (Tabletop and Seat Pieces)
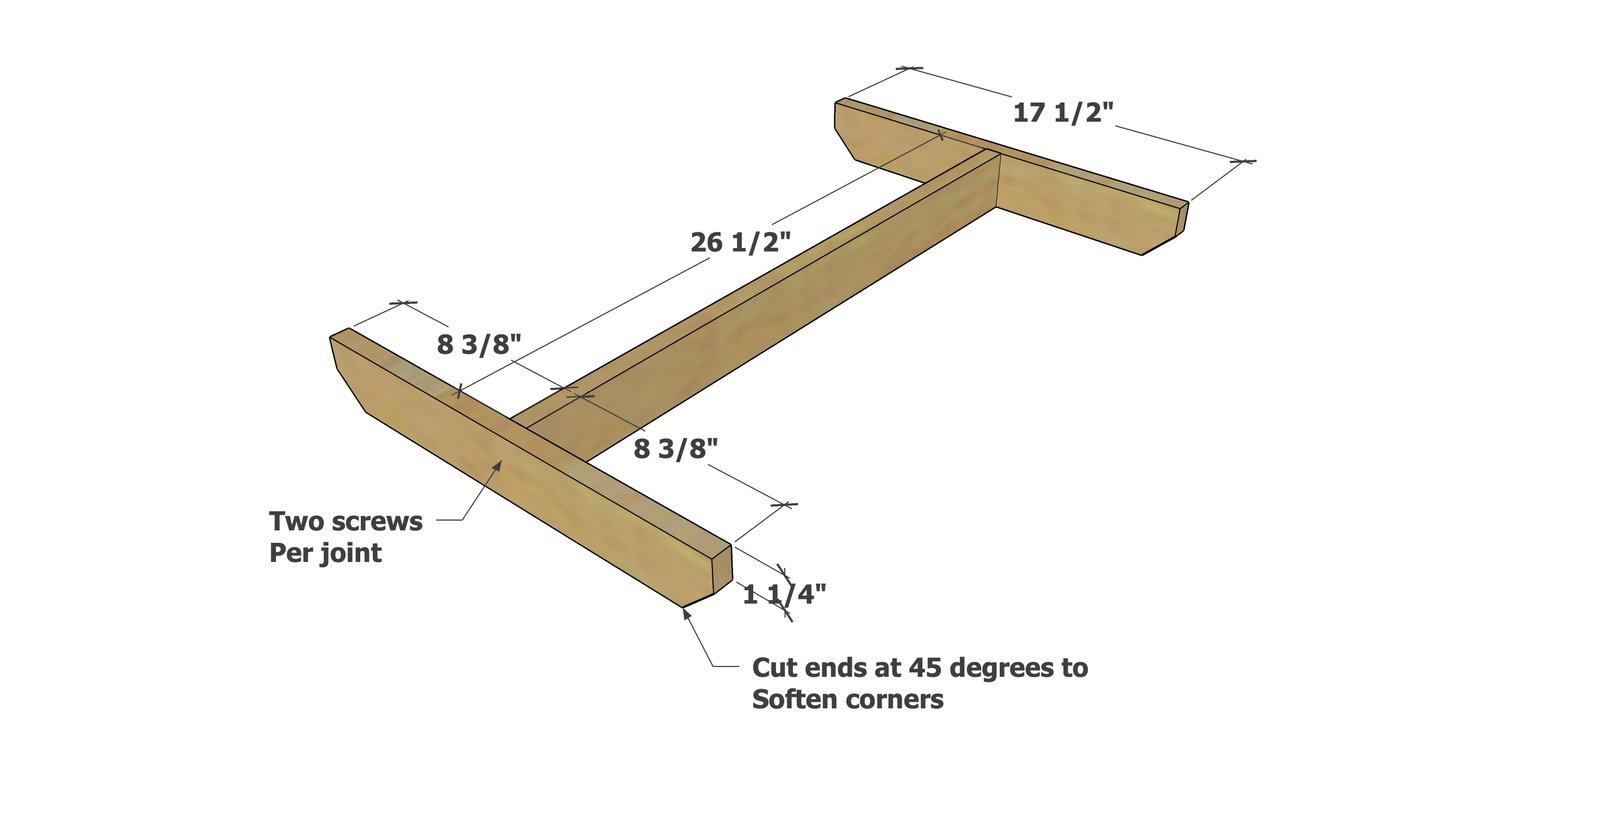
- 2 – 1×3 @ 17 1/2″ (Under Table Supports) *
- 1 – 1×3 @ 26 1/2″ (Center Support)
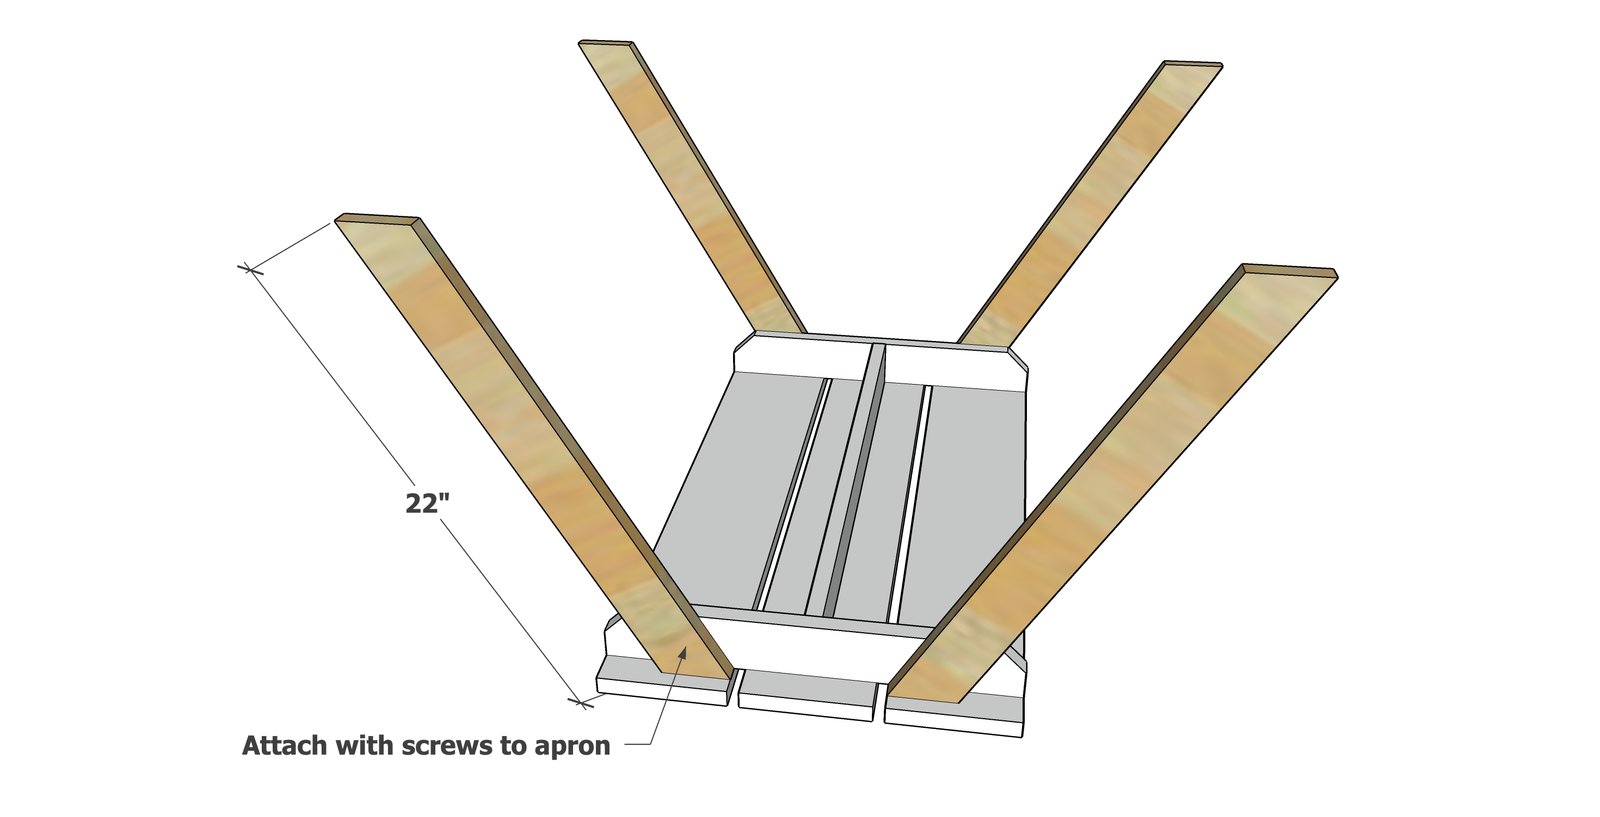
- 4 – 1×3 @ 22″, both ends cut at 30 degrees off square, long point to short point measurement, ends ARE parallel (Legs)
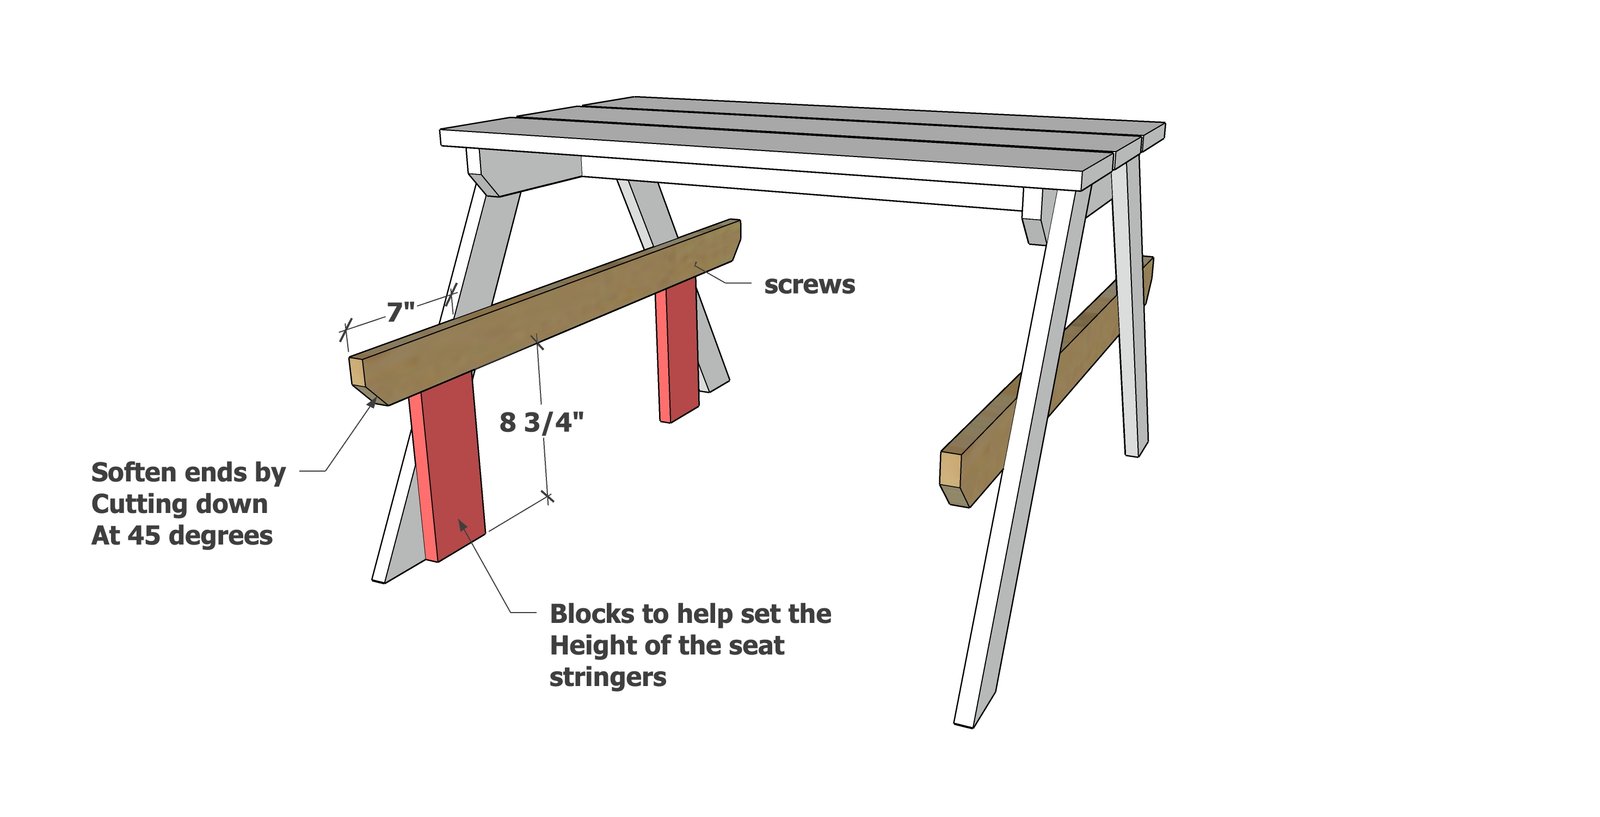
- 2 – 1×3 @ 35-1/2″ (Seat Stringer) *
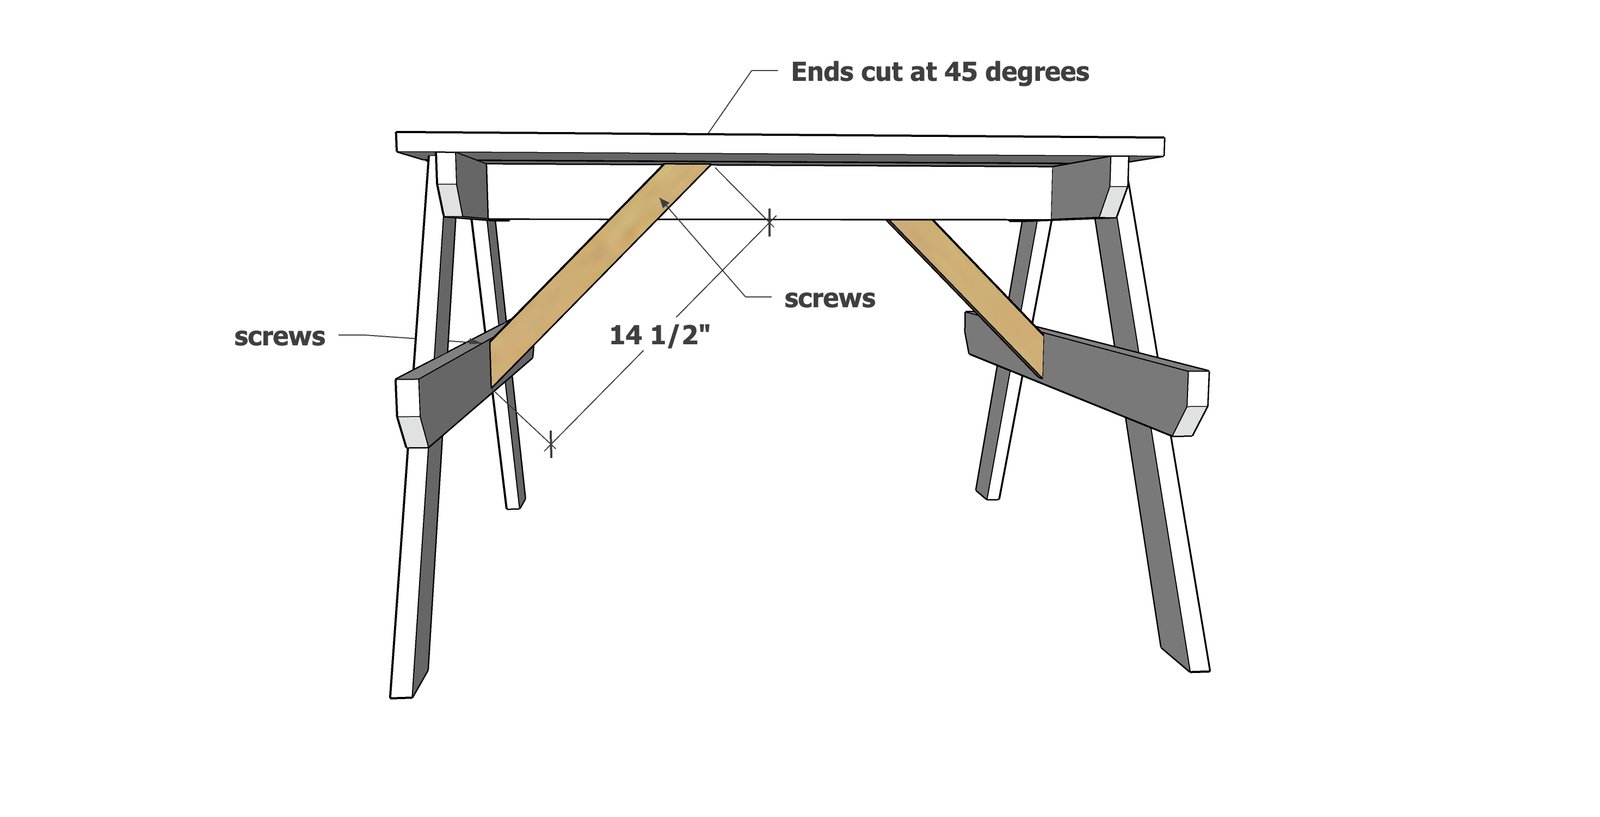
- 2 - 1x2 @ 14-12", both ends cut at 45 degrees off square, long point to long point measurements, ends are NOT parallel (Cross Supports)
*Ends are clipped at 45 degrees to soften edges, see in diagrams
Tools
- measuring tape
- square
- pencil
- safety glasses
- drill
- compound miter saw
- sander
Step-by-step Instructions
Cut the ends of the tabletop supports back at 45 degrees as shown to soften edges.
Attach the center tabletop support to the two ends to make an I shaped support system. Adjust for square, meaning the outside corner diagonal measurements match - this is to ensure your project is a rectangle and NOT a parallelogram.
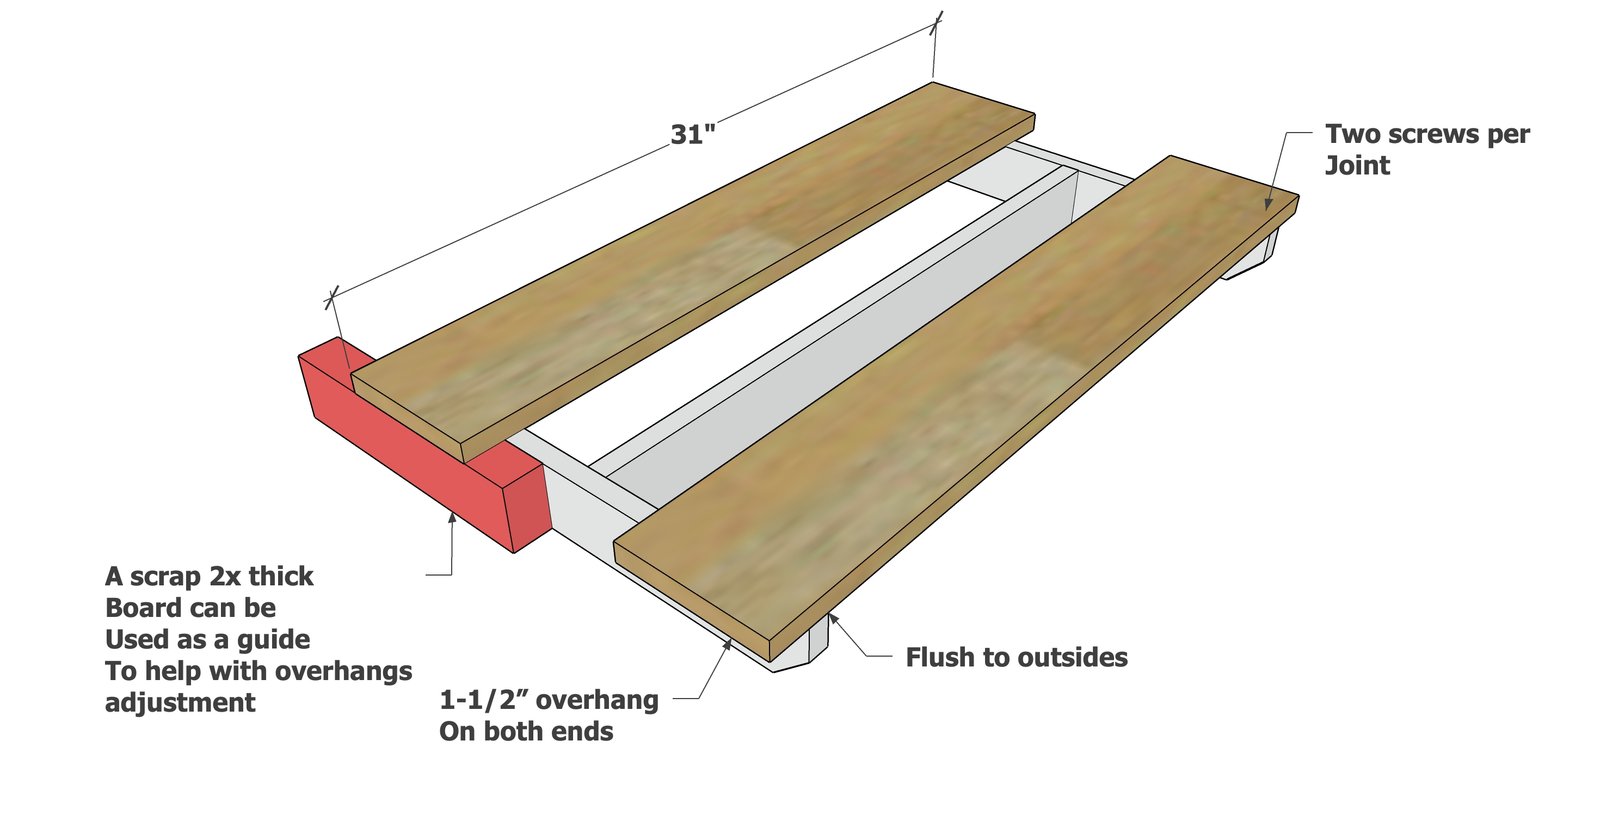
Lay two of the 1x6 boards on top, with even 1-1/2" overhangs on ends and flush to outsides.
Screw down with two screws per joint. Center the third tabletop board and screw down, also add a couple screws to the center support.
Step 3
Flip over and attach the legs to the outsides of the aprons with two screws per joint.
Step 4
Flip over. If your table is wobbly, make sure the surface it is setting on is level. If still wobbly, unscrew one of the legs and rotate slightly, until the wobble is out. Use blocks to set the seat stringer and attach to the insides of the legs.
With the table setting flat and no wobble, attach the cross supports inside as shown.
Alternative - add a second 1x3 @ 26-1/2" centered on the seat stringers (as shown in some photos)
Step 6
Attach the seat boards to the tops of the seat stringers with two screws per joint.
Finishing. Fill screw holes with wood filler, sand and finish as desired.
For more help with outdoor wood finishing, go here.
Finishing
Sand all surfaces, starting with a medium grit and finishing with fine. Wipe off the dust, fill any holes or gaps with wood filler, and sand smooth once dry. Apply primer if you're painting, then finish with your choice of paint or stain and seal with a durable clear topcoat. For outdoor projects, use exterior-rated primer, paint or stain, and sealer so the piece stands up to the weather.
Source (temporary): https://www.ana-white.com/woodworking-projects/little-kids-picnic-table