Little Library or Community Pantry Box
Build your own Little Free Library or Free Pantry with just 1/2 sheet of plywood!! walk you through how to build a sturdy outdoor box that can be used to share books, pantry items, garden produce, or anything your community needs. The clean, modern cabinet features a full-overlay door for improved weather protection, a sloped roof to shed water, and a strong post mount that keeps it stable in any climate. Designed for beginner to intermediate builders, this project uses basic lumber and straightforward construction steps. Customize it as a pantry, a library, or a farm stand — the layout works for all three. Perfect for neighborhoods, schools, parks, and rural areas where sharing brings people together. Includes: • Step-by-step instructions • Material + cut list • Build diagrams • Mounting guidance • Finishing details Build one, set it out in your community, and make a positive impact — one book or one meal at a time. This is a fantastic Boy Scout project, community project or wood shop class project.
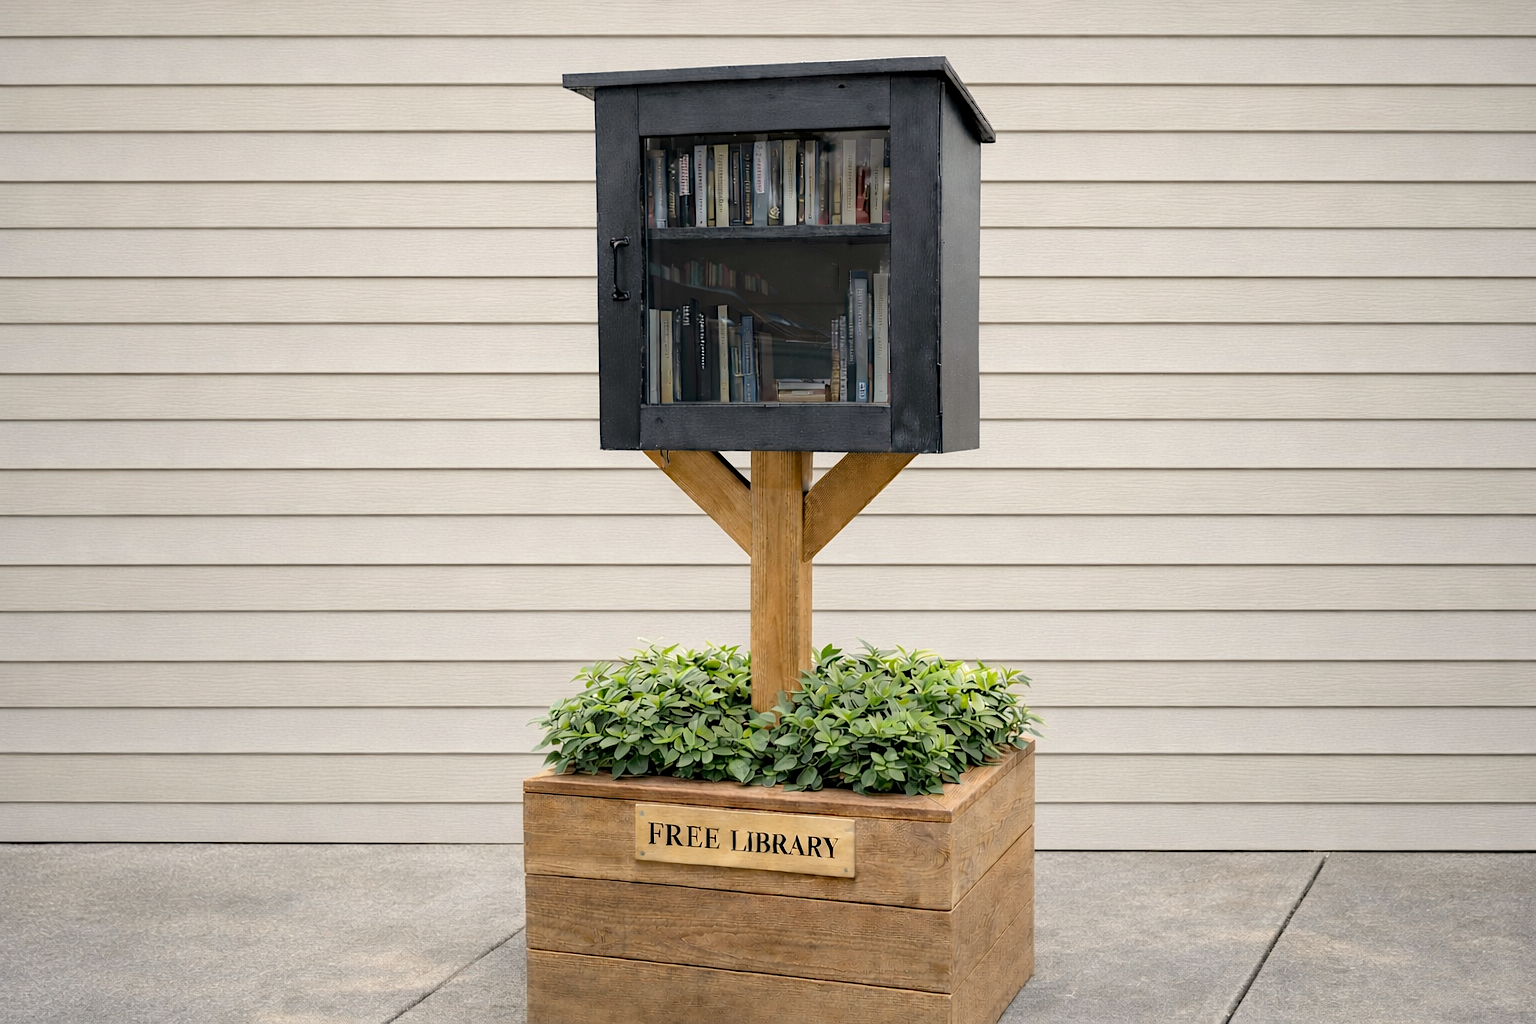
Specifications
| Project type | Other Projects |
|---|---|
| Room | Outdoor |
| Difficulty | Intermediate |
Dimensions
Use the size-specific shopping and cut lists below.
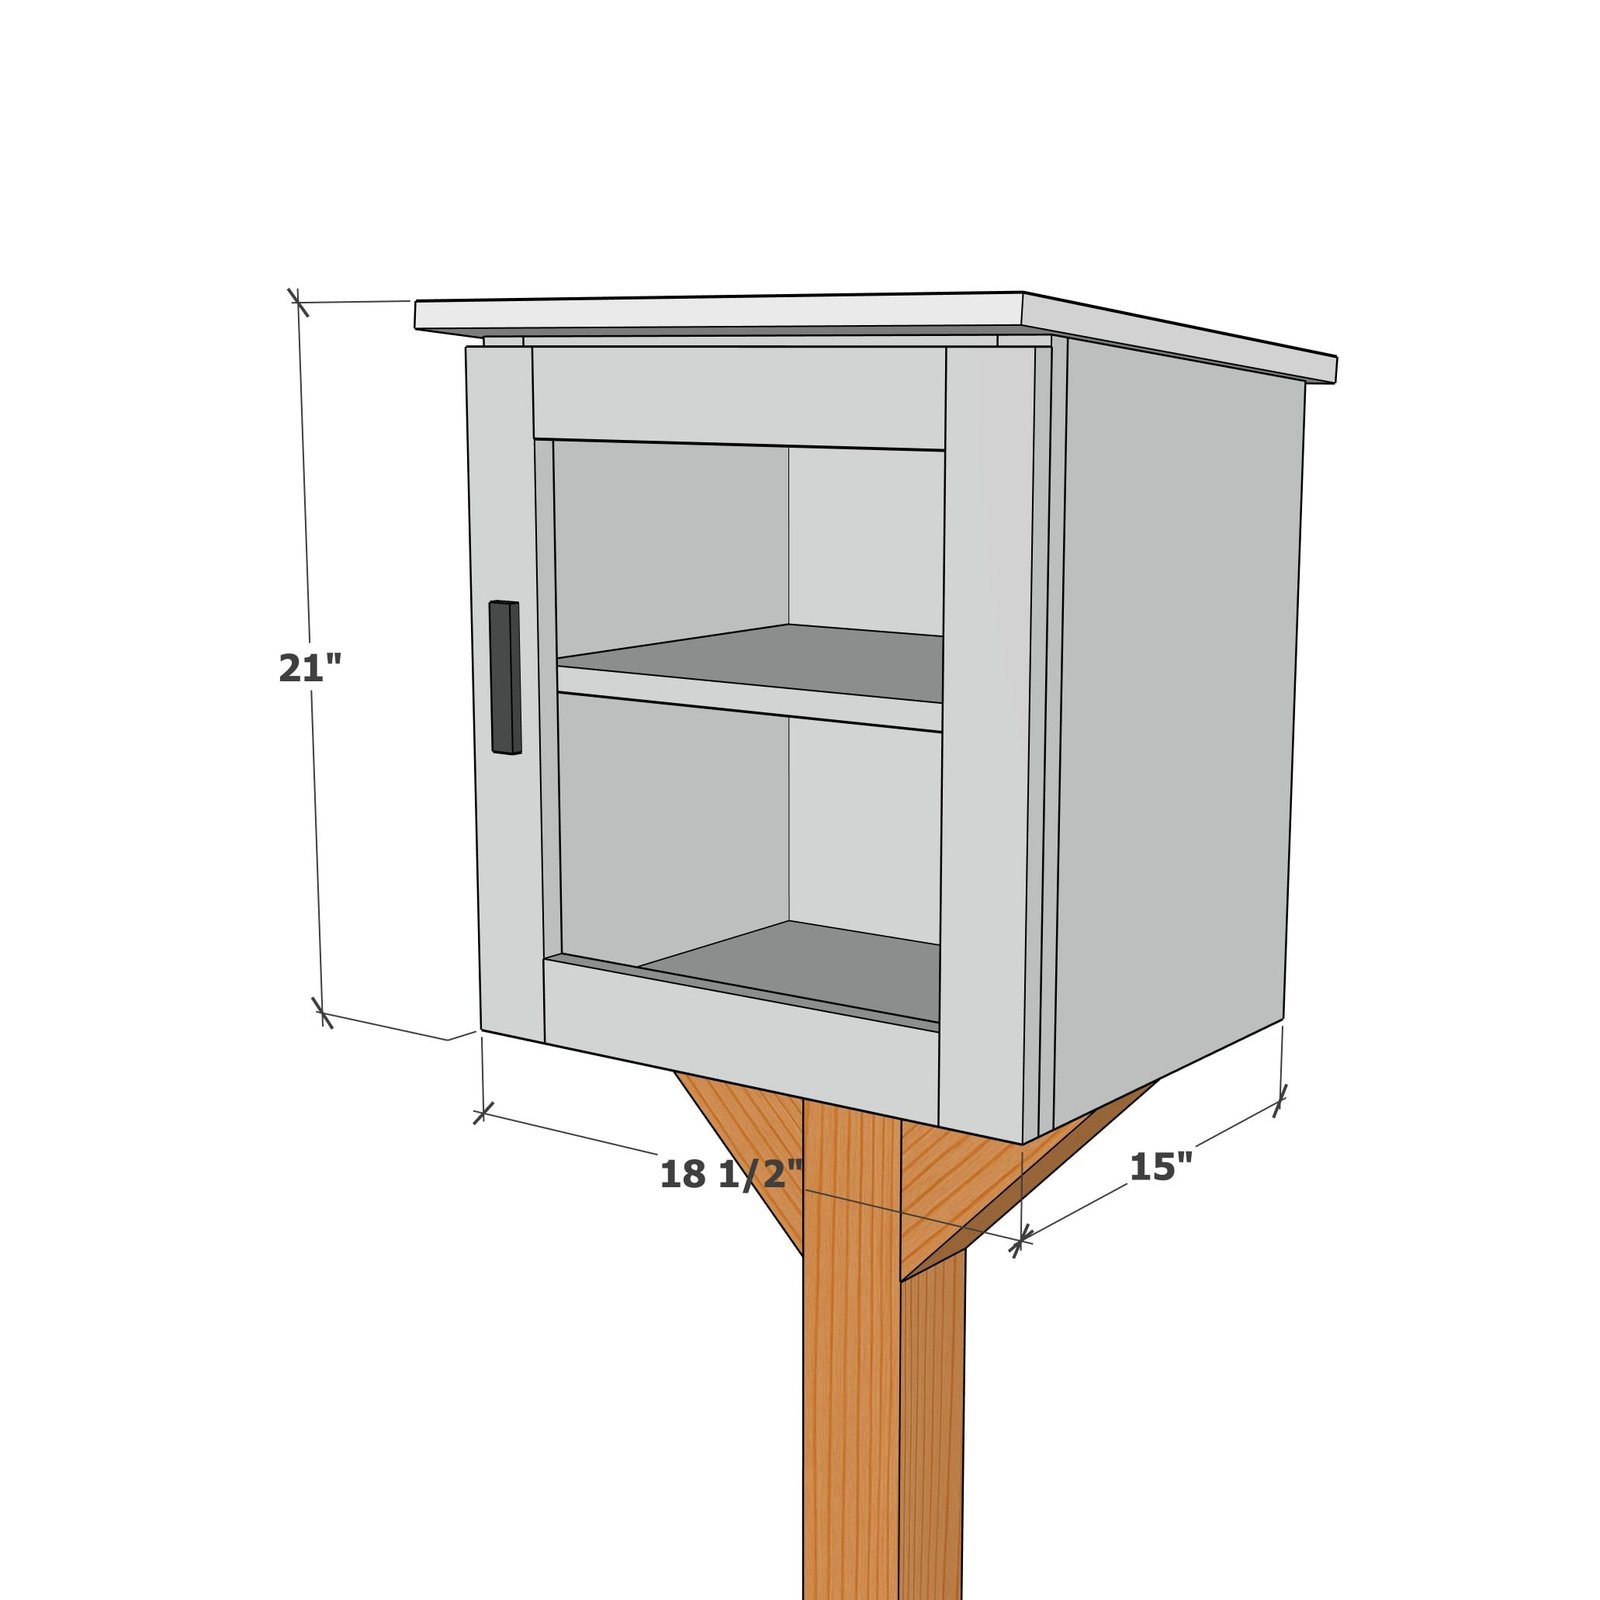
Shopping List
- 1 - 48" x 48" x 3/4" thick exterior plywood (CDX or AC)
- 2" self tapping exterior wood screws
- 1-1/4" pocket hole screws (for building doors and attaching top)
- 1x2 - 12 board feet
- 1x3 - 6 board feet
- 4x4 post, 6-8 feet long depending on installation
- exterior wood glue
- exterior wood filler
- paint
- Helmsman Spar Urethane or other flexible exterior clear coating
- weather stripping tape (about 5 feet needed)
- acrylic glass (about 15" x 16")
- 2 exterior hinges
- 1 exterior clasp
- 1 exterior handle
The Planter Box Stand Plans are Here
Cut List
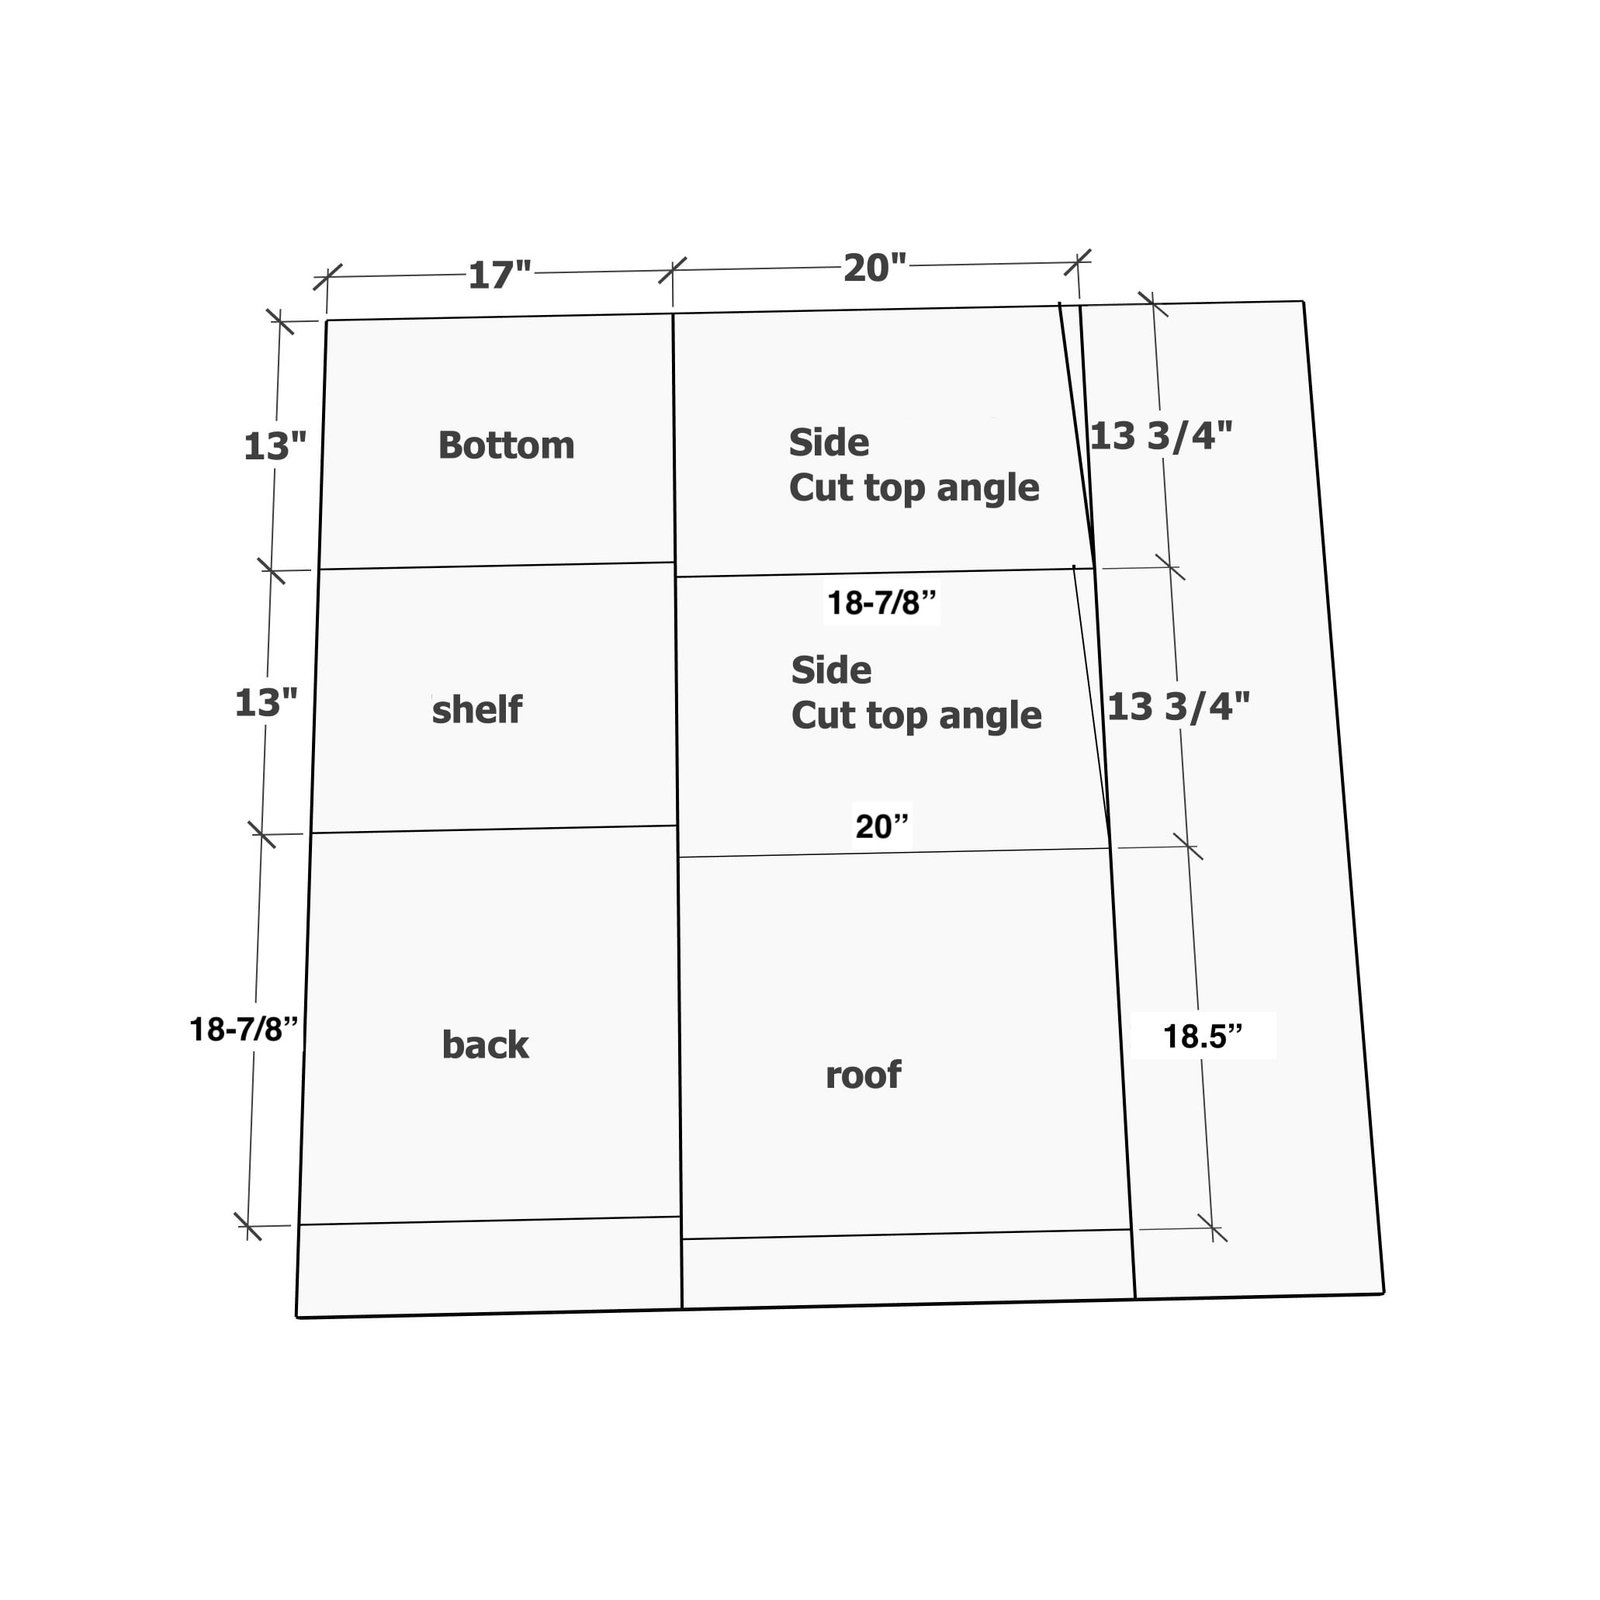
PLYWOOD PIECES - SEE STEP 1 FOR CUTTING LAYOUT
- 2 - 3/4" plywood @ 17" x 13" (shelf and bottom)
- 1 - 3/4" plywood @ 17" x 18-3/4" (back)
- 2 - 3/4" plywood @ 13.75" x 20" - cut down roof profile to 18-7/8" on one side, see step 1 and 3 (sides)
- 1 - 3/4" plywood @ 18.5" x 20" (roof - shown as 17.5" but a little bigger will increase coverage)
TRIM/SUPPORTS
- 2 - 1x2 @ 17"
- 2 - 1x2 @ 20-1/8"
- 2 - 1x2 @ 15-1/2"
DOOR
- 2 - 1x3 @ 19-3/4"
- 2 - 1x3 @ 13-1/2"
- acrylic glass 15" x 16-1/4"
Step-by-step Instructions
First, cut the plywood into strips, one strip 17" wide x 48" and the second strip 20" wide x 48".
Then crosscut the pieces as shown, labeling each piece for bottom and shelf (2), back, sides (2) and roof. For the sides, cut in the slant roof profile by marking so the lower side is 18-7/8" and cut off a triangle shaped piece from the top. This piece is clearly shown in step 3 for reference.
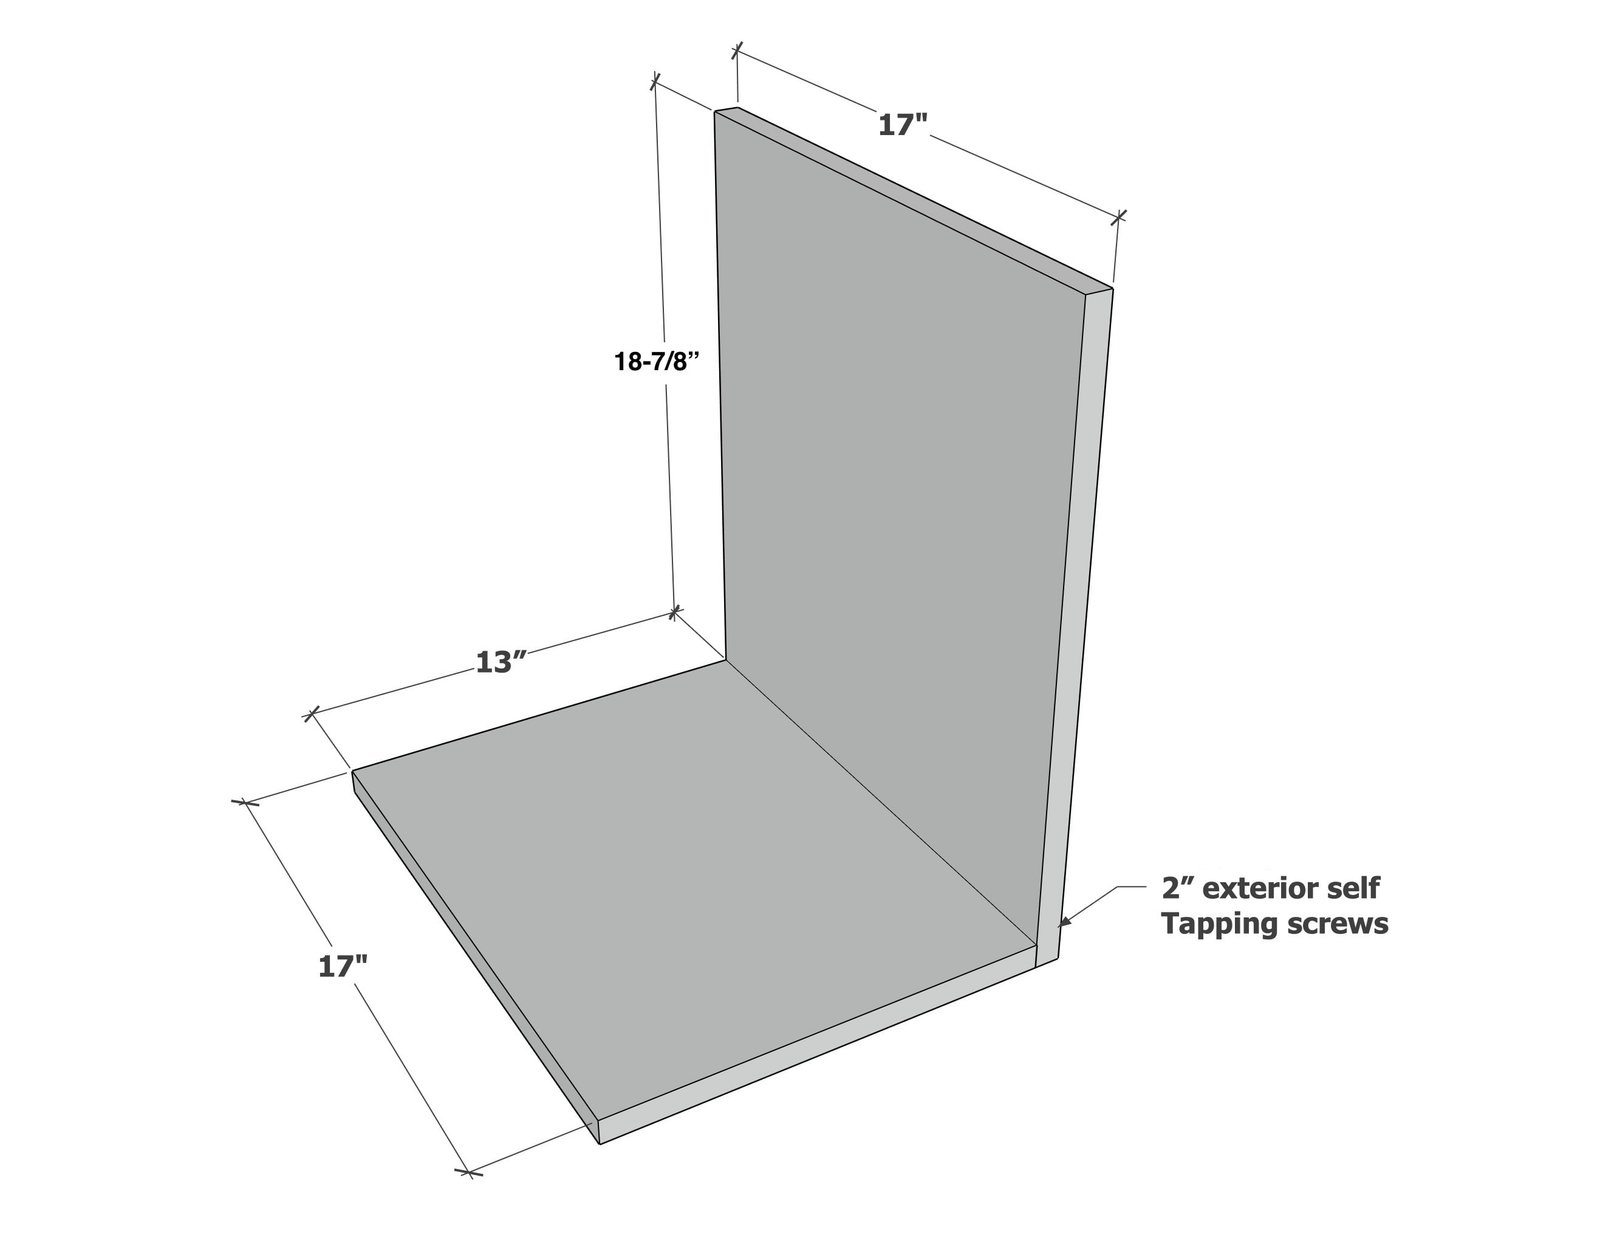
Step 2
Attach the bottom to the back with 2" screws and wood glue.
Step 3
Attach the sides to the bottom and back with 2" screws.
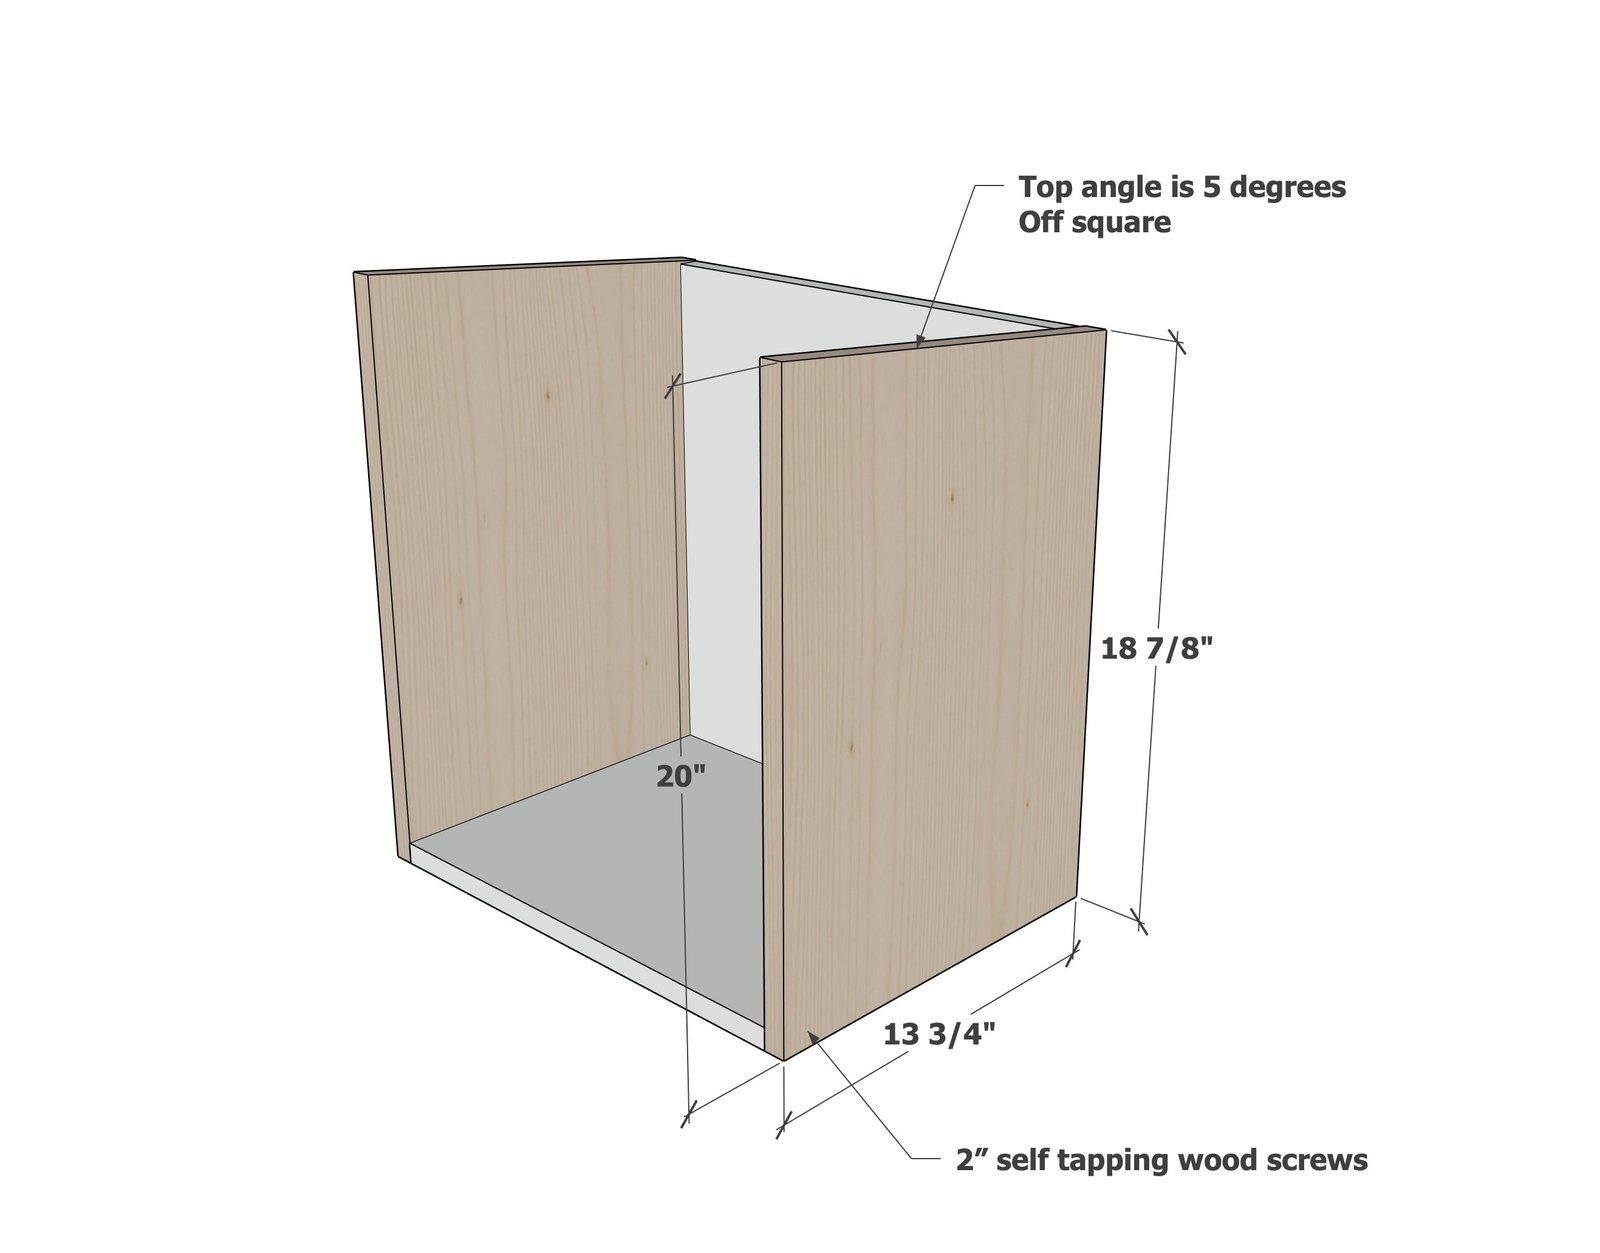
Step 4
Add the 1x2 top strips at the top with 2" screws.
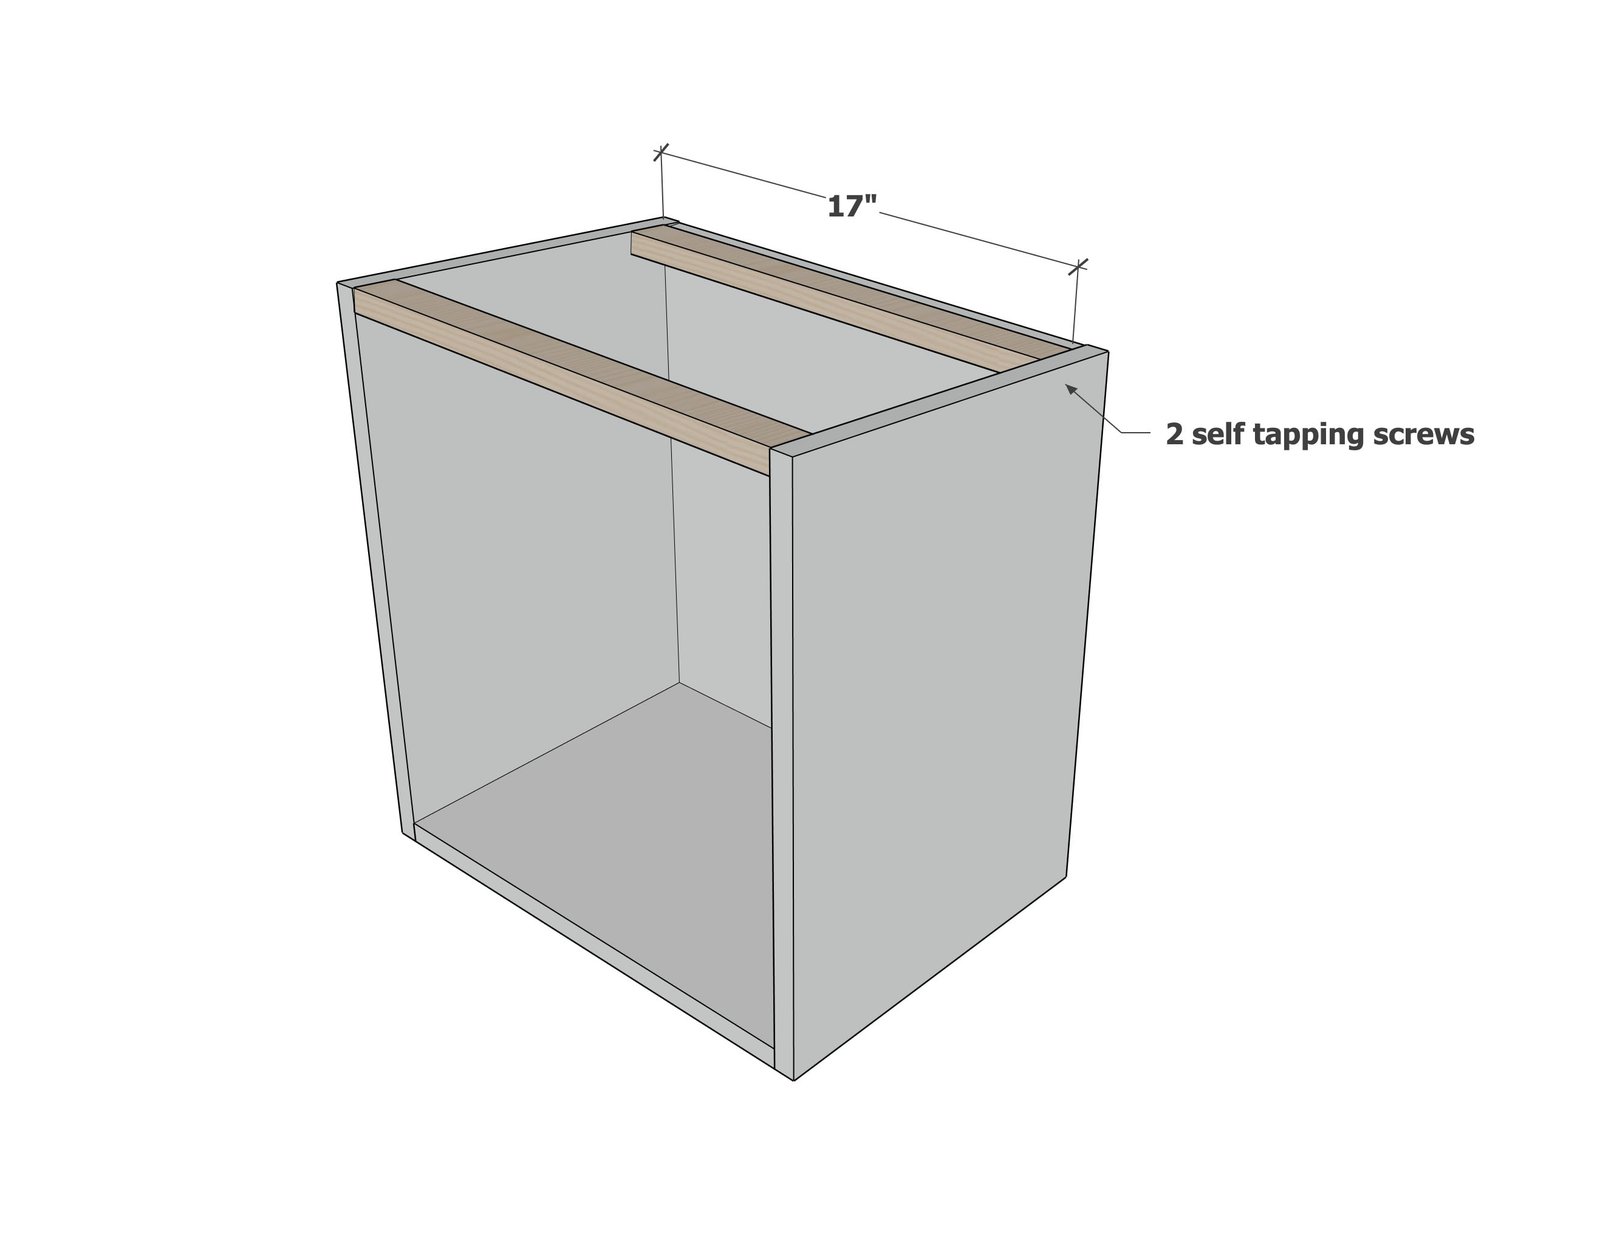
Step 5
Attach the top to the frame with 1-1/4" screws and glue
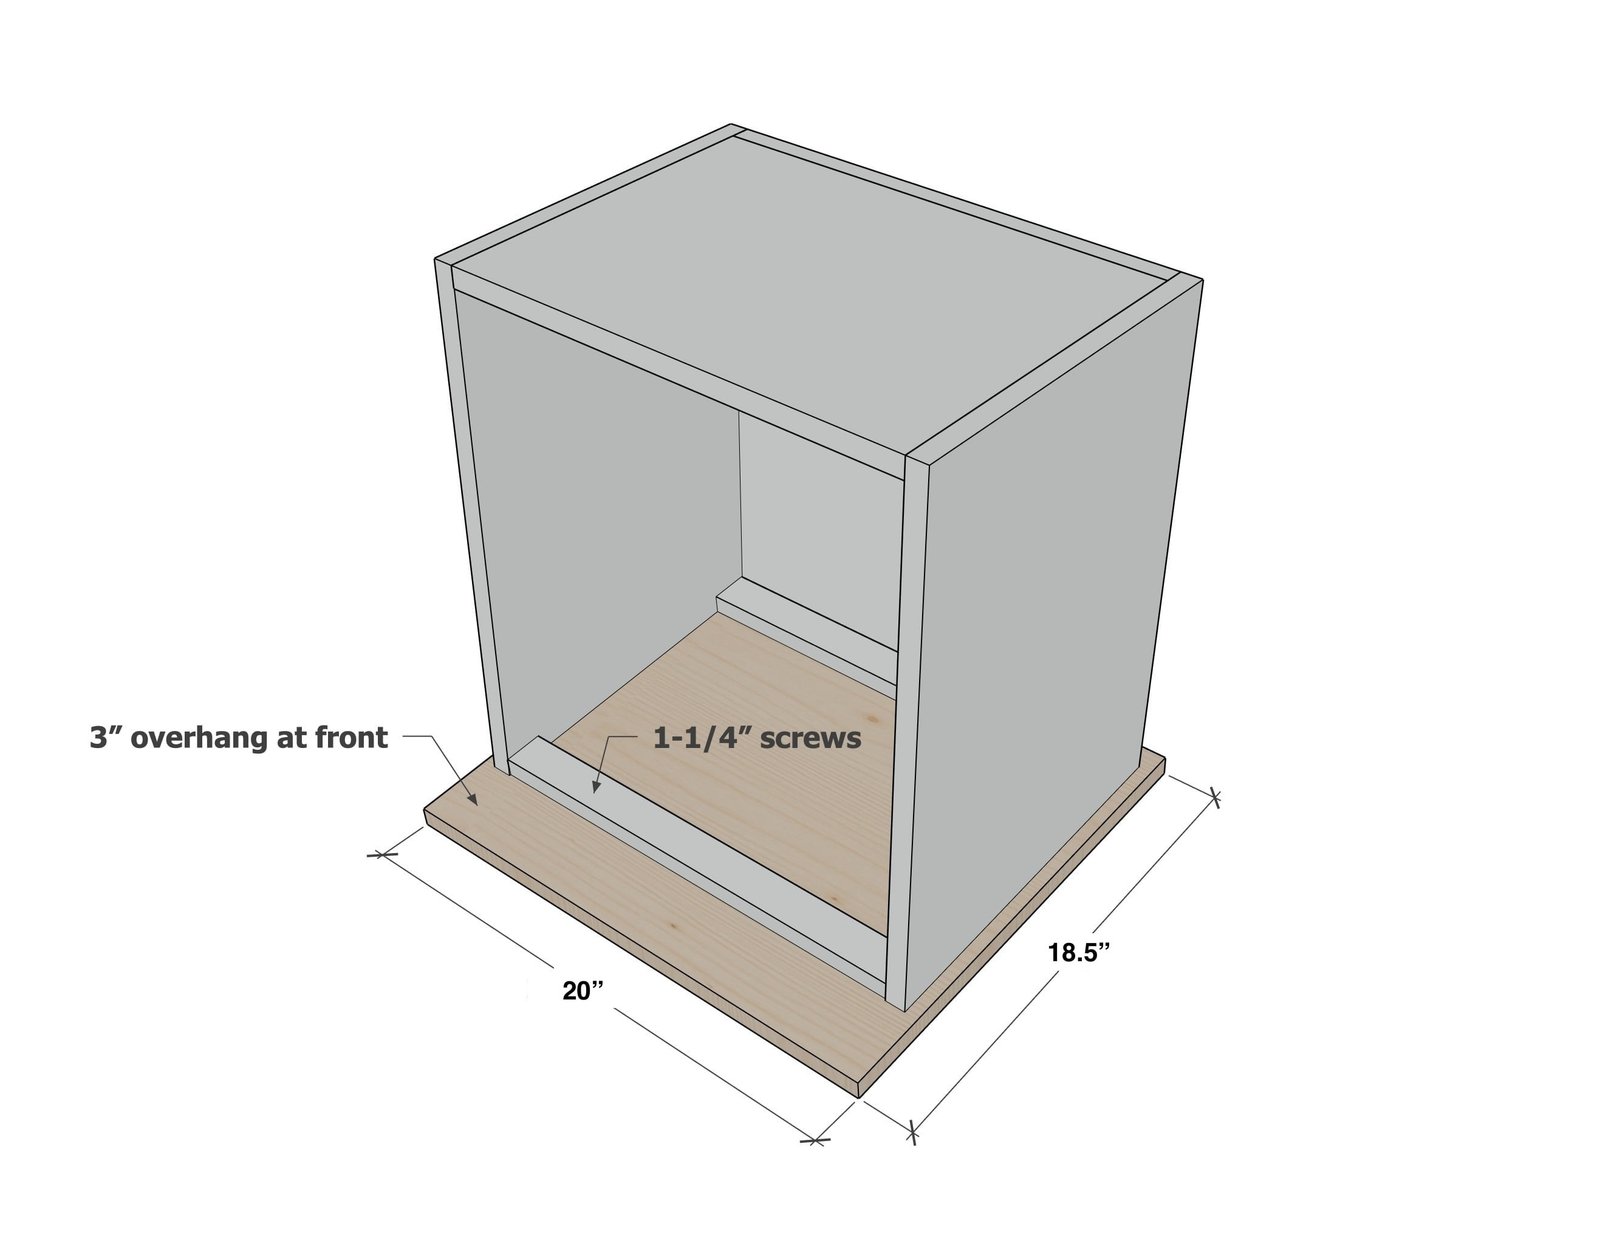
Step 6
Add the shelf in the interior. You can portion at any height, consider different sized books or pantry items.
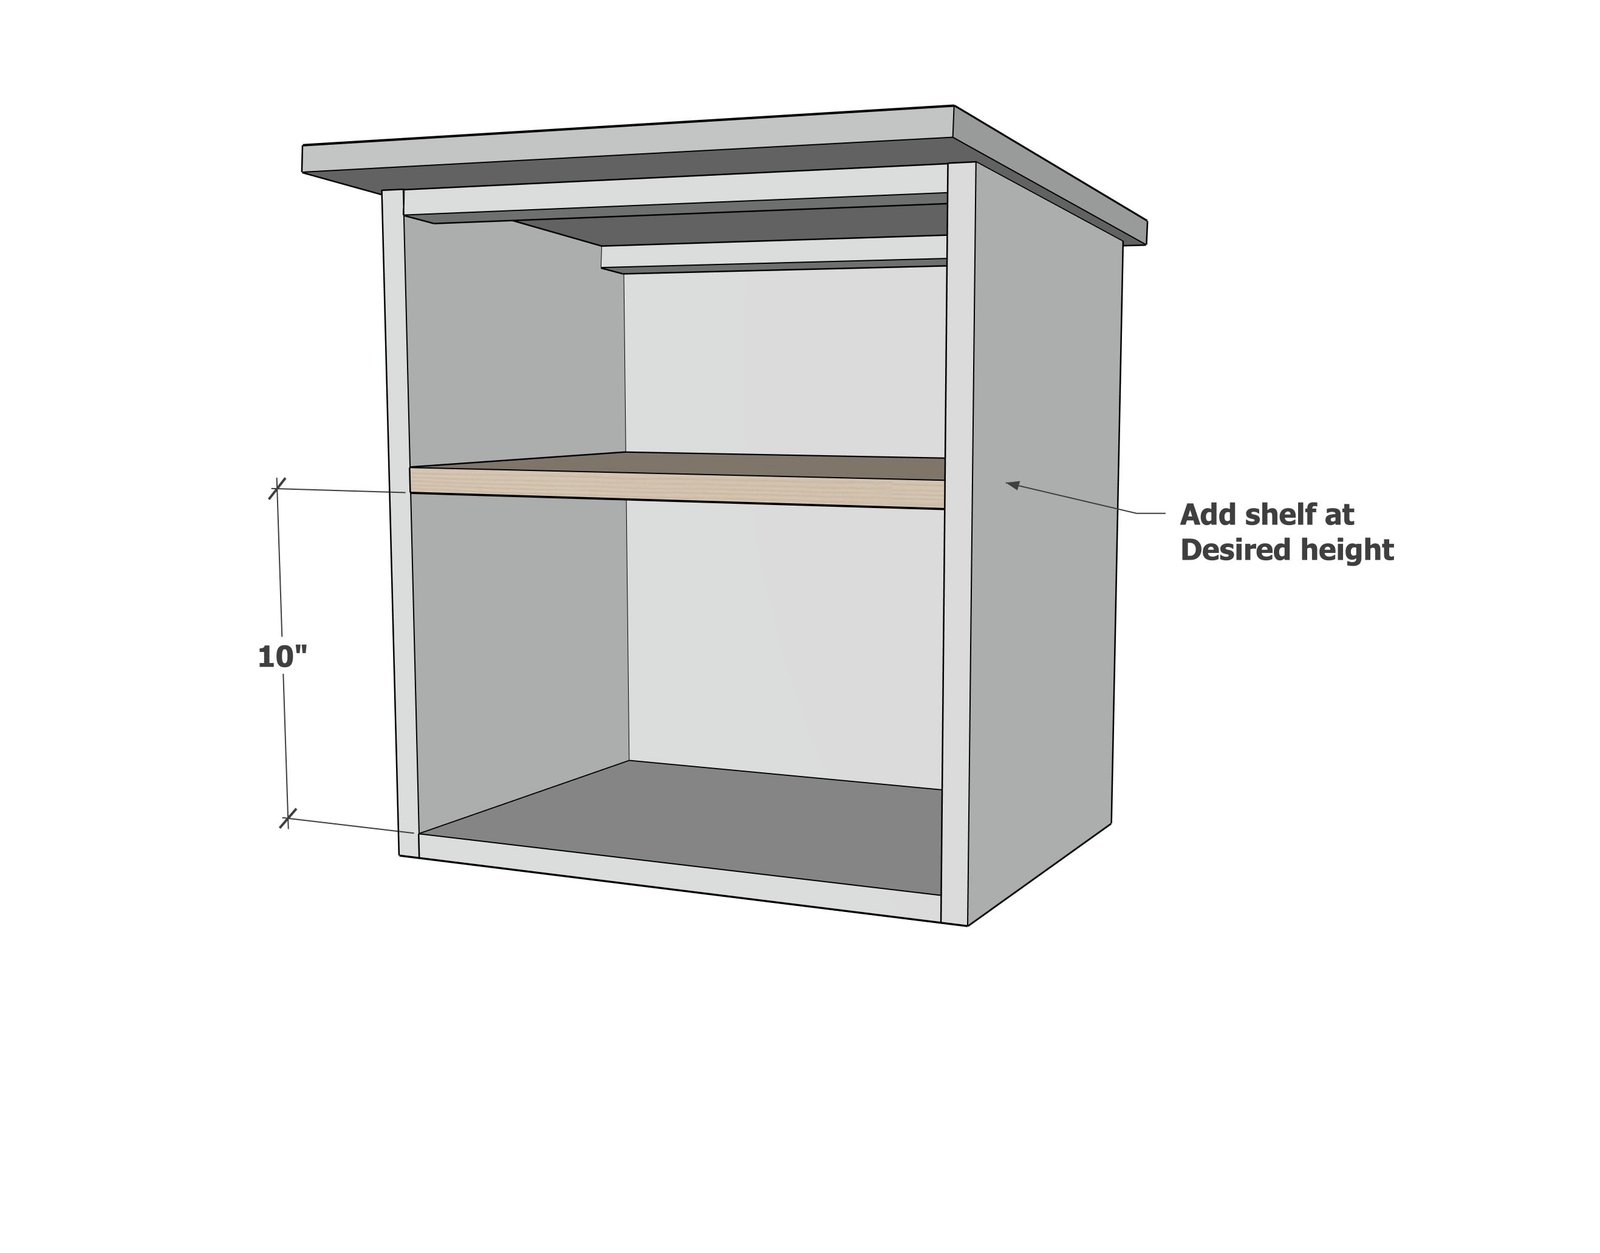
Step 7
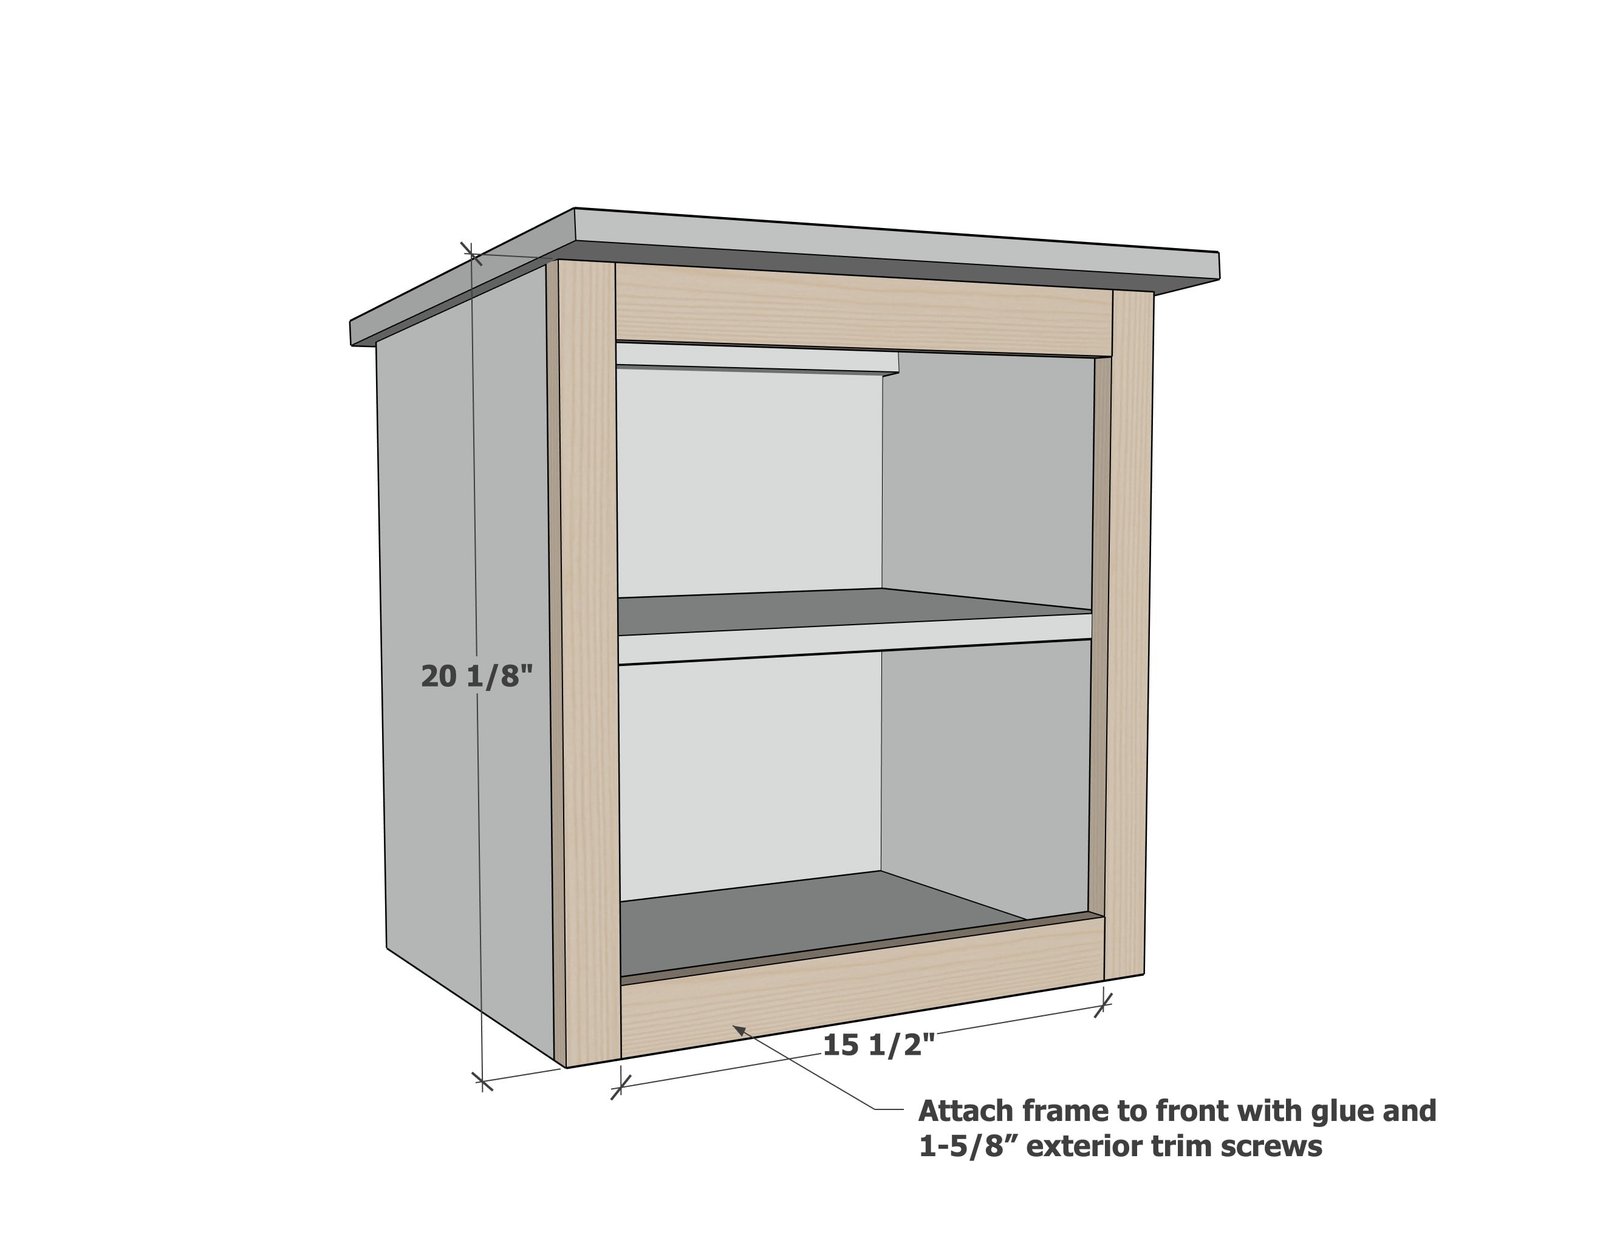
Trim the front out with 1x2s. If you have a pocket hole jig, it is best to build the frame first and attach to the front with glue and trim screws. NOTE: After finishing the project, apply a weatherstripping tape along the top and sides, but not the bottom, to seal when the door is closed.
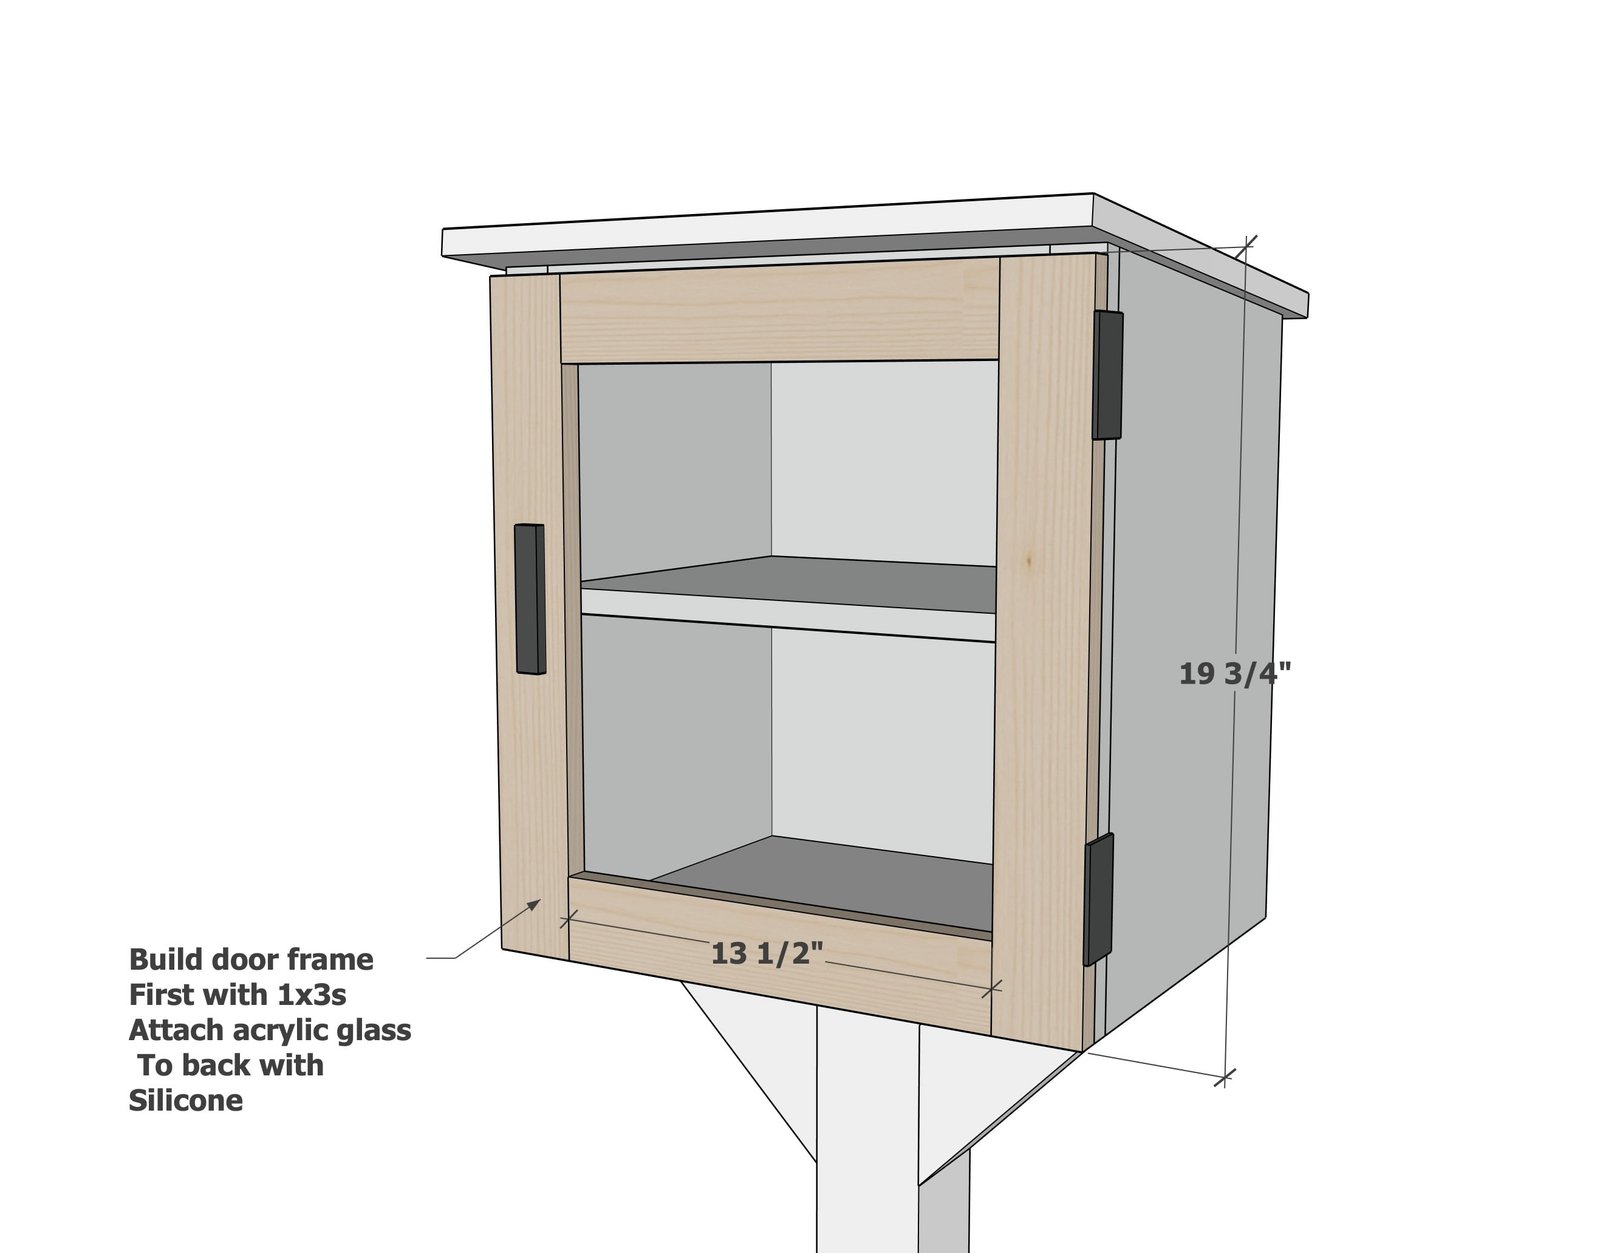
Build the door with pocket holes and 1x3s. Add the acrylic glass to the back with screws.
Attach door to the cabinet with hinges on the side. You will also need hardware to keep the door closed and tight against the weather stripping.
Step 9
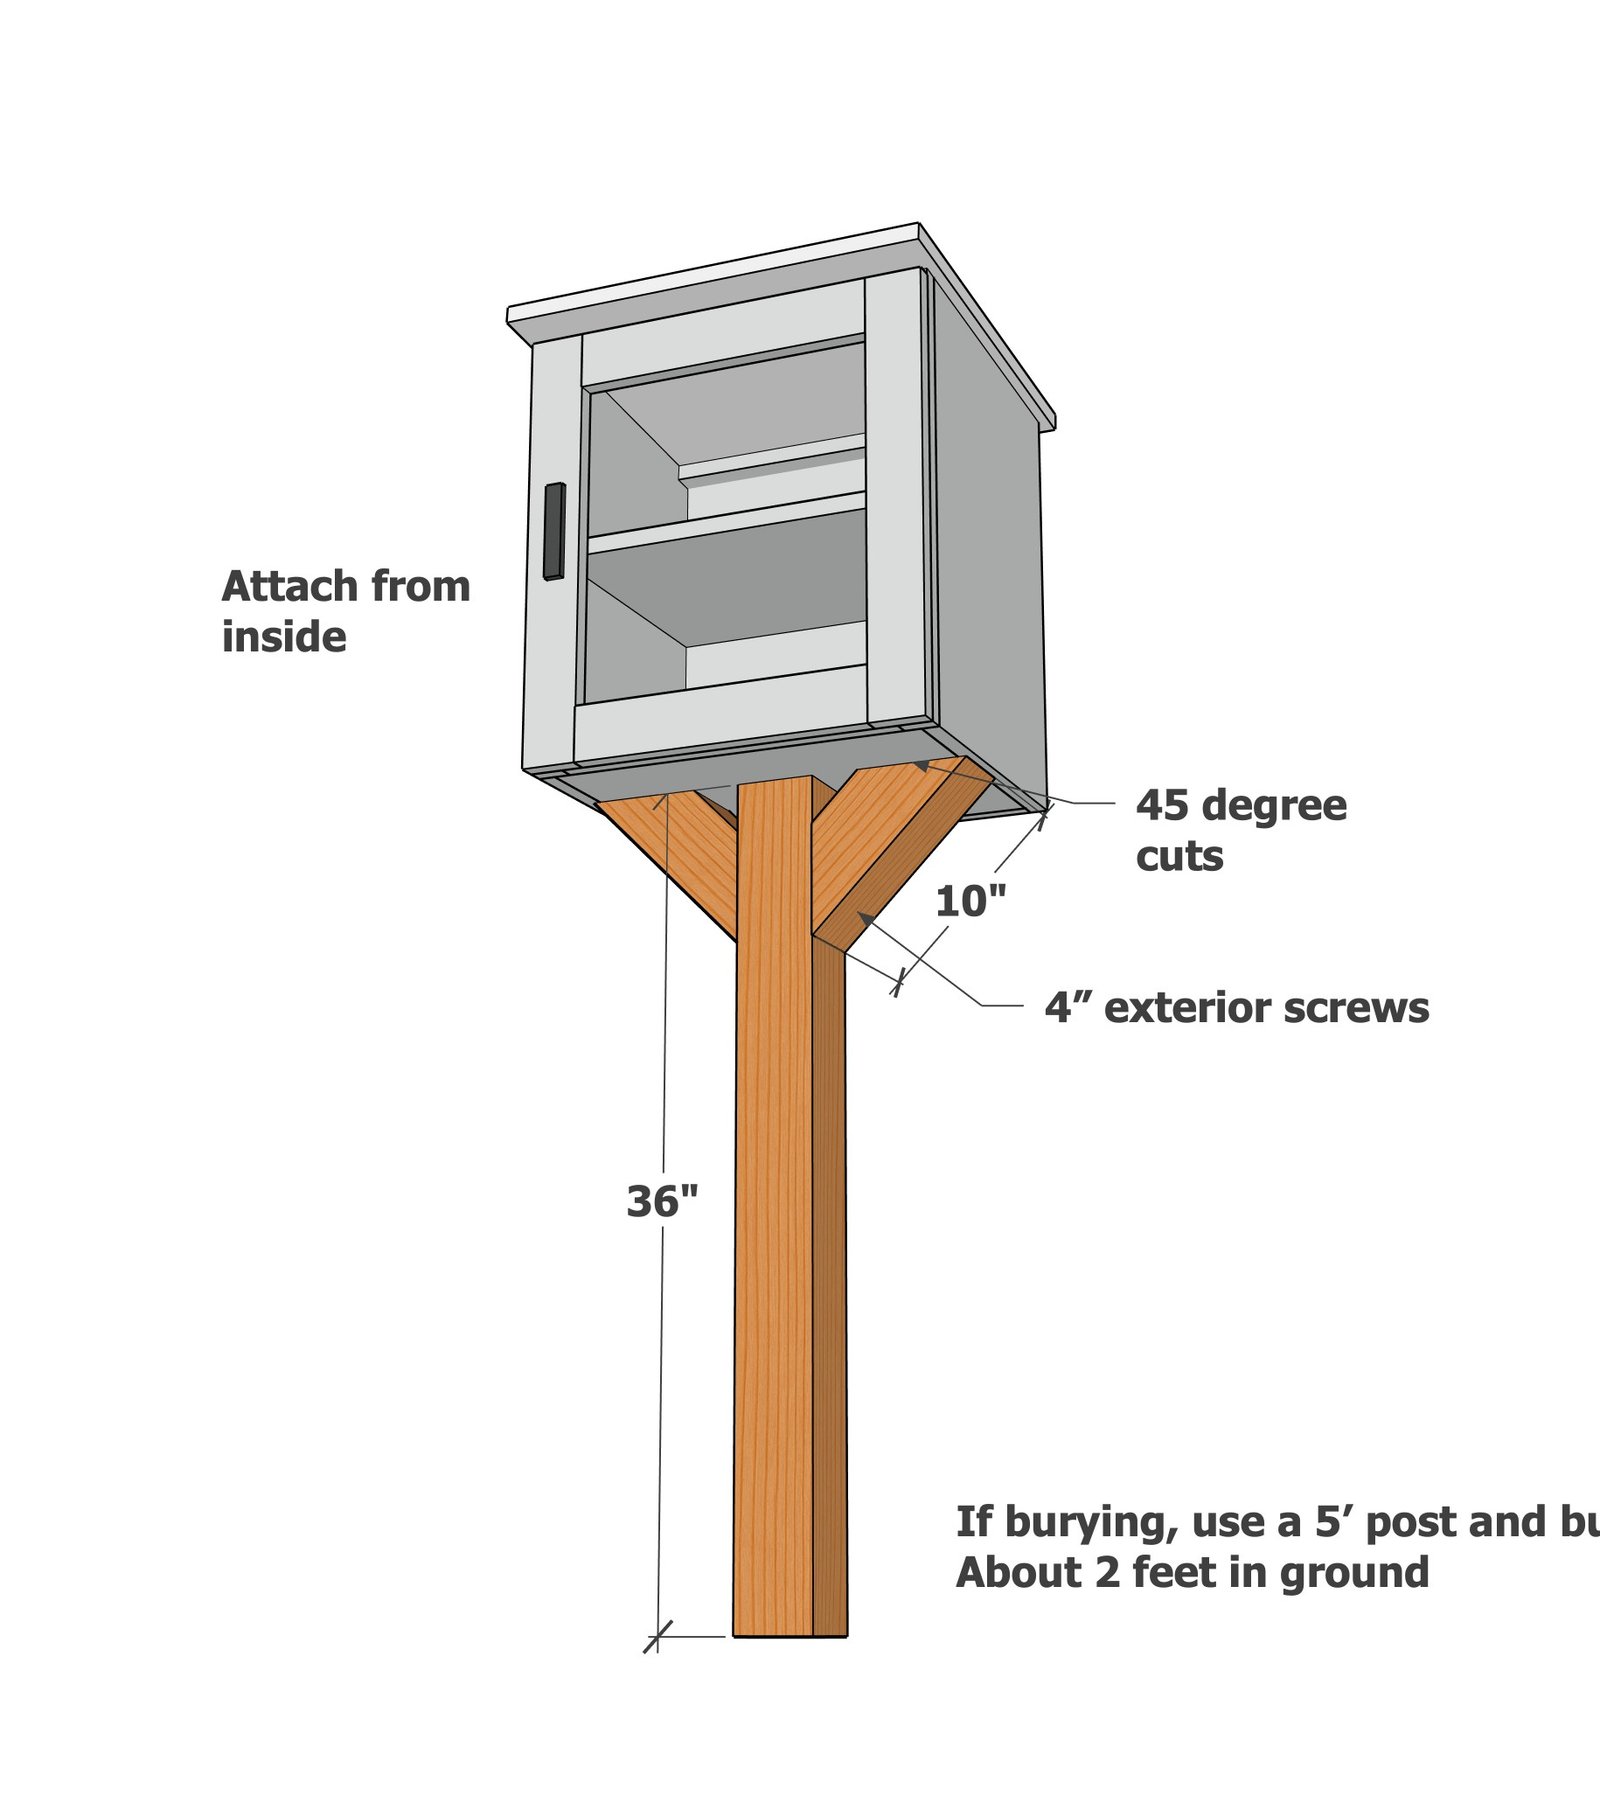
Suggestion for base is a 5' post buried 2 feet in the ground. Optionally, a 3' post can be placed in a planter, with 2' of top soil to ground it and keep it in place.
Finishing
Sand all surfaces, starting with a medium grit and finishing with fine. Wipe off the dust, fill any holes or gaps with wood filler, and sand smooth once dry. Apply primer if you're painting, then finish with your choice of paint or stain and seal with a durable clear topcoat. For outdoor projects, use exterior-rated primer, paint or stain, and sealer so the piece stands up to the weather.
Source (temporary): https://www.ana-white.com/woodworking-projects/little-library-or-community-pantry-box-free-plans