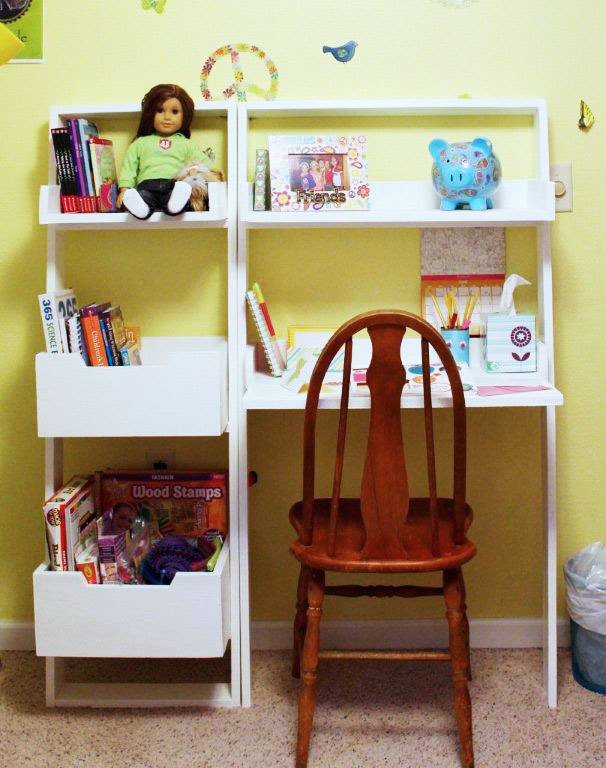
Little Sloan Leaning Desk
to build a kids leaning wall desk from
Specifications
| Project type | Kids Tables and Chairs |
|---|---|
| Room | Kids and Toys |
| Style | Modern Style Furniture Plans |
| Difficulty | Intermediate |
Dimensions
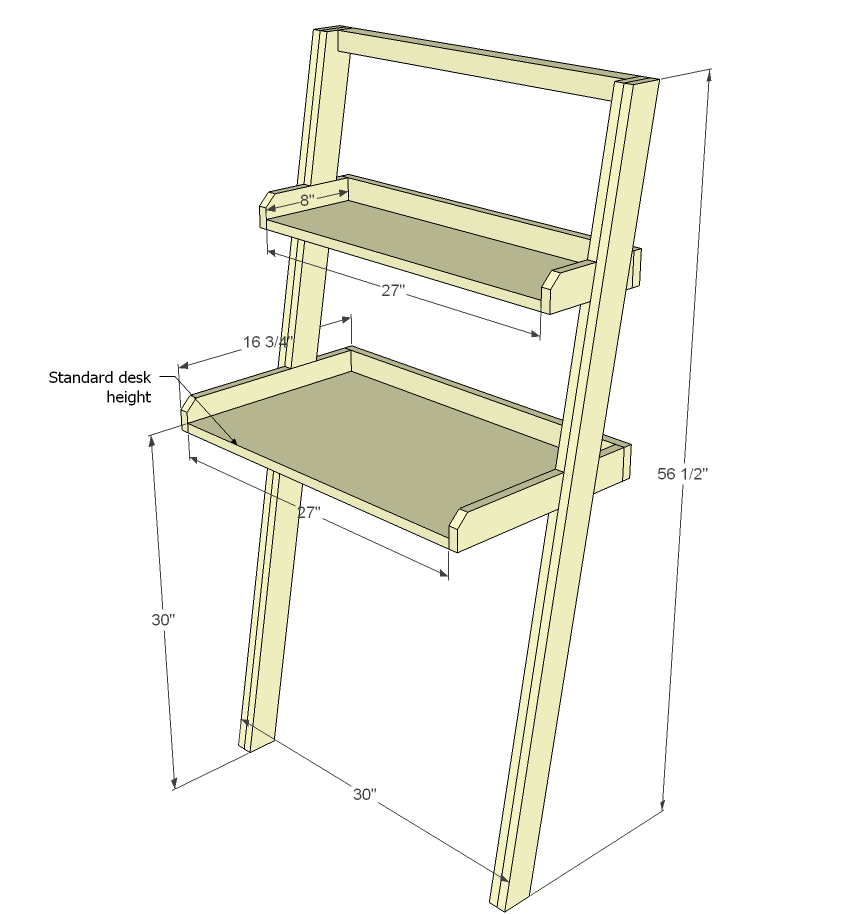
Use the size-specific shopping and cut lists below.
Shopping List
4 - 1x3 @ 8 feet long
1 - 2x2 @ 30" long
1 - piece of plywood at least 27" x 32" (can use MDF, project panel etc)
3" or longer screws (2 or more) for attaching frame to wall
1 1/4" finish nails
Recommend 1 1/4" pocket hole screws
Cut List
FRAME
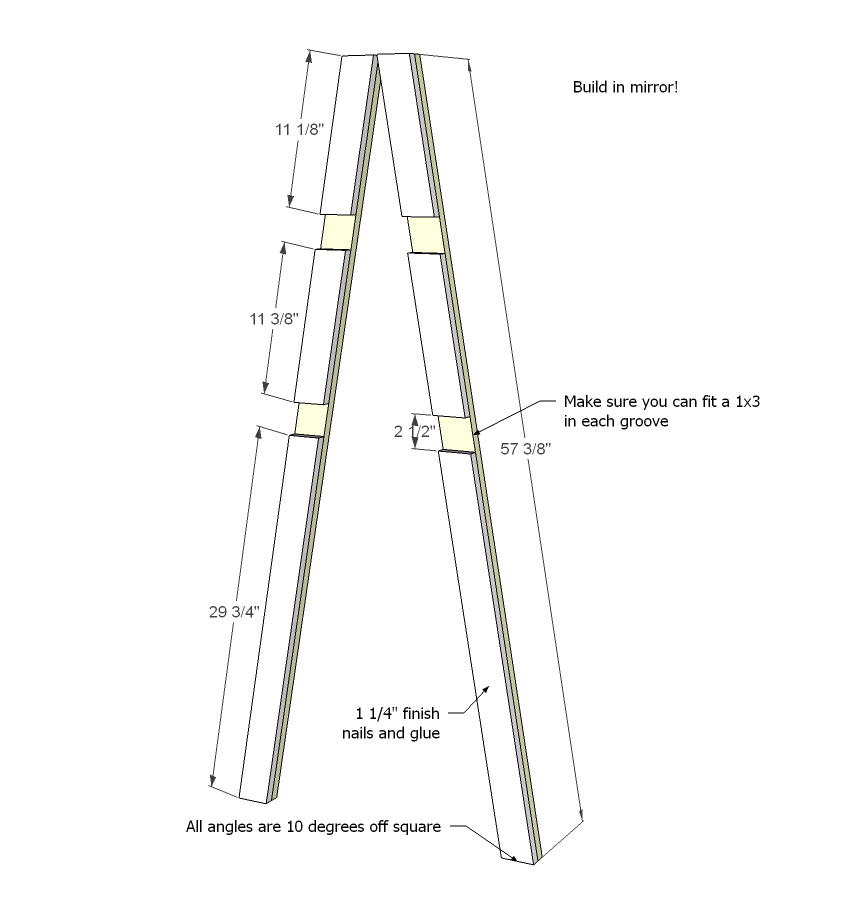
2 - 1x3 @ 57 3/8" (both ends are cut at 10 degrees off square, ends ARE parallel, long point to short point measurement)
2 - 1x3 @ 29 3/4 (both ends are cut at 10 degrees off square, ends ARE parallel, long point to short point measurement)
2 - 1x3 @ 11 3/8" (both ends are cut at 10 degrees off square, ends ARE parallel, long point to short point measurement)
2 - 1x3 @ 11 1/8" (both ends are cut at 10 degrees off square, ends ARE parallel, long point to short point measurement)
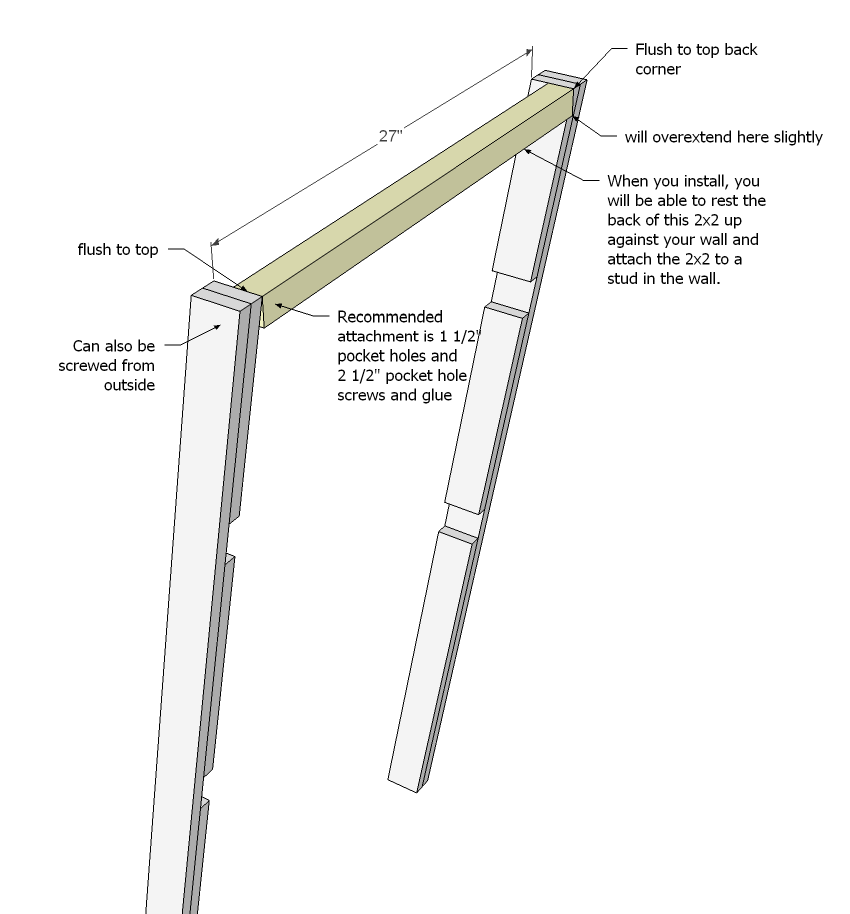
1 - 2x2 @ 27"
SMALL SHELF
1 - 3/4" plywood 27" x 8"
1 - 1x3 @ 28 1/2" (back)
2 - 1x3 @ 8" (sides)
LARGE SHELF
1 - 3/4" plywood 27" x 16
1 - 1x3 @ 28 1/2" (back)
2 - 1x3 @ 16 (sides)
Tools
- measuring tape
- square
- pencil
- safety glasses
- hearing protection
- kreg-jig
- drill
- compound miter saw
- nailer
- sander
- level
- countersink drill bit
Step-by-step Instructions
Step 1
You will need to lay these guys out in mirror. The most important thing is making sure the two sides match, and the grooves will fit your 1x3 boards. Start at the bottom and work your way upward, nailing the filler boards on to the legs with 1 1/4" finish nails. Try to get 1x3s with square edges if you can. The rounded edges will be hard to disguise. You may wish to at this step fill the joint facing forward between the 1x3s to give the illusion of a solid leg and then sand.
Now attach 2x2 to the top. We'll later use the 2x2 to anchor the desk to the wall.
2 1/2" pocket hole screws are preferred here, but you could get away with 3/4" PH and 1 1/4" PH screws on back side.
Step 3
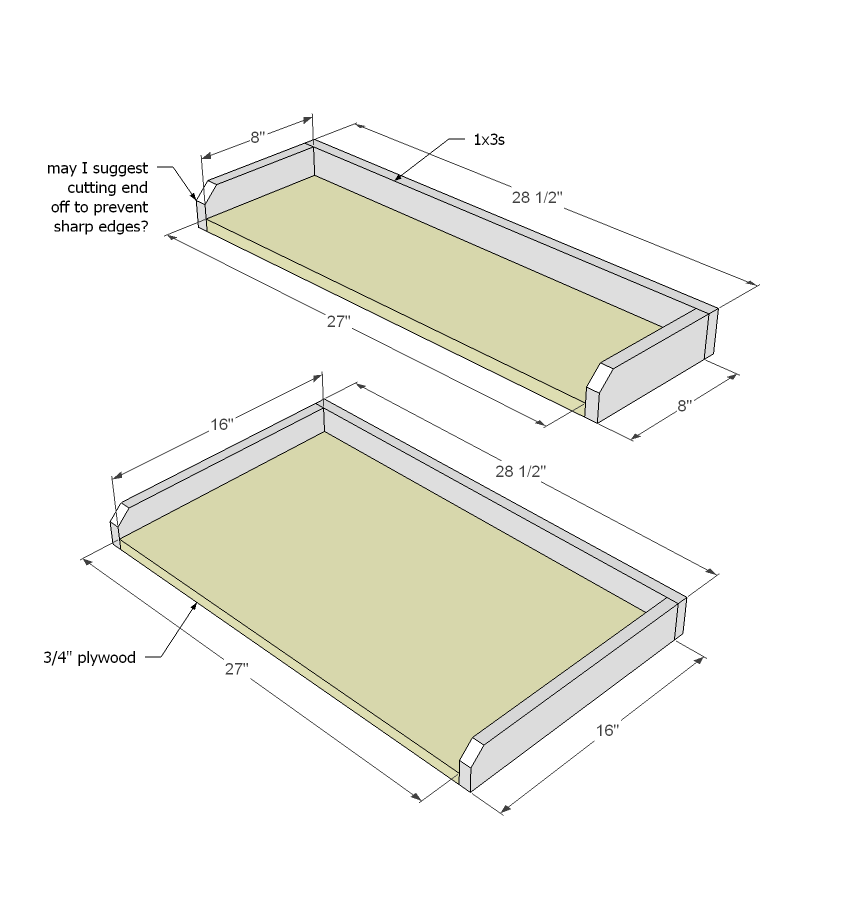
Build your shelves as shown here. The best way is 3/4" pocket holes drilled on three sides of each shelf bottom, and then the sides attached with 1 1/4" pocket hole screws and glue. You could also join the back side with the sides with 3/4" PHs and 1 1/4" PH screws on the back side that will be placed against the wall.
Step 4
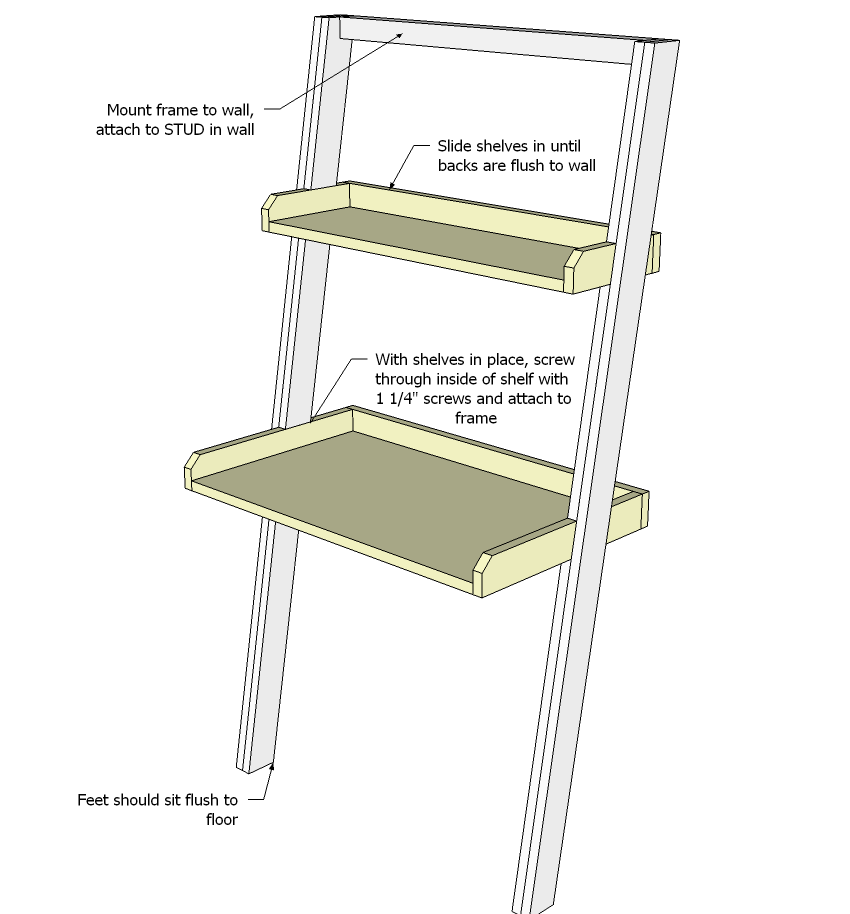
I recommend finishing the piece first, but make sure you still can fit the shelves in the grooves. Then anchor the frame to the wall where you want the desk, screwing through the 2x2 through a predrilled hole into a stud in the wall. Depending on your wall composition, you may need different fasteners - for a standard dry-walled wall, you'll need at least a 3" screws - at least two. Try to hit two different studs. Make sure the angle is right so that your feet are flush to the floor, and the 2x2 sits square to the wall. Then slide shelves in and attach to frame with 1 1/4" screws.
Finishing
Sand all surfaces, starting with a medium grit and finishing with fine. Wipe off the dust, fill any holes or gaps with wood filler, and sand smooth once dry. Apply primer if you're painting, then finish with your choice of paint or stain and seal with a durable clear topcoat. For outdoor projects, use exterior-rated primer, paint or stain, and sealer so the piece stands up to the weather.
Source (temporary): https://www.ana-white.com/woodworking-projects/little-sloan-leaning-desk