The Littlest Helper Tower
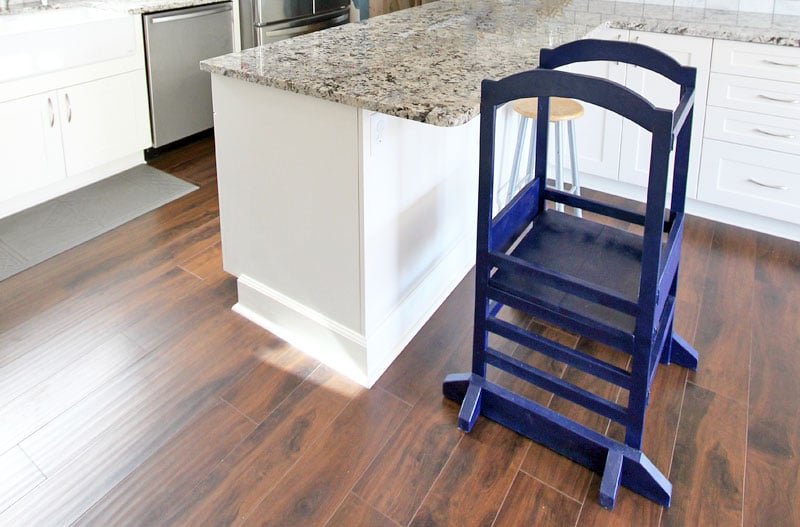
Build your own toddler step stool and bring your child to counter height. Features adjustable height platform, removable tip resistant kit, and optional fold flat modification.
Specifications
| Project type | Toys |
|---|---|
| Room | Kids and Toys |
| Style | Children's and Kid's Room Furniture and Toy Plans |
| Difficulty | Intermediate |
| Estimated cost | $20 - $50 |
Dimensions
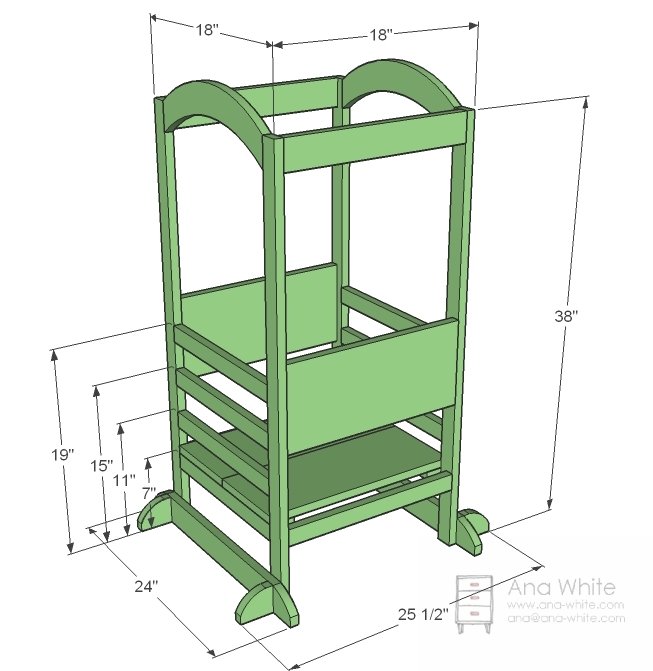
Use the size-specific shopping and cut lists below.
Shopping List
1 – 1×8, 8 feet long
4 – 1×2, 8 feet long
1 – 1×3, 8 feet long
Cut List
4 – 1×2 @ 38″ (Legs)
8 – 1×2 @ 15″ (Ladder rungs)
1 – 1×8 @ 15″ (Arches) OR 2 - 1x3 @ 15" (Substitute for arches)
2 – 1×8 @ 16 1/2″ (Front and Back Sides)
2 – 1×8 @ 18″ (Platform)
2 – 1×2 @ 15″ (Platform Supports)
2 – 1×2 @ 16 1/2″ (Bottom Supports)
2 – 1×3 @ 16 1/2″ (Top Supports)
2 – 1×3 @ 24″ (Tip Resistors)
4 – 1×3 @ 3″ (Tip Resistors)
Tools
- measuring tape
- square
- pencil
- safety glasses
- hearing protection
- kreg-jig
- drill
- circular saw
- jigsaw
- sander
- level
- countersink drill bit
Step-by-step Instructions
Step 1
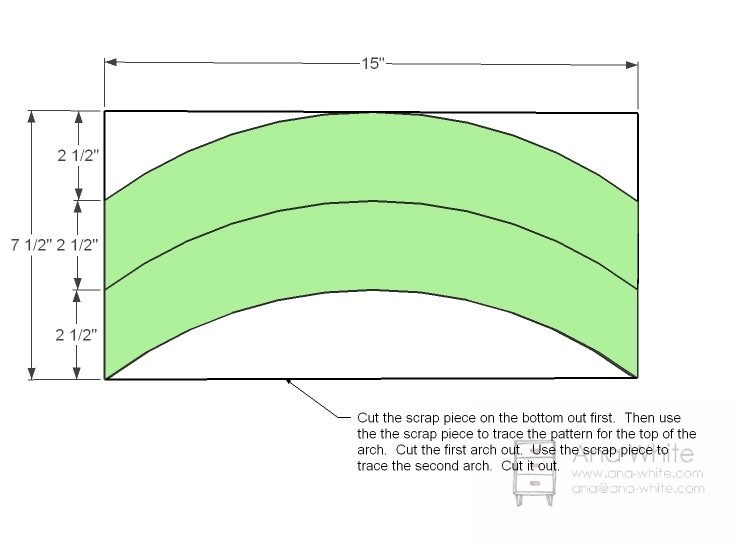
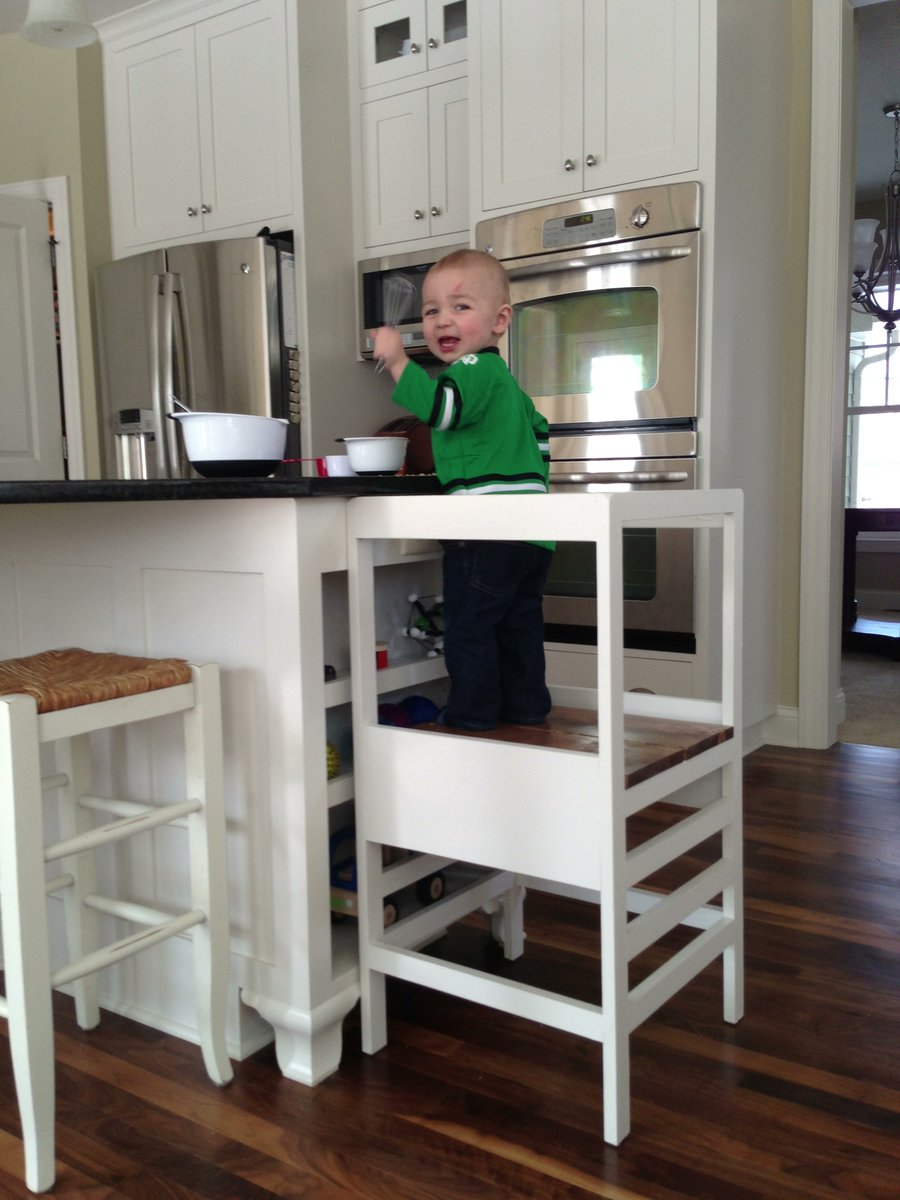
Cut Arches From the 1×8 that is 15″ long, cut arches as shown in diagram with a jigsaw. Adjust so you can get both arches on the 1x8. NOTE: Some people just opt for straight boards across as done in this reader submitted photo. You can substitute for 1x3 instead. This will simplify the building process.
Ladder Rungs
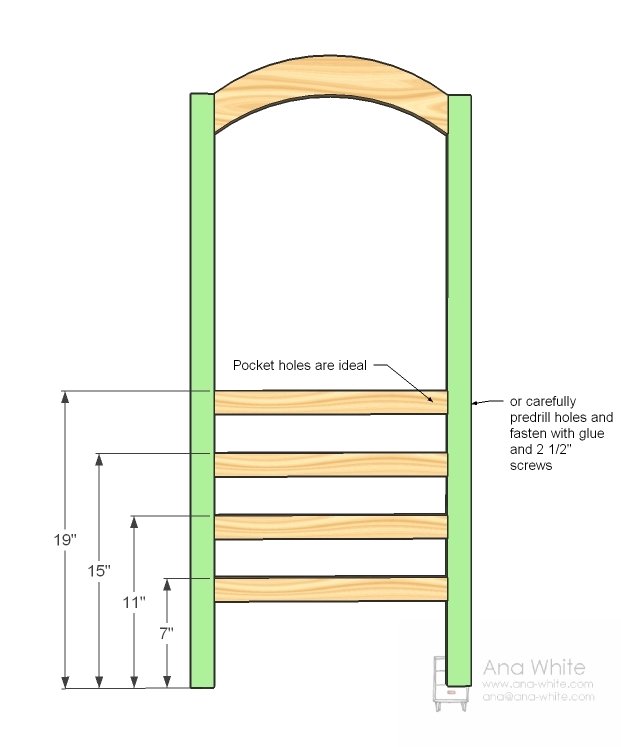
Measure and mark legs for ladder rung positions. Drill 3/4" pocket holes and apply glue to ends of ladder rungs. Attach with 1-1/4" pocket hole screws. Build two identical.
Assembly
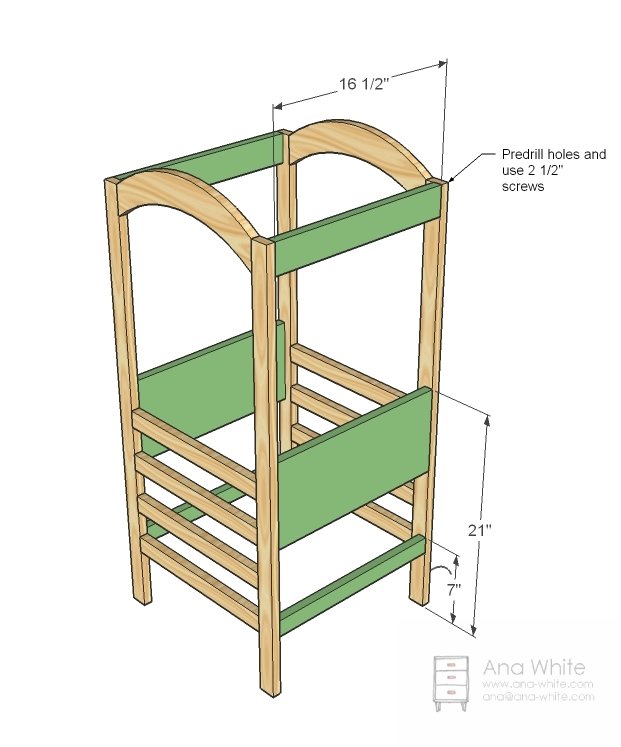
Mark the location of the end pieces and predrill holes. Apply glue and screw in place with pocket hole screws. Adjust for square. You can add additional rails to the front and back as you see fit, but keep the sides open so your youngster can crawl in and out of the helping tower.
Platform
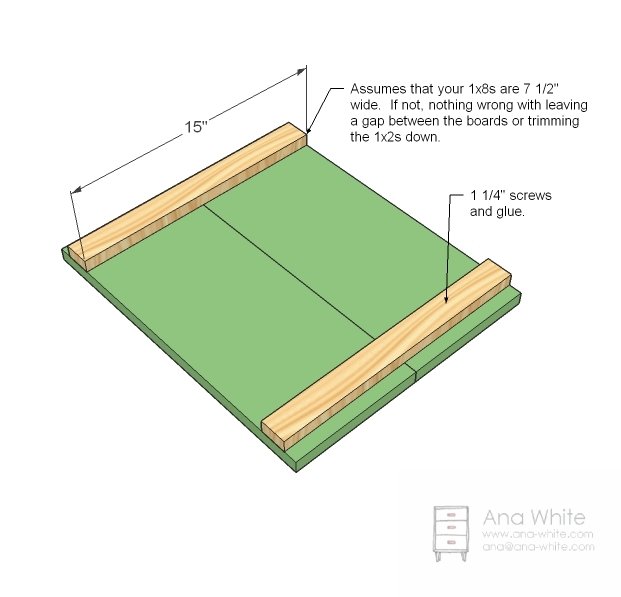
Next, build your platform by marking the 1x8s that are 18″ long 1″ from the outsides. Attach with glue and 1 1/4″ screws the platform supports. These platform supports not only join the 1x8s, but they also keep the platform in place inside the helping tower.
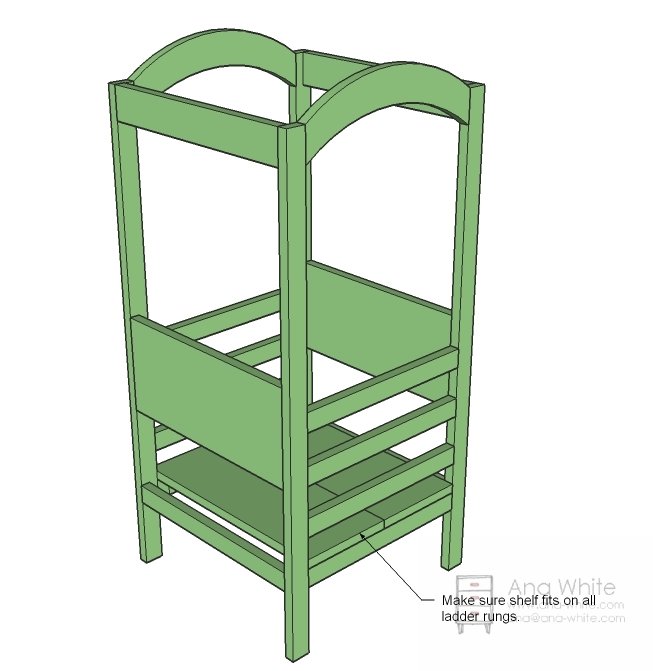
Step 5
Tip Resistant Foot
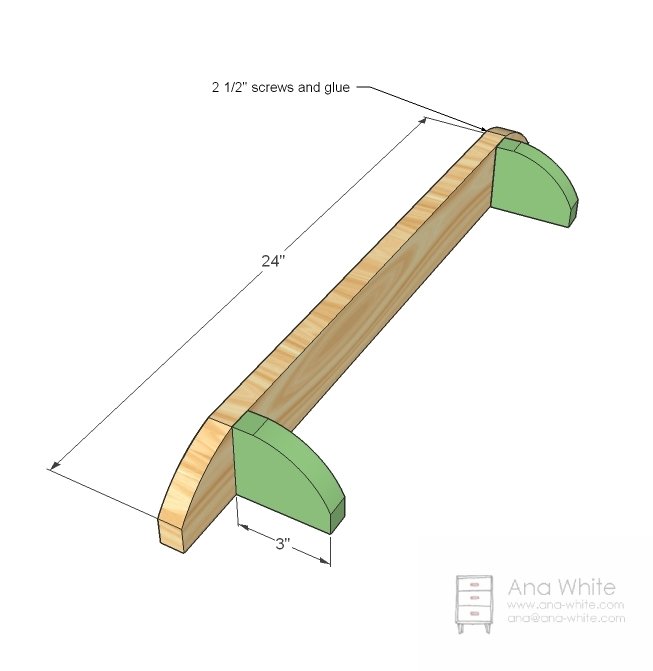
Round the corners on the tip resistors as shown above. Screw together. You can optionally exclude the smaller tip resistors, as side to side tipping is less likely than backward tipping. You know your child better than anyone. Build to suit your child’s needs
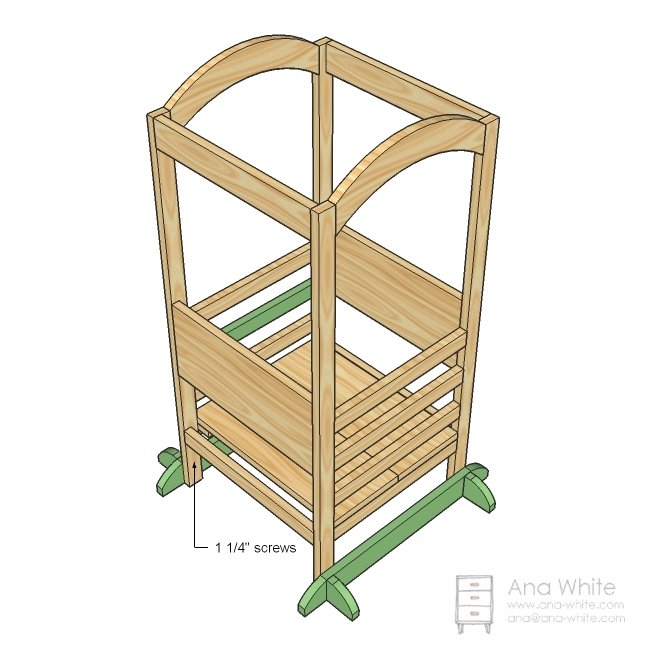
Attach Tip Resistant Footer
Simply screw the tip resistant footer to the legs as shown above.
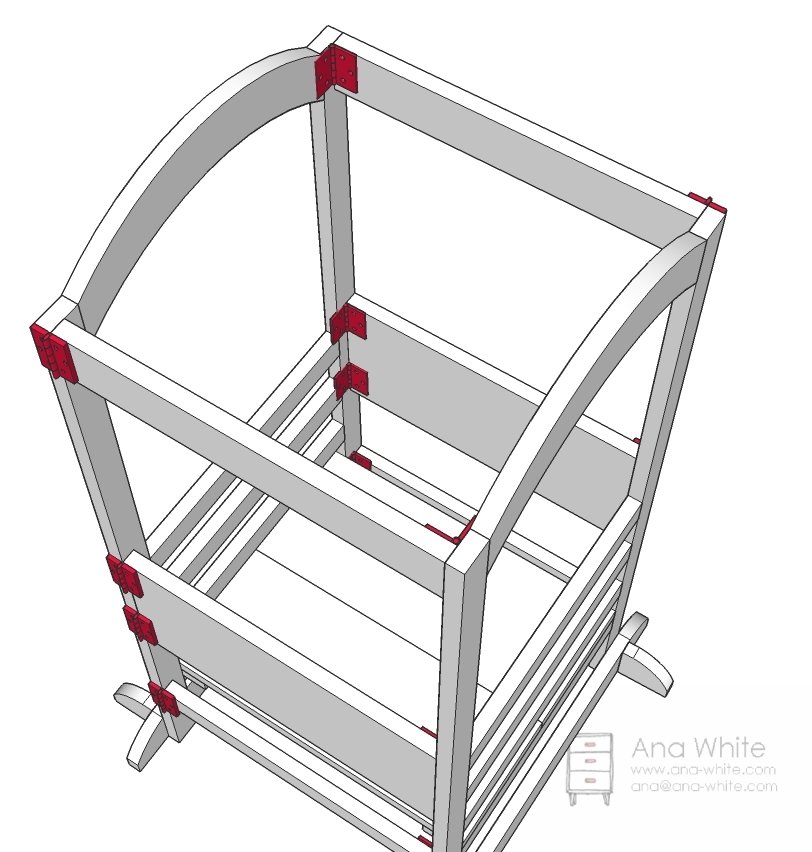
Folding Mod
By placing hinges instead of screwing the front and back pieces to the side pieces, you can make the Little Helper Tower fold easily. Just make sure you use plenty of strong hinges, make the platform fit very tight (adjust the inset on the ends to 3/4″ instead of 1″ in step 4, and regularly check to make sure your hinges are not loose. I personally prefer simplicity, and any time you add hinges, it increases the complexity. But for those of you who require storage for the Little Helper Tower (would slide under a bed easily) this mod if done with care can be the solution.
Finishing
Sand all surfaces, starting with a medium grit and finishing with fine. Wipe off the dust, fill any holes or gaps with wood filler, and sand smooth once dry. Apply primer if you're painting, then finish with your choice of paint or stain and seal with a durable clear topcoat. For outdoor projects, use exterior-rated primer, paint or stain, and sealer so the piece stands up to the weather.
Source (temporary): https://www.ana-white.com/woodworking-projects/littlest-helper-tower