Locker Bookshelf
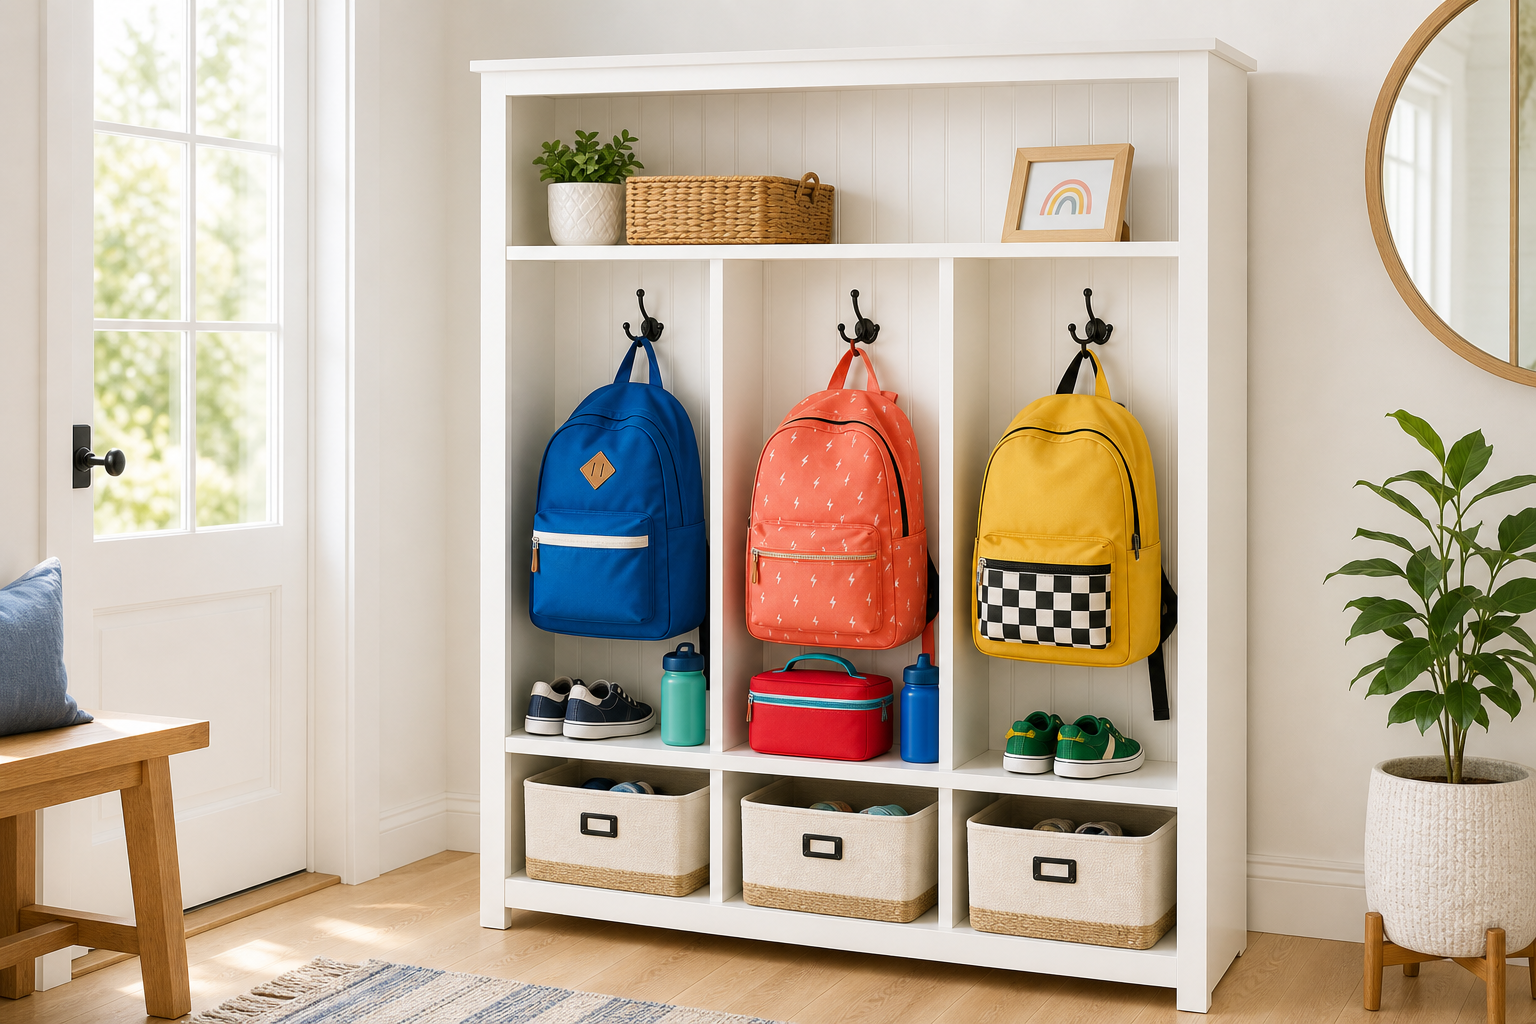
Need better organization in your entryway or hall, but it's too narrow for a hall tree or bench, and don't want to drill holes in your wall? Build your own locker unit! It's the size of a bookshelf, and is freestanding - so you can move into your home without drilling holes in the wall. You can build it with basic tools and with full diagrams, shopping and cut lists. Need a smaller size? We have plans for a smaller locker bookshelf here.
Specifications
| Project type | Lockers |
|---|---|
| Room | Entryway and Mudroom |
| Style | Cottage Style Furniture Plans |
| Difficulty | Intermediate |
| Estimated cost | $100-$150 |
Dimensions
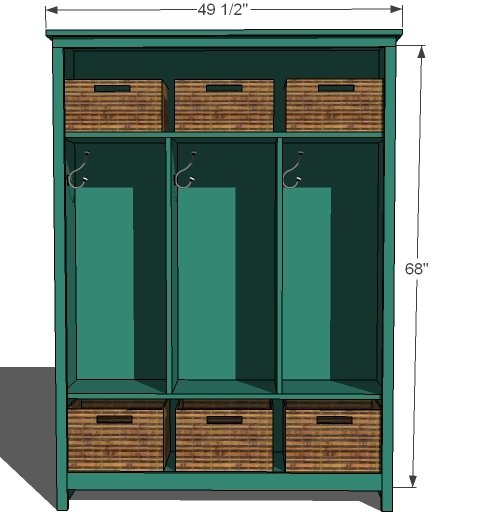
Use the size-specific shopping and cut lists below.
Shopping List
- 44 – 1 1/4″ Pocket Hole Screws
- 2″ brad nails
- 1″ brad nails
- 3 – 1×12 – 12 foot Pine or Whitewood Boards
- 4 – 1×2 – 8 foot Pine or Whitewood Boards
- 1 – 1×3 – 4 foot Pine or Whitewood Board
- One sheet 1/4″ plywood, paneling or MDF
- Wood Glue
- Wood filler or Pocket Hole Plugs
- Coat Hooks
Cut List
- 2 – 1×12 @ 67 1/4″ (sides)
- 3 – 1×12 @ 46 1/2″ (shelves)
- 1 – 1×12 @ 49 1/2″ (top)
- 2 – 1×12@ 36 1/2″ (locker sides)
- 1 – 1×2 @ 48″ (header)
- 2 – 1×2 @ 65 3/4″ (side trim)
- 1 – 1×2 @ 49 1/2″ (crown)
Tools
- measuring tape
- square
- pencil
- hammer
- safety glasses
- hearing protection
- kreg-jig
- drill
- circular saw
- jigsaw
- nailer
- sander
- level
- countersink drill bit
Step-by-step Instructions
Build the Box
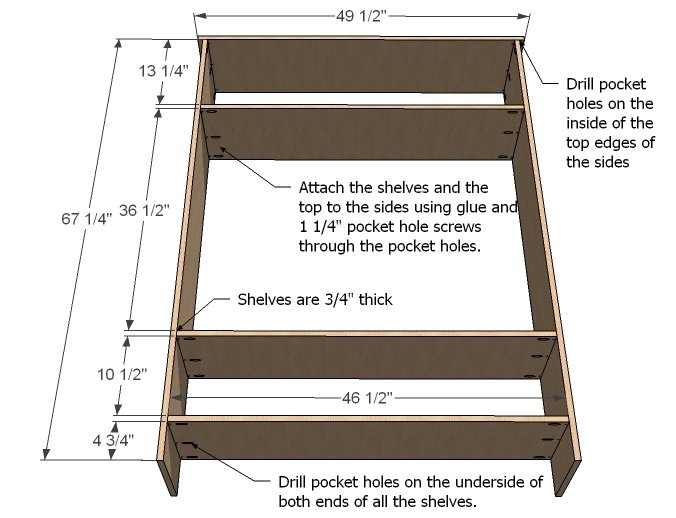
This is so easy. Just drill pocket holes on both ends of all of the shelves and the top ends of the sides. Drill three pocket holes per end, as shown in the diagram. Then mark the sides for the joints of the shelves. Apply glue to the shelves and screw in place with 1 1/4″ pocket hole screws and glue.
Locker Dividers
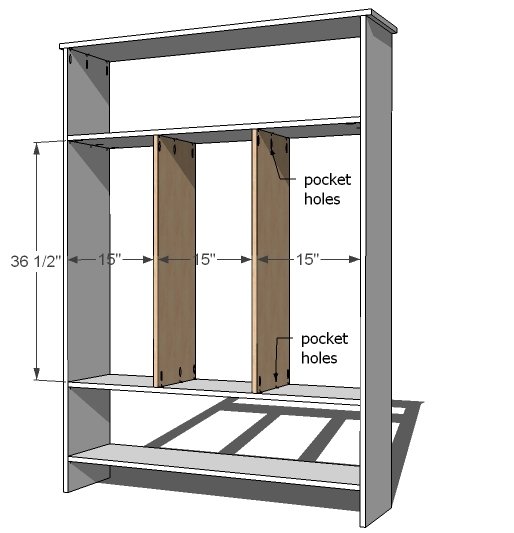
Mark the middle shelves as shown above. Drill pocket holes on both ends of each of the dividers. Use 1 1/4″ screws and glue to attach dividers to the shelves.
Back
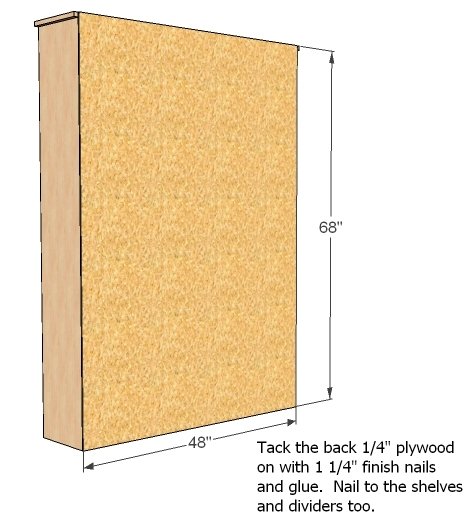
I purposely choose to make the back 48″ wide so that 1) you don’t have to rip plywood and 2) you don’t have to waste plywood. Use 2″ nails and glue to nail the back on. Make sure you all the shelves and dividers too.
Face Frame
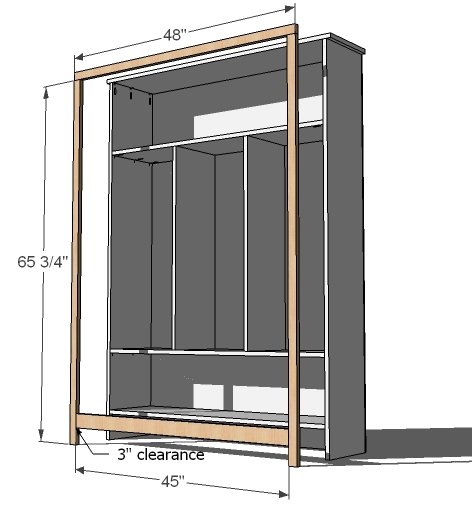
Drill pocket holes on both ends of the footer and header. Drill two pocket holes per end. Mark legs 3″ from bottom and screw the footer and header to legs as shown above. Tack the frame to the face of the cabinet.
Step 5
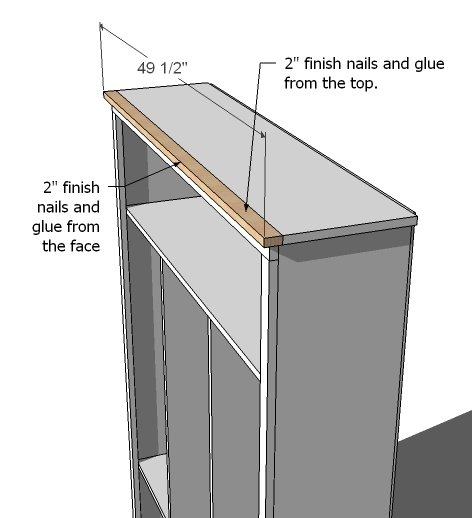
Attach front top trim to finish out the front edge of the cabinet.
Finishing
Sand all surfaces, starting with a medium grit and finishing with fine. Wipe off the dust, fill any holes or gaps with wood filler, and sand smooth once dry. Apply primer if you're painting, then finish with your choice of paint or stain and seal with a durable clear topcoat. For outdoor projects, use exterior-rated primer, paint or stain, and sealer so the piece stands up to the weather.
Source (temporary): https://www.ana-white.com/woodworking-projects/locker-bookshelf-freestanding-mudroom-solution-48-wide-free-plans