Long Picnic Table
Easy to build 8 foot long picnic table - seats more people, and more substantial (so won't blow away in the wind or easily be stolen). Step by step plans from RELATED: 6 foot picnic table plans with PDF
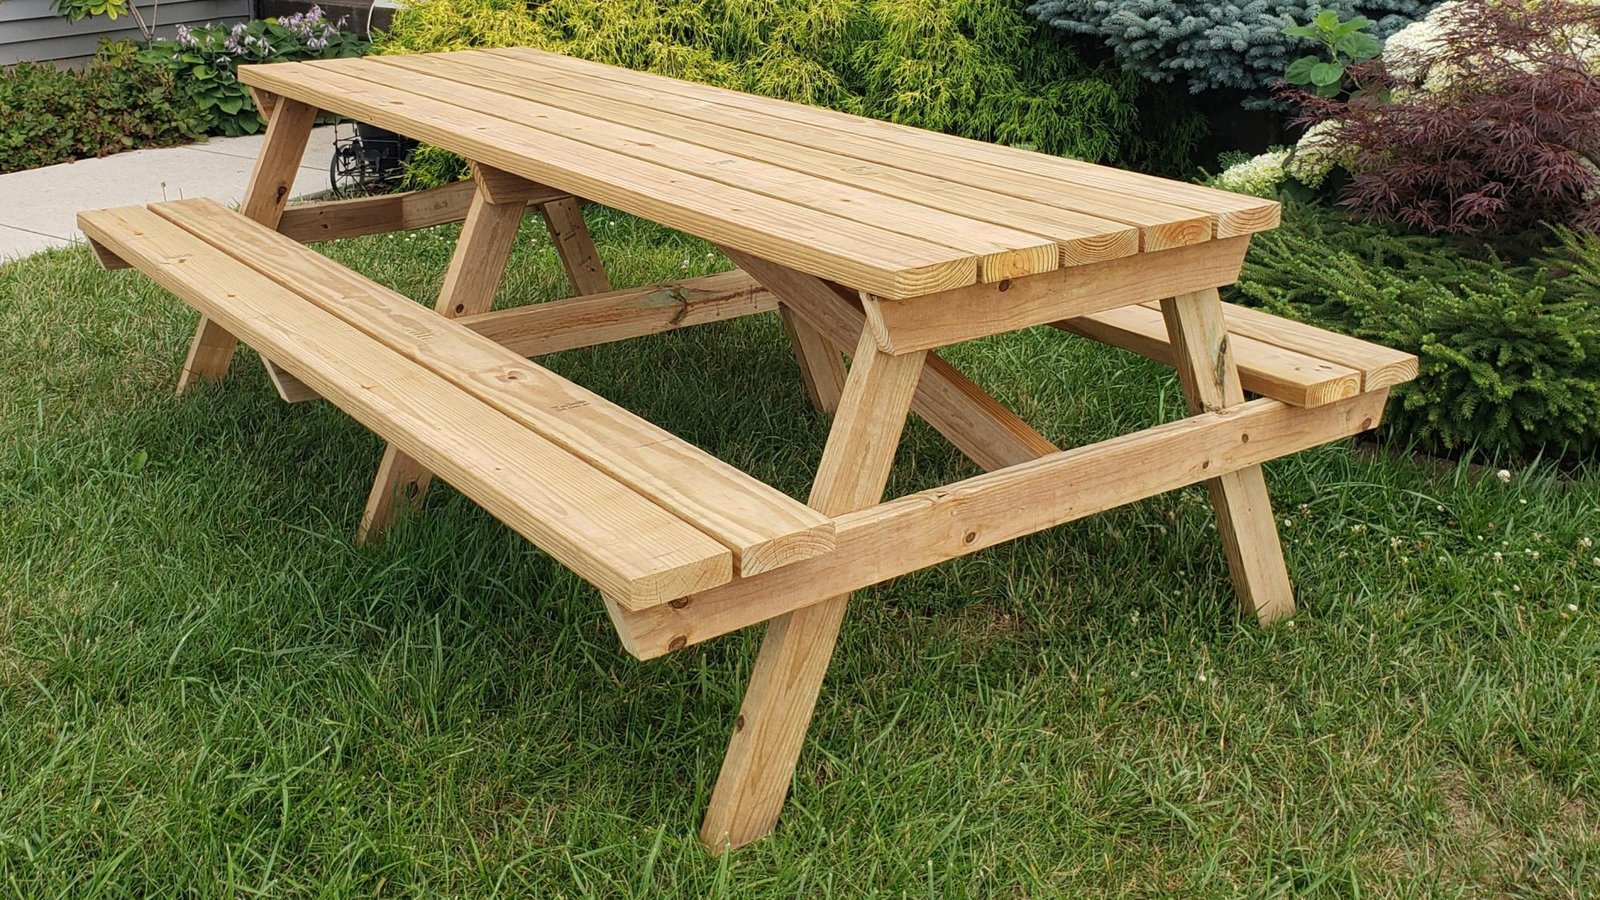
Specifications
| Project type | Picnic Tables and Outdoor Dining |
|---|---|
| Room | Outdoor |
| Difficulty | Intermediate |
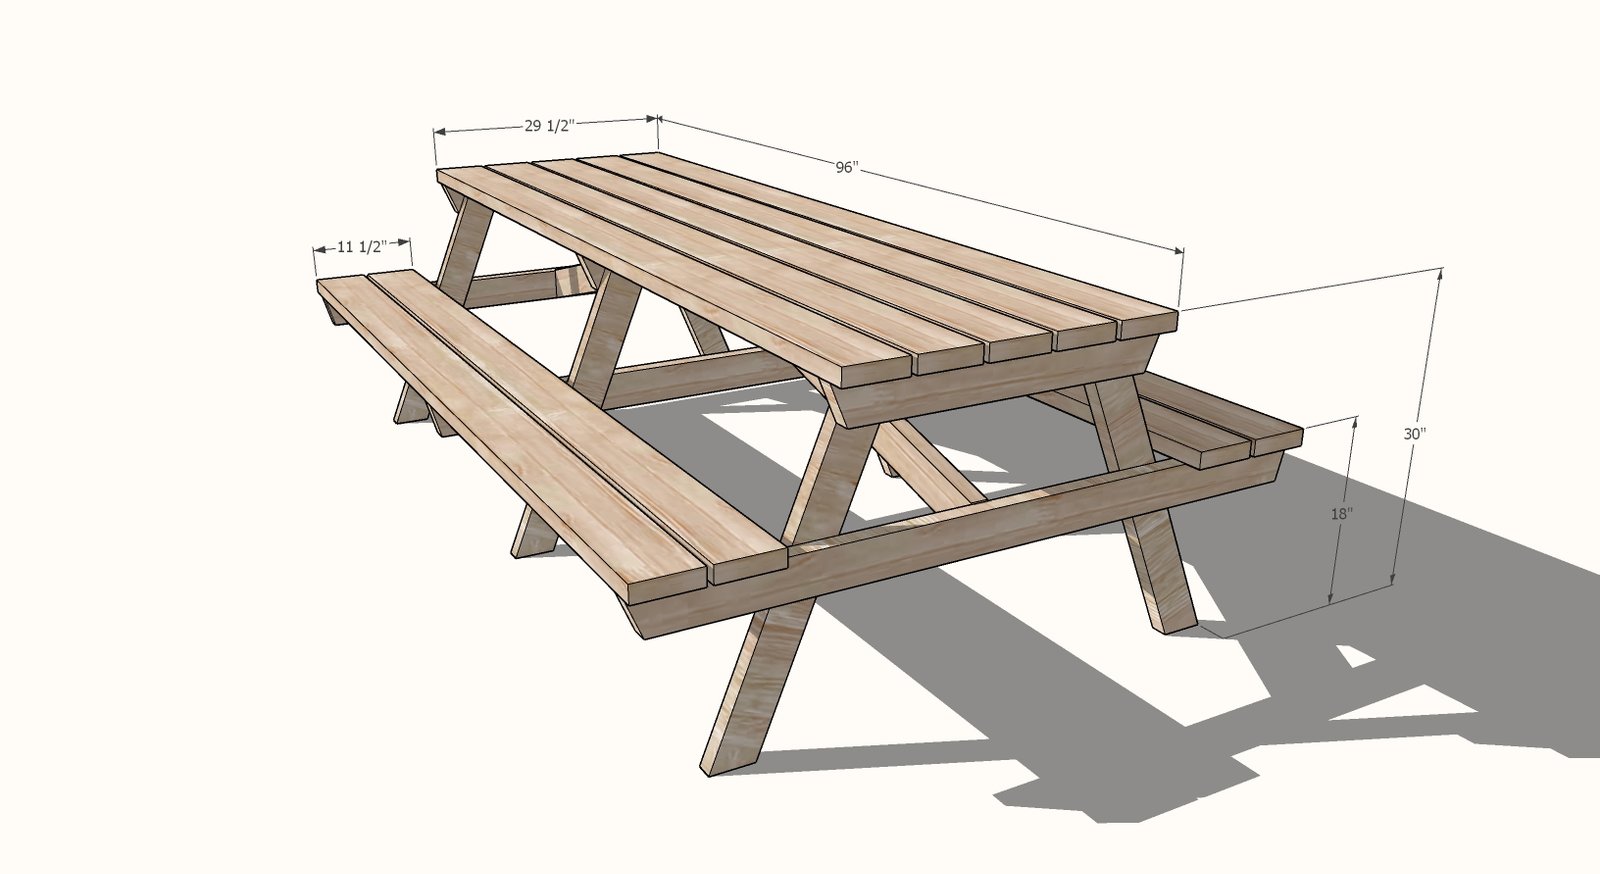
Dimensions
Use the size-specific shopping and cut lists below.
Shopping List
- 6 - 2x4 @ 8 feet long
- 9 - 2x6 @ 8 feet long
- 100 exterior screws, between 2-1/2" and 3" long (recommend star bit construction or deck screws, #9)
- Finish - recommend a penetrating stain, can be semi transparent or opaque for a paint like finish
TIP: Apply finish to the boards before making cuts. After assembly, add a coat to the tops of the table and seat, and cut ends
Cut List
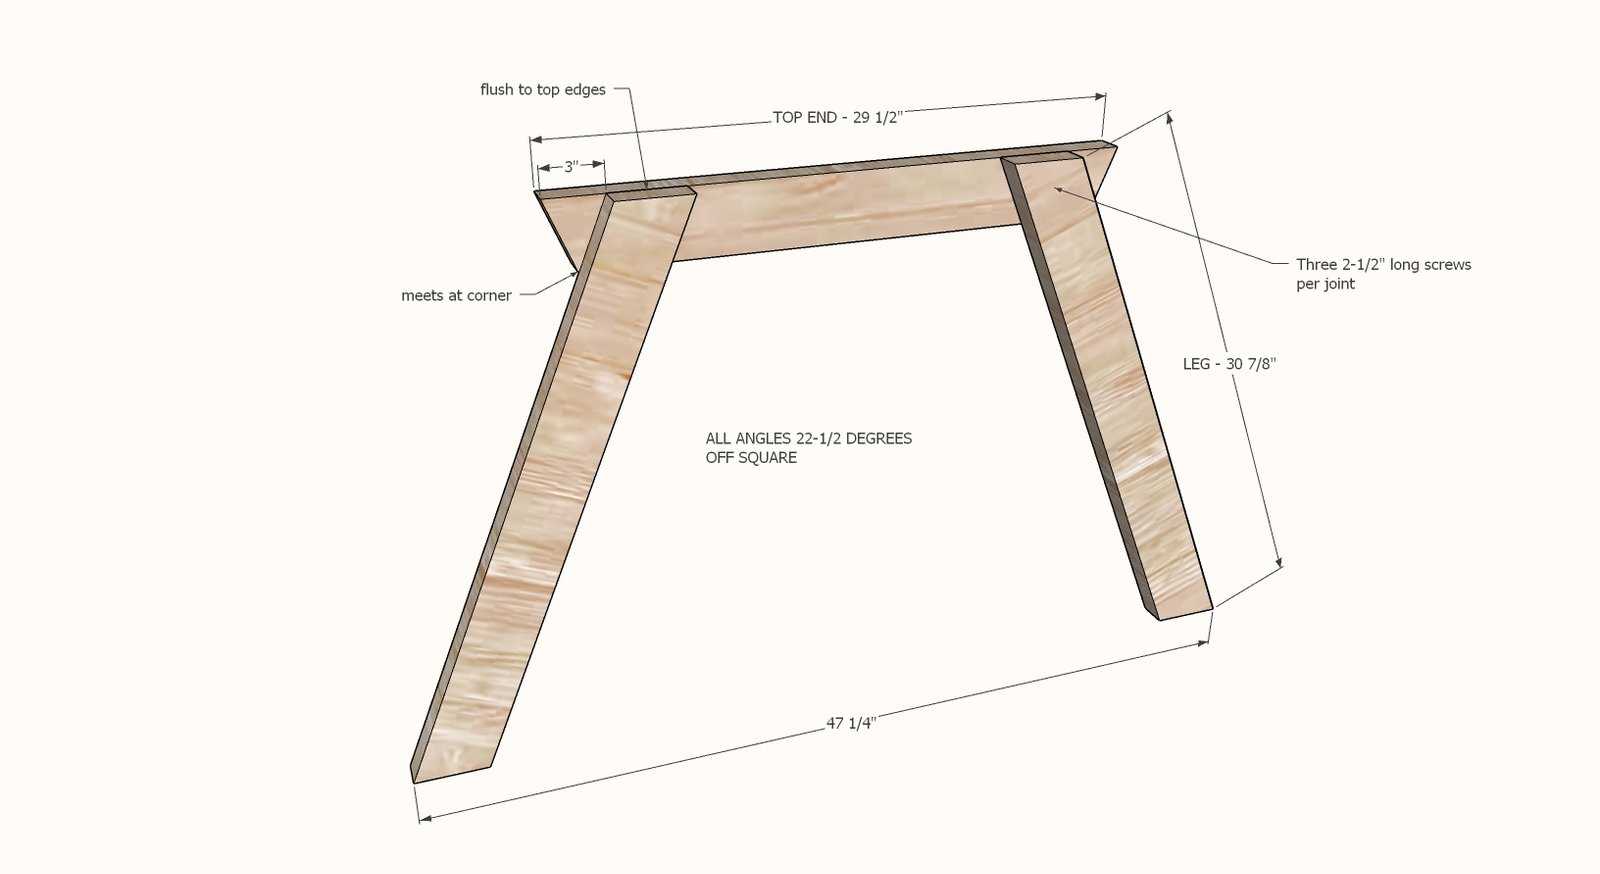
- 6 - 2x4 @ 30-7/8" long - both ends cut PARALLEL to each other at 22-1/2 degree angle cut, long point to short point measurement - LEGS
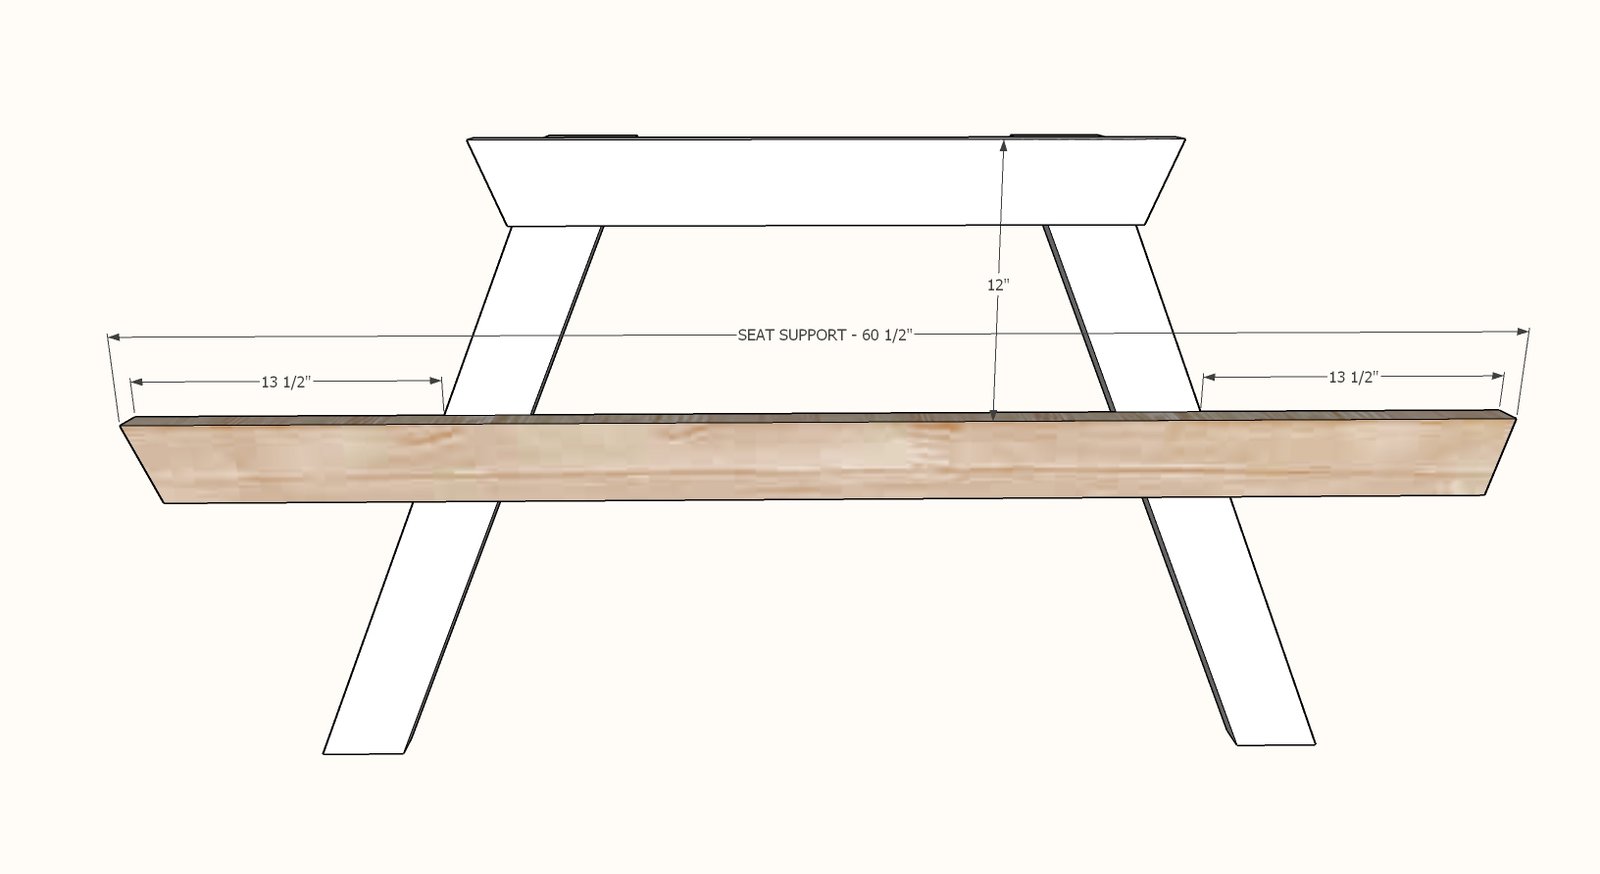
- 3 - 2x4 @ 60-1/2" long - both ends cut NOT PARALLEL to each other, 22-1/2" degree angle cut, long point to long point measurement - SEAT SUPPORT
- 3 - 2x4 @ 29-1/2" long - both ends cut NOT PARALLEL to each other, 22-1/2" degree angle cut, long point to long point measurement - TABLE SUPPORT
- 2 - 2x4 @ 45-3/4" long - both ends cut PARALLEL to each other at 15 degree angle cut, long point to short point measurement - CROSS BRACE
- 9 - 2x6 @ 8 feet long (do not need to cut)
Tools
- measuring tape
- pencil
- safety glasses
- drill
- compound miter saw
- sander
Step-by-step Instructions
Step 1
Lay out two legs and one table support and line up carefully so top edges are flush, and bottom of legs are correct distance apart. Screw together with three screws and wood glue. TIP: Scrap wood pieces of 2x4s can be used to elevate the bottom of the legs so they sit flat while you work.
Flip over and lay out the seat support.
Attach to the legs with three screws per joint and glue. Build three leg sets identical.
Mark the center of the seat supports and the table support.
Attach one cross brace in between, centered, top edges flush.
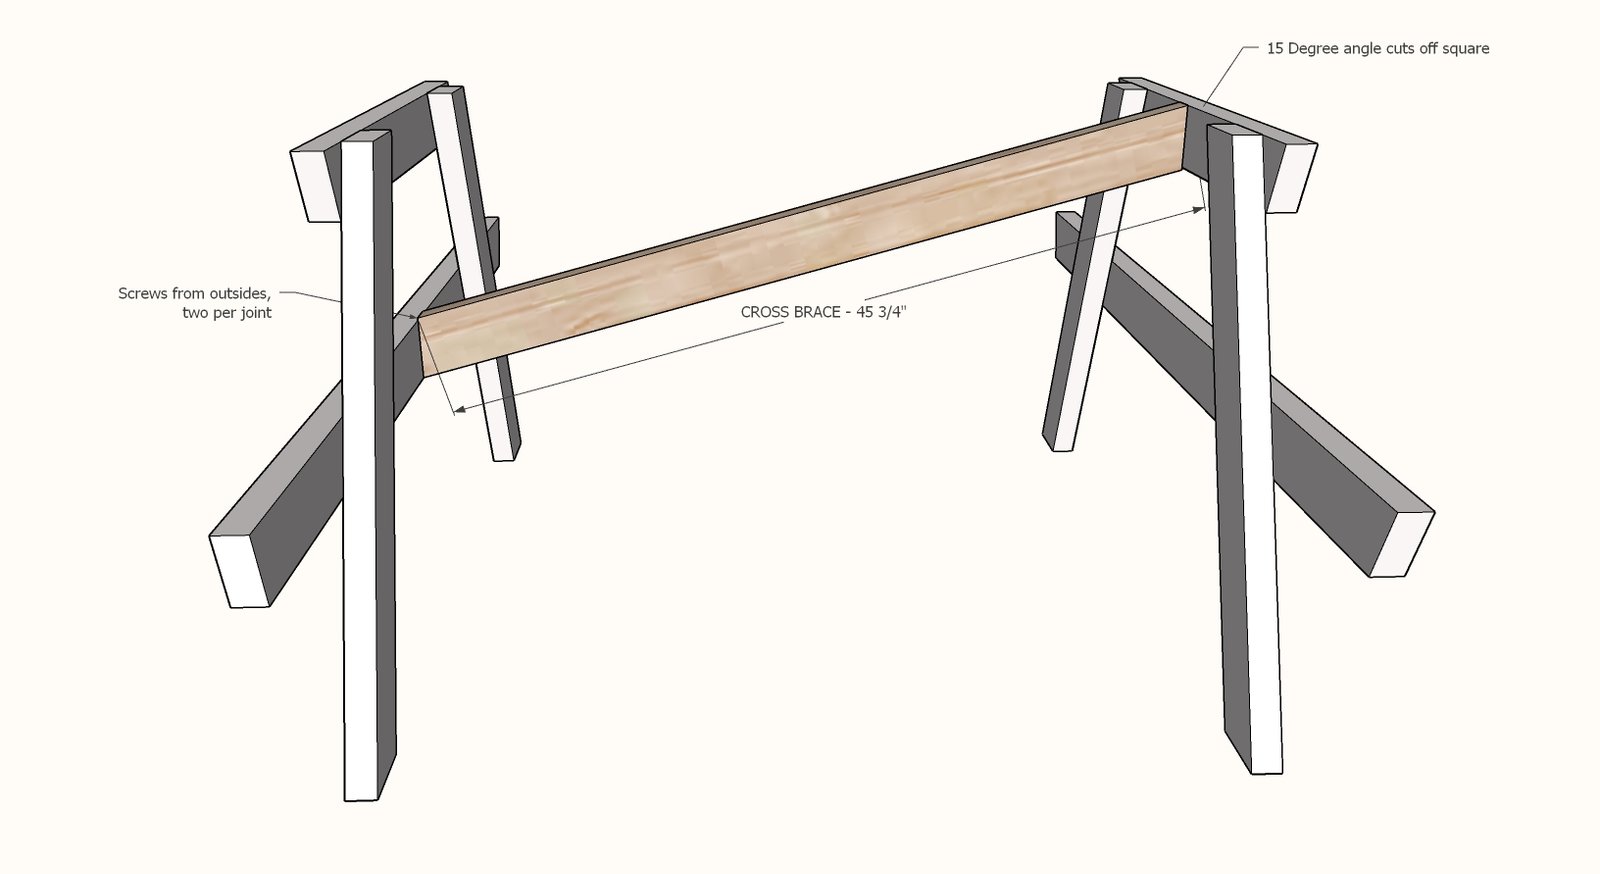
Step 4
Mark center of remaining leg set seat support. Attach with the cross brace centered on the legs as shown.
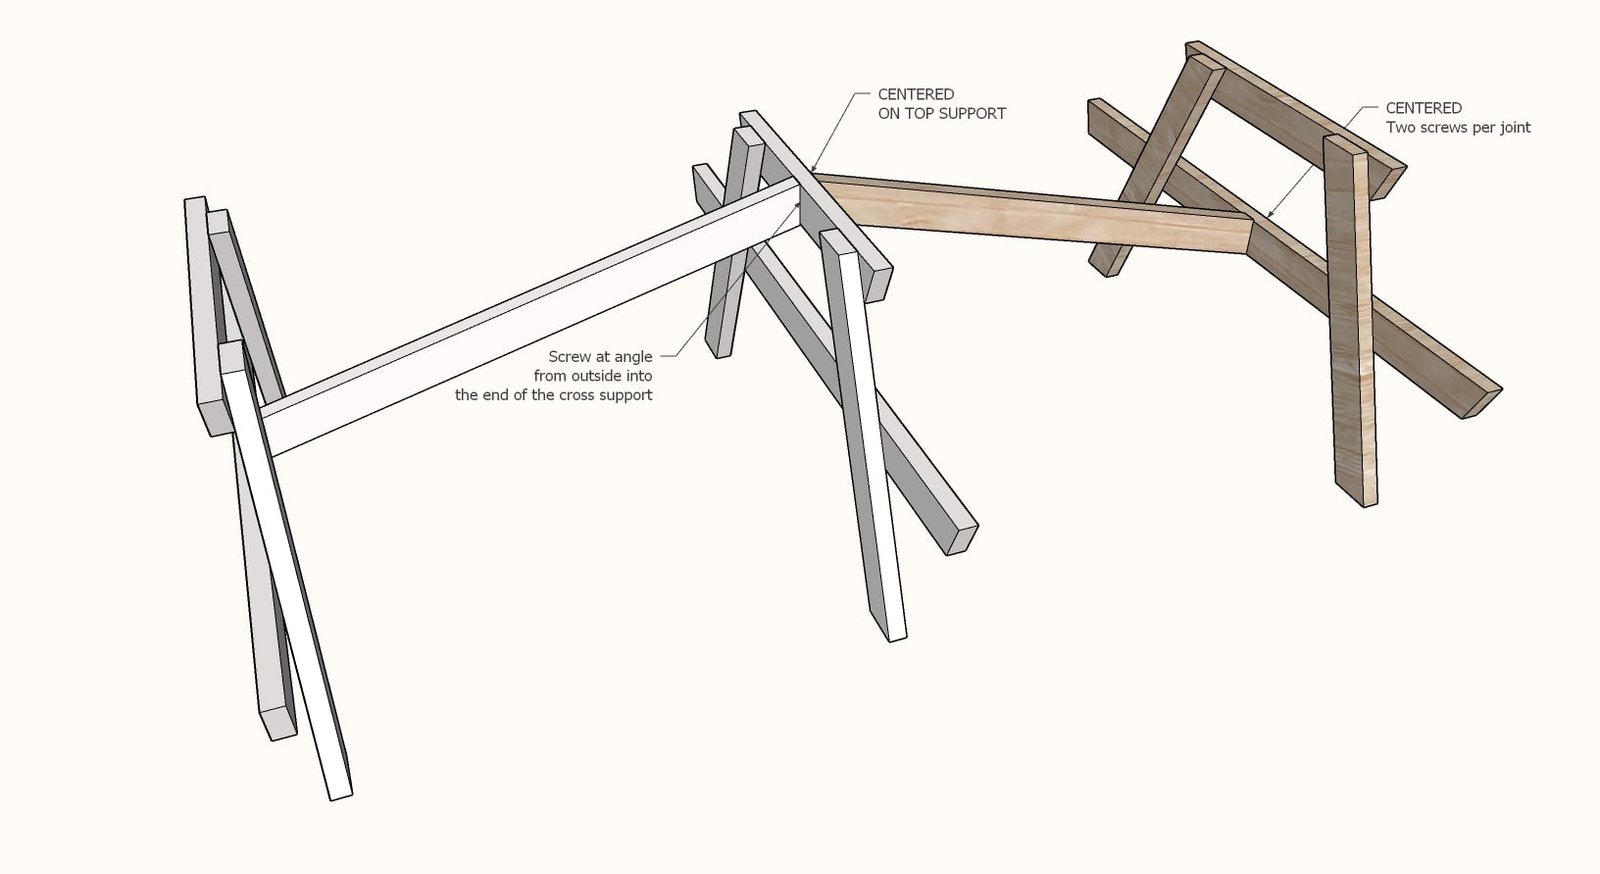
Step 5
Lay the 2x6 boards down on top of the table and adjust. Side edges are flush, ends overhang 1-1/2" or the width of a 2x4 scrap. Screw down with two screws per joint.
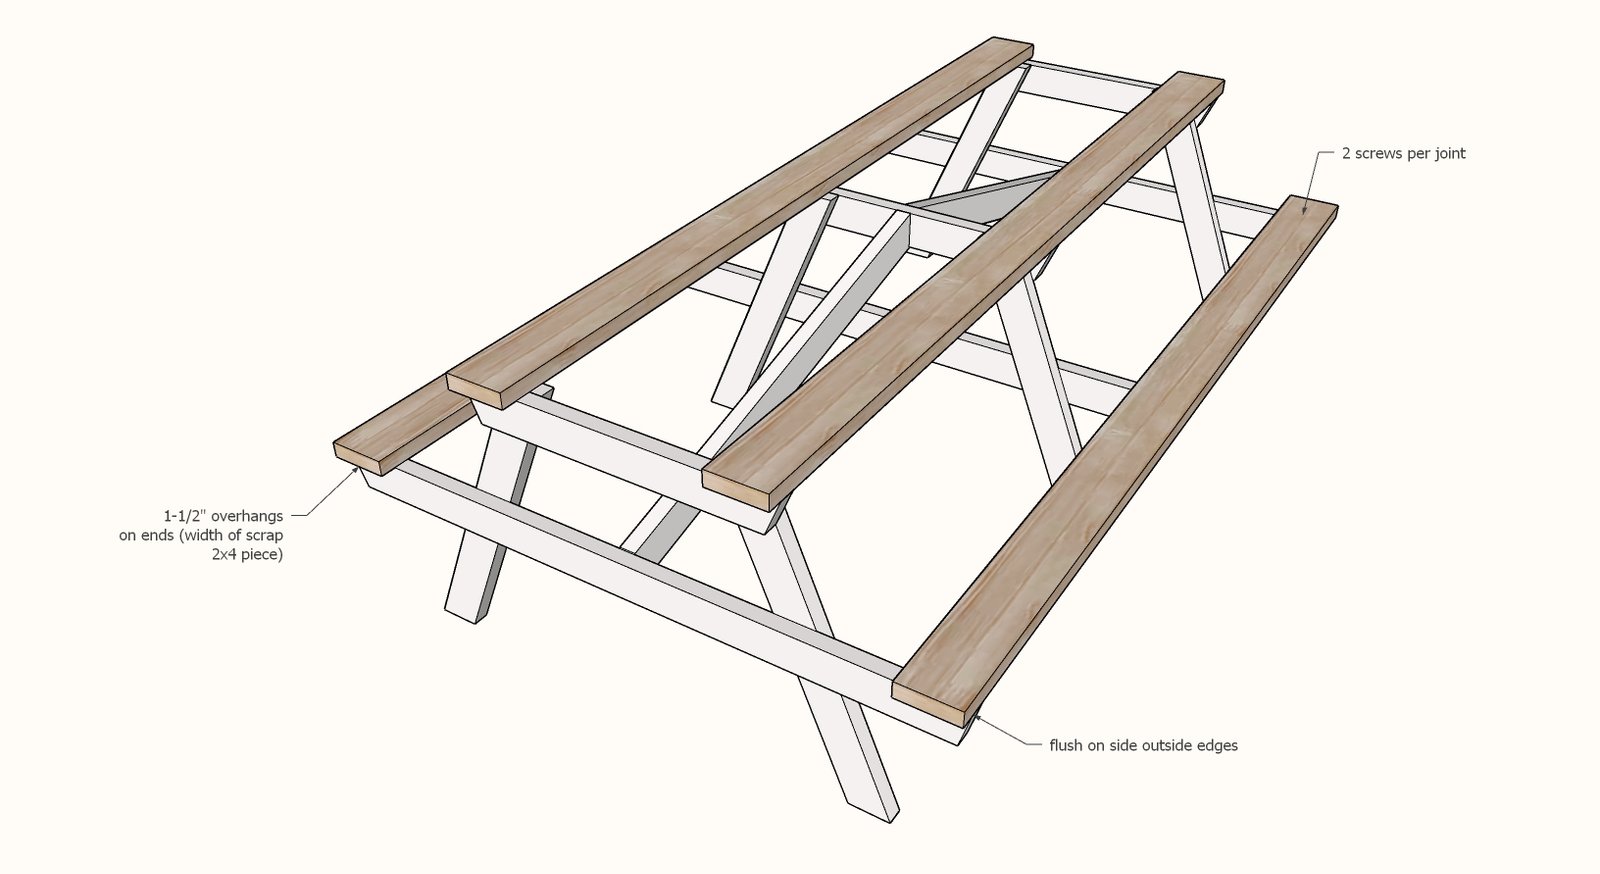
Layout remaining 2x6 boards with even spacing in between.
Screw down with two screws per joint.
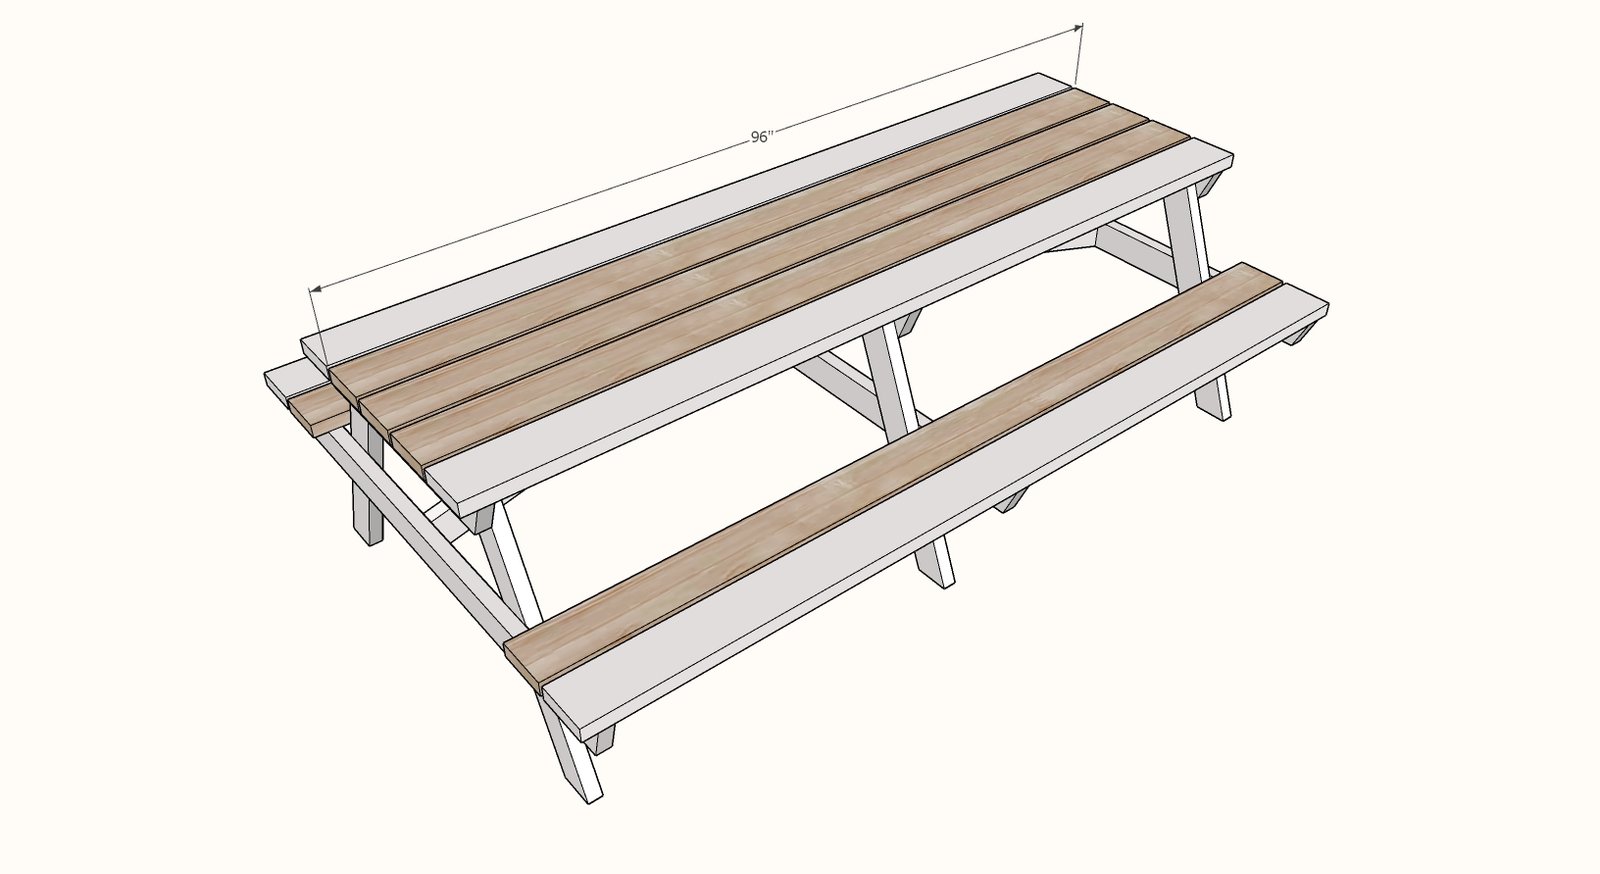
Finishing
Sand all surfaces, starting with a medium grit and finishing with fine. Wipe off the dust, fill any holes or gaps with wood filler, and sand smooth once dry. Apply primer if you're painting, then finish with your choice of paint or stain and seal with a durable clear topcoat. For outdoor projects, use exterior-rated primer, paint or stain, and sealer so the piece stands up to the weather.
Source (temporary): https://www.ana-white.com/woodworking-projects/long-picnic-table