Lydia Daybed
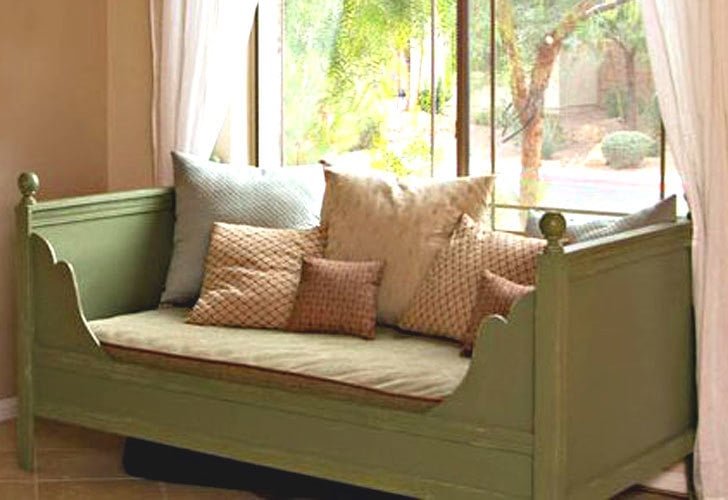
This beautiful daybed will surprise you with it's easy to build plan. Features scalloped edges, moulding on the inside and out and finials. Easy to modify to a full size.
Specifications
| Project type | Beds and Bed Frames |
|---|---|
| Room | Bedroom |
| Style | Cottage Style Furniture Plans |
| Difficulty | Advanced |
Dimensions
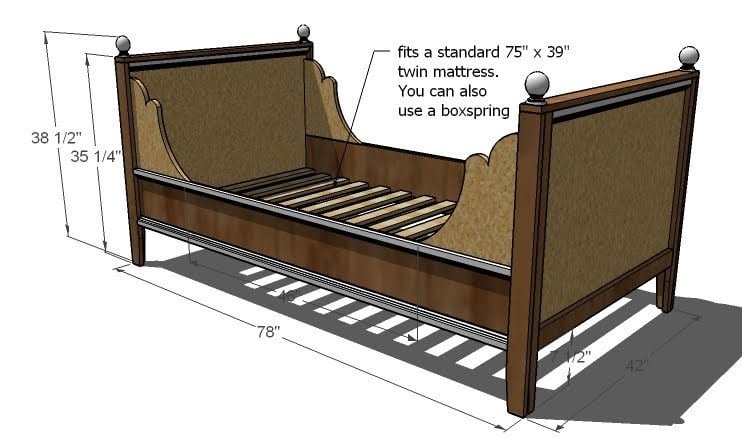
Use the size-specific shopping and cut lists below.
Shopping List
- 6 – Pieces of 2 1/4″ moulding, 8′ Length
- 2 – 1×10, 8′ Length
- 1 – Sheet of 3/4″ MDF or plywood
- 4 – 1×2 Boards
- 11 – 1×3 Boards
- Wood Filler
- Wood Glue
- 1 1/4″ Nails
- 2″ Nails
- 1 1/4″ Screws
Cut List
- 2 – 3/4″ plywood @ 40 1/2″ x 27″ (Panels)
- 4 – 1×2 @ 34 1/2″ (End Legs, ends tapered in step 1)
- 2 – 1×3 @ 37 1/2 (Bottom Panel Trim)
- 4 – 1×3 @ 34 1/2″ (Side Legs, ends tapered)
- 2 – 1×3 @ 42″ (Top of Ends)
- 2 – 2 1/4″ Base Moulding @ 37 1/2″ (Trim for outside of panel)
- 2 – 2 1/4″ Base Moulding @ 40 1/2″ (Trim for inside of panel)
- 4 – 3/4″ MDF @ 15″ x 15″ (Scalloped Sides)
- 2 – 1×10 @ 75″ (Siderails)
- 2 – 1×2 @ 75″ (Cleats)
- 14 – 1×3 @ 39″ (Slats)
- 4 – 2 1/4″ Moulding @ 73″ (Siderail Trim)
Tools
- measuring tape
- square
- pencil
- safety glasses
- hearing protection
- kreg-jig
- drill
- circular saw
- jigsaw
- nailer
- sander
Step-by-step Instructions
END PANELS
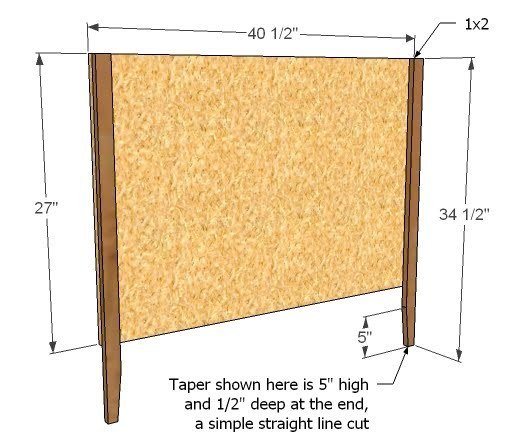
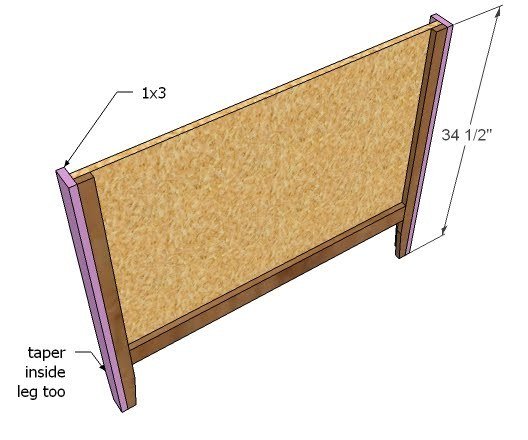
Use 1 1/4″ nails and glue to fasten the 1×2 leg pieces to the end panel. Keep side edges flush, and top edge. Taper the legs as shown above. Just a tiny taper will show up, remember, the side legs will also be tapered. Taper with your jigsaw.
BOTTOM PANEL TRIM
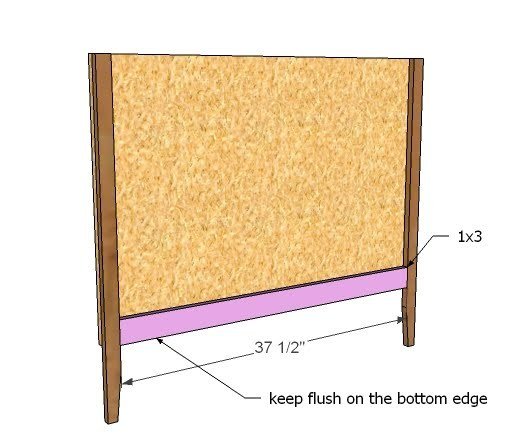
Use 1 1/4″ nails and glue to fasten the bottom panel trim in place. Keep bottom edges flush.
SIDE LEGS
Use glue and 2″ nails to fasten the side legs to the panel and the end legs. Fasten all the way down the end leg.
TOPS
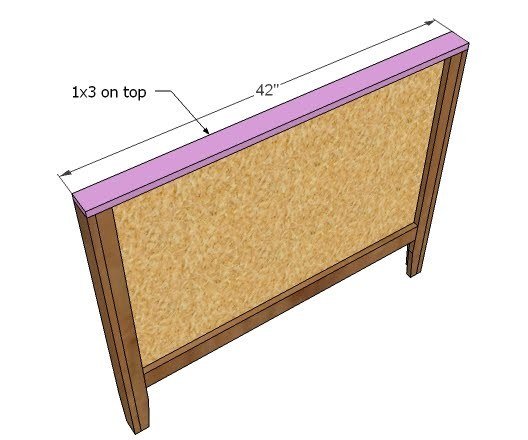
Attach the tops with 2″ nails and glue. Keep edges flush with the side legs.
Step 5
SCALLOPED SIDES
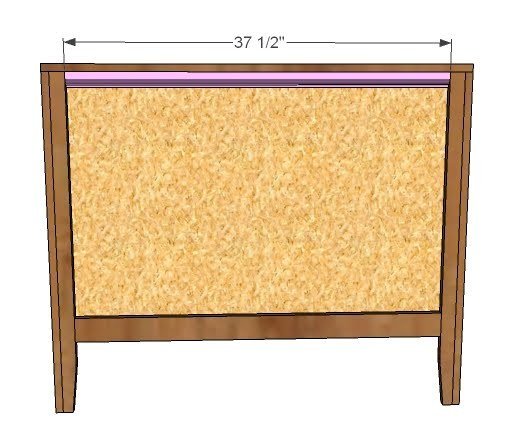
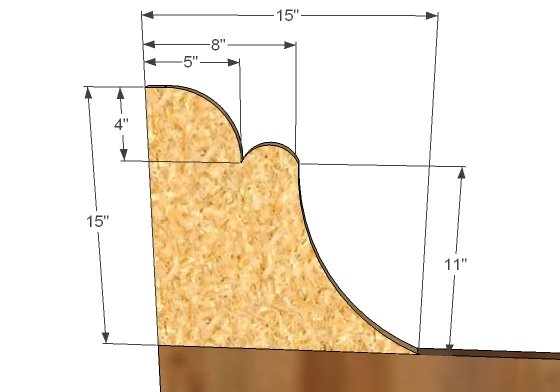
Use the points given above to guide drawn the arched shapes. Cut out with a jigsaw. Once you have one side done, use it as a pattern for the remaining sides.
ATTACHING THE SCALLOPED SIDES
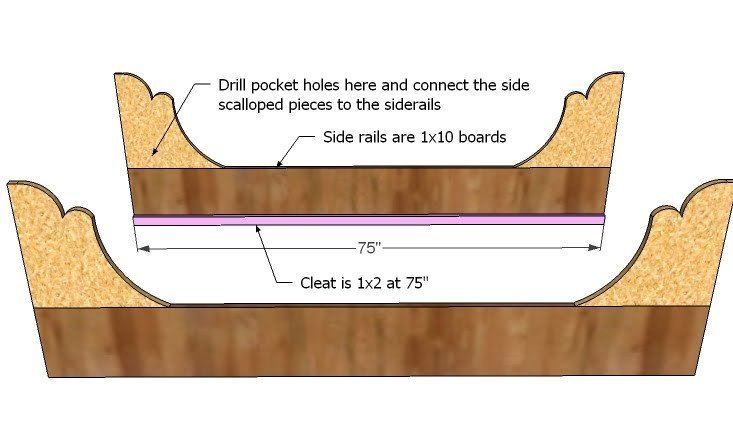
Drill pocket holes in the scalloped sides and attach to the siderails as shown above. Then use 1 1/4″ nails and glue to attach the cleats to the siderails.
ASSEMBLY & SLATS
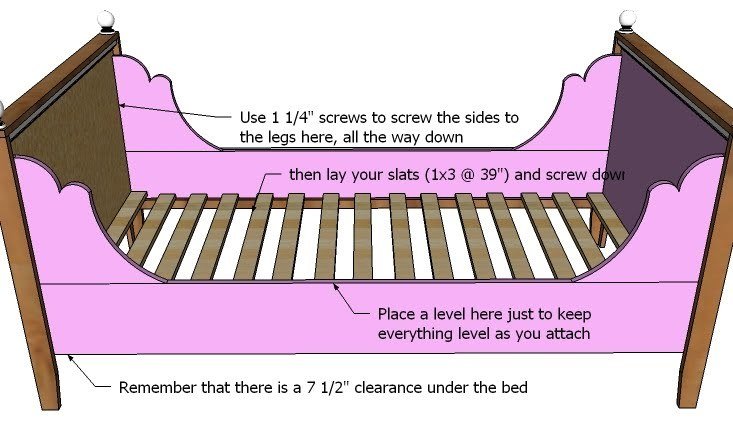
Assemble your bed as shown above. Then lay your slats on top of the siderails and screw down with 1 1/4″ screws.
SIDERAIL TRIM
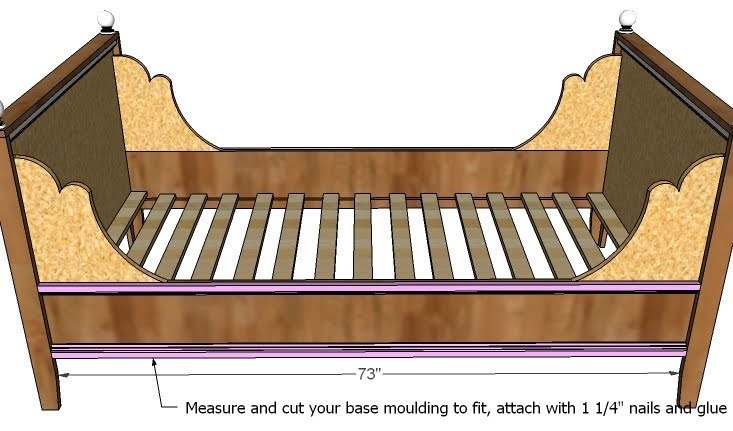
Measure and cut your siderail trim to fit the siderails. Glue and nail with 1 1/4″ to the siderails.
Finishing
Sand all surfaces, starting with a medium grit and finishing with fine. Wipe off the dust, fill any holes or gaps with wood filler, and sand smooth once dry. Apply primer if you're painting, then finish with your choice of paint or stain and seal with a durable clear topcoat. For outdoor projects, use exterior-rated primer, paint or stain, and sealer so the piece stands up to the weather.
Source (temporary): https://www.ana-white.com/woodworking-projects/lydia-daybed