Lydia Toddler Bed
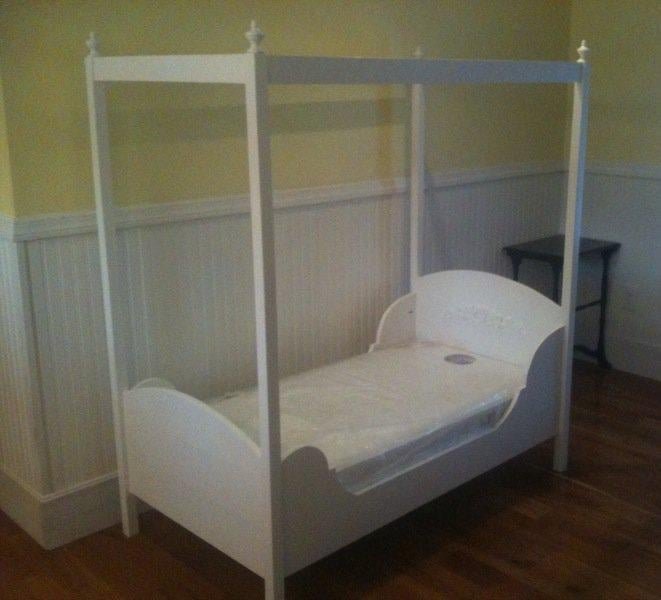
A toddler bed with canopy option for little ones. Special thanks to Barbara for sharing her photos.
Specifications
| Project type | Beds and Bed Frames |
|---|---|
| Room | Bedroom |
| Style | Children's and Kid's Room Furniture and Toy Plans |
| Difficulty | Beginner Projects |
| Estimated cost | $20 - $50 |
Dimensions
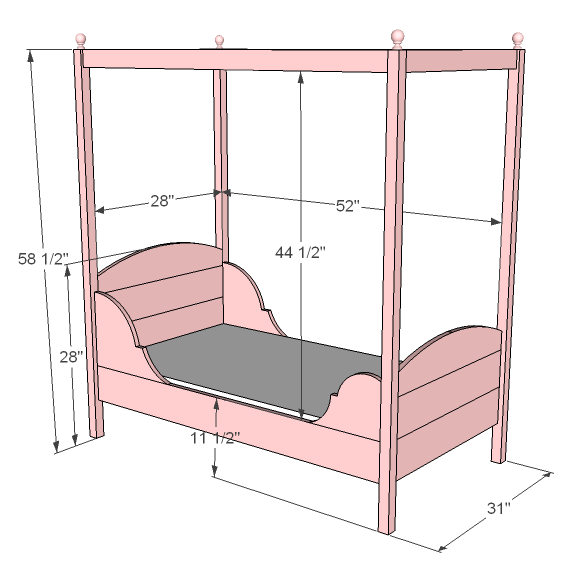
Use the size-specific shopping and cut lists below.
Shopping List
4 – 1×6 @ 8 feet long
1 – 1×12 @ 4 feet long
6 – 2×2 @ 8 feet long
2 – 1×3 @ 8 feet long
More 1x3s (4) or 1/2″ plywood for the mattress supports
1 1/4″ pocket hole screws
Cut List
7 – 1×6 @ 28″ (Headboard and Footboard Planks)
4 – 2×2 @ 58 1/2″ (Legs)
2 – 1×3 @ 28″ (Canopy Top/Bottom)
2 – 1×6 @ 52″ (Siderails)
2 – 1×3 @ 52″ (Canopy Sides)
2 – 2×2 @ 52″ (Cleats)
2 – 1×12 @ 15″ (Decorative Side, Top)
2 – 1×12 @ 8 1/2″ (Decorative Side, Bottom)
12 – 1×3 @ 28″ OR 1/2″ plywood 28″ x 52″ (Mattress Bottom)
Tools
- measuring tape
- square
- pencil
- safety glasses
- hearing protection
- kreg-jig
- drill
- circular saw
- jigsaw
- sander
- level
- countersink drill bit
Step-by-step Instructions
Headboard
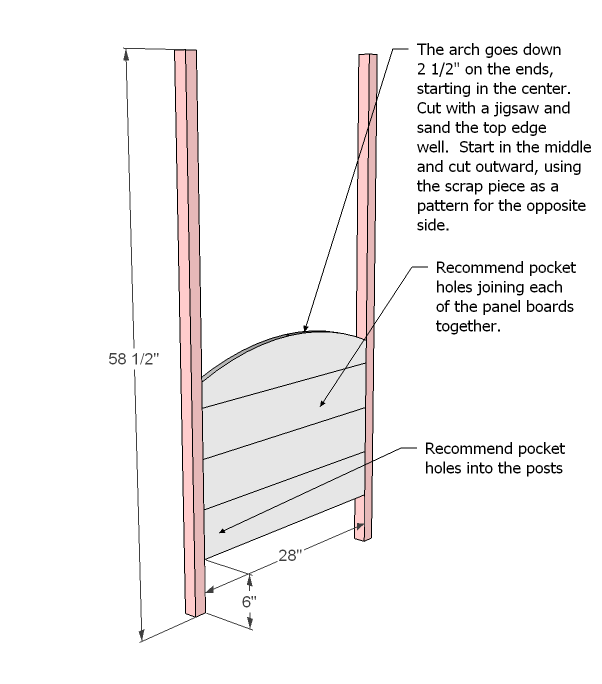
Begin by attaching all the headboard boards together as shown above with pocket hole screws and glue. Make sure you rotate the grain of the wood (bark side out, bark side in and so on) so that the panel won’t warp in one direction over time as you attach the planks. Cut the arch out of the top board. Then attach the planks to two of the legs as shown above.
Footboard
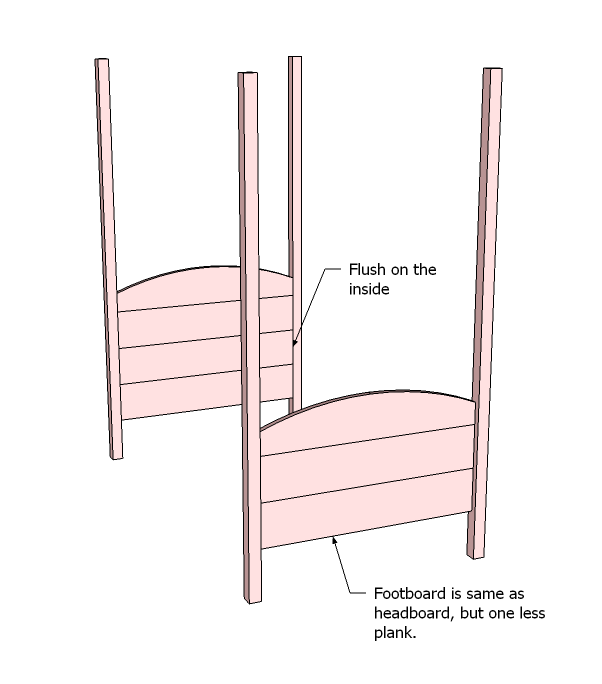
Build the footboard as you did the footboard, but use one less plank.
Canopy
Add the canopy tops with pocket holes and glue.
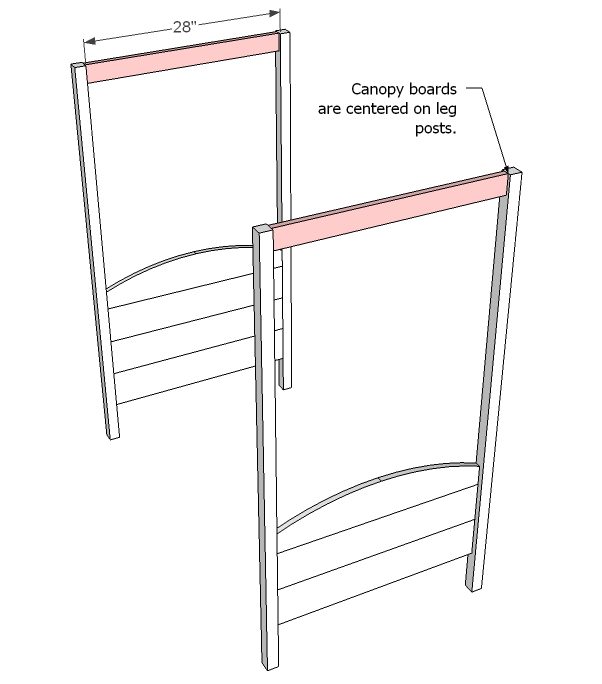
Joining Headboard/Footboard
You may wish to do this inside your room as the size of the bed is getting quite large at this stage. Pocket holes will do the trick, but you could also opt for metal brackets.
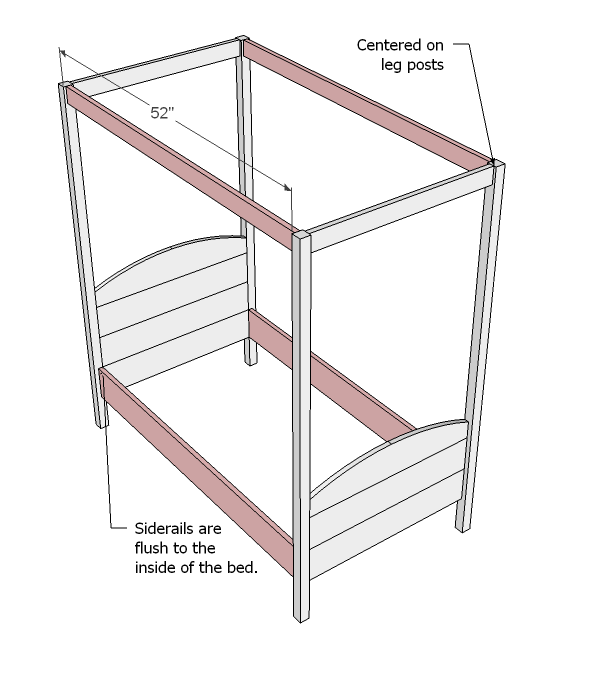
Step 5
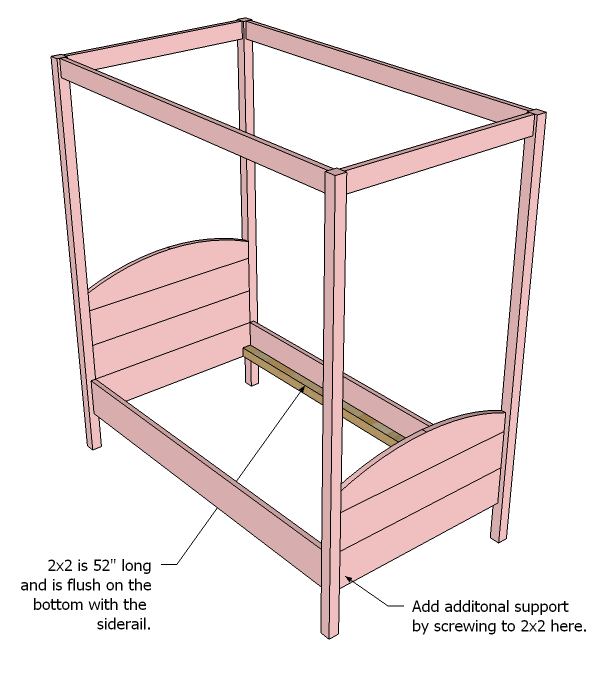
Top Side
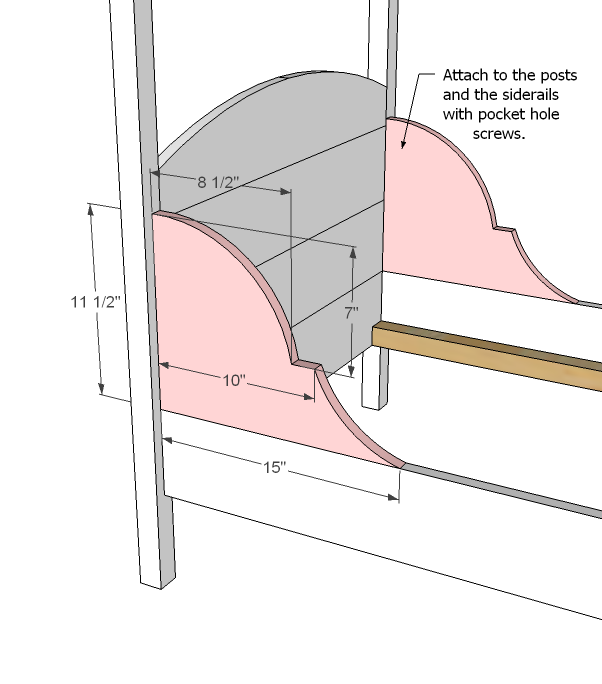
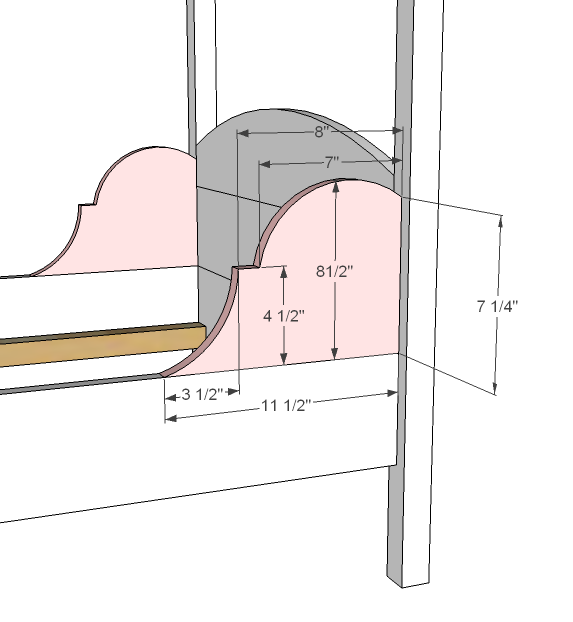
Now take the longer 1×12 pieces and mark out a pattern as shown above, using the measurements in the diagram to guide you. Carefully cut out with the jigsaw. Once one is cut, use it as a pattern for the other. Sand your cut well. Attach the side to the headboard and siderail with pocket hole screws. Avoid glue on the headboard joint so that you can disassemble the bed if needed.
Bottom Sides
Same thing on the bottom as the top. Use the shorter 1x12s and measure and cut out. Sand well and attach to the siderails and the legs.
Slats
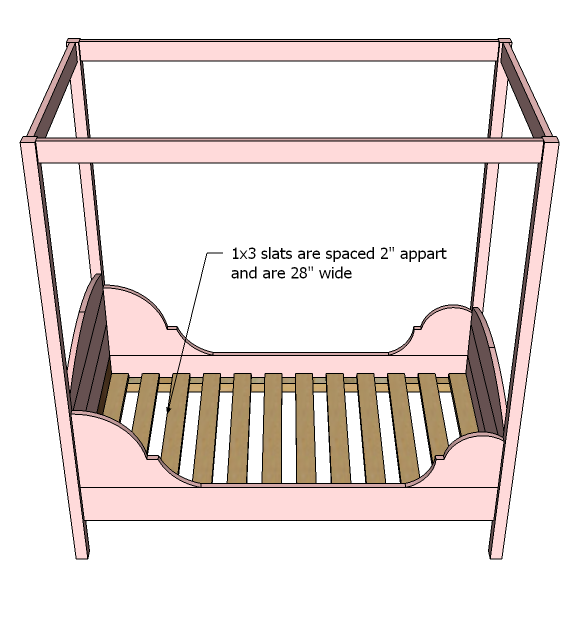
I’m so torn on this one. My daughter loves to jump, and the crib mattresses are so flimsy. But a full sheet of plywood instead of slats doesn’t give much air movement for accidents. Do what works for your child and your mattress. You could use 1×3 slats as shown above or 1/2″ plywood over the cleats (use scrap 2x2s to build joists – you will have enough 2x2s in scraps for this).
Icing
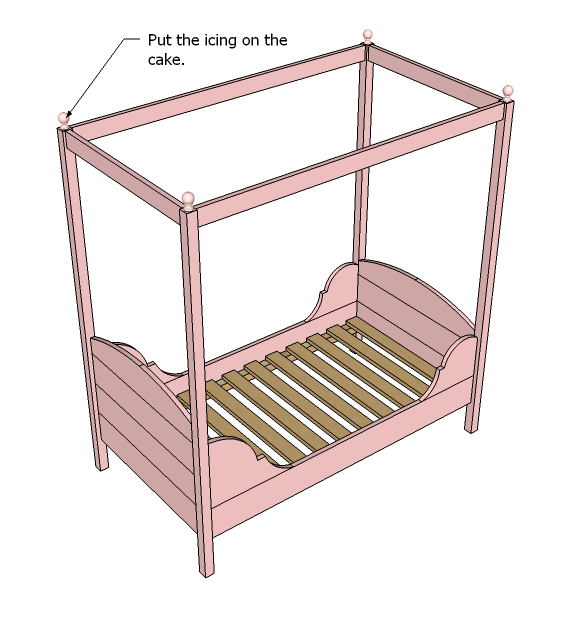
Doesn’t need it, but would be cute! Look in the curtain aisle or the craft wood section for unfinished wood finials. They should be relatively cheap, and need to be less than 1 1/2″ diameter at the base.
Finishing
Sand all surfaces, starting with a medium grit and finishing with fine. Wipe off the dust, fill any holes or gaps with wood filler, and sand smooth once dry. Apply primer if you're painting, then finish with your choice of paint or stain and seal with a durable clear topcoat. For outdoor projects, use exterior-rated primer, paint or stain, and sealer so the piece stands up to the weather.
Source (temporary): https://www.ana-white.com/woodworking-projects/lydia-toddler-bed