Madeline Side Hutch for Changing Wall
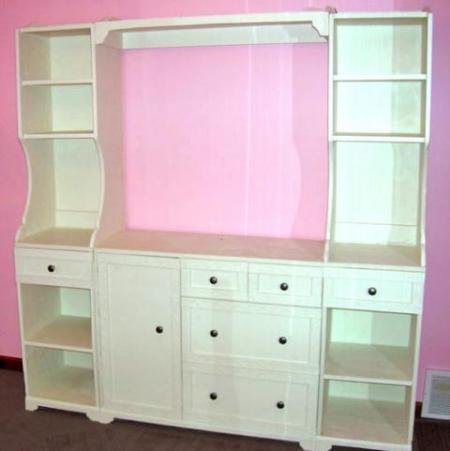
to build a Pottery Barn Kids inspired changing wall - this is the side hutch plans from DIY your own furniture and save tons!
Specifications
| Project type | Hutch Plans |
|---|---|
| Room | Nursery and Baby |
| Style | Children's and Kid's Room Furniture and Toy Plans |
| Difficulty | Advanced |
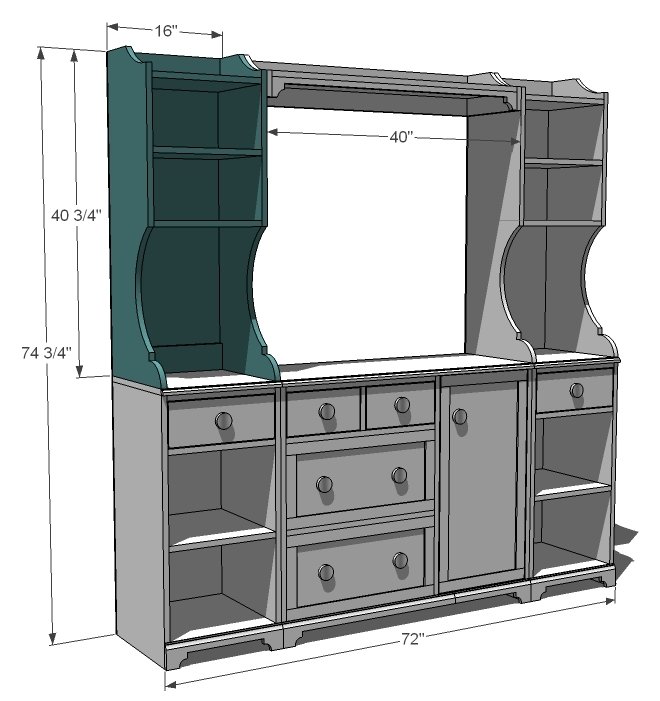
Dimensions
Use the size-specific shopping and cut lists below.
Shopping List
Shopping List for ONE Side Hutch
1 - strip of plywood 8 feet long x 15 1/2" wide
1 - 1/4 sheet of 1/4" thick plywood for back
1 - 1x4 @ 30" long
1 - 1x12 @ 4 feet long
Favorite fasteners
1" nails for attaching back to the 1x4s
Also recommend hardware to attach bases to hutches and a tip resistant kit
Cut List
Cut list is for ONE side hutch
2 - 1x16 boards (15 1/2" width) @ 40 3/4" long (sides)
3 - 1x12 @ 14 1/2"
2 - 1x4 @ 14 1/2"
1 - 1/4" plywood @ 16" x 40 3/4"
Tools
- measuring tape
- square
- pencil
- safety glasses
- hearing protection
- drill
- circular saw
- jigsaw
- nailer
- countersink drill bit
Step-by-step Instructions
Step 1
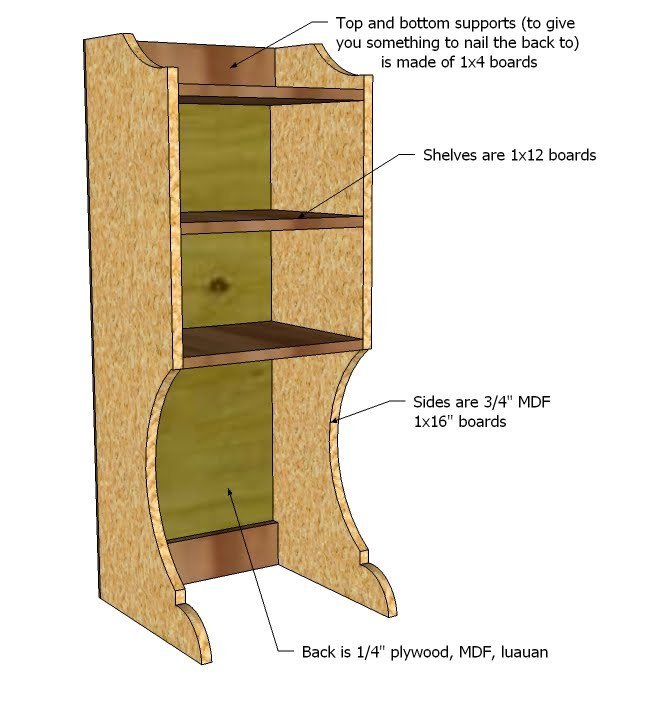
Here's a view of the composition of this project. You can build the entire hutch from 3/4" thick plywood or MDF - it's up to you. One note, I don't recommend staining this project because those exposed plywood front edges will be difficult to finish out (unless you are super good with the edge banding).
Step 2
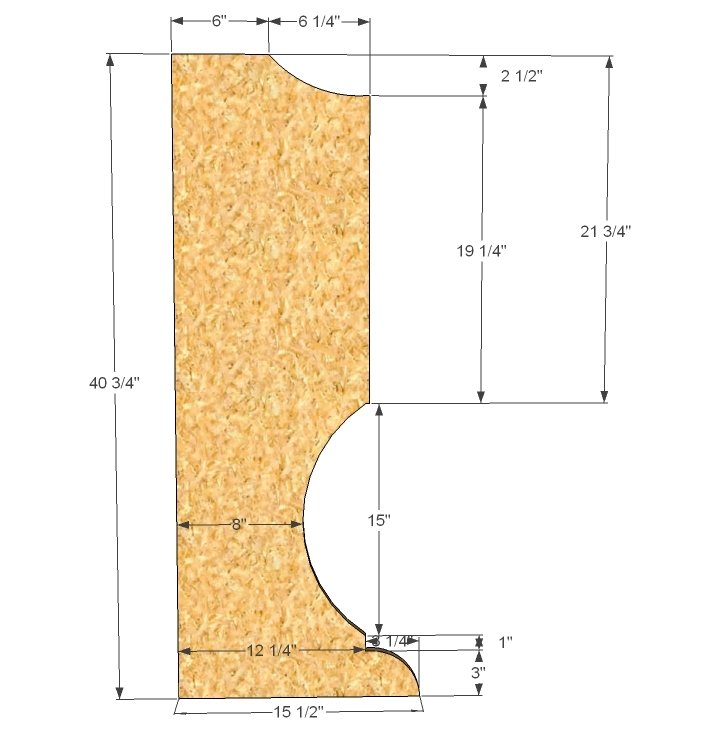
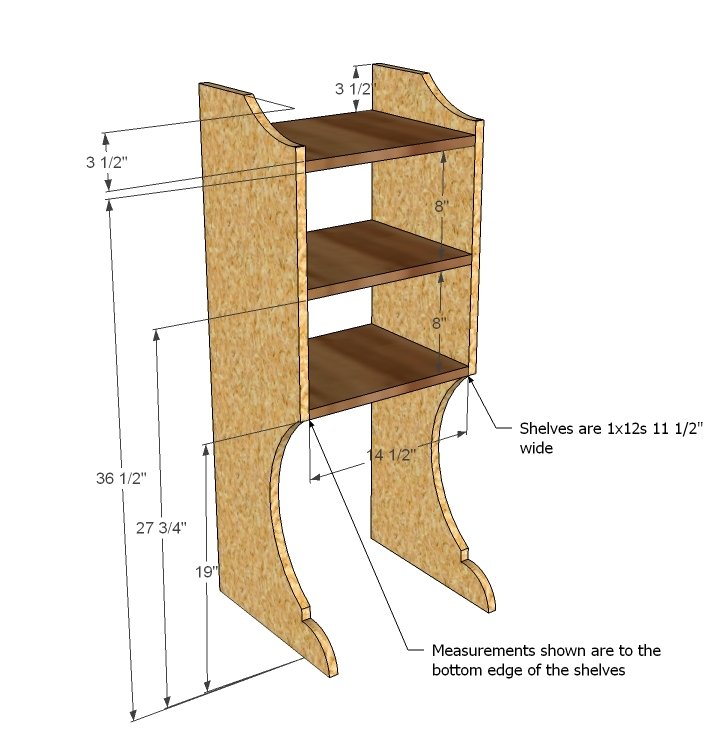
Start by cutting out the sides. I recommend cutting one as pattern and then using it to cut the remaining. Once the sides are cut, clamp the two together and sand to make sure they match up.
Step 3
Now add the shelves. You can add shelves with shelf pins, nailed in place with glue or pocket holes or countersunk screws. Shelves will sit inset a bit - this is expected. If you want shelves flush to front, you can cut from plywood. Also at this step add the 1x4s to the top and bottom.
Step 4
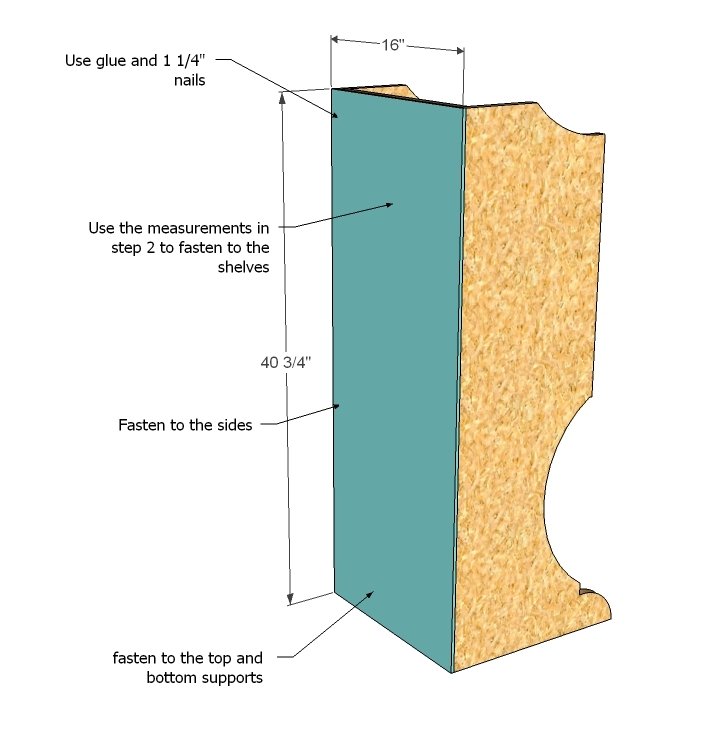
Now attach back to the project with finish nails and wood glue. When you attach to the 1x4 boards, use nails less than 1" long.
Finishing
Sand all surfaces, starting with a medium grit and finishing with fine. Wipe off the dust, fill any holes or gaps with wood filler, and sand smooth once dry. Apply primer if you're painting, then finish with your choice of paint or stain and seal with a durable clear topcoat. For outdoor projects, use exterior-rated primer, paint or stain, and sealer so the piece stands up to the weather.
Source (temporary): https://www.ana-white.com/woodworking-projects/madeline-side-hutch-changing-wall