Mantle Moulding Headboard
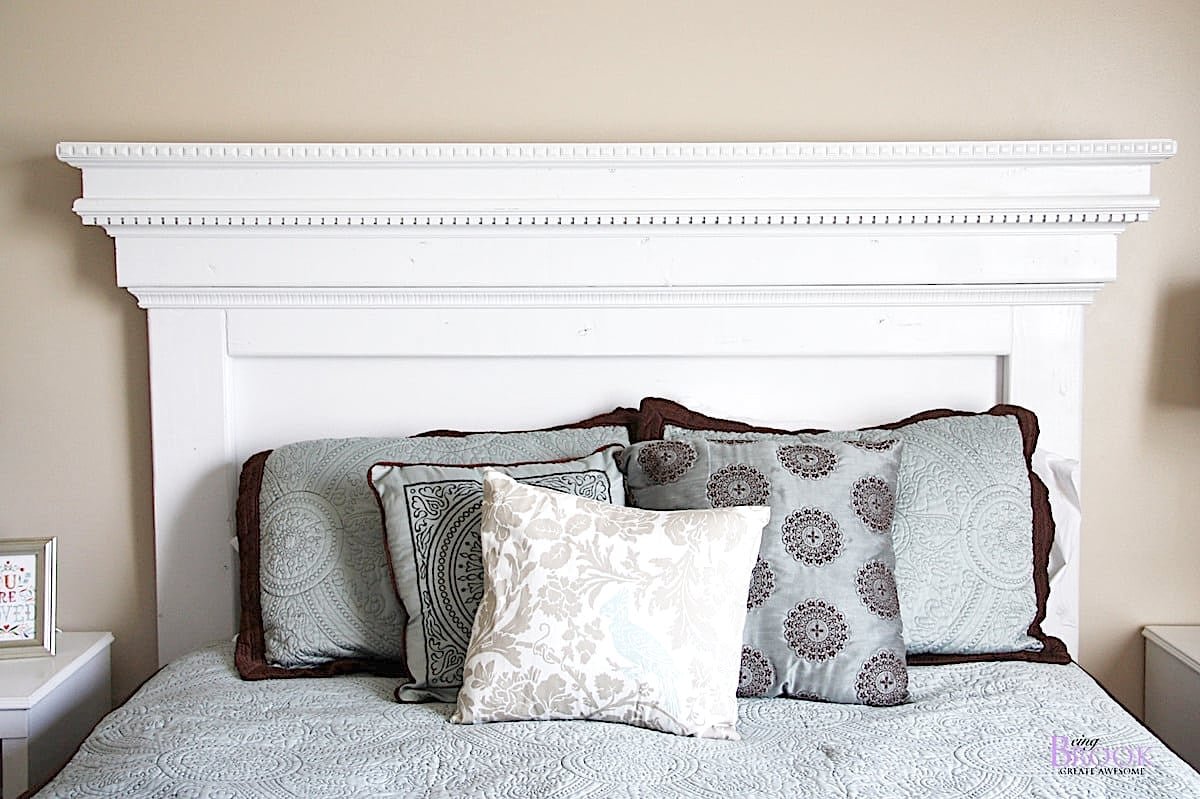
Make a headboard with lots of moulding! Inspired by Pottery Barn Addison Headboard, features dentil moulding and crown moulding. from
Specifications
| Project type | Headboard |
|---|---|
| Room | Bedroom |
| Style | Cottage Style Furniture Plans |
| Difficulty | Intermediate |
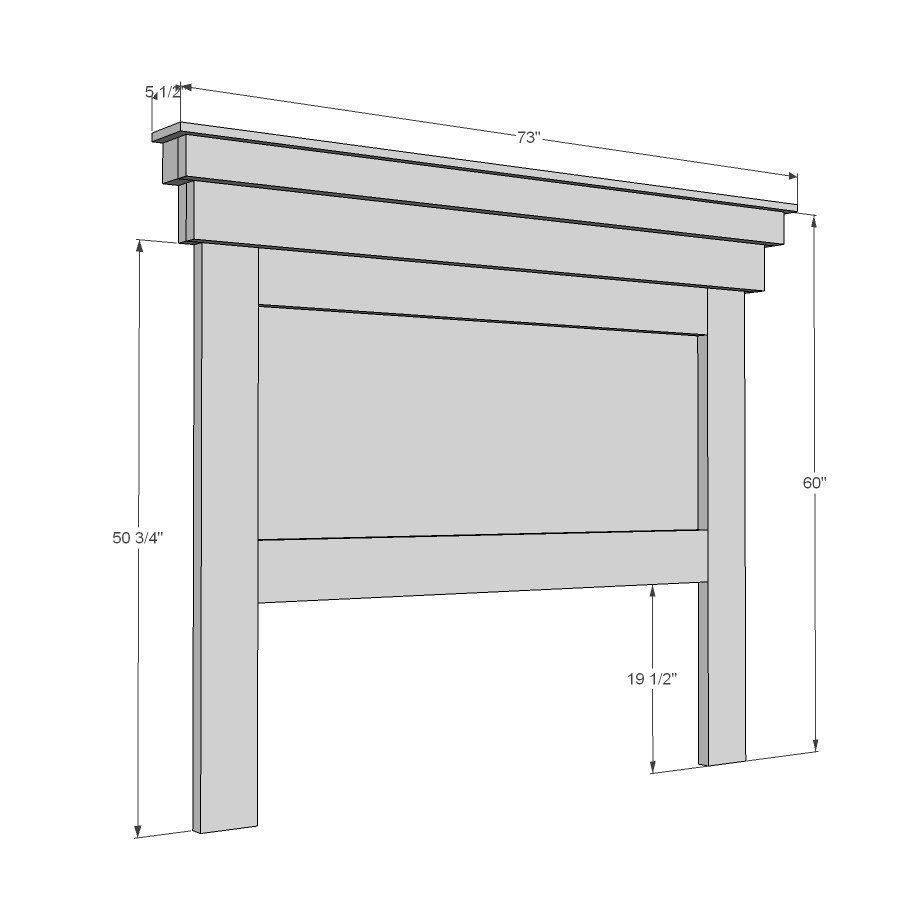
Dimensions
Use the size-specific shopping and cut lists below.
Shopping List
- 5 – 2x6 @ 8 feet or stud length
- 1 – 2x2 @ 8 feet long
- 1 – 2x4 @ 8 feet long
- 1 – 1x6 @ 8 feet long
- 1 sheet of ¼” plywood
- 3 – 7’ sticks of moulding in sizes (see last step)
- Optional moulding on center panel (2 8’ sticks)
- 2 ½” pocket hole screws
- 2” and 1 ¼” brad nails
Cut List
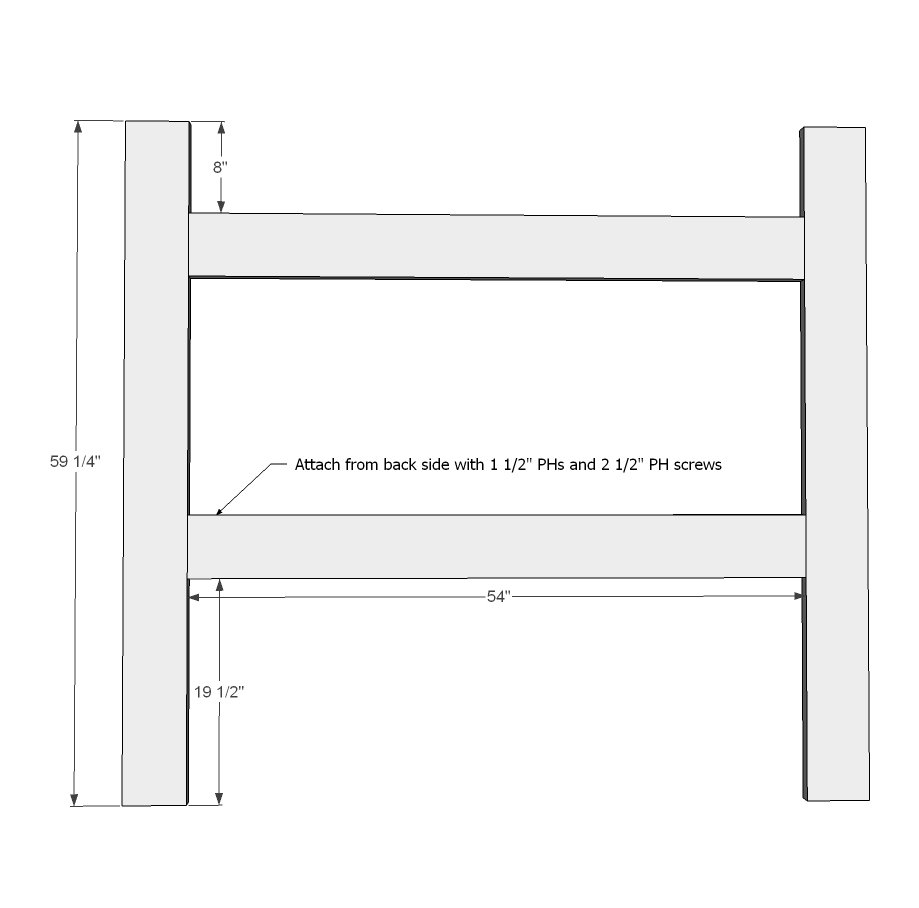
- 2 – 2x6 @ 59 ¼”
- 2 – 2x6 @ 54”
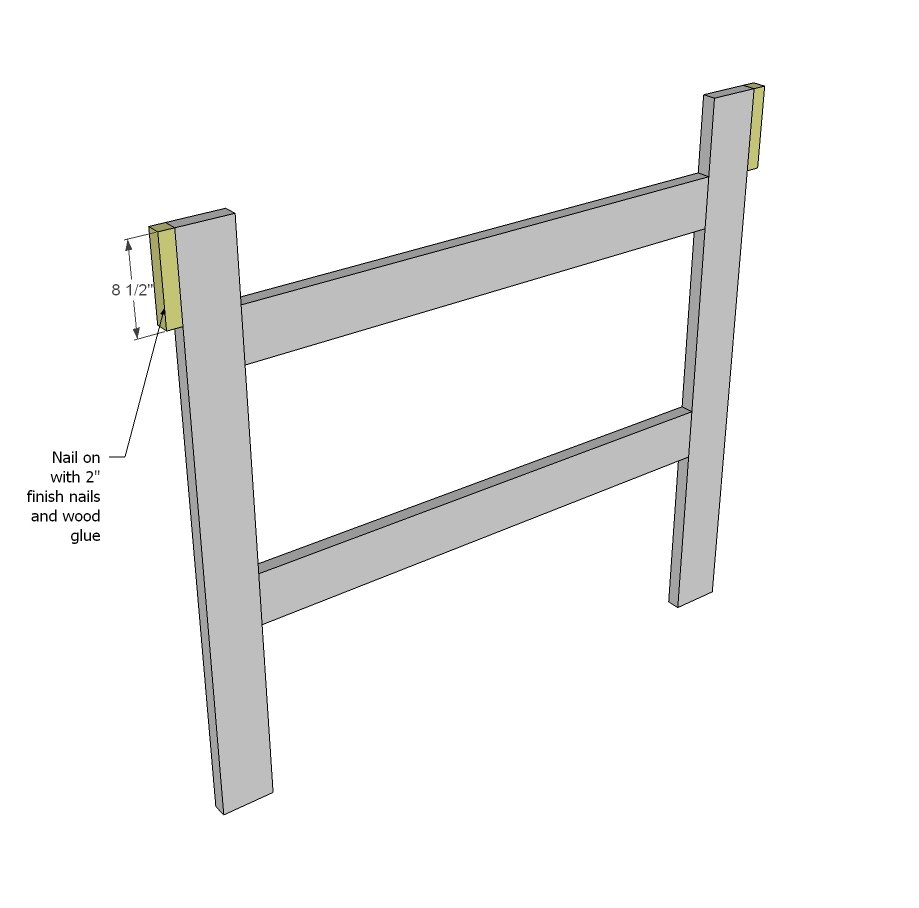
- 2 – 2x2 @ 8 ½”
- 1 – 2x2 @ 68”
- 1 – 2x6 @ 68”
- 2 – 2x4 @ 3”
- 1 – 2x4 @ 71”
- 1 – 1x6 @ 73”
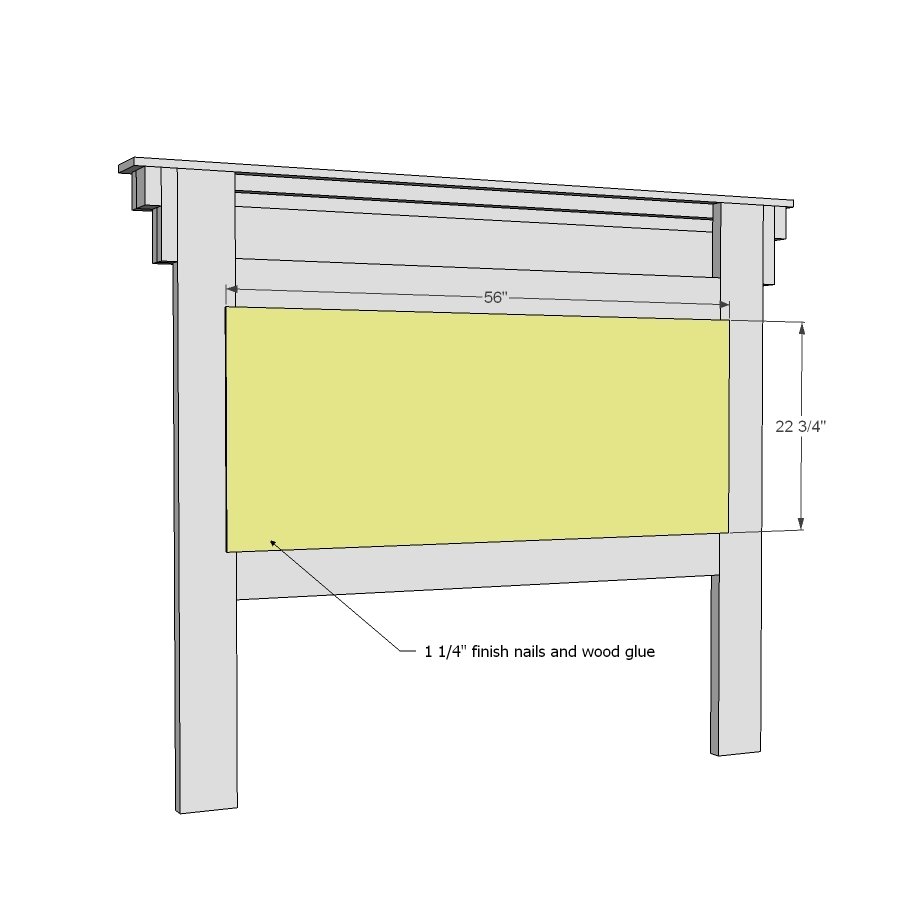
- 1 – ¼” plywood @ 56” x 22 ¾”
Tools
- measuring tape
- square
- pencil
- safety glasses
- hearing protection
- kreg-jig
- drill
- compound miter saw
- nailer
- sander
Step-by-step Instructions
Step 1
Start by building a basic frame. This headboard is designed for a queen size. You can alter the size by adding to the width for king, or subtracting from the width for twin and full sizes.
Step 2
Now attach cleats to sides.
Step 3
And then to front, attach additional boards. Take your time to make sure the ends match up perfectly.
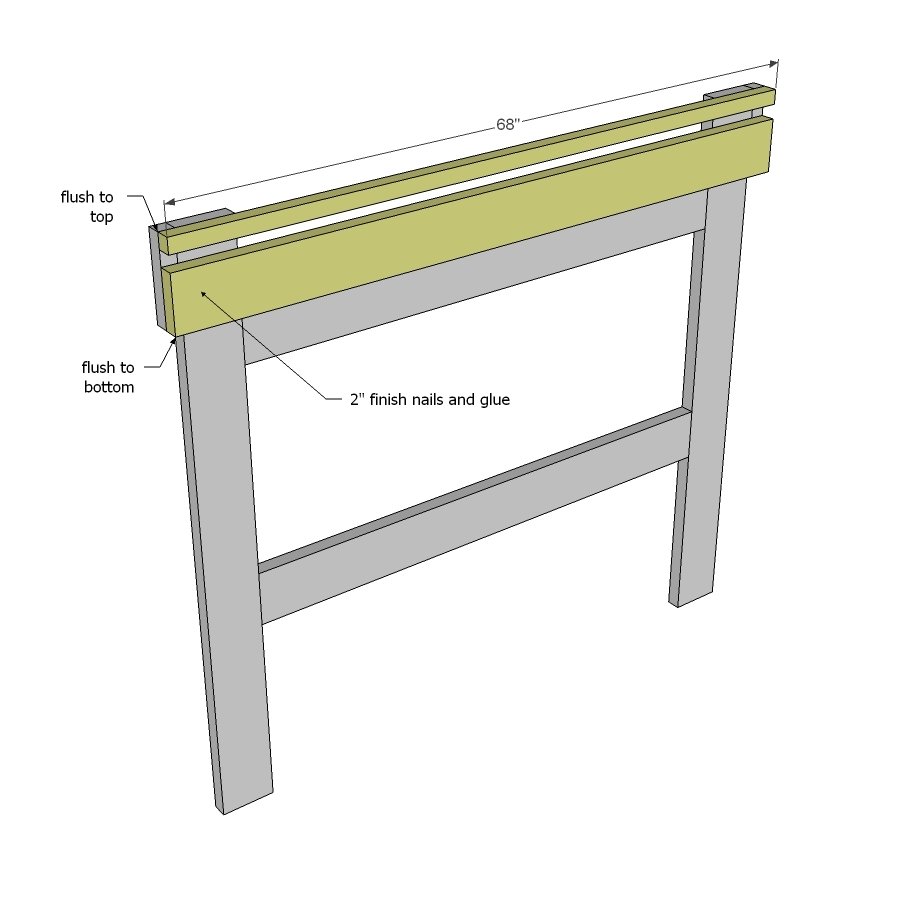
Step 4
Finish off the end with some blocking....
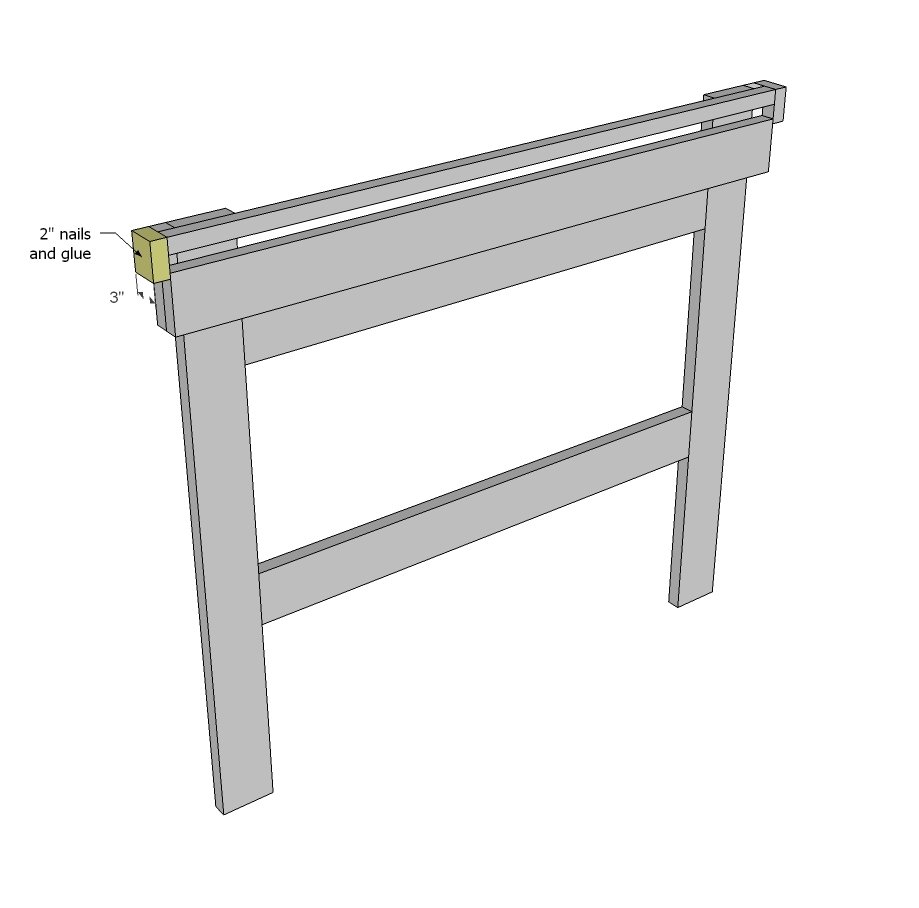
Step 5
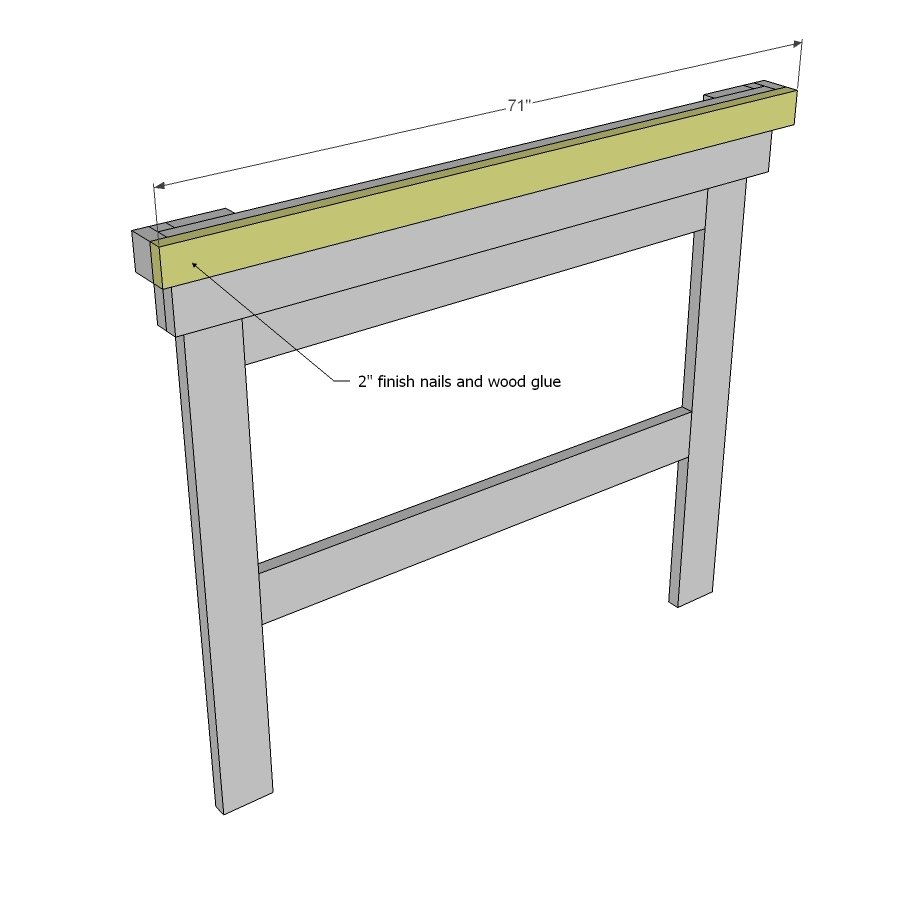
Step 6
And now the header. You can also use screws here.
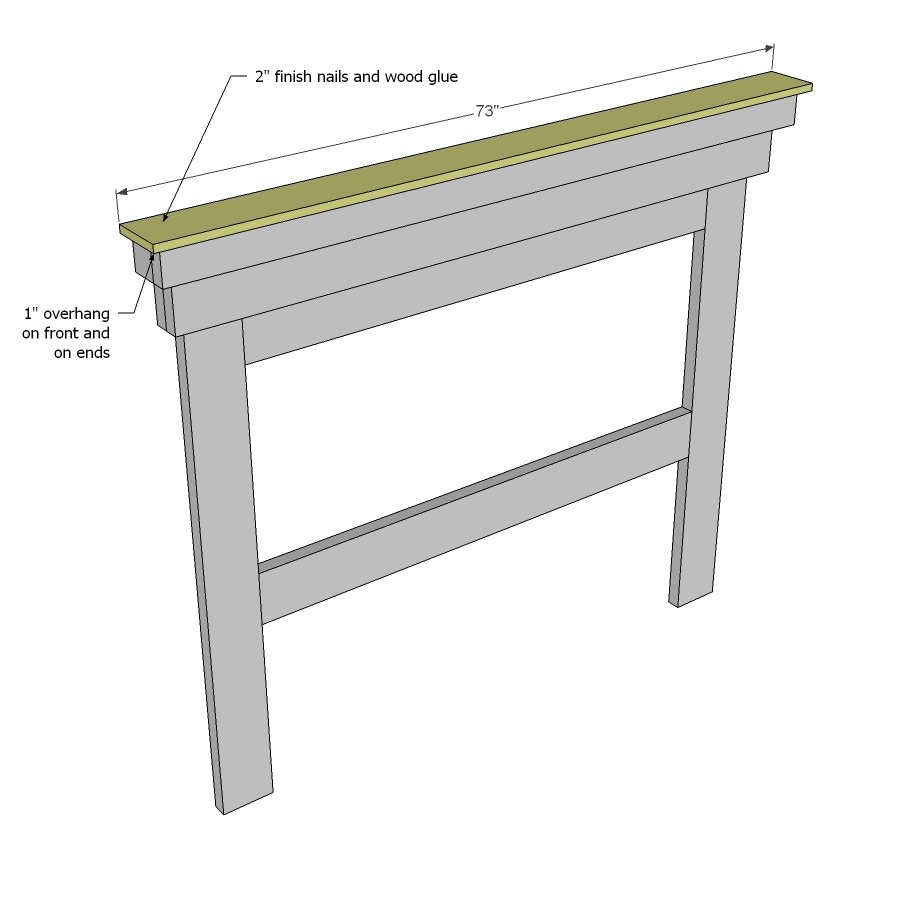
Step 7
Fill in the back panel. You could also fill in with an upholstered panel!
Step 8
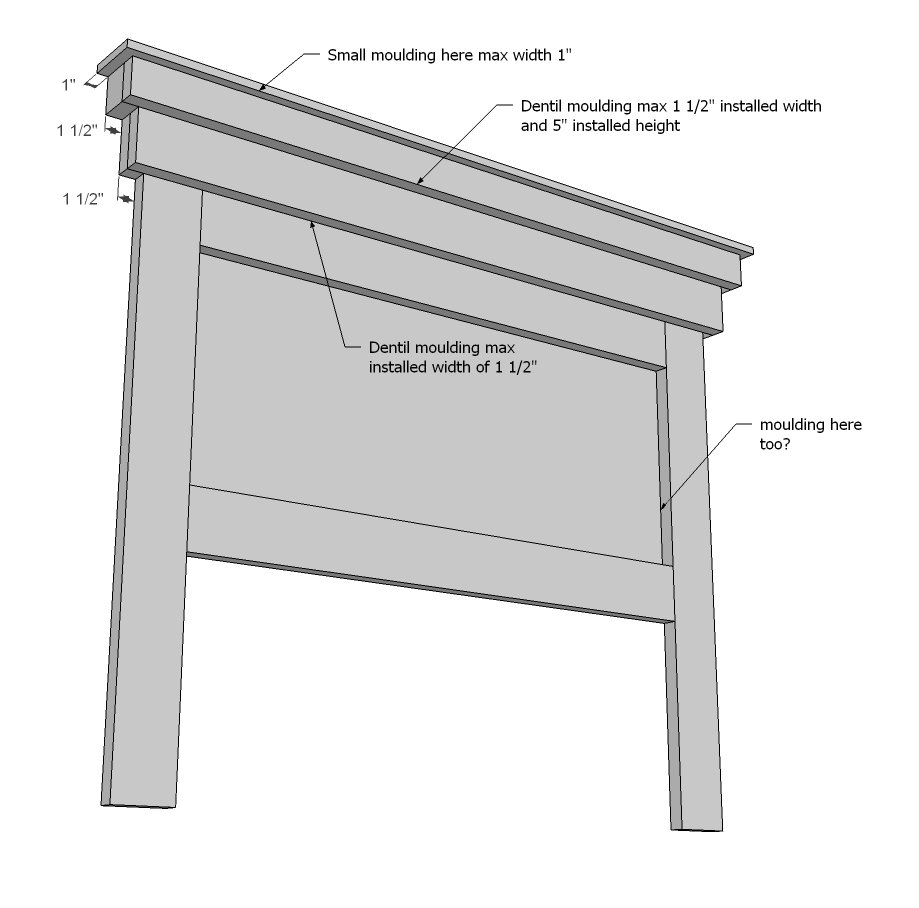
Now add moulding! There's alot of flexibility in the type of moulding you choose.
Step 9
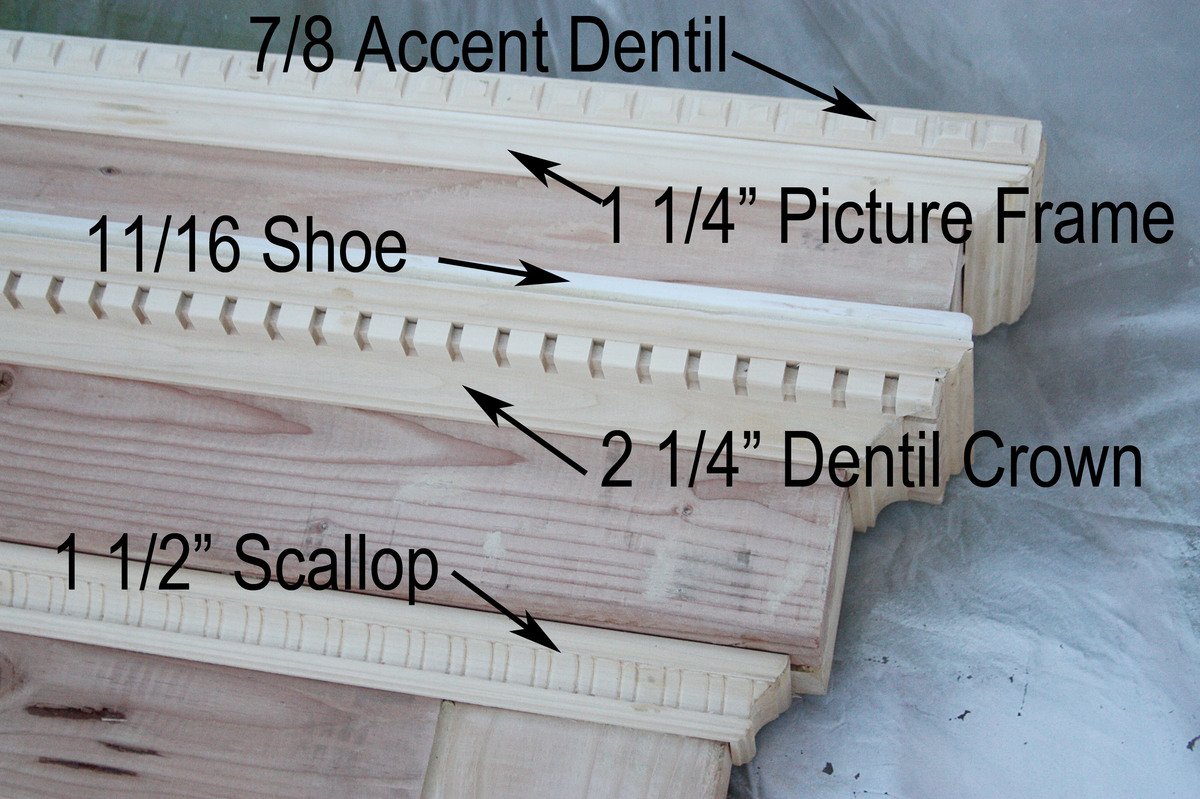
Here is a close up of the moulding Brook used.
Step 10
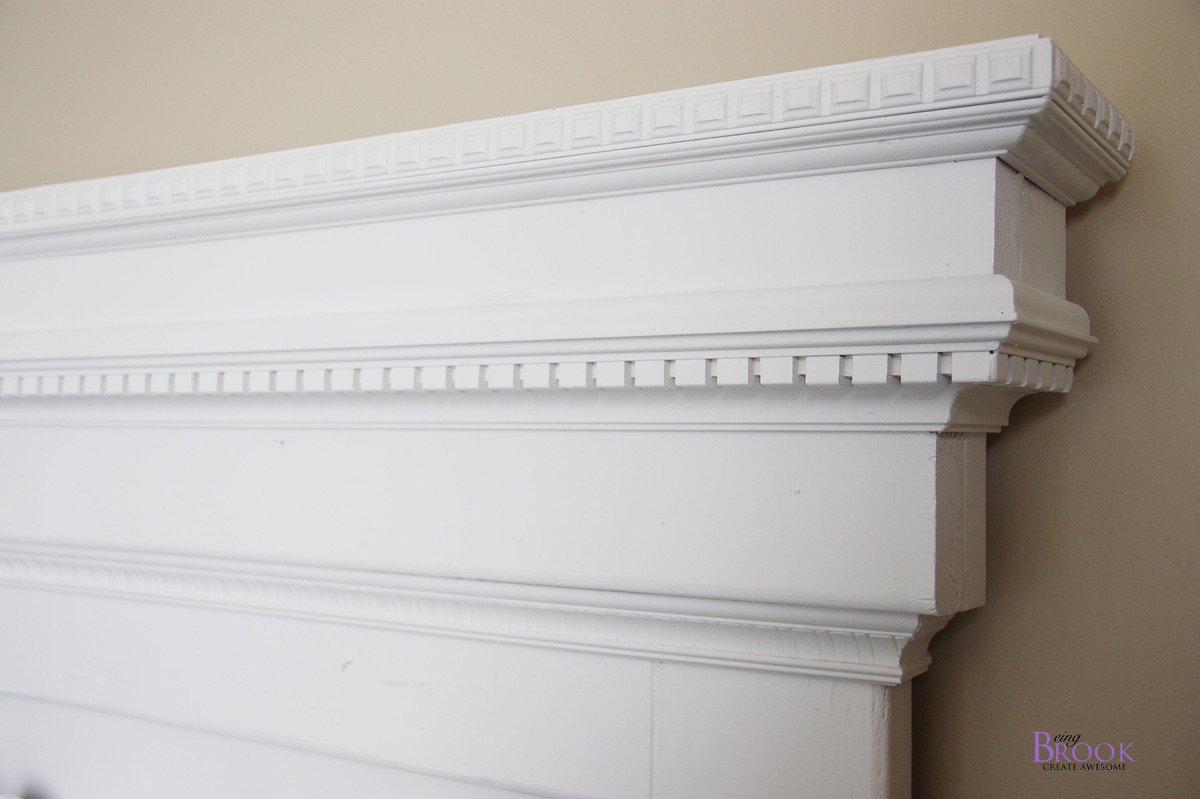
And a close up of the finished moulding Brook used. Please stop over and read Brook's post here for more details.
Finishing
Sand all surfaces, starting with a medium grit and finishing with fine. Wipe off the dust, fill any holes or gaps with wood filler, and sand smooth once dry. Apply primer if you're painting, then finish with your choice of paint or stain and seal with a durable clear topcoat. For outdoor projects, use exterior-rated primer, paint or stain, and sealer so the piece stands up to the weather.
Source (temporary): https://www.ana-white.com/woodworking-projects/mantle-moulding-headboard