Market Base for Grace's Town Collection
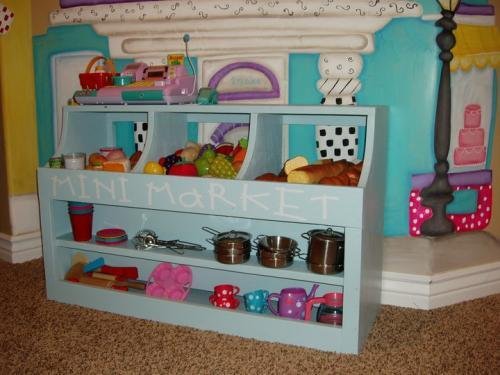
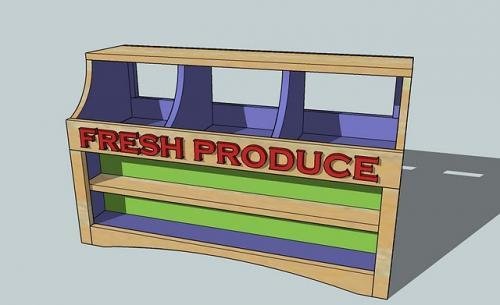
Featuring front and back storage, pass through market bins, and just right height for a cash register, this market base also works with a hutch (plans available in Grace's Town Collection). Give your child endless hours of pretend play with this solid wood, easy to build project plans. Special thanks to Canessa for sharing her photos with us.
Specifications
| Project type | Grace's Town |
|---|---|
| Room | Kids and Toys |
| Style | Green or Eco-Friendly Style Furniture |
| Difficulty | Intermediate |
| Estimated cost | $20 - $50 |
Dimensions
Use the size-specific shopping and cut lists below.
Shopping List
2 - 1x12 @ 6 feet long
1 - 1x10 @ 3 feet long
1 - 1x8 @ 3 feet long
1 - 1x4 @ 10 feet long
1 - 1x2 @ 8 feet long
1 - 1x3 @ 8 feet long
Cut List
A) 2 – 1×12 @ 21 1/2″ (Sides)
B) 2 – 1×12 @ 34 1/2″ (Shelves)
C) 1 – 1×4 @ 34 1/2″ (Front Shelf)
D) 1 -1×10 @ 34 1/2″ (Center Divider)
E) 2 – 1×12 @ 8 3/4″ (Bin Dividers)
F) 1 – 1×8 @ 36″ (Top of Bins)
G) 1 – 1×4 @ 36″ (Front of Bins)
H) 2 – 1×2 @ 12″ (Front Side Trim)
I) 1 – 1×3 @ 33″(Footer on Front, cutout arch)
J) 1 – 1×4 @ 36″ (Back of Bins Trim)
K) 1 – 1×2 @ 36″ (Back Top Trim)
L) 2 – 1×2 @ 5 1/4″ (Back Bin Side Trim)
M) 1 – 1×3 @ 36″ (Back Bottom Trim)
N) 2 – 1×2 @ 9 1/2″ (Back Side Trim)
Cut out your boards first and use glue and 2″ nails unless otherwise specified.
Tools
- measuring tape
- square
- safety glasses
- hearing protection
- drill
- circular saw
- jigsaw
- nailer
- sander
Step-by-step Instructions
Step 1
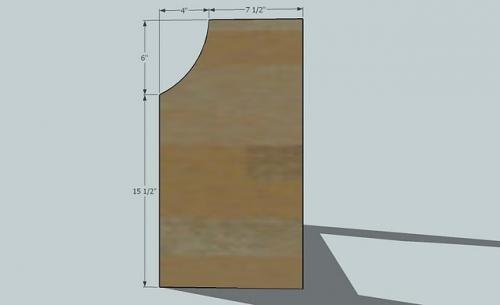
First cut out the side pieces, A, as shown above. Use the above measurements to guide you. Once you cut one out, use the finished piece as a pattern for the other pieces.
Step 2
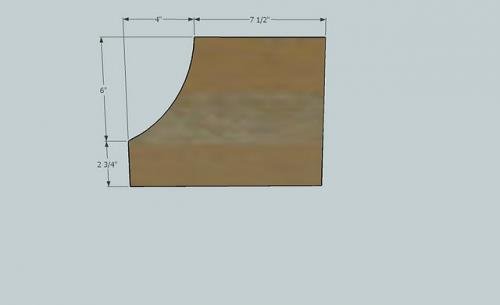
Cut out the bin dividers E the same as above.
Step 3
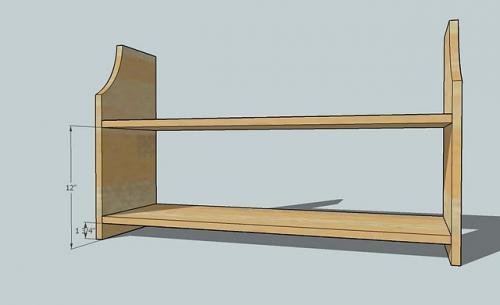
As shown above, nail through the sides into the shelves. The easiest way to do this is to mark on the insides of the shelf boards A where you will place the shelves B.
Step 4
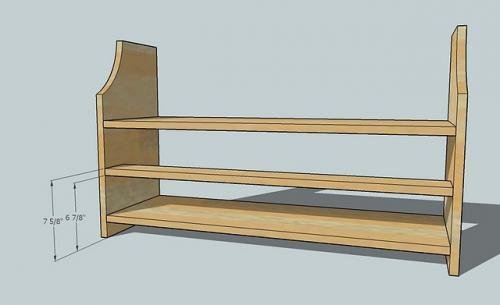
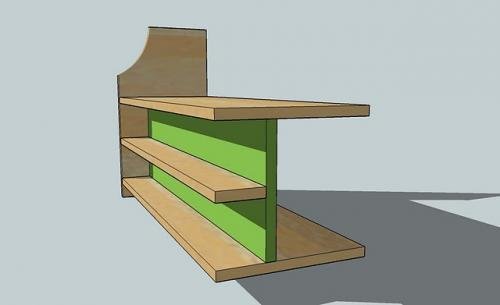
Now add the Front Shelf, C, as shown above. Keep the front flush. See below for a section cut illustrating this.
Step 5
Step 6
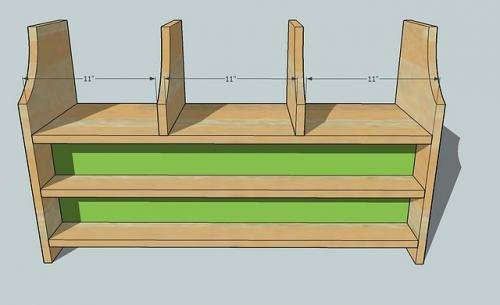
Now add the bin dividers, E, as shown above.
Step 7
Add F to the top, keeping outside edges flush.
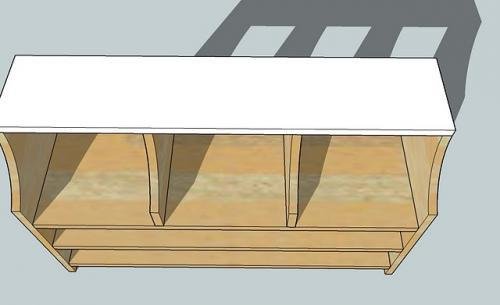
Step 8
Add G to the front, keeping the bottom edge flush with the top shelf, B. Keep outside edges flush. Nail into the shelf and the bin dividers and the sides.
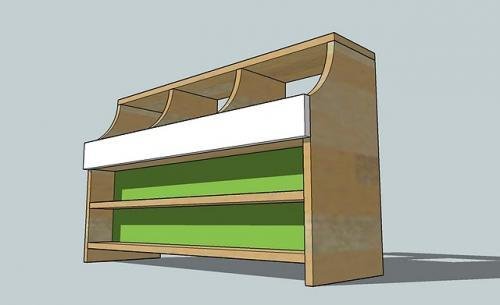
Step 9
Now add the front side trim, H, to the sides of the front shelves. Make sure you nail into all the shelves and the sides. Now the footer, I, then cut out the arch in place. Cut out an arch as shown above. I started the arch 2 1/2″ in and went up 1 1/2″. Make sure you nail through the sides of the Front Side Trim pieces from step 9, pieces H, into the end edges of the footer, I.
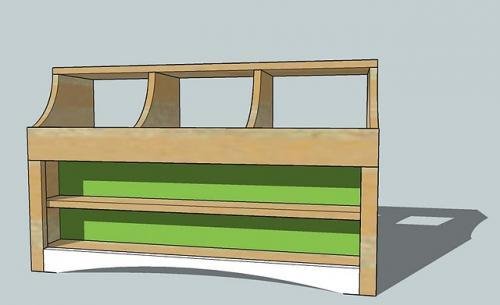
Step 10
Now add the remaining boards as trim to the back as shown here.
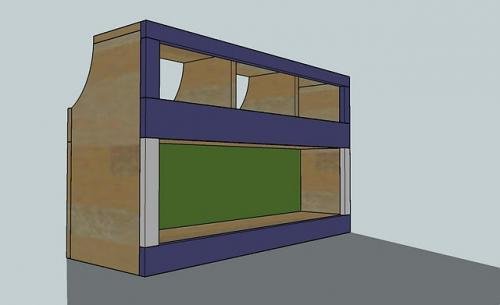
Finishing
Sand all surfaces, starting with a medium grit and finishing with fine. Wipe off the dust, fill any holes or gaps with wood filler, and sand smooth once dry. Apply primer if you're painting, then finish with your choice of paint or stain and seal with a durable clear topcoat. For outdoor projects, use exterior-rated primer, paint or stain, and sealer so the piece stands up to the weather.
Source (temporary): https://www.ana-white.com/woodworking-projects/market-base-graces-town-collection