Max Storage Dresser
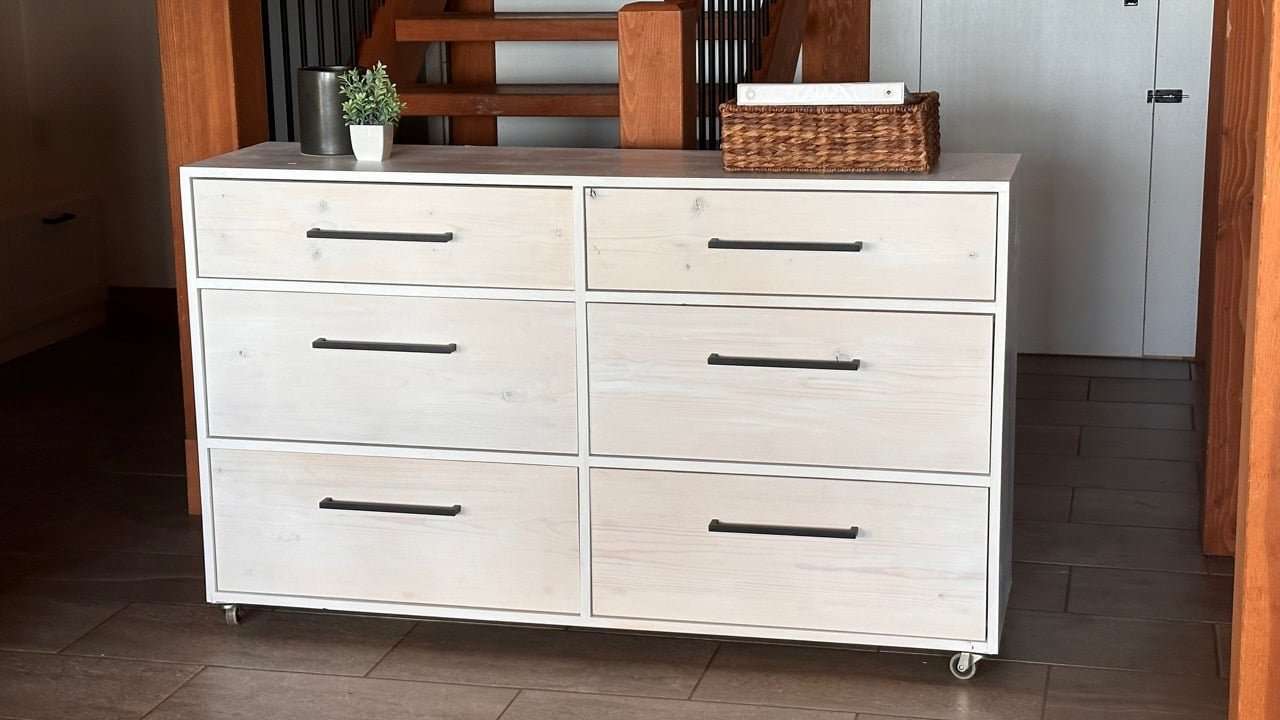
Build your own dress with maximum storage! You can customize the size for a perfect fit. This dresser is a no frills, frameless design that spares the ornate detail in favor of maximum storage. This dresser is perfect in closets, as a console table, or anywhere you need lots of storage in a sleek profile. This is a free step by step project plans with detailed diagrams, build video, shopping and cut list and more from
Specifications
| Project type | Buffet, Sideboard and Credenza Plans |
|---|---|
| Room | Bedroom |
| Difficulty | Advanced |
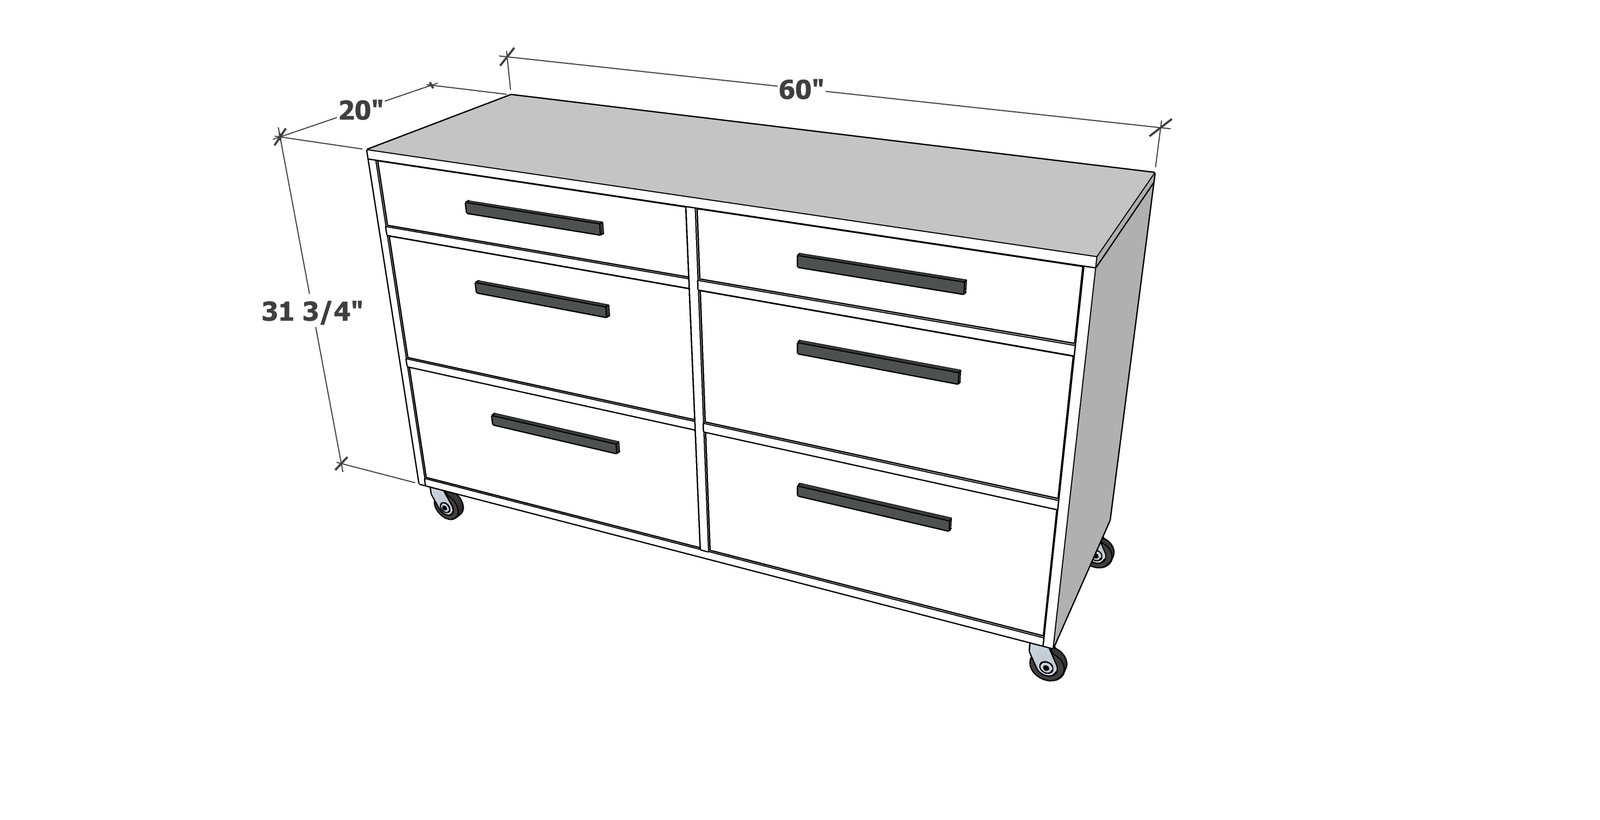
Dimensions
Use the size-specific shopping and cut lists below.
Shopping List
- (1) 4x8 sheet of 3/4" hardwood plywood
- (2) 4x8 sheets of 1/4" hardwood plywood or underlayment
- 4- 1x4 @ 8 feet long
- 2 - 1x2 @ 8 feet long
- 4 - 1x8 @ 8 feet long
- 1 - 1x6 @ 5 feet long
- 1 - 1x12 @ 10 feet long
- 1-1/4" pocket hole screws
- 1-1/4" and 3/4" brad nails
- wood glue
- (4) 3" caster wheels
- (6) knobs or handles
- (6) 18" euro style drawer slides
Cut List
Carcass
- 1 - 3/4" plywood @ 20" x 60" - top, edge band front and end edges
- 2 - 3/4" plywood @ 20" x 31" - sides, edge band front edge only
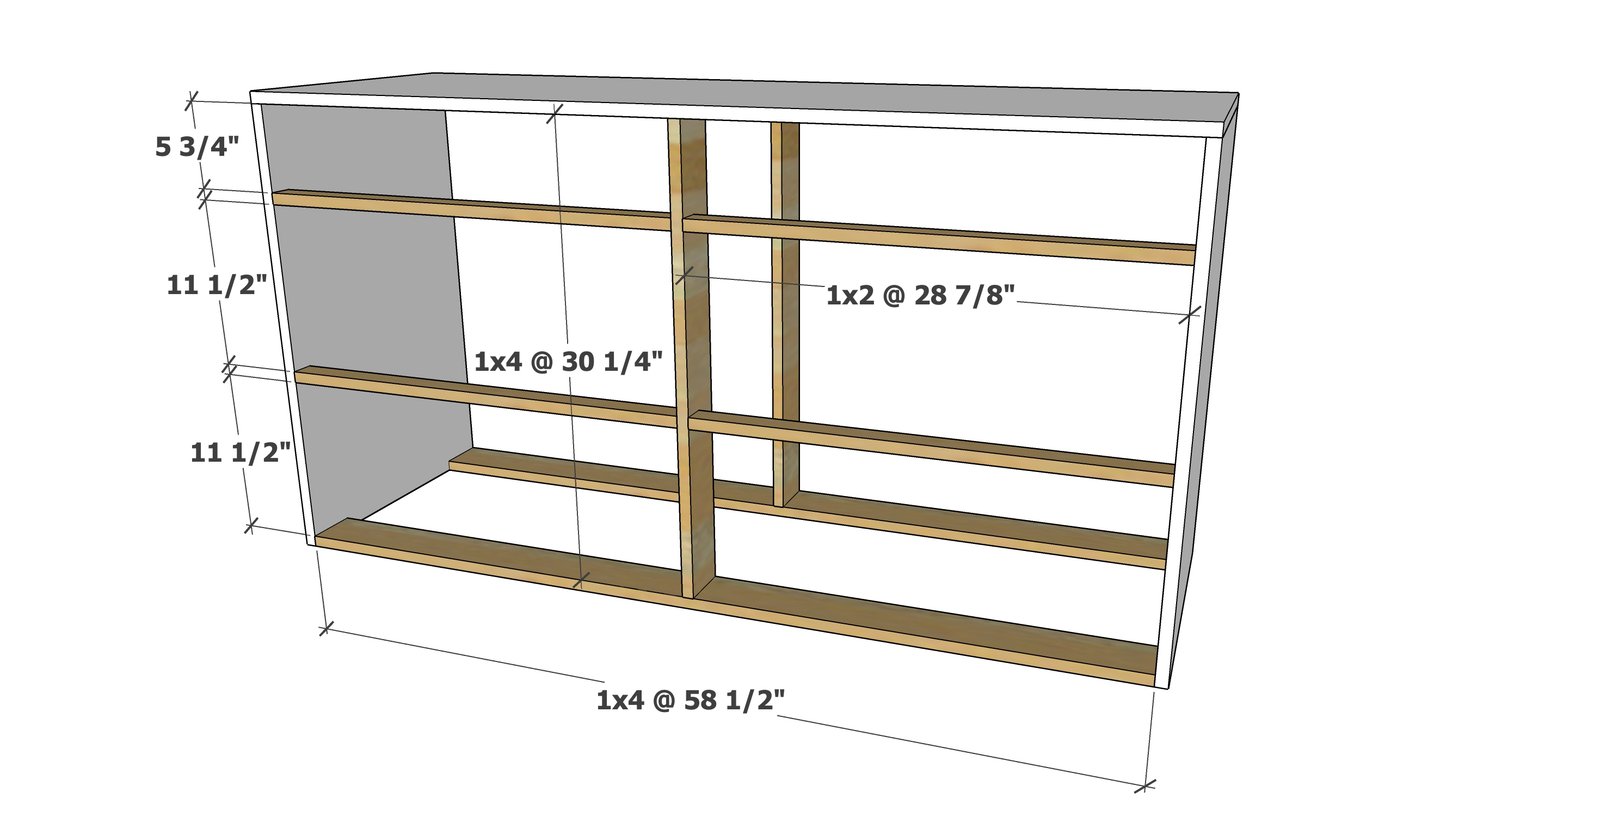
- 2 - 1x4 @ 58-1/2" - bottoms
- 2 - 1x4 @ 30-1/4" - center
- 4 - 1x2 @ 28-7/8" - between drawer trim
- 1 - 1/4" plywood @ 60" x 31-3/4"
Drawers
- 4 - 1x4 @ 20"
- 4 - 1x4 @ 26-3/8" - front and back, should be 2-1/2" less than opening width
- 8 - 1x8 @ 20"
- 8 - 1x8 @ 26-3/8" - front and back, should be 2-1/2" less than opening width
- 6 - 1/4" plywood @ 20" x 27-7/8"- drawer bottoms
- 2 - 1x6 @ 28-5/8" - top drawer faces
- 4 - 1x12 @ 28-5/8" - lower drawer faces
Tools
- measuring tape
- square
- pencil
- safety glasses
- kreg-jig
- drill
- circular saw
- compound miter saw
- nailer
- sander
- level
Step-by-step Instructions
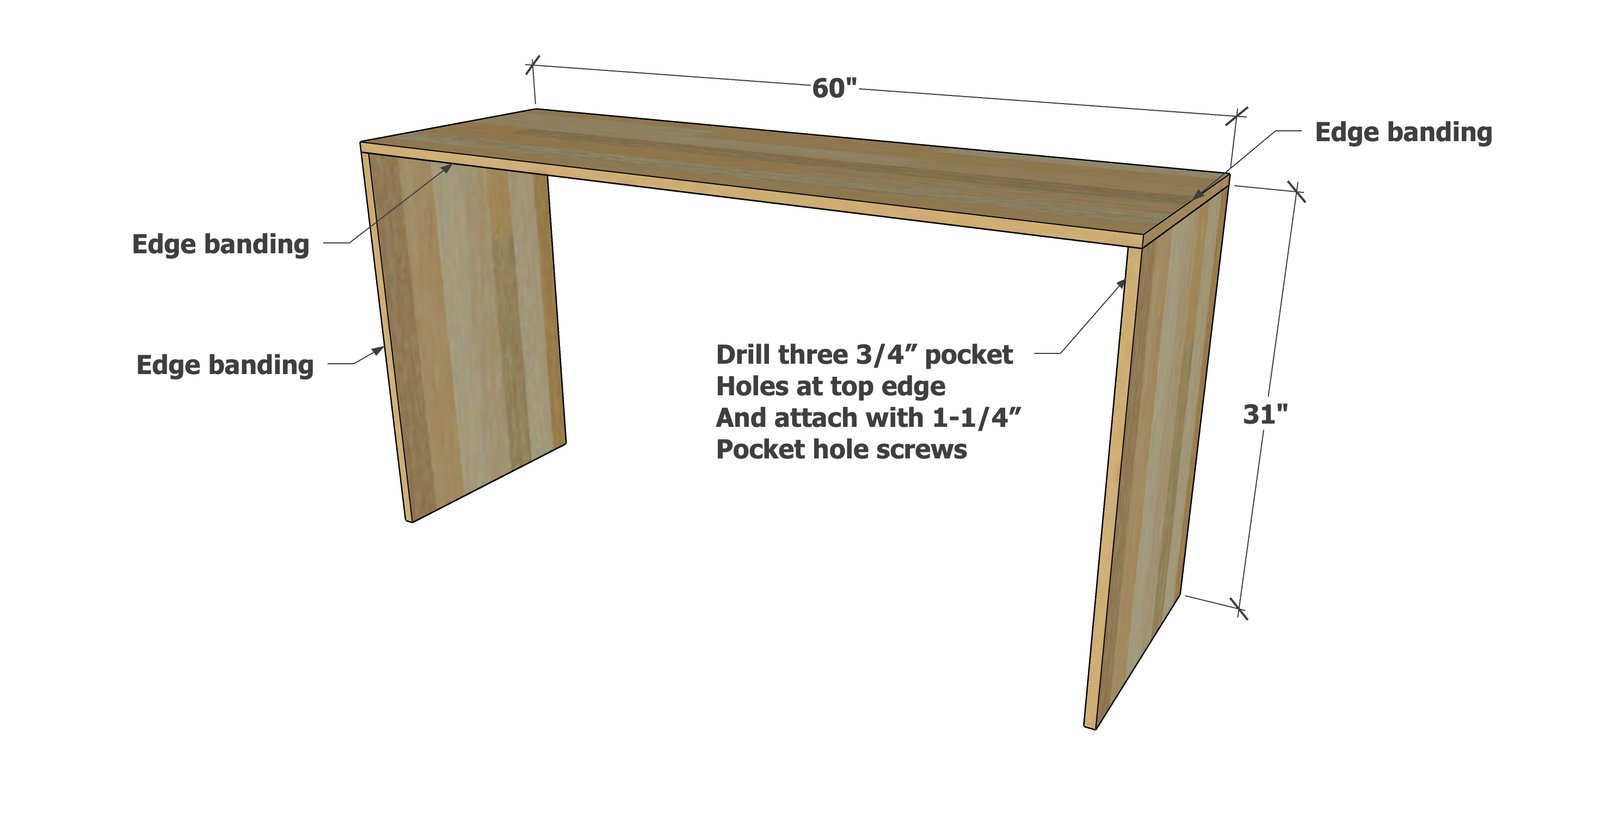
Drill 3/4" pocket holes along the inside edge of the sides.
Attach to the underside of the top with 1-1/4" pocket hole screws. TIP: First nail the top to the sides to hold in place. Then secure with pocket hole screws.
Attach the inner framing. This must be precise for the drawers to work out.
1x2 trim is not needed on the back.
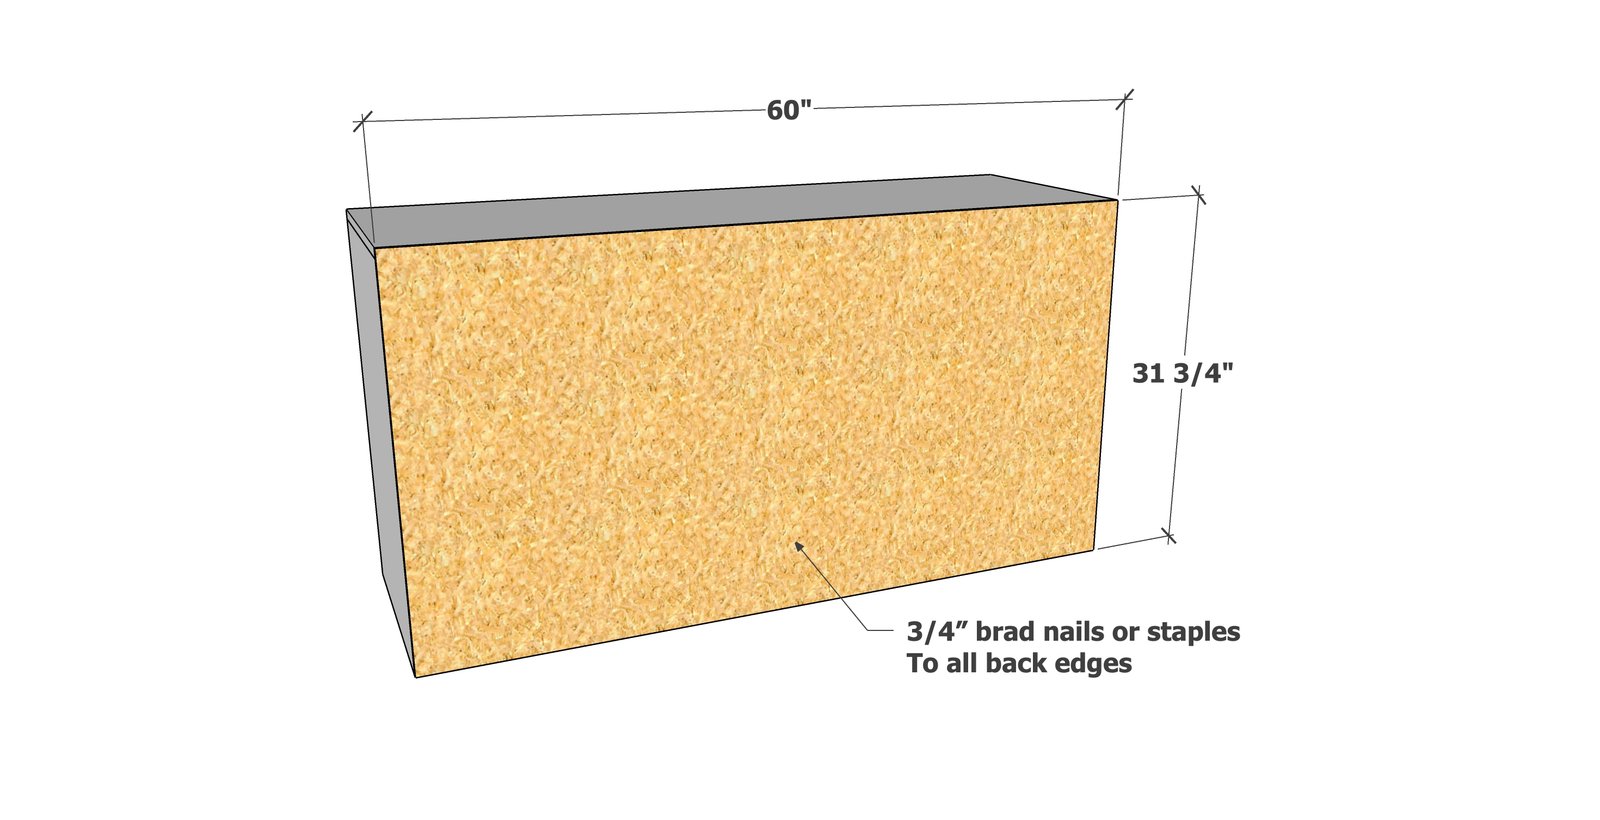
Apply glue and attach 1/4" plywood to the back.
Use the 1/4" plywood to square up the carcass as you attach it.
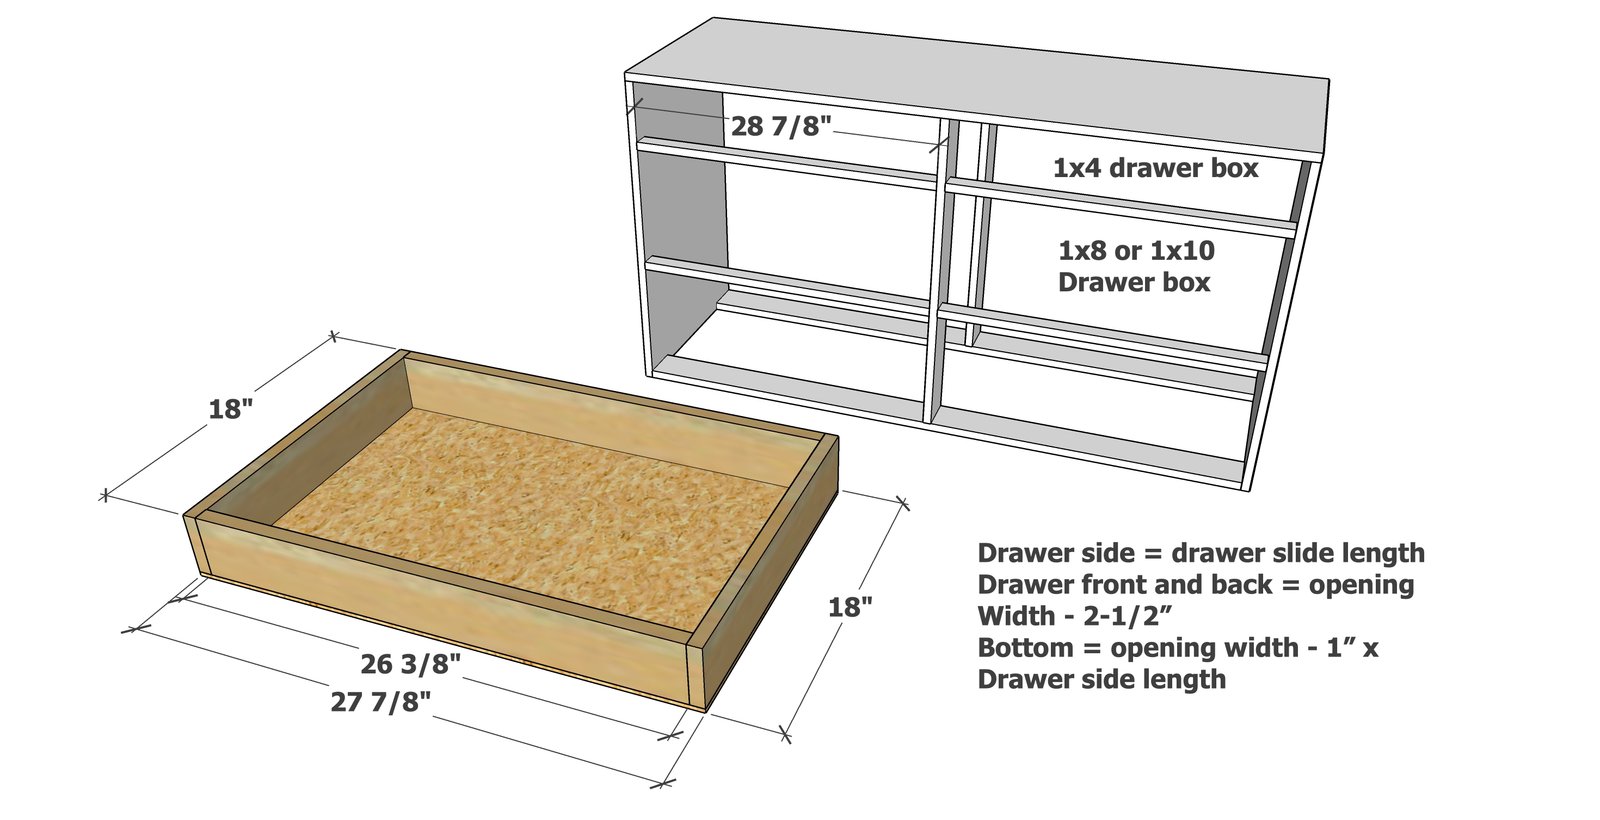
Measure the openings for your drawers and confirm they match the diagram, or adjust as needed.
Build the drawers with 1-1/4" brad nails and glue. Attach the bottom with 3/4" brad nails or staples and glue.
Check to make sure your cabinet is level in all directions.
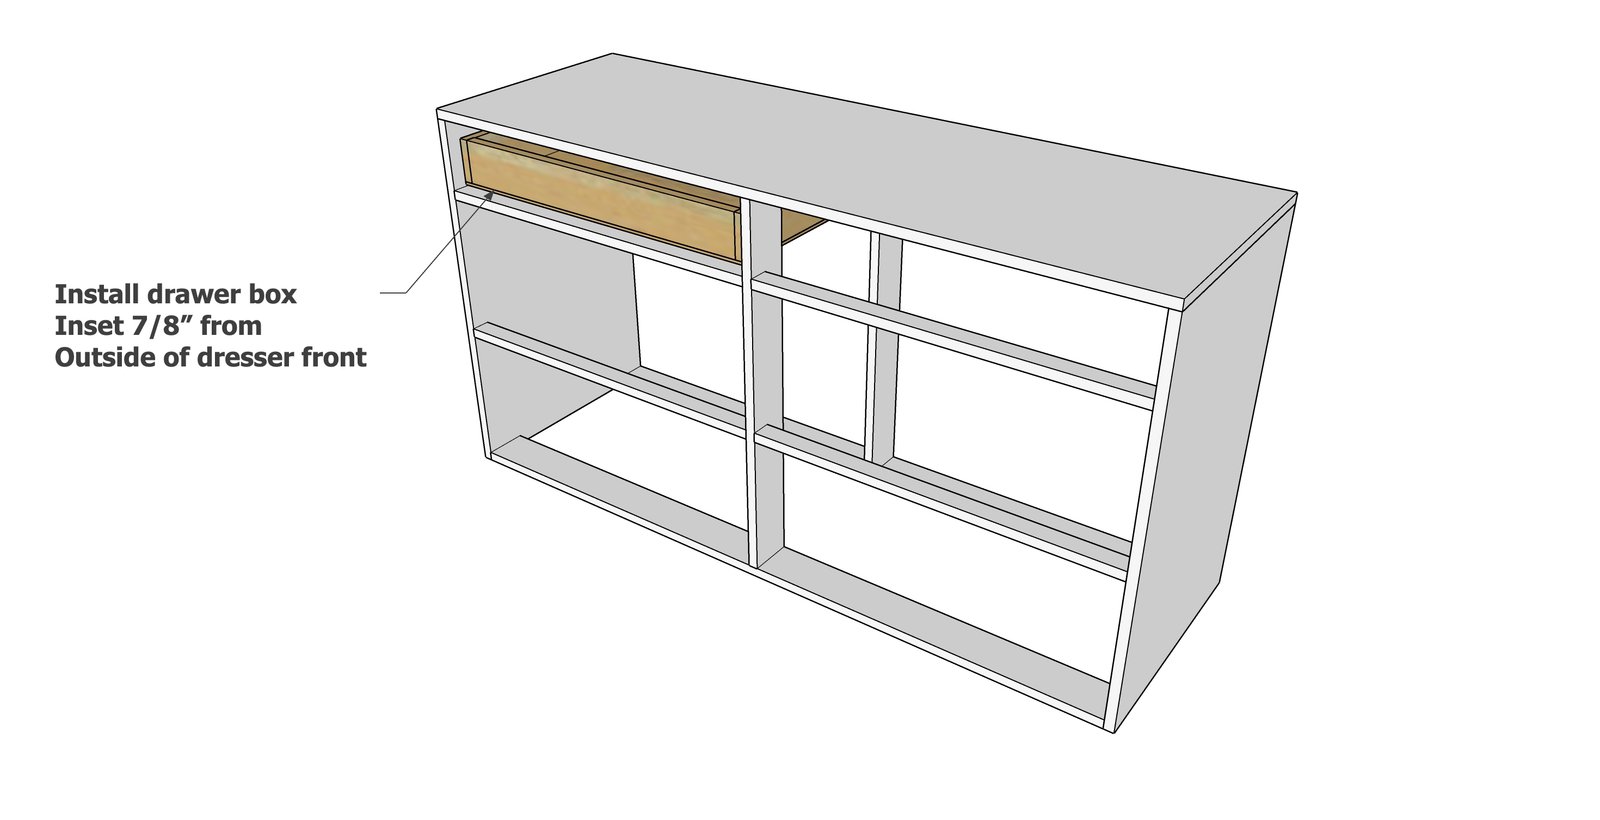
Install the cabinet member inset in the opening 7/8". Here's a video tutorial on installing these drawer slides.
Step 6
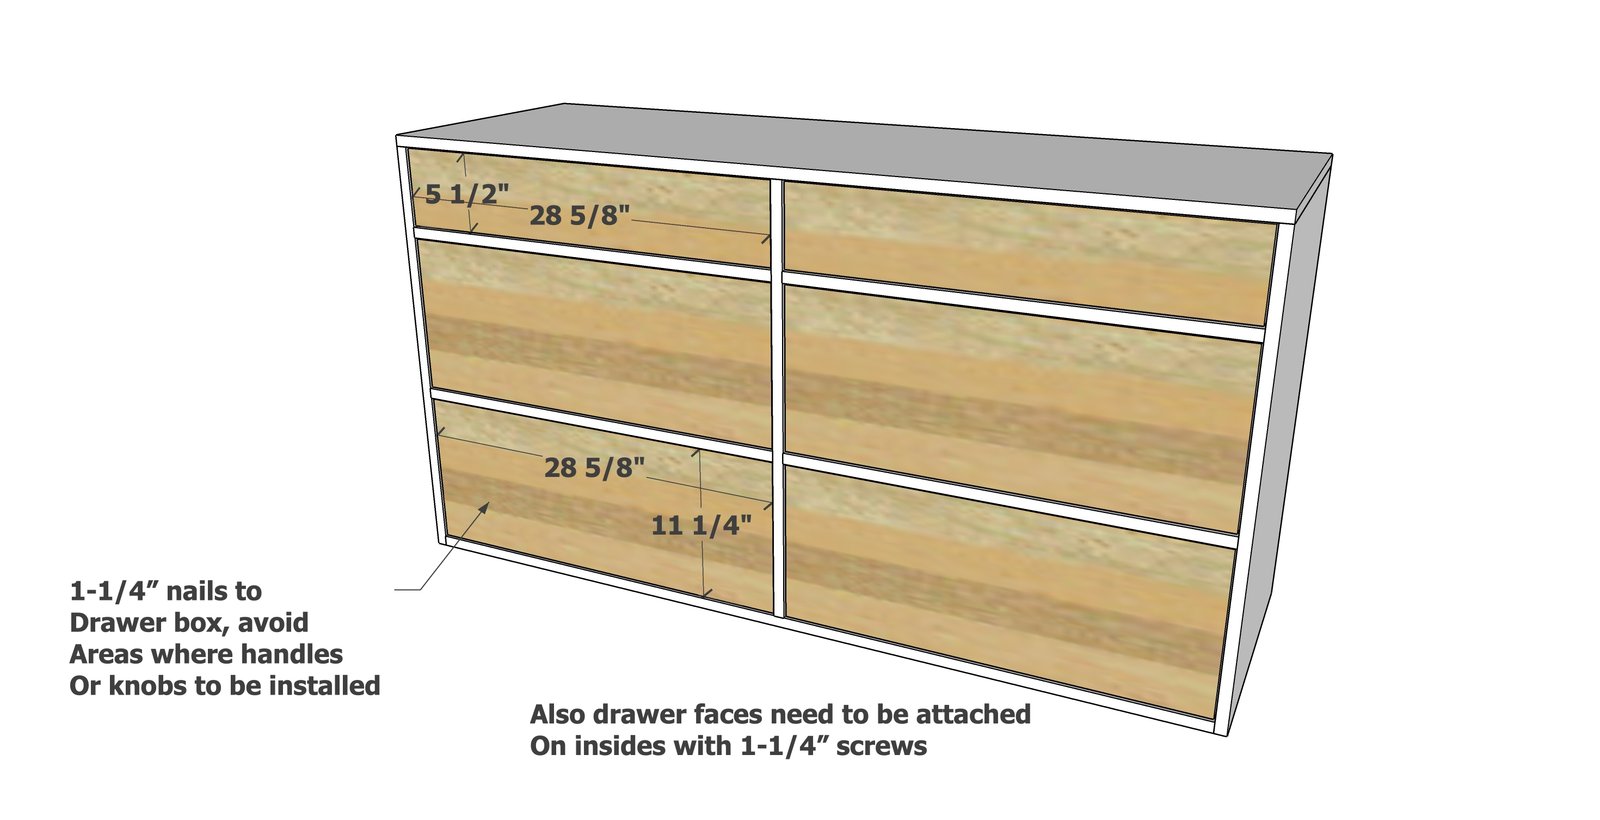
TIP: Paint or stain drawer faces first. It may easier to attach hardware before the drawer face is attached to the drawer box. Attach drawer faces to the drawer boxes with 1-1/4" brad nails, so there is an even 1/8" gap around all four sides. Further secure from inside with 1-1/4" screws (I use pocket hole screws)
Step 7
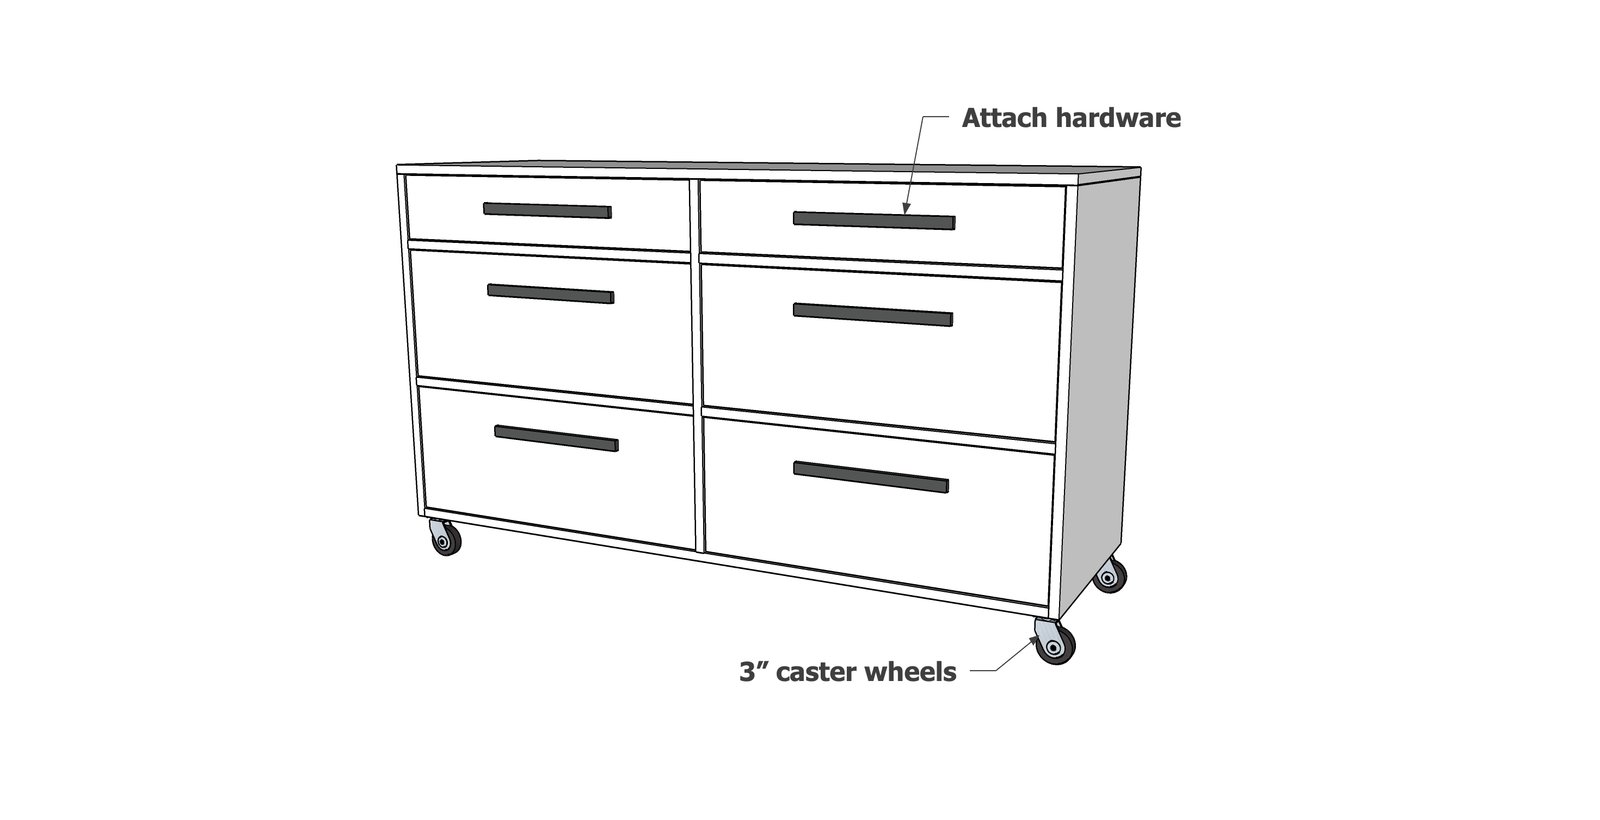
Attach handles to the drawer faces and caster wheels to the base.
Finishing
Sand all surfaces, starting with a medium grit and finishing with fine. Wipe off the dust, fill any holes or gaps with wood filler, and sand smooth once dry. Apply primer if you're painting, then finish with your choice of paint or stain and seal with a durable clear topcoat. For outdoor projects, use exterior-rated primer, paint or stain, and sealer so the piece stands up to the weather.
Source (temporary): https://www.ana-white.com/woodworking-projects/max-storage-dresser-easy-modify-size