Media Hutch for Basic Collection
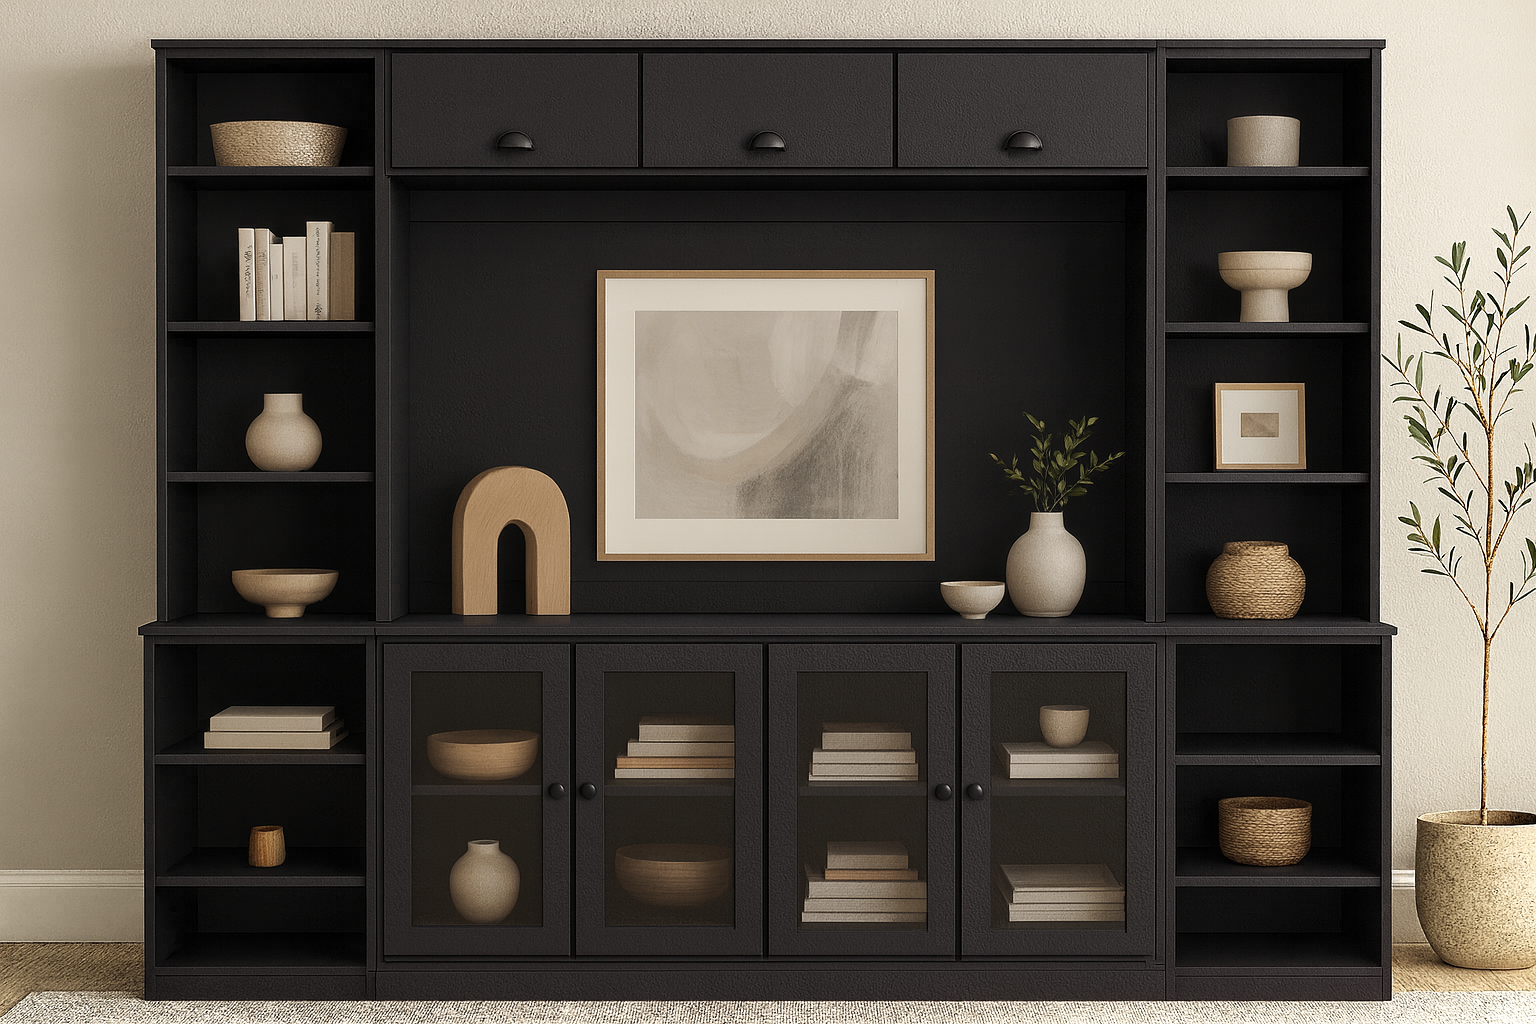
Free PDF Plans – Simple Media Wall Hutch Works with plans from our Basic Collection (all free) Download this to build a Media Wall Hutch, a center hutch designed to integrate perfectly with your custom storage wall. This upper cabinet is built to span over a television or artwork, adding both functional storage and architectural presence to your built-in. Features include: • Clean lines and three upper drawers or cubbies for concealed storage • Designed to integrate with standard 16" side hutch cabinets • Finished opening accommodates most wall-mounted TVs or framed artwork • Crown-style nosing for a built-in look • Works with base units that are 30" high and 15 1/2" deep This free PDF includes: • Precise cut list, plywood layout guide, and joinery instructions • Assembly diagrams with measurements • Material and hardware recommendations • Scaled for painted finishes or wood stains Perfect for intermediate builders or advanced DIYers looking to complete their custom media wall. Download instantly—no email required.
Specifications
| Project type | Hutch Plans |
|---|---|
| Room | Storage Solutions |
| Style | Farmhouse Furniture |
| Difficulty | Intermediate |
| Estimated cost | $100-$150 |
Shopping List
- 2 – 10′ 1×12 Pine or Whitewood Boards (Pottery Barn Printer Collection is built with Particle board and pine boards)
- 2 – 8′ 1×3 Pine or Whitewood Boards (Look for furring strips in good condition to save tons)
- 1 – 8′ 1×2 Pine or Whitewood Board
- 64″ of 3/4″ Edging or Nosing or Beading (to trim out the top face of the hutch)
- 1 – sheet of 1/4″ sanded plywood (for the back)
- 1 – 6′ 1×10 or pine select 1/2 x 10 for thinner doors (for the doors)
- 3 sets of self closing surface mount overlay hinges
- 3 – pulls, handles or knobs 3/4″ brad nails
- 1-1/4″ brad nails
- 2″ brad nails
- Pocket hole screws or 2″ self tapping screws
- Wood glue
- Finishing supplies
Cut List
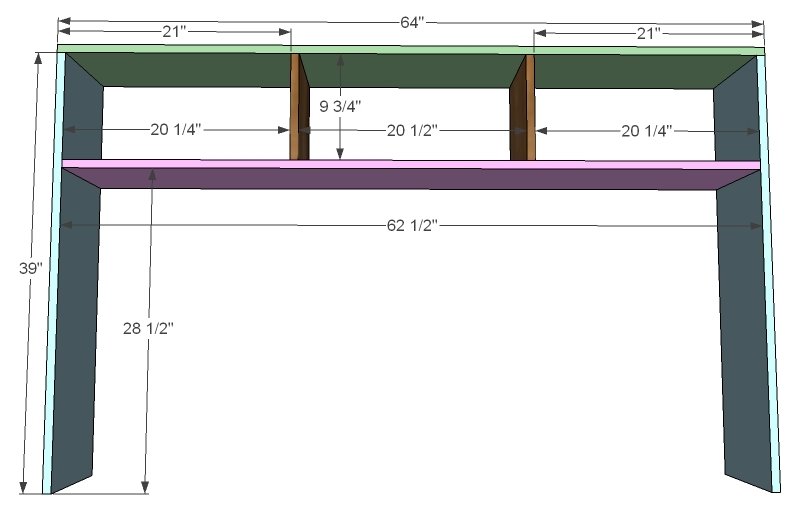
- 2 – 1×12 Boards @ 39″ (Box Sides)
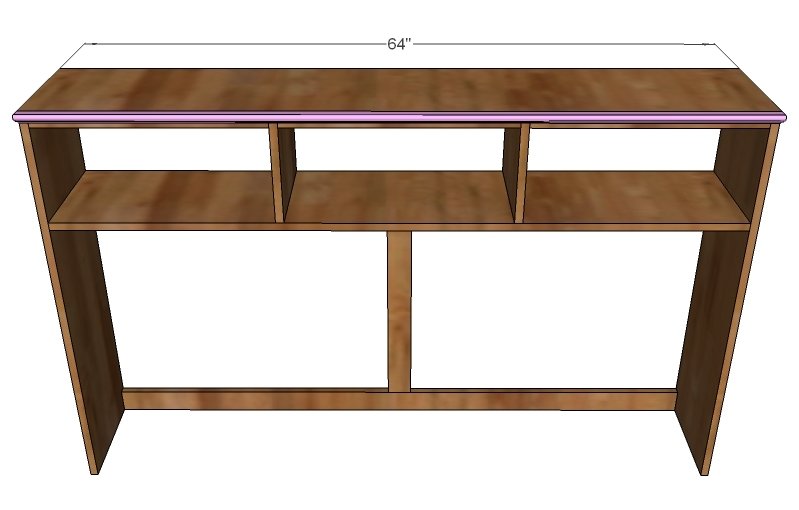
- 1 – 1×12 Board @ 64″ (Box Top)
- 1 – 1×12 Board @ 62 1/2″ (Shelf)
- 2 – 1×12 Boards @ 9 3/4″ (Cubby Dividers)
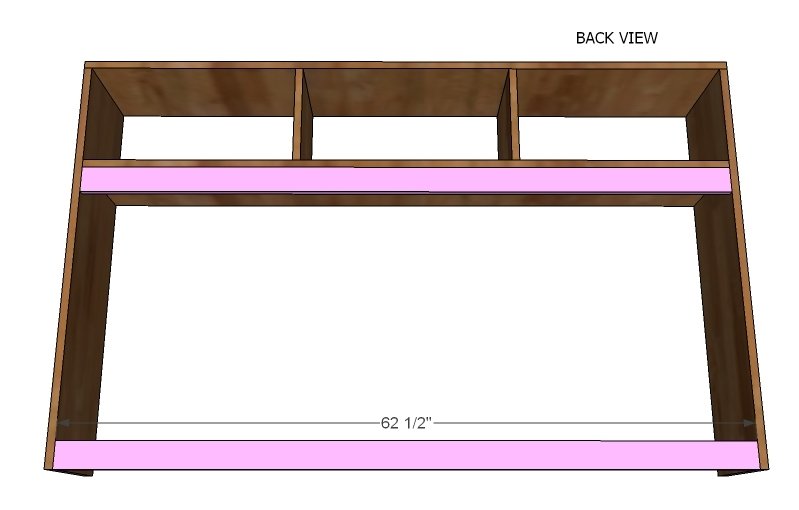
- 2 – 1×3 Boards @ 62 1/2″ (Back Frame)
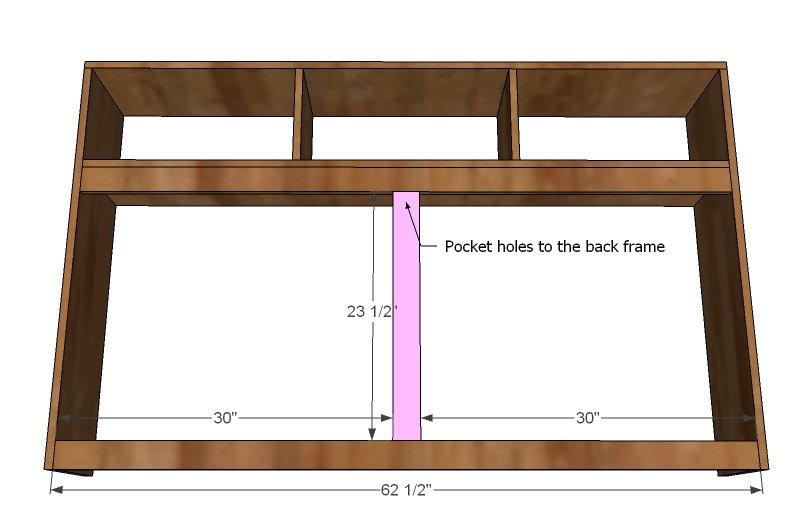
- 1 – 1×3 Board @ 23 1/2″ (Back Frame Support)
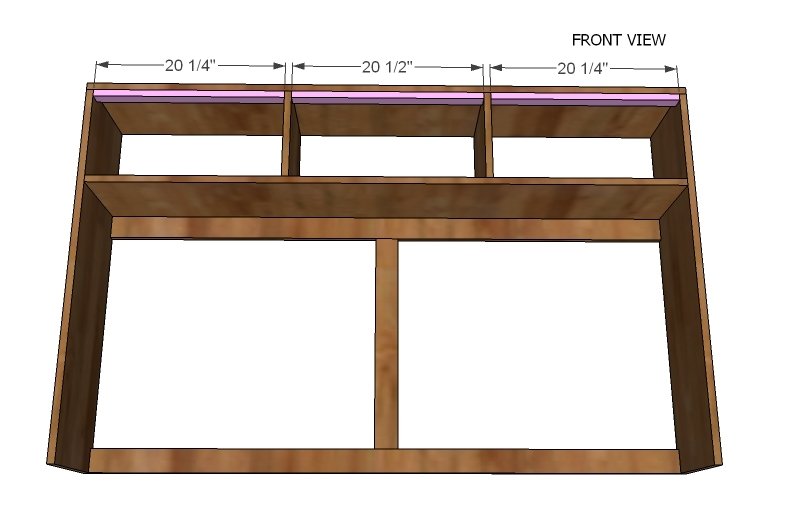
- 2 – 1×2 @ 20 1/4″ (Side Cubby Top Trim)
- 1 – 1×2 @ 20 1/2″ (Center Cubby Top Trim)
- 1 – 3/4″ Edge Trim @ 64 (Top Trim)
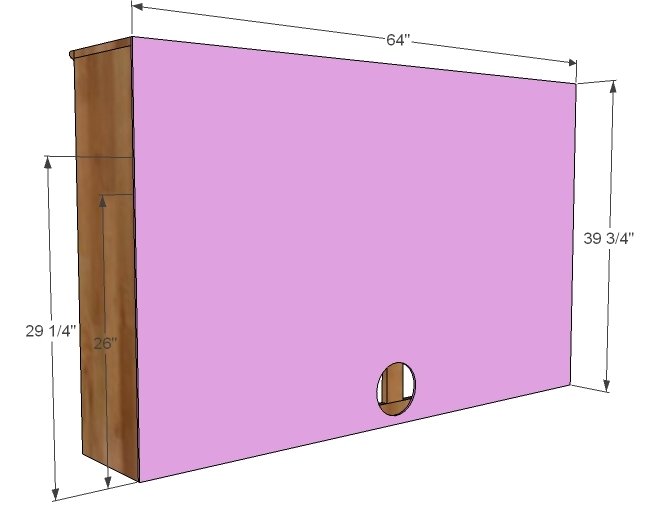
- 1 – 1/4″ Plywood @ 64″ x 39 3/4″ (Back)
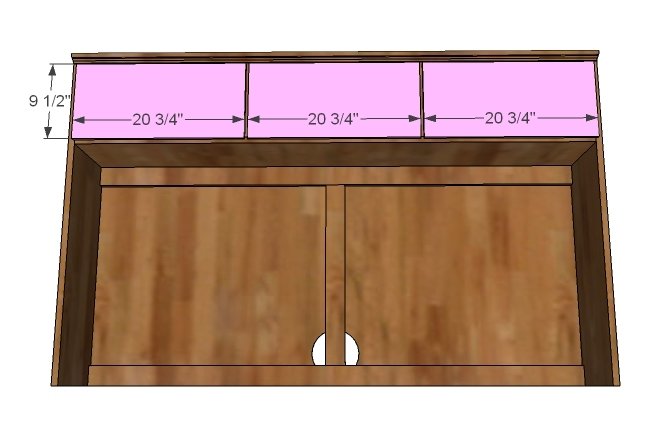
- 3 – 1/2 x 10 Boards @ 20 3/4″ (Door Faces) (Can also use a 1×10 board, 3/4″ thick instead of 1/2″ thick)
Tools
- measuring tape
- square
- pencil
- hammer
- safety glasses
- hearing protection
- kreg-jig
- drill
- circular saw
- jigsaw
- sander
Step-by-step Instructions
Build the Box
As you know, my preferred method to build boxes is pocket hole screws. I just find I am able to build a square project on the very first try, and the pocket hole screws are much easier to start, then say lining up and countersinking screws from the outside. I use a Kreg Jig™. You could also use glue and a finish nailer, being that this is a hutch, and no one will be sitting or climbing on it. It’s up to you. If you do use a finish nailer, use 2″ finish nails and wood glue.
Back Frame
Add the back frame to the back. This gives you something to nail the back plywood to and adds support and structure to the hutch. Keep edges flush to the back, and make sure you use pocket hole screws to attach the top back frame piece to the shelf (or you could use nails from the top).
Center Support
Because 62 1/2″ is a long way for plywood to go without support, the center support with tie it all in. Attach to the back frame with pocket hole screws.
Top Trim
Use 1 1/4″ nails and glue to attach the top trim pieces inside the cubbies. Your piece should begin to feel much less flimsy at this stage.
Step 5
Back
The back plywood will reinforce everything, so make sure you nail to all of the shelves and back frames. Nail to anything that you can to reinforce all joints. Just make sure when you nail into the back frame that you are using brad nails less than 1″ long, or you will go through the board. Use glue. Also, make sure your project is square before applying the plywood back.
Doors
The final step is to add the doors. The doors are simply 1x10s, 1/2″ stock unless you choose to use 3/4″ stock for the glass doors below. Simply attach with surface mount hinges, designed for partial overlay doors. I like the self closing ones myself.
Finishing
Sand all surfaces, starting with a medium grit and finishing with fine. Wipe off the dust, fill any holes or gaps with wood filler, and sand smooth once dry. Apply primer if you're painting, then finish with your choice of paint or stain and seal with a durable clear topcoat. For outdoor projects, use exterior-rated primer, paint or stain, and sealer so the piece stands up to the weather.
Source (temporary): https://www.ana-white.com/woodworking-projects/media-hutch-basic-collection-free-woodworking-plans