The Media Hutch
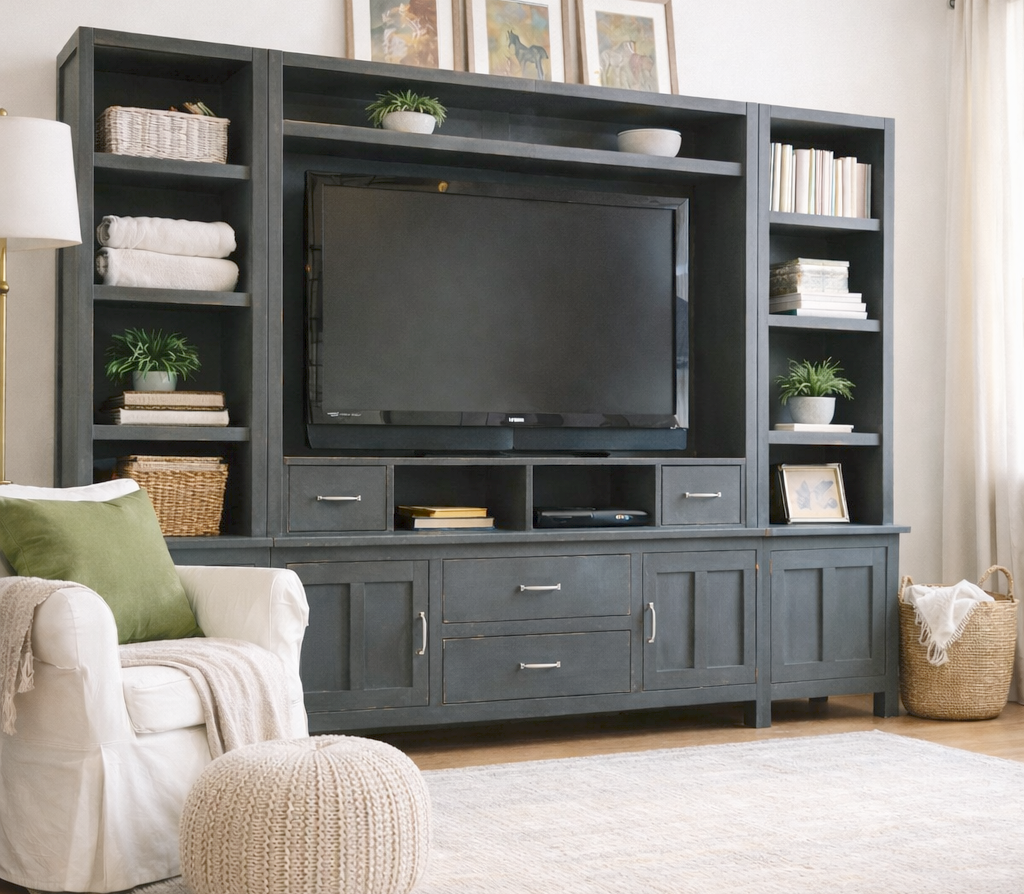
A to build your own media wall - this large media hutch to match the Board and Batten Media Console. Features two large open shelves for controllers, two drawers for remotes, and a large shelf to customize the fit of the tv and store additional controllers, games, or books. Board and Batten Collection – Classic and cozy board and batten style furniture you can build yourself. Perfect for bedrooms, guest spaces, and rustic-inspired homes. View the Full Collection
Specifications
| Project type | Media and Entertainment Centers |
|---|---|
| Room | Storage Solutions |
| Style | Farmhouse Furniture |
| Difficulty | Intermediate |
| Estimated cost | $50 - $100 |
Dimensions
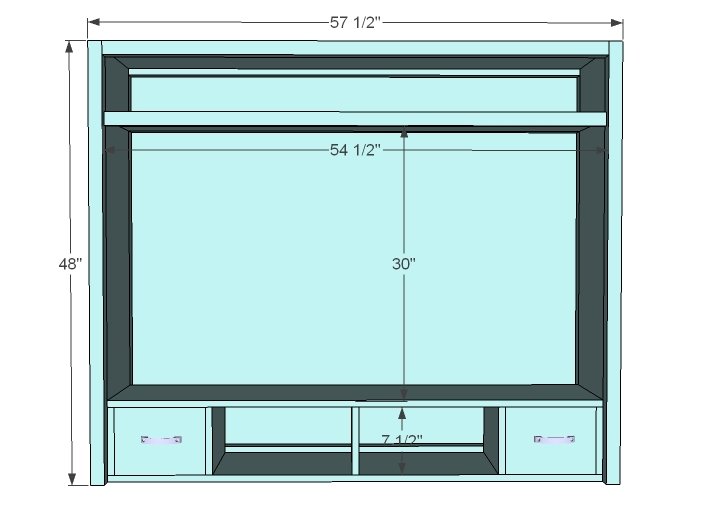
Use the size-specific shopping and cut lists below.
Shopping List
- 1 – 1×12 @ 8 feet long
- 2 – 1×12 @ 10 feet long
- 6 – 2×2 @ 8 feet long 1 – 1×2 @ 8 feet long
- 1/4″ plywood for back (to do both side hutches and the center, you can use the same piece of plywood)
- 2 – 1×8 @ 10″ long (scraps for drawer fronts)
Cut List
- 2 – 1×12 @ 48″ (Sides)
- 4 – 1×2 @ 11 1/2″ (Trim for sides, cut it to match the width of your 1x12s)
- 4 – 2×2 @ 48″ (Legs)
- 4 – 2×2 @ 54 1/2″ (Front/Back Trim)
- 4 – 1×12 @ 54 1/2″ (Shelves/Top)
- 1 – 1×2 @ 54 1/2″ (Shelf Trim)
- 1 – 1/4″ plywood @ 48″ x 57 1/2″ (Back)
- 5 – 1×12 @ 7 1/2″ (Assuming your 1×8 drawer fronts are 7 1/4″ wide – adjust to fit your 1x8s)
- 2 – 1×8 @ 10″ (for 10 1/4″ wide drawers)
Tools
- measuring tape
- square
- pencil
- hammer
- safety glasses
- hearing protection
- kreg-jig
- drill
- circular saw
- nailer
- sander
- countersink drill bit
Step-by-step Instructions
Sides
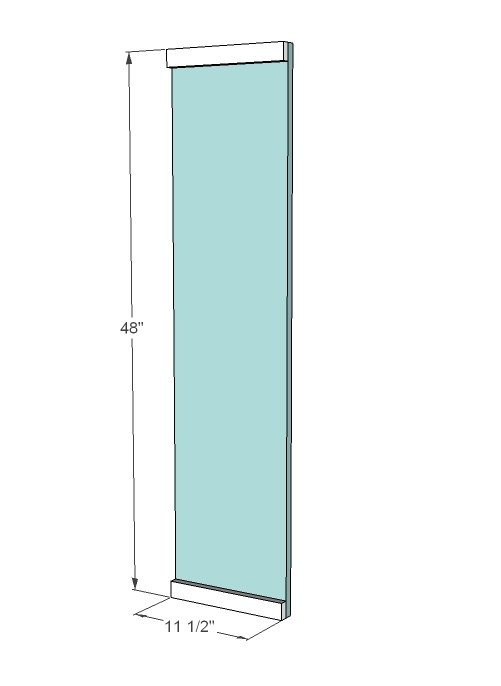
As we did the side on the rest of the collection, start by trimming out the top and bottom. I didn’t have a nailer handy, so I used 1 1/4″ screws from the inside (flat side) countersunk and glue.
Legs
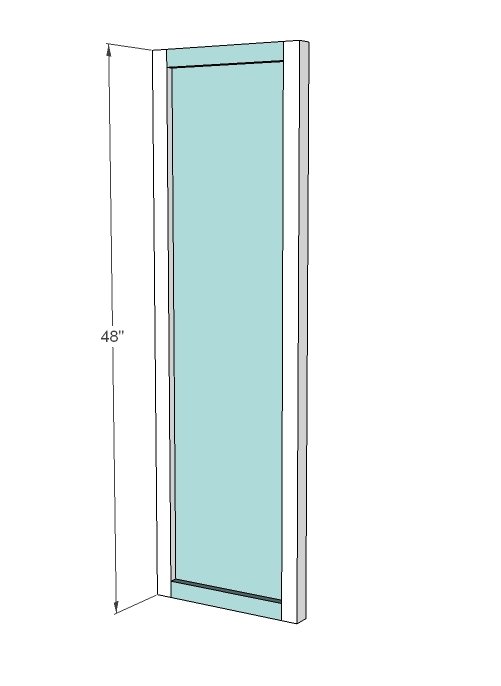
These would be the legs if we were making a bookshelf, so I’ll refer to them as legs. I used pocket hole screws to attach, but you can also use 2 1/2″ finish nails and glue or countersunk trim screws (I believe trim screws come in a 2 5/8″ length, which is perfect).
Taking Shape
You can do step 4 first, step 3 first – do what makes sense for you. Attach the 2x2s with either pocket hole screws (2 1/2″ long) or the trim screws from the outside.
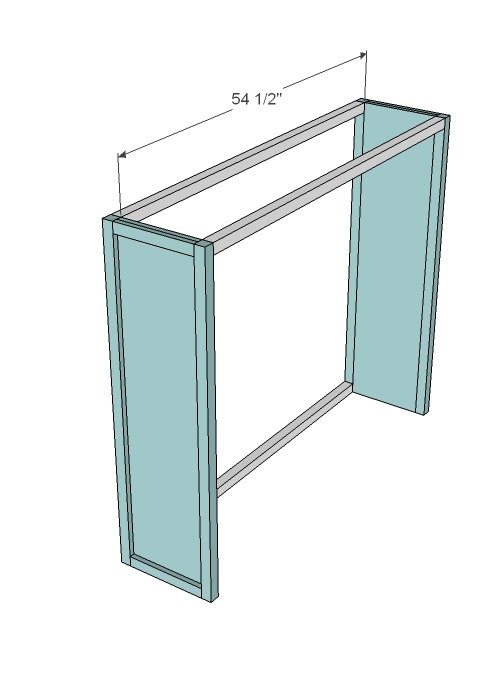
Top
Attach the top to the sides and front/back trim with either pocket hole screws or the trim screws and glue.
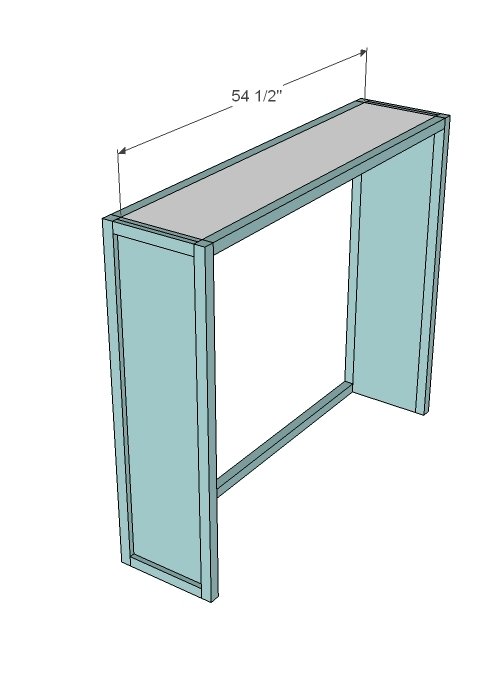
Step 5
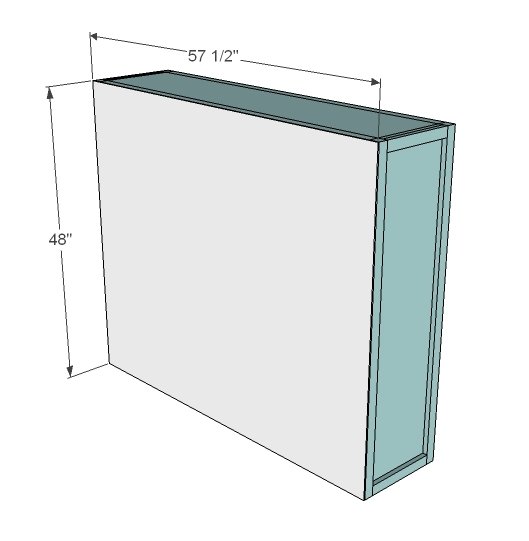
Back
I highly recommend a back on the top just because the piece is so large, and the back adds so much strength. If your shelf is fixed, attach to the shelf too with 1 1/4″ screws and glue.
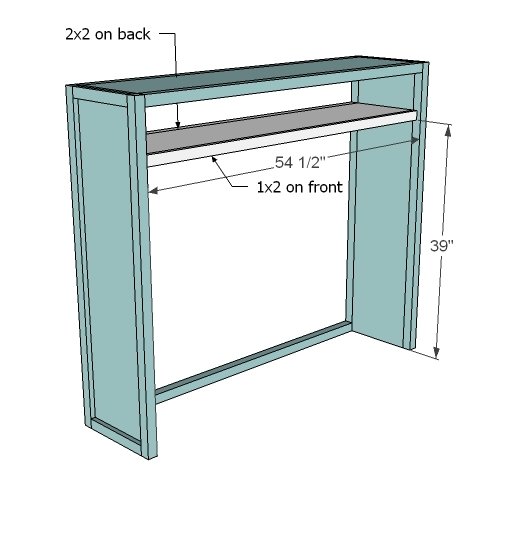
Build the Controller Shelf
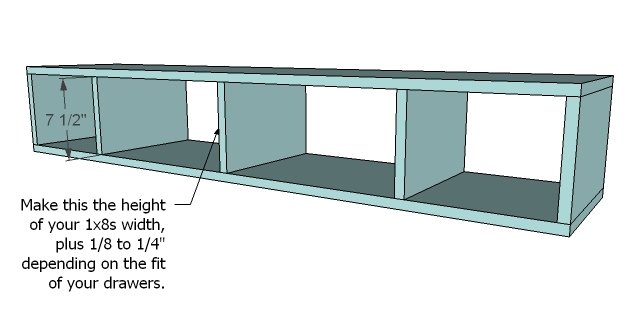
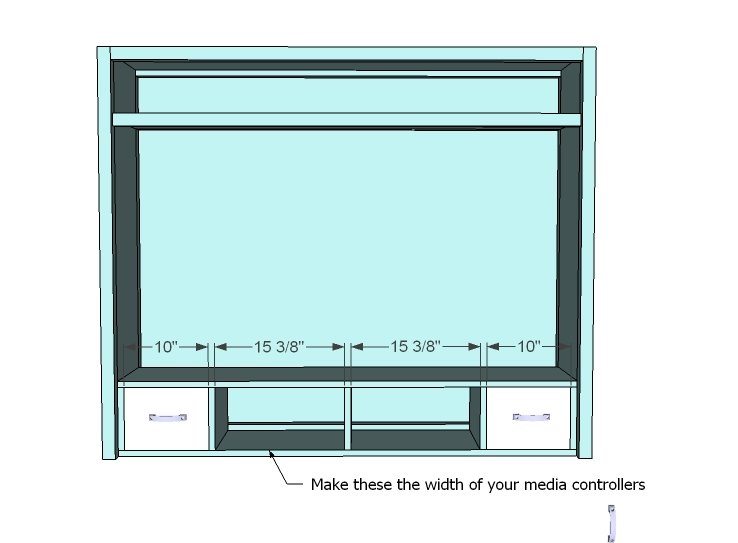
The controller shelf not only adds dimension to the look of the piece, not to mention increased useability, but it also strengthens up the base unit. Measure your 1x8s drawer fronts (you should have some leftover from the media base unit) and cut your 1×12 dividers to 1/8″ (tight fit) to 1/4″ (loose fit) longer than the width of the 1x8s. Also, measure the width of your controllers (as shown below) and make your two center cubbies a width fit for your controllers.
Adding the Controller Shelf
We screwed the controller shelf directly to the bottom of the hutch. There is a 1 1/2″ gap behind the controller shelf for wires. The drawer fronts are simply 1x8s on hinges – perfect spot to hide remotes and to place charging cords.
Assembly
When we assembled the entire unit, we screwed all of the pieces together and also anchored to the wall behind the hutch. Safety first!
Finishing
Sand all surfaces, starting with a medium grit and finishing with fine. Wipe off the dust, fill any holes or gaps with wood filler, and sand smooth once dry. Apply primer if you're painting, then finish with your choice of paint or stain and seal with a durable clear topcoat. For outdoor projects, use exterior-rated primer, paint or stain, and sealer so the piece stands up to the weather.
Source (temporary): https://www.ana-white.com/woodworking-projects/media-hutch-board-and-batten-collection