Media Hutch (Rebecca Media Suite)
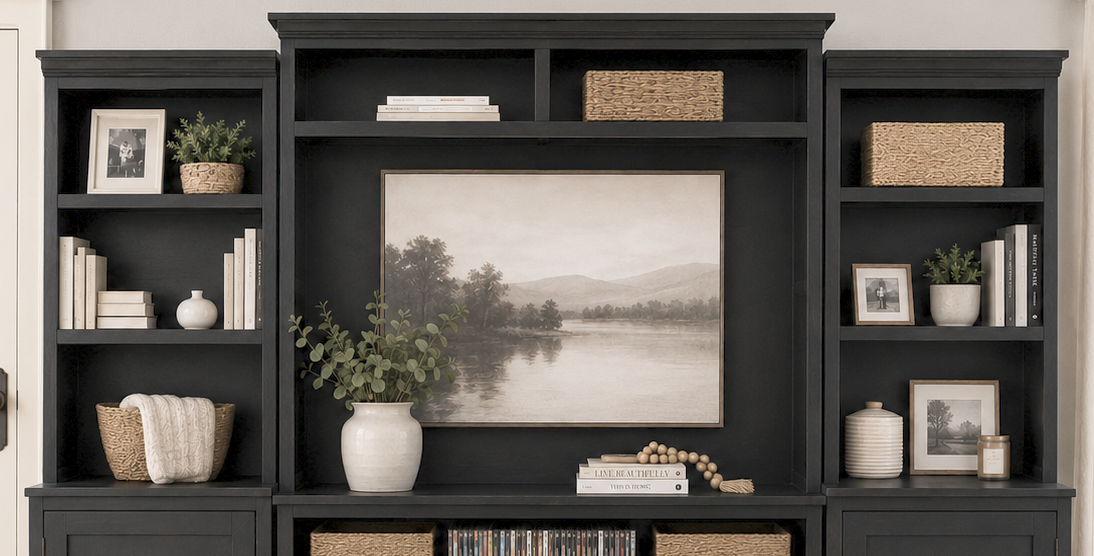
A hutch can dress up a tv and make it a beautiful focal point in your living room. This woodworking plan is adjustable to fit your tv. Pair this hutch with our center console plans and the rest of our Rebecca Media Suite collection. All plans are free and include step by step diagrams, shopping list and cut list.
Specifications
| Project type | Hutch Plans |
|---|---|
| Room | Storage Solutions |
| Style | Cottage Style Furniture Plans |
| Difficulty | Advanced |
Dimensions
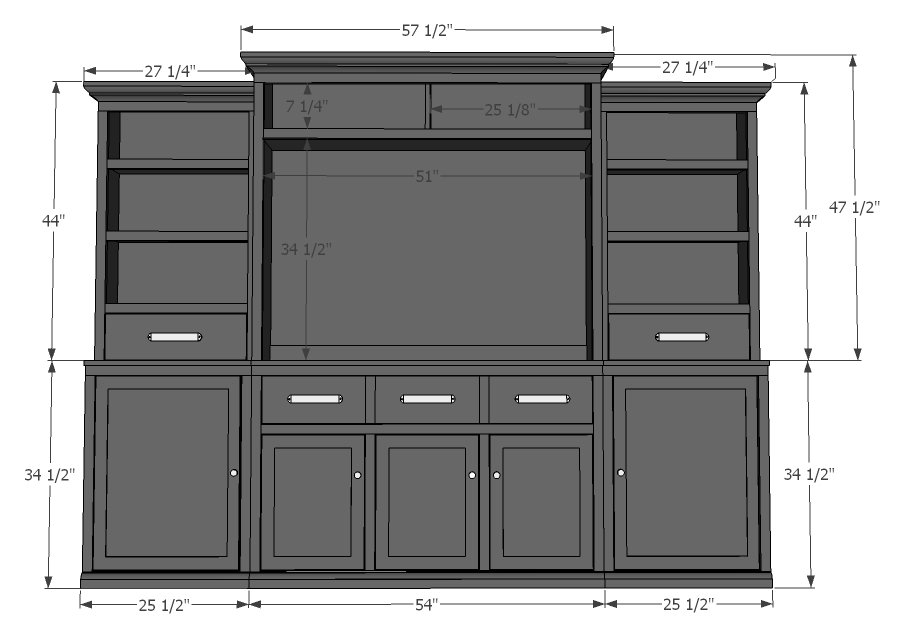
Use the size-specific shopping and cut lists below.
Shopping List
- 1- sheet 3/4" plywood
- 1- sheet 1/4" plywood
- 3- 8ft 1x2's
- 1- 8ft 1x3
- 1- 8ft 1x4
- 83" of molding for top
Cut List
3/4" Plywood
- 2 @ 11 3/4" x 46 3/4"
- 1 @ 11 3/4" x 57 1/2"
- 1 @ 11 3/4" x 52 1/2"
- 1 @ 11 3/4" x 10 3/4"
1x2's
- 2 @ 43 1/2"
- 1 @ 51"
- 1 @ 57 1/2"
1x3's
- 1@ 52 1/2"
1x4's
- 1 @ 54"
Moulding
- 1 @ 57 1/2" (cut on miter, make your own measurements before cutting)
- 2 @ 11 3/4" (cut on miter, make your own measurements before cutting)
Tools
- measuring tape
- square
- pencil
- hammer
- safety glasses
- hearing protection
- kreg-jig
- drill
- compound miter saw
- table saw
- nailer
- sander
- staple gun
- level
- countersink drill bit
Step-by-step Instructions
Step 1
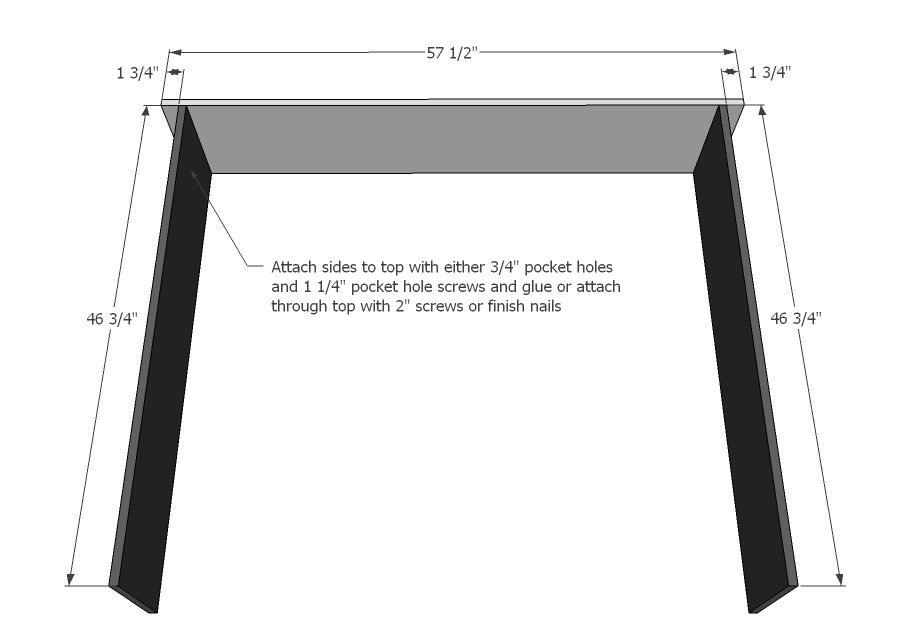
Attach top to sides. You can use your pocket hole jig or screws countersunk here.
Step 2
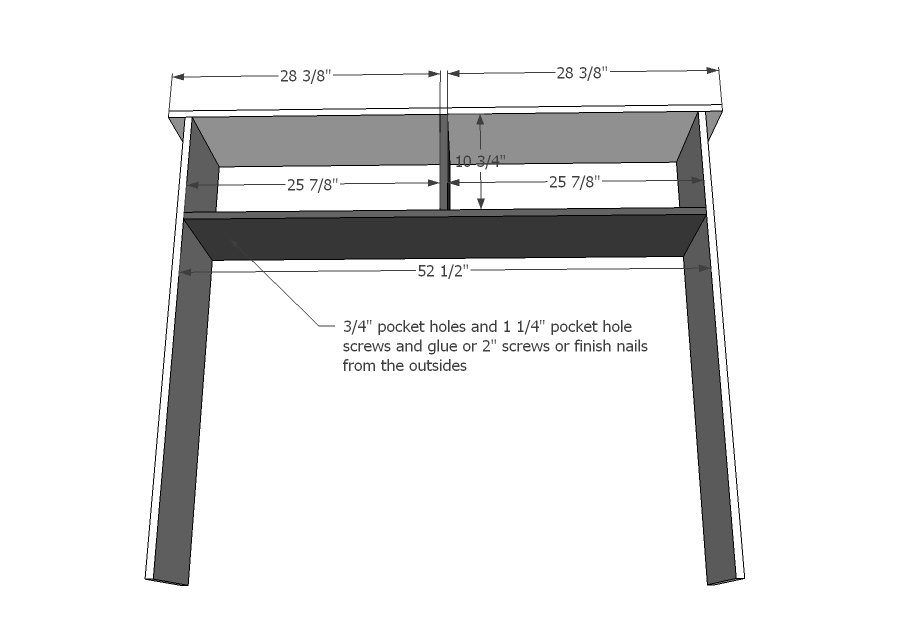
Now add the shelf and dividers.
Step 3
And the back support.
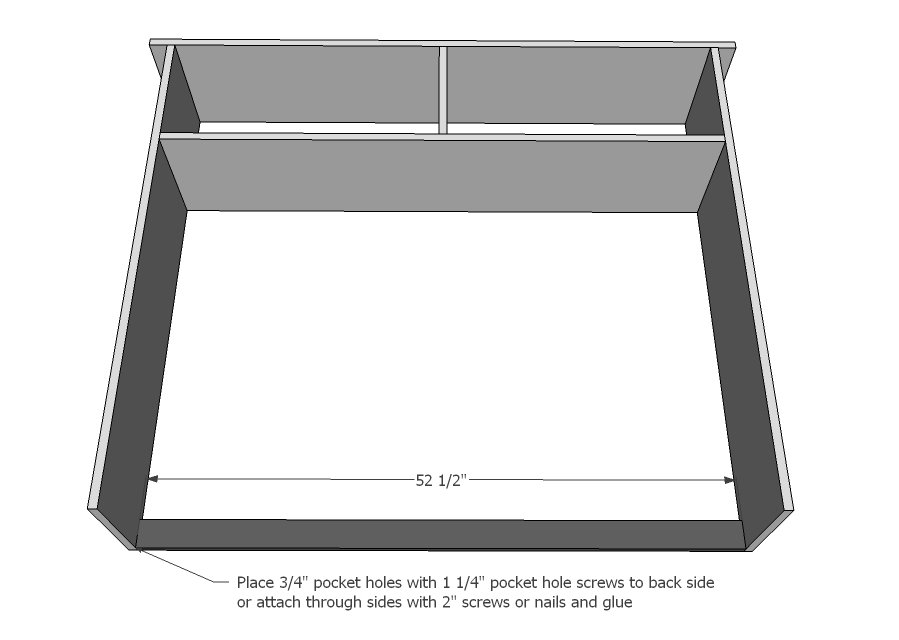
Step 4
Attach face frame pieces to box as shown here. If you have a pocket hole jig, build first, the attach.... Also see Rebecca's note next.
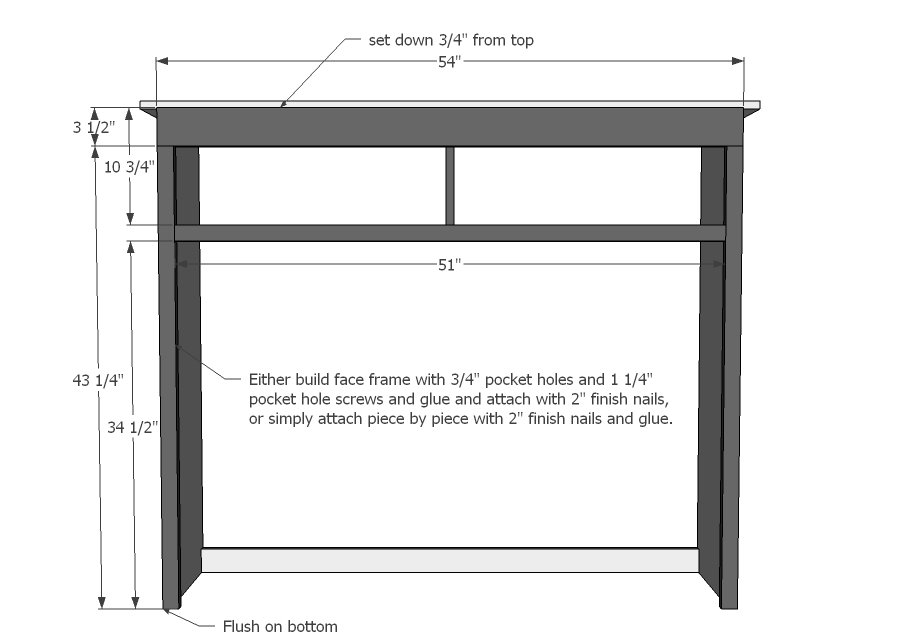
Step 5
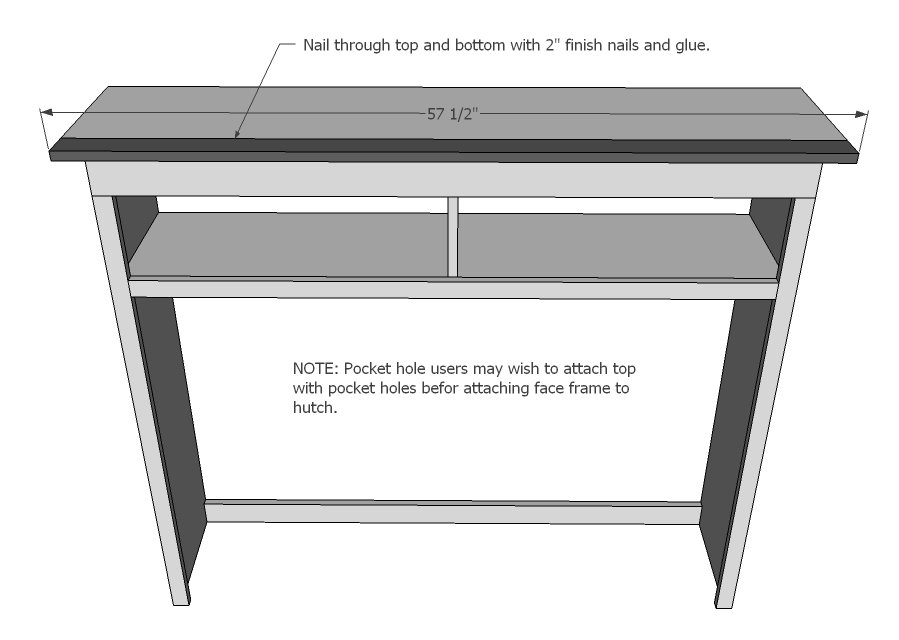
Step 6
Then add the back.
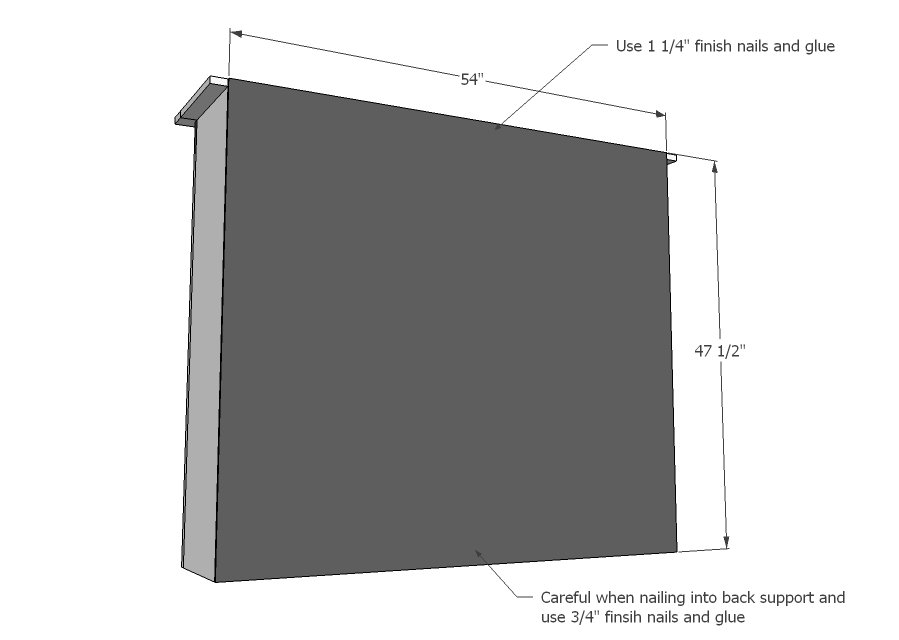
Step 7
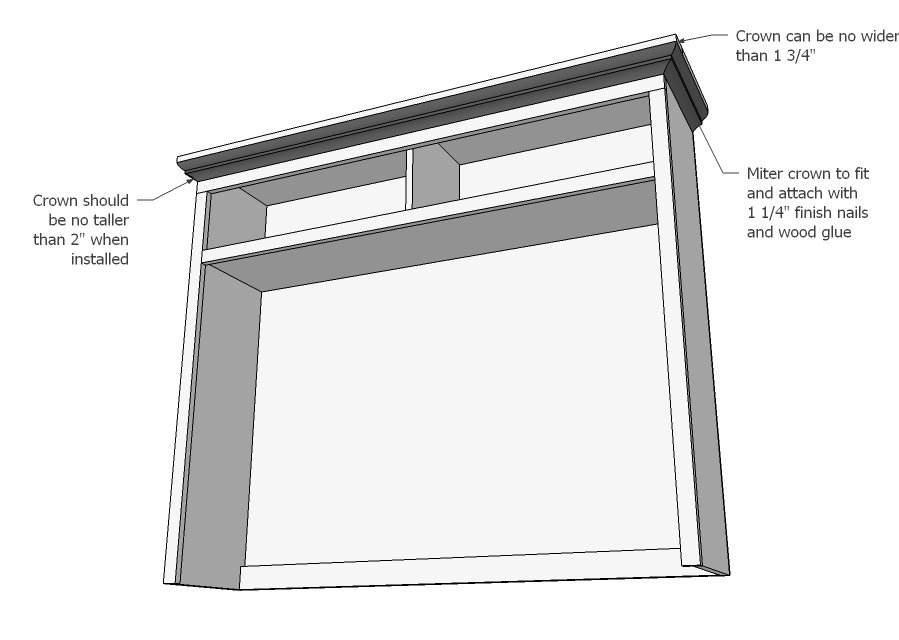
And cut crown, metering corners as shown above.
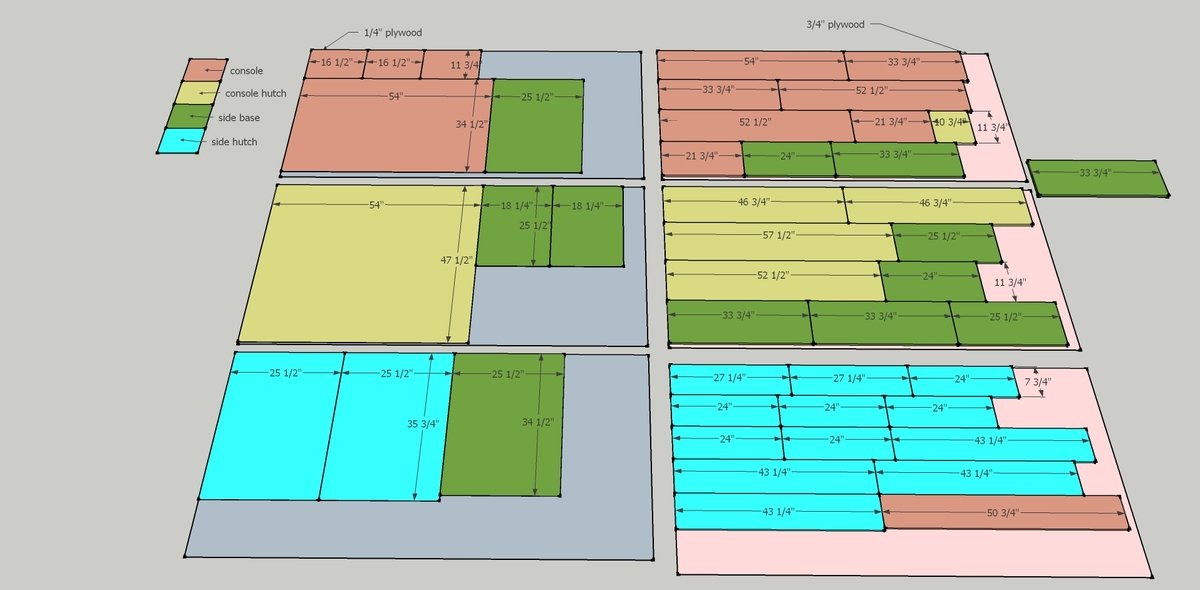
Step 8
Cutting layout.....
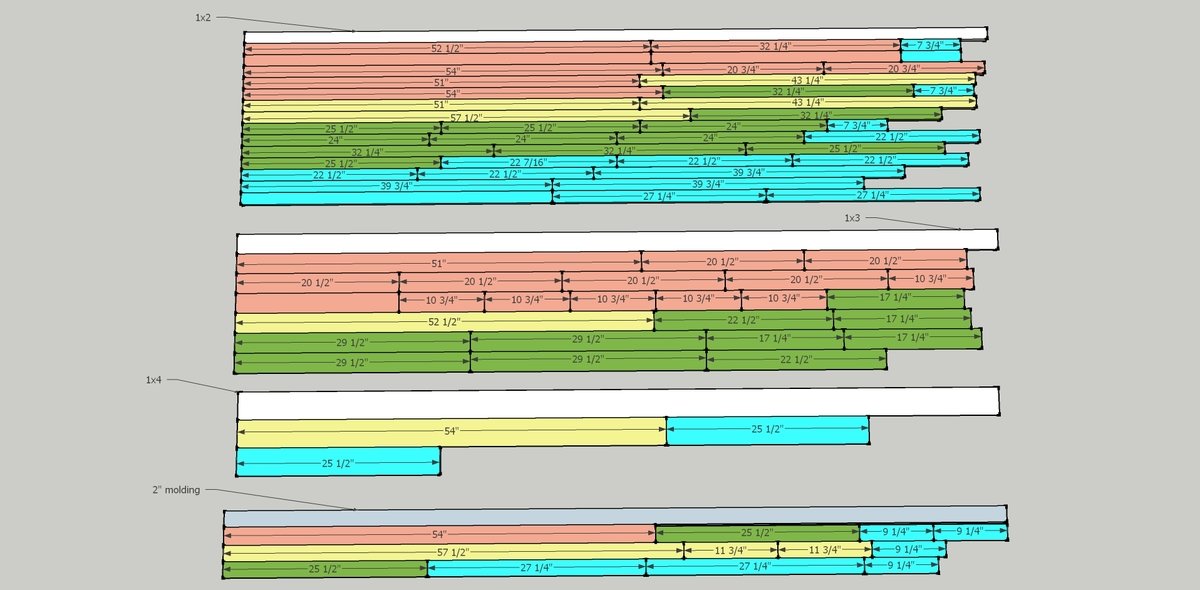
Step 9
Cutting layout....
Finishing
Sand all surfaces, starting with a medium grit and finishing with fine. Wipe off the dust, fill any holes or gaps with wood filler, and sand smooth once dry. Apply primer if you're painting, then finish with your choice of paint or stain and seal with a durable clear topcoat. For outdoor projects, use exterior-rated primer, paint or stain, and sealer so the piece stands up to the weather.
Source (temporary): https://www.ana-white.com/woodworking-projects/media-hutch-rebecca-media-suite