Mid Height Dresser with 5 Drawers
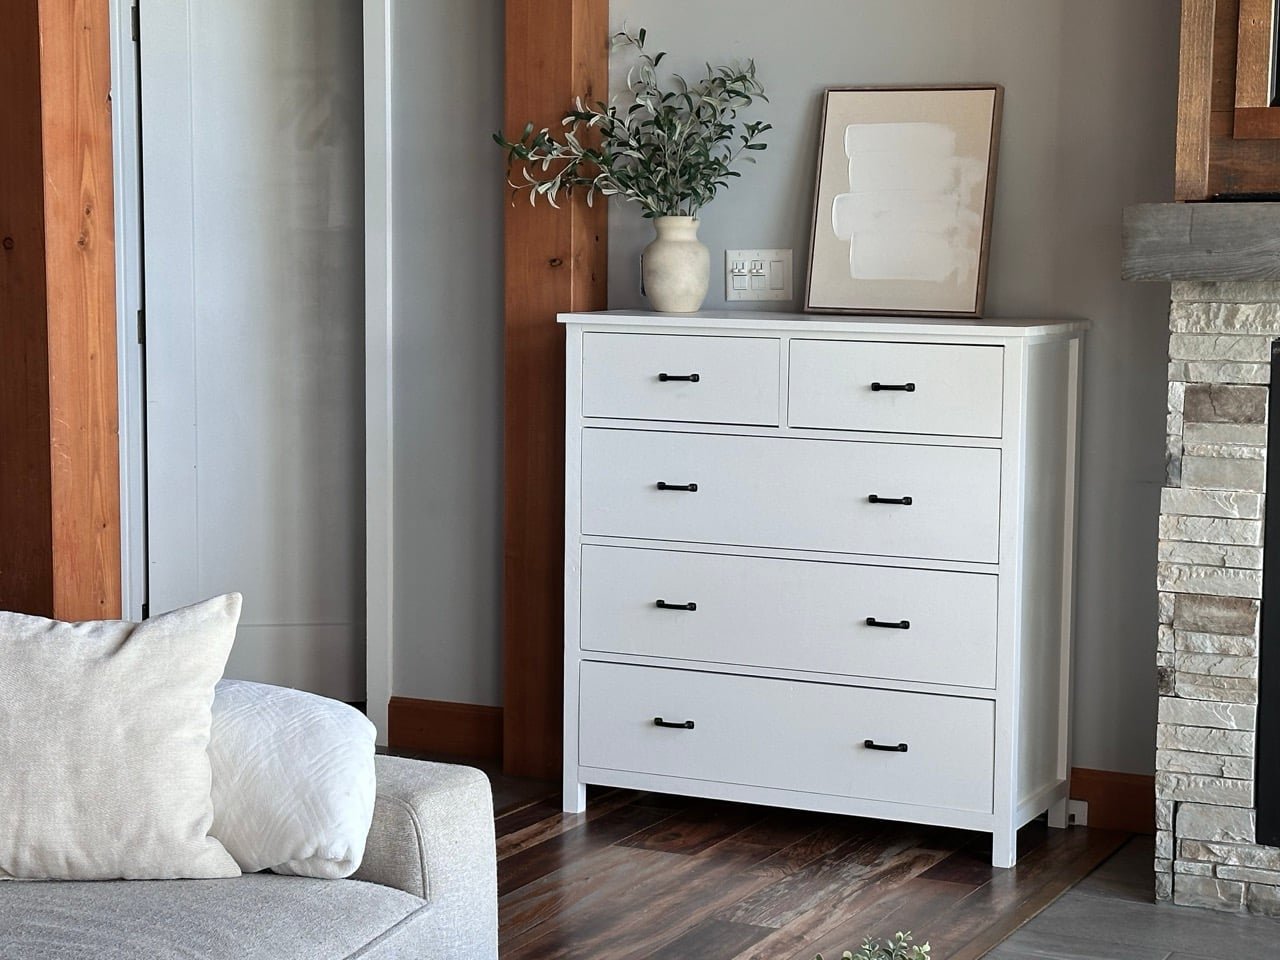
to build your own mid height dresser with five drawers. This solid wood dresser features two mid sized drawers and three large drawers, all in a compact footprint. The build style uses pine boards and half a sheet of 3/4" plywood. This is a with detailed diagrams, shopping and cut list - check it out and build today!
Specifications
| Project type | Dresser Plans |
|---|---|
| Room | Bedroom |
| Difficulty | Advanced |
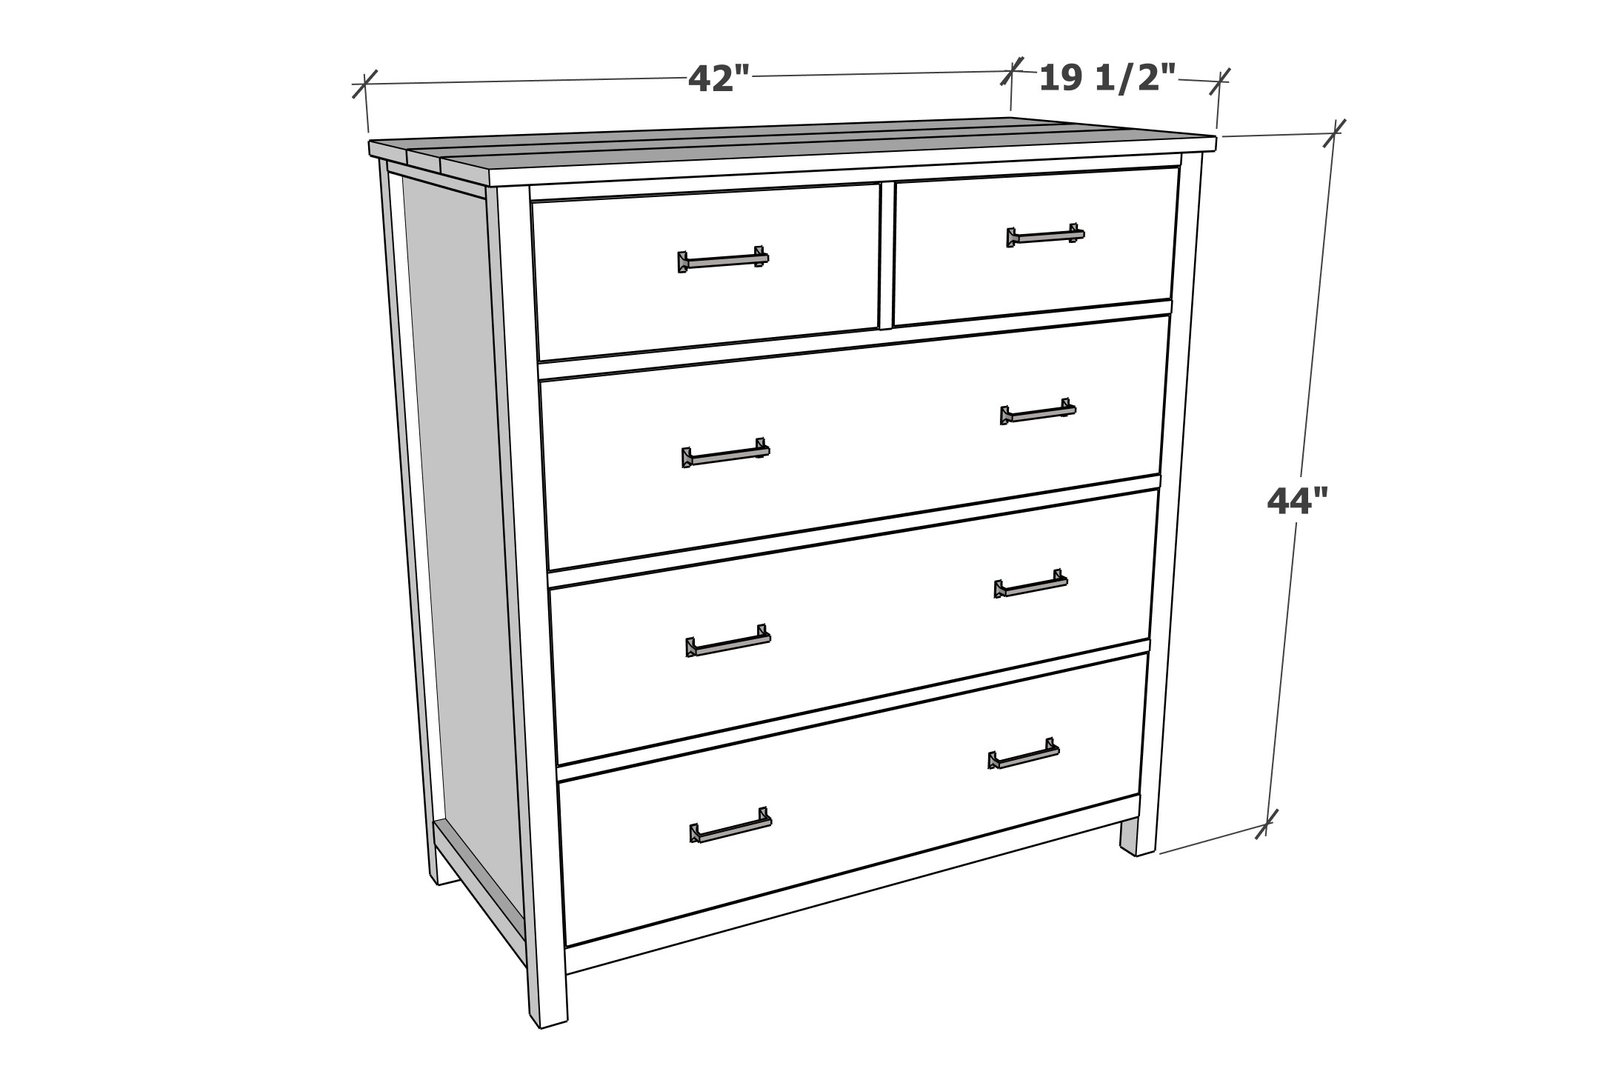
Dimensions
Use the size-specific shopping and cut lists below.
Shopping List
- 3 - 2x2 @ 8 feet long
- 4 - 1x2 @ 8 feet long
- 1 - 3/4" plywood panel, 48" x 48"
- 12 linear board feet of 1x6
- 30 linear board feet of 1x8
- 10 linear board feet of 1x10
- 1 sheet of 1/4" plywood - I used underlayment (for drawer bottoms)
- 1-1/4" pocket hole screws (about 75)
- 2-1/2" pocket hole screws (I used 4)
- 1-1/4" and 3/4" brad nails
- wood glue
- 5 sets of 16" euro drawer slides (bottom corner mount, usually white in color)
- 8 handles or pulls
- edge banding in matching wood veneer (about 7 feet needed)
I used spruce for all 1x boards, I ripped a 2x6 into three pieces for the 2x2s since I couldn't find straight 2x2s.
Cut List
Dresser Frame
- 4 - 2x2 @ 43-1/4" - legs
- 4 - 1x2 @ 14" - side panel top and trim
- 2 - 3/4" plywood @ 14" x 39-3/4" - side panels
- 2 - 2x2 @ 38" - front frame, bottom
- 6 - 1x2 @ 38" - front frame
- 2 - 1x2 @ 7-1/2" - front frame
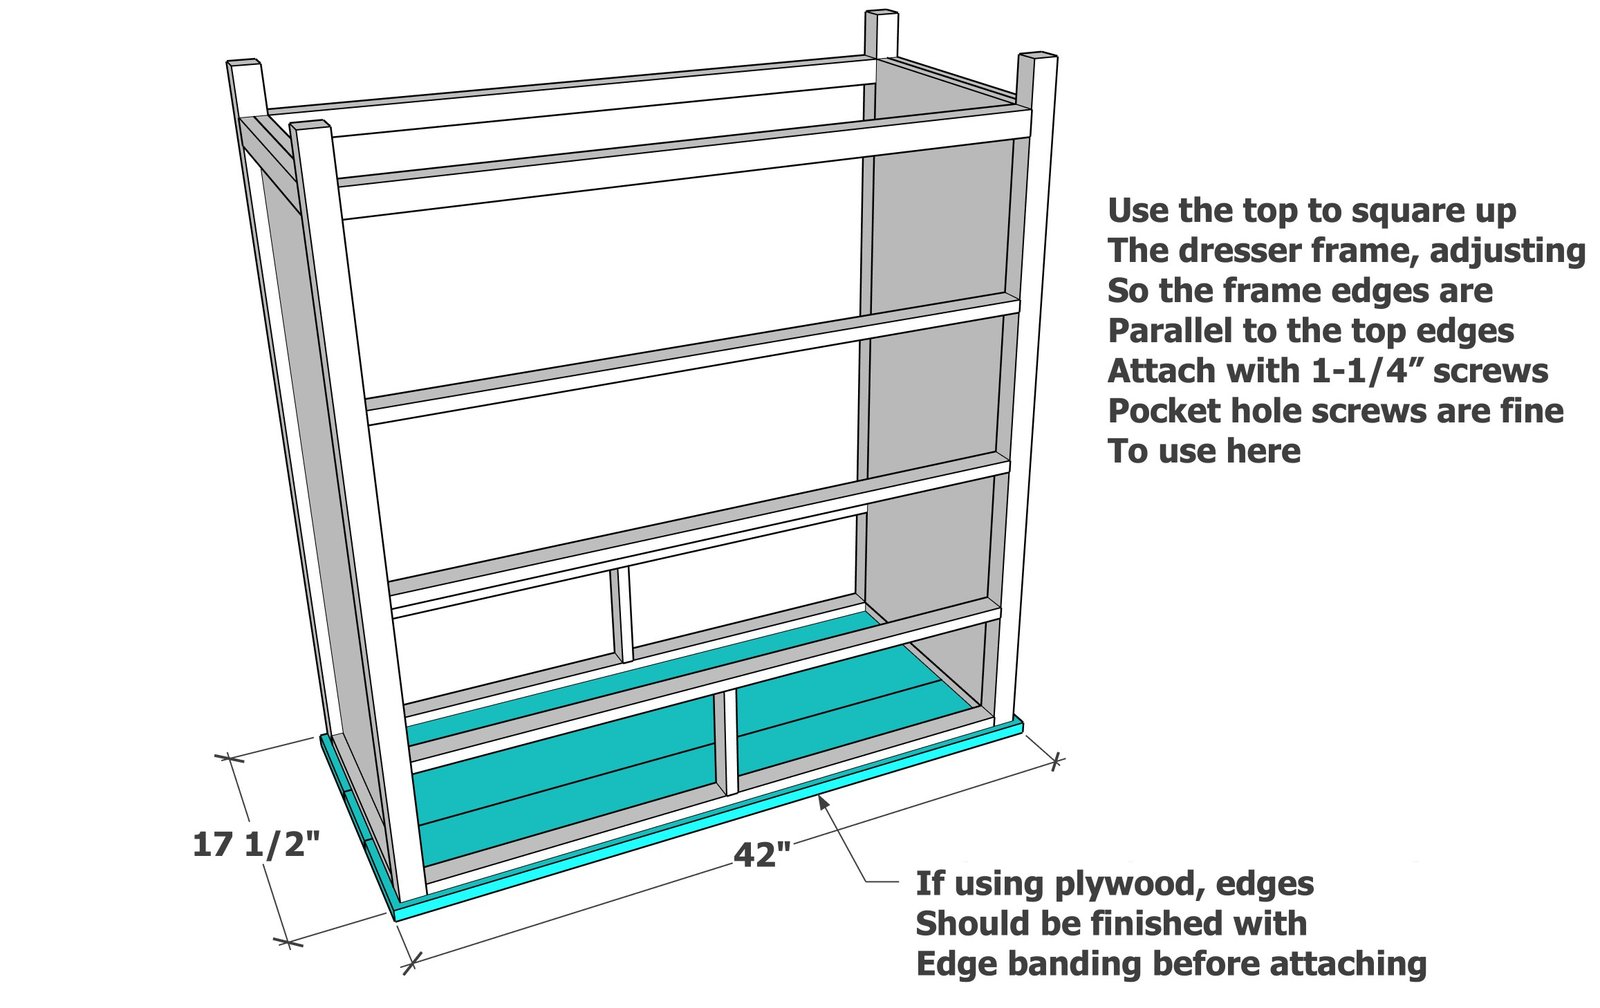
- 1 - 3/4" plywood @ 17-1/2" x 42" - top
Drawers
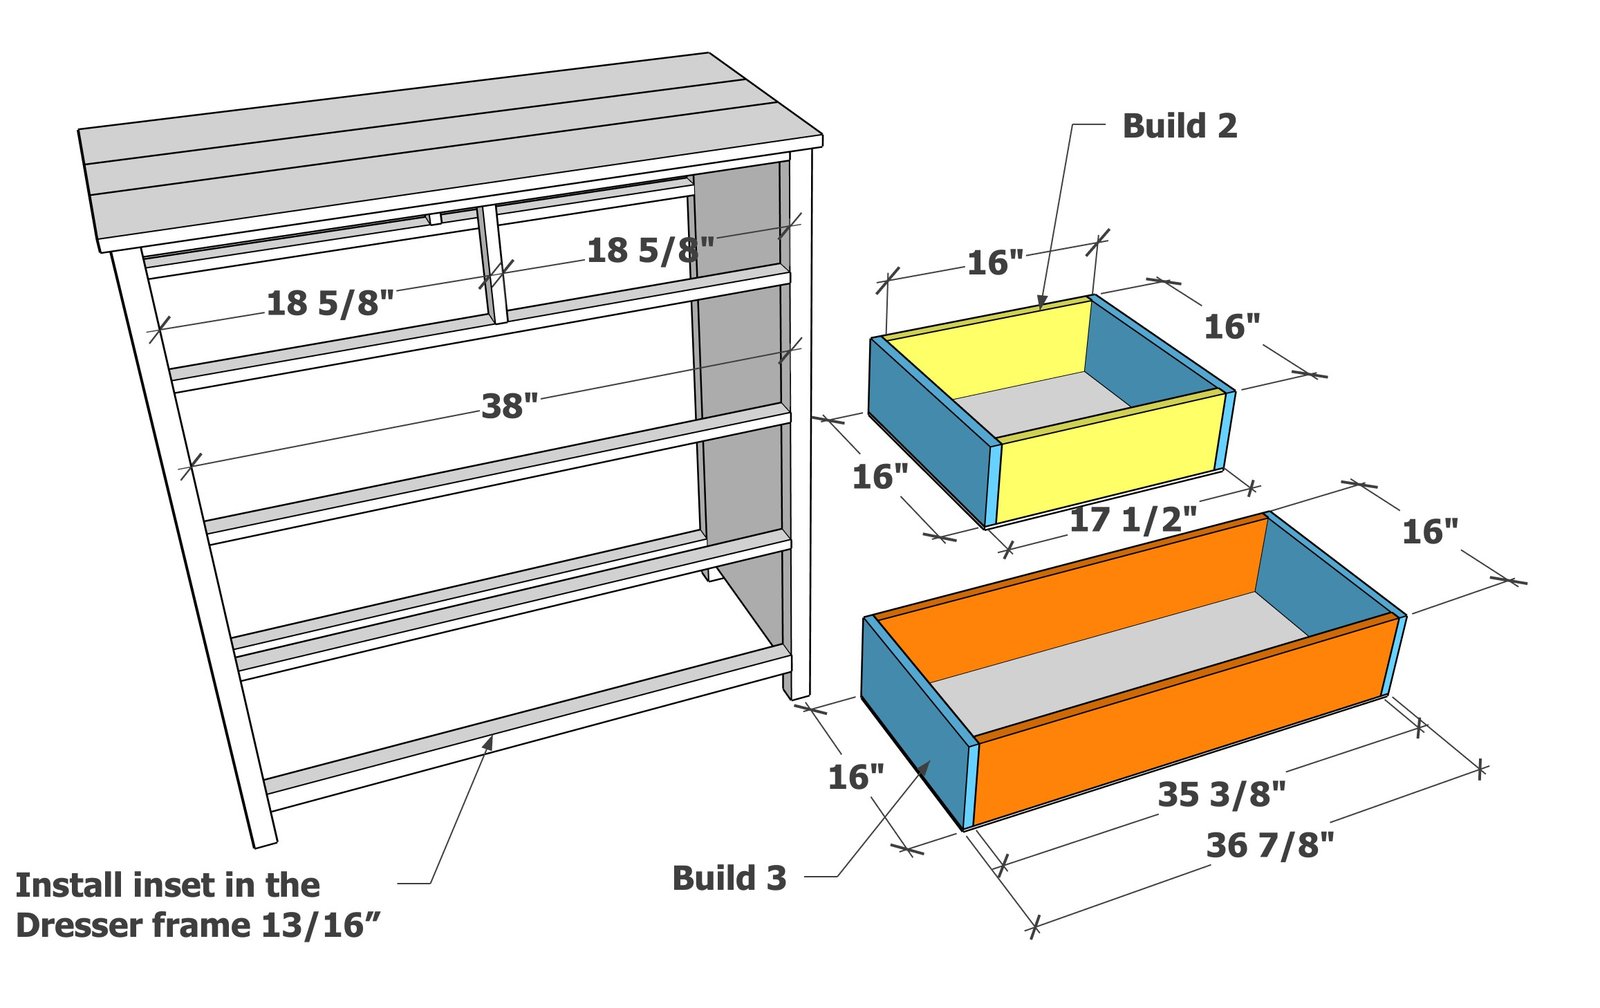
- 8 - 1x6 @ 16" - small drawers sides (could also use 1x4 boards)
- 2 - 1/4" plywood @ 16" x 17-1/2" - smaller drawers bottom
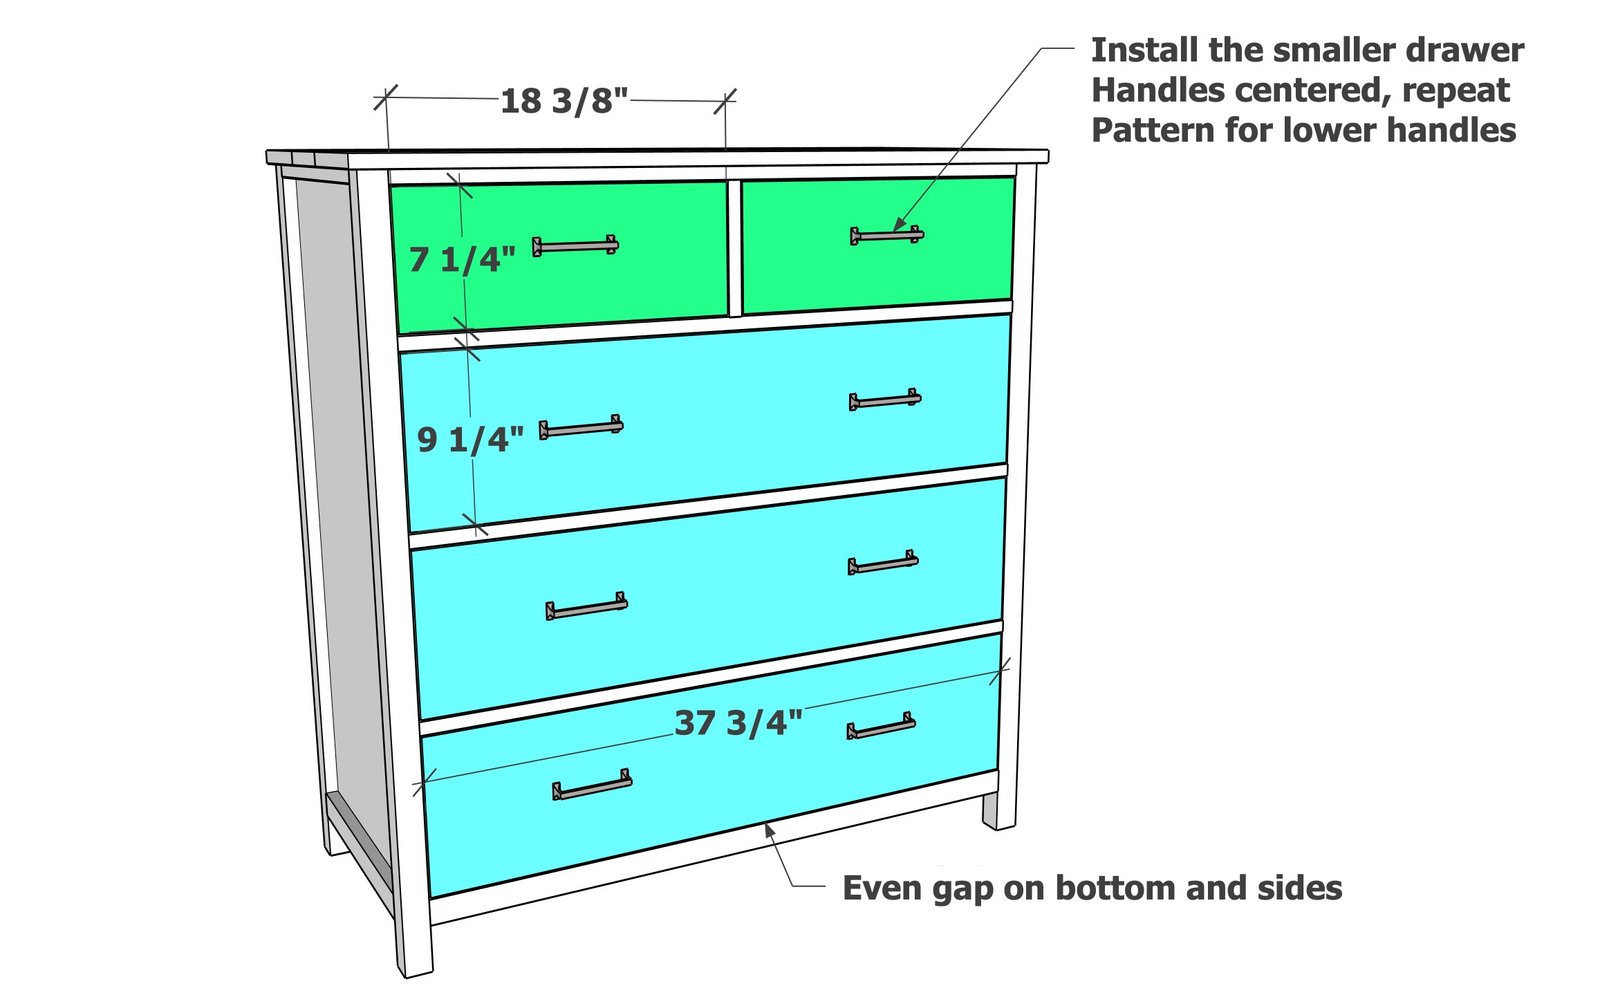
- 2 - 1x8 @ 18-3/8" - drawer face, measure and cut to fit
- 6 - 1x8 @ 16 - larger drawer sides
- 6 - 1x8 @ 35-3/8" - larger drawers front and back
- 3 - 1/4" plywood @ 16" x 36-7/8"- larger drawer bottoms
- 3 - 1x10 @ 37-3/4" - drawer face, measure and cut to fit
Tools
- measuring tape
- square
- pencil
- safety glasses
- kreg-jig
- drill
- compound miter saw
- table saw
- nailer
- sander
Step-by-step Instructions
Step 1
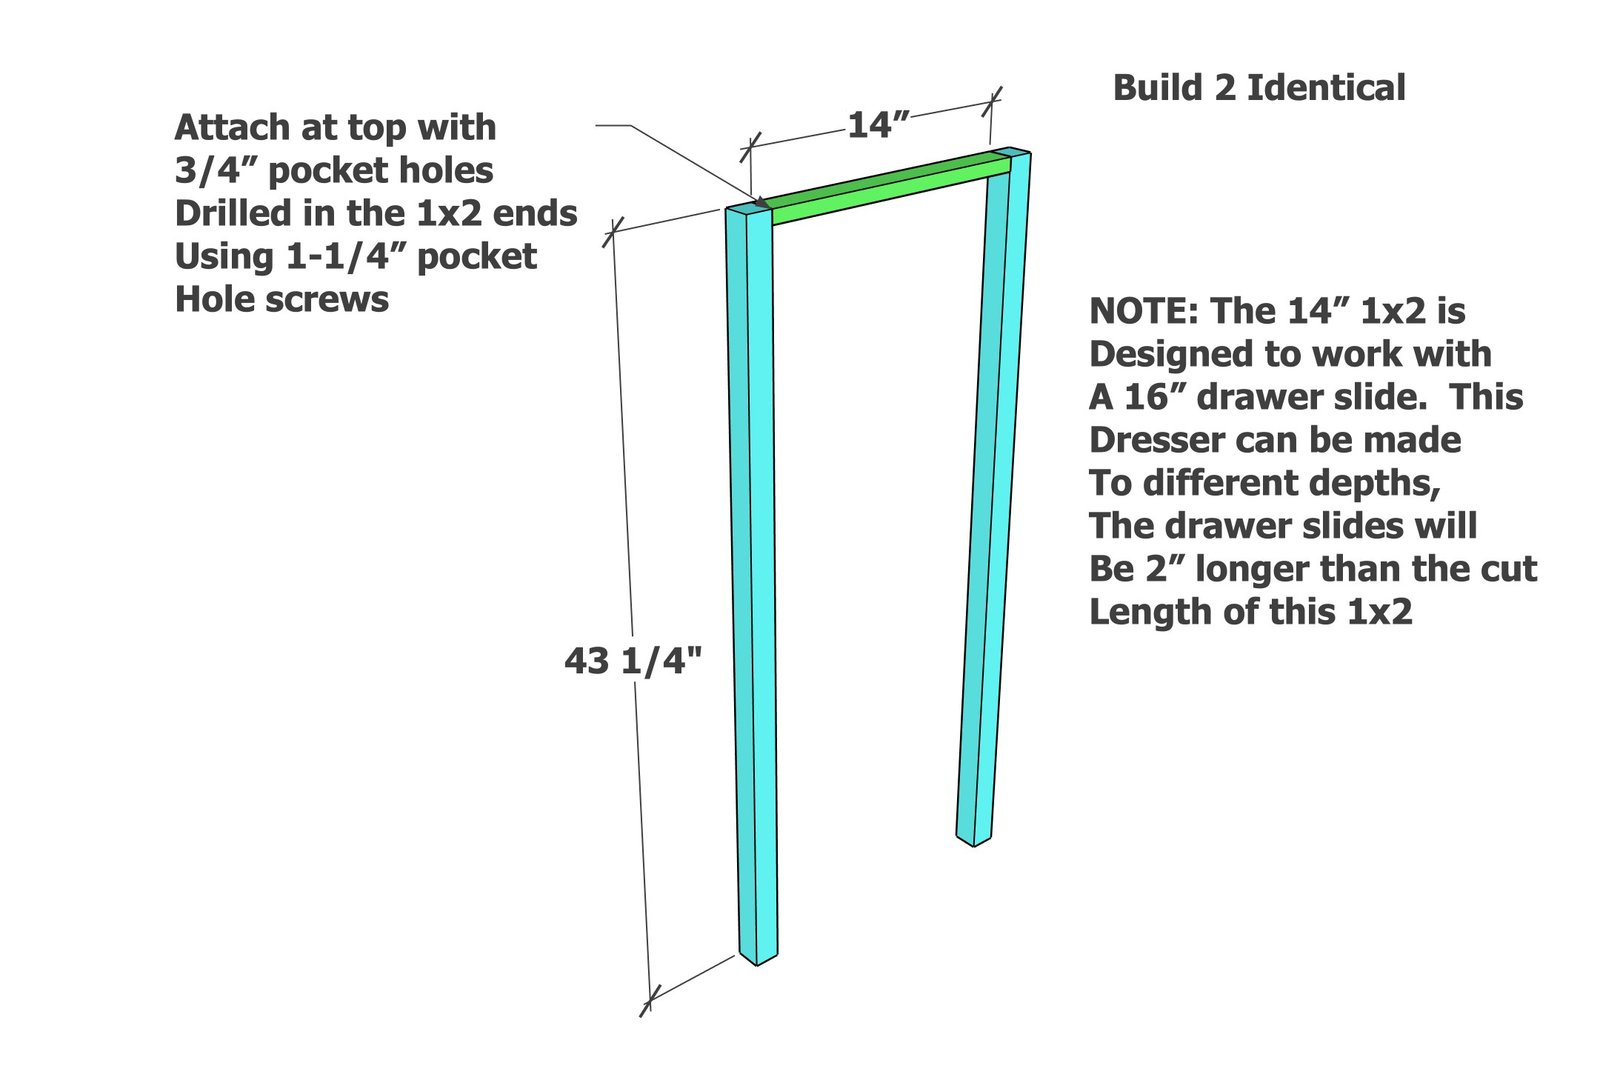
Build the frame for the sides by attaching the 1x2 to the top of the 2x2s as shown. Place the pocket holes on the top. NOTE: I only used one pocket hole and glue for my joints. This is plenty strong, as there will be many pocket holes in the plywood panel to reinforce.
Step 2
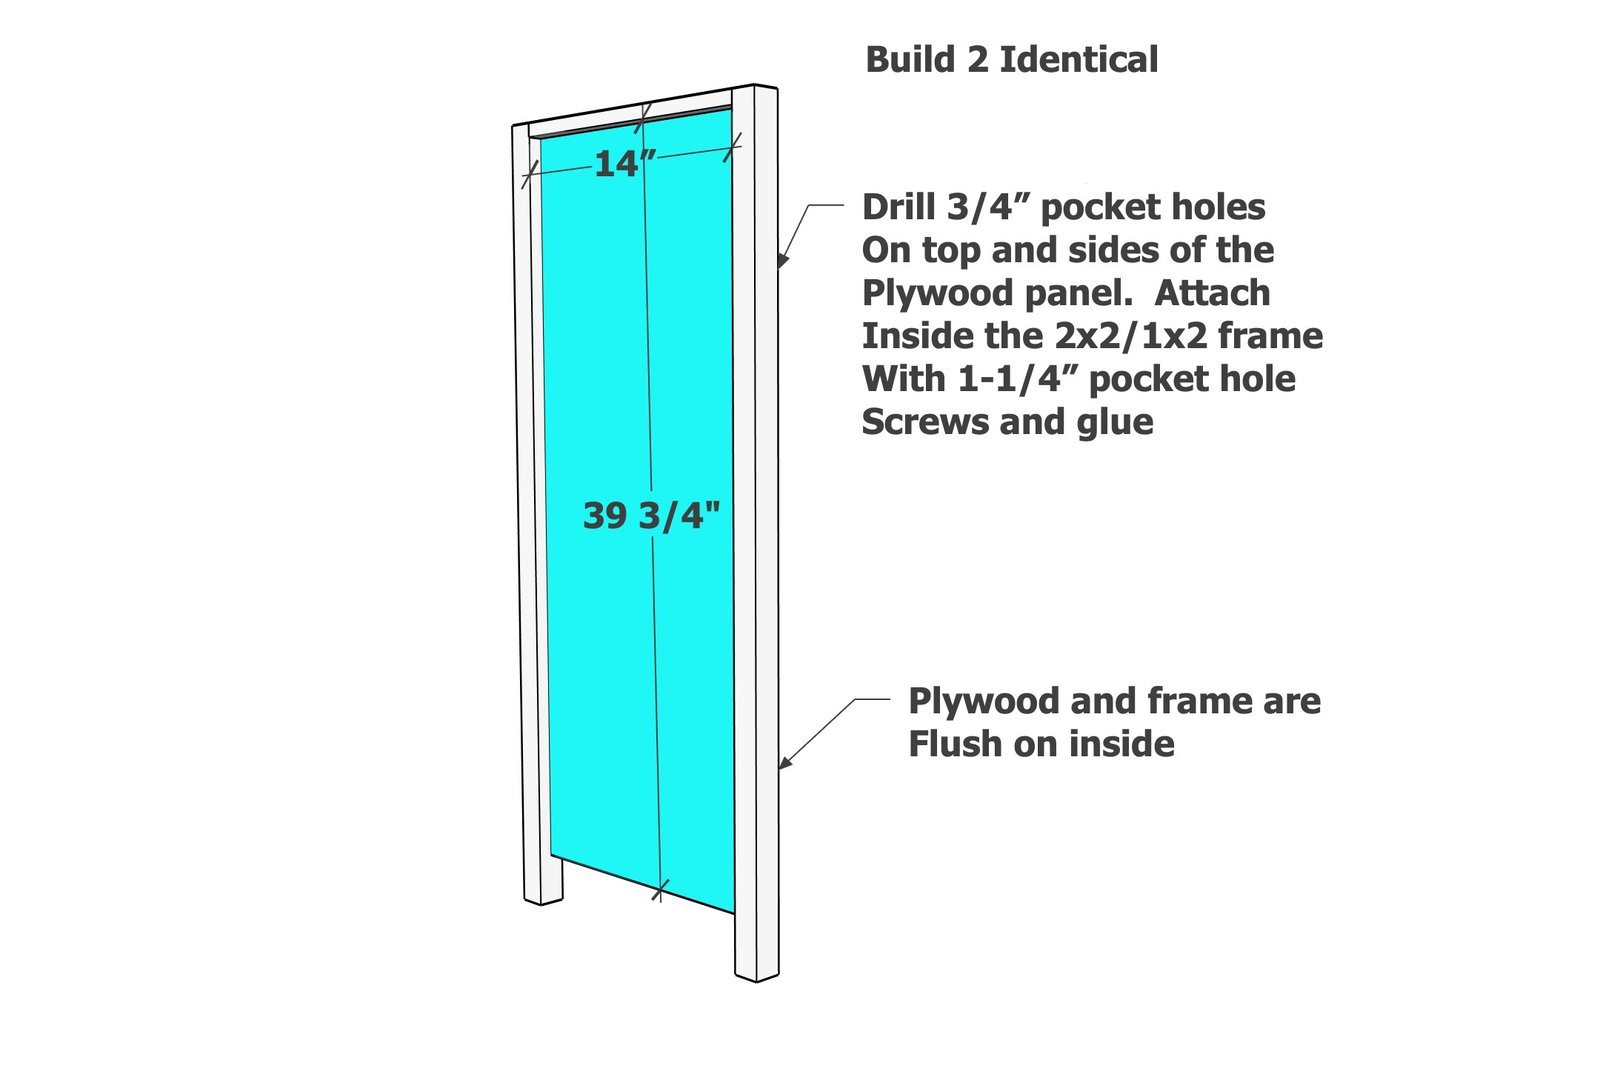
Rip the 3/4" plywood along the direction of the wood grain into two strips, 14" wide. Save the remaining piece for the top of the dresser. Cross cut to the height needed. Drill 3/4" pocket holes along top and side edges and attach with glue inside the frame built in step 1.
Step 3
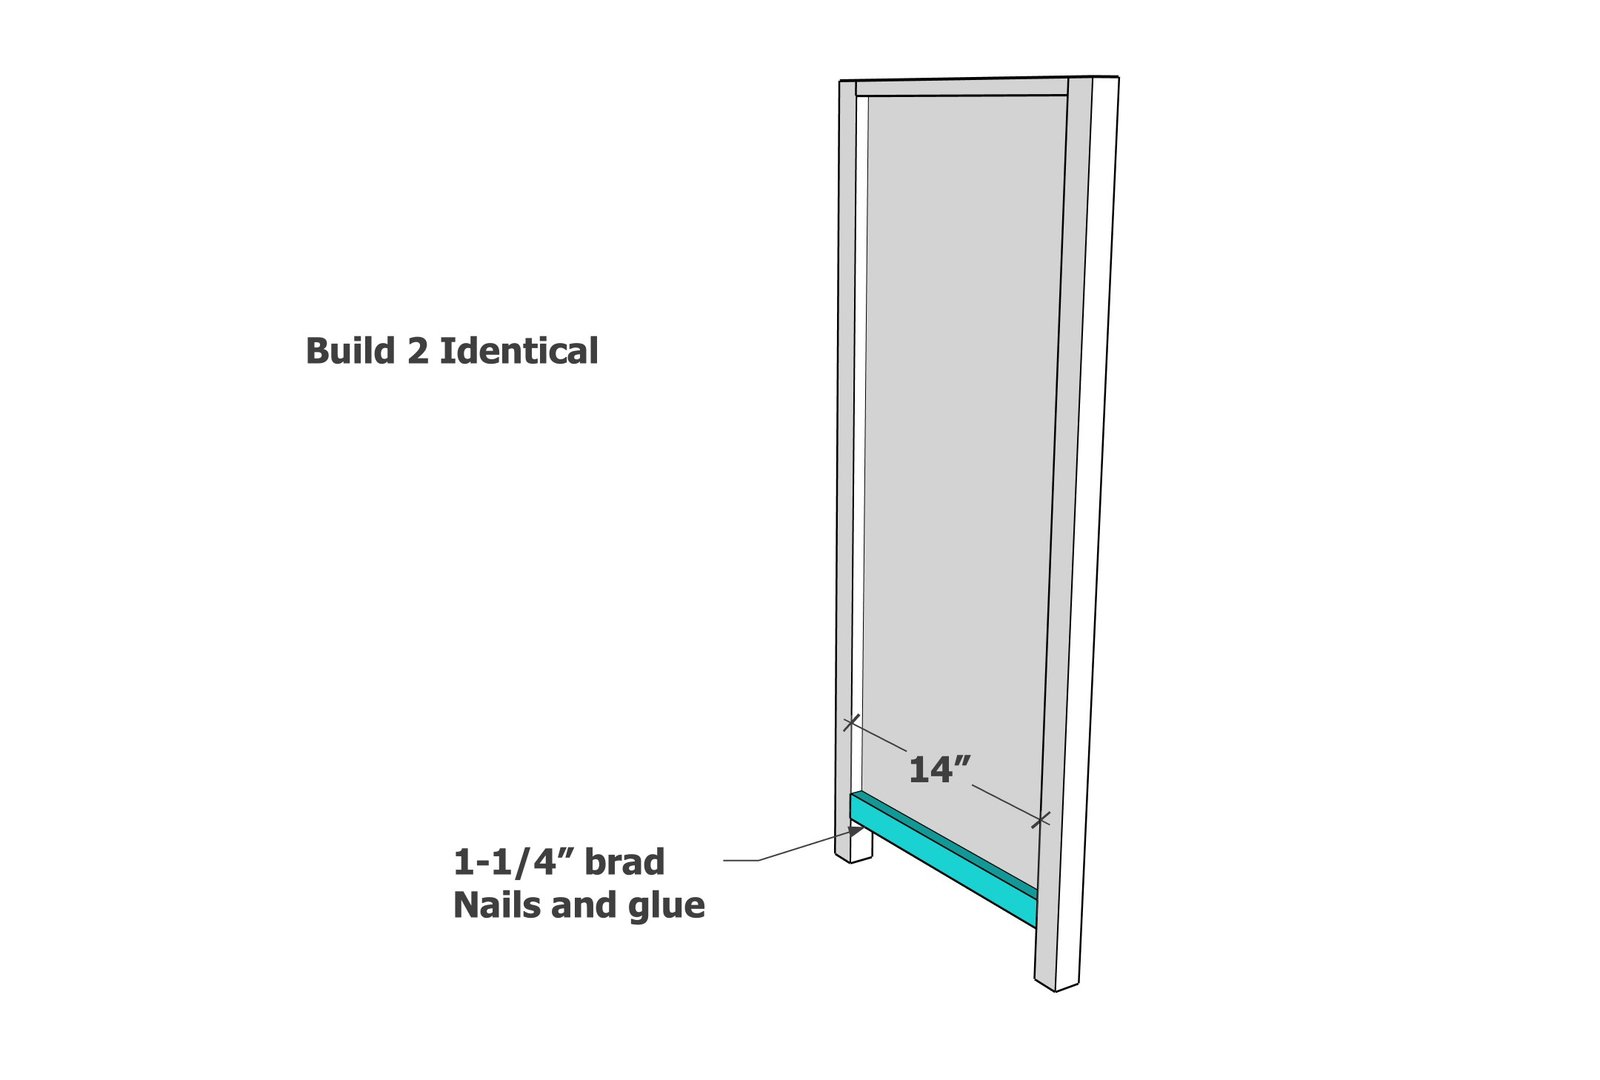
Attach the remaining 1x2 to the bottom with 1-1/4" brad nails and glue.
Step 4
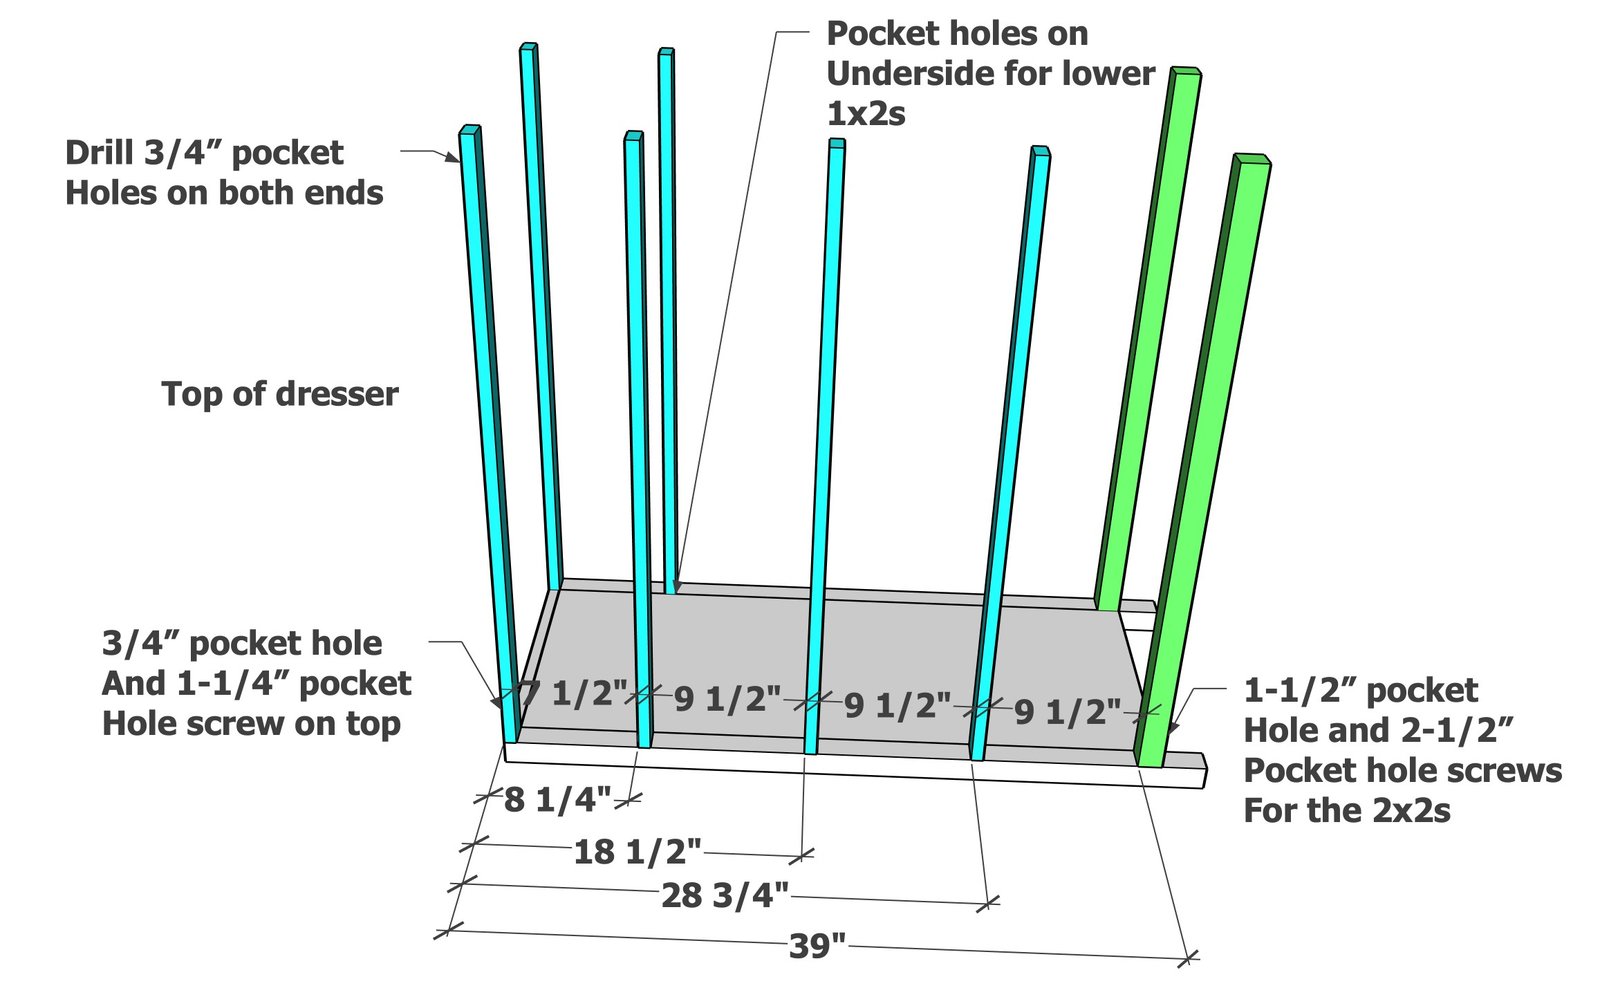
Attach the frame boards as shown. It is very important that these boards are placed accurately, as they will be between the drawer faces. I used one pocket hole and glue for all joints. For the bottom 2x2 to 2x2 joint, switch to a 1-1/2" pocket hole and 2-1/2" pocket hole screw.
Step 5
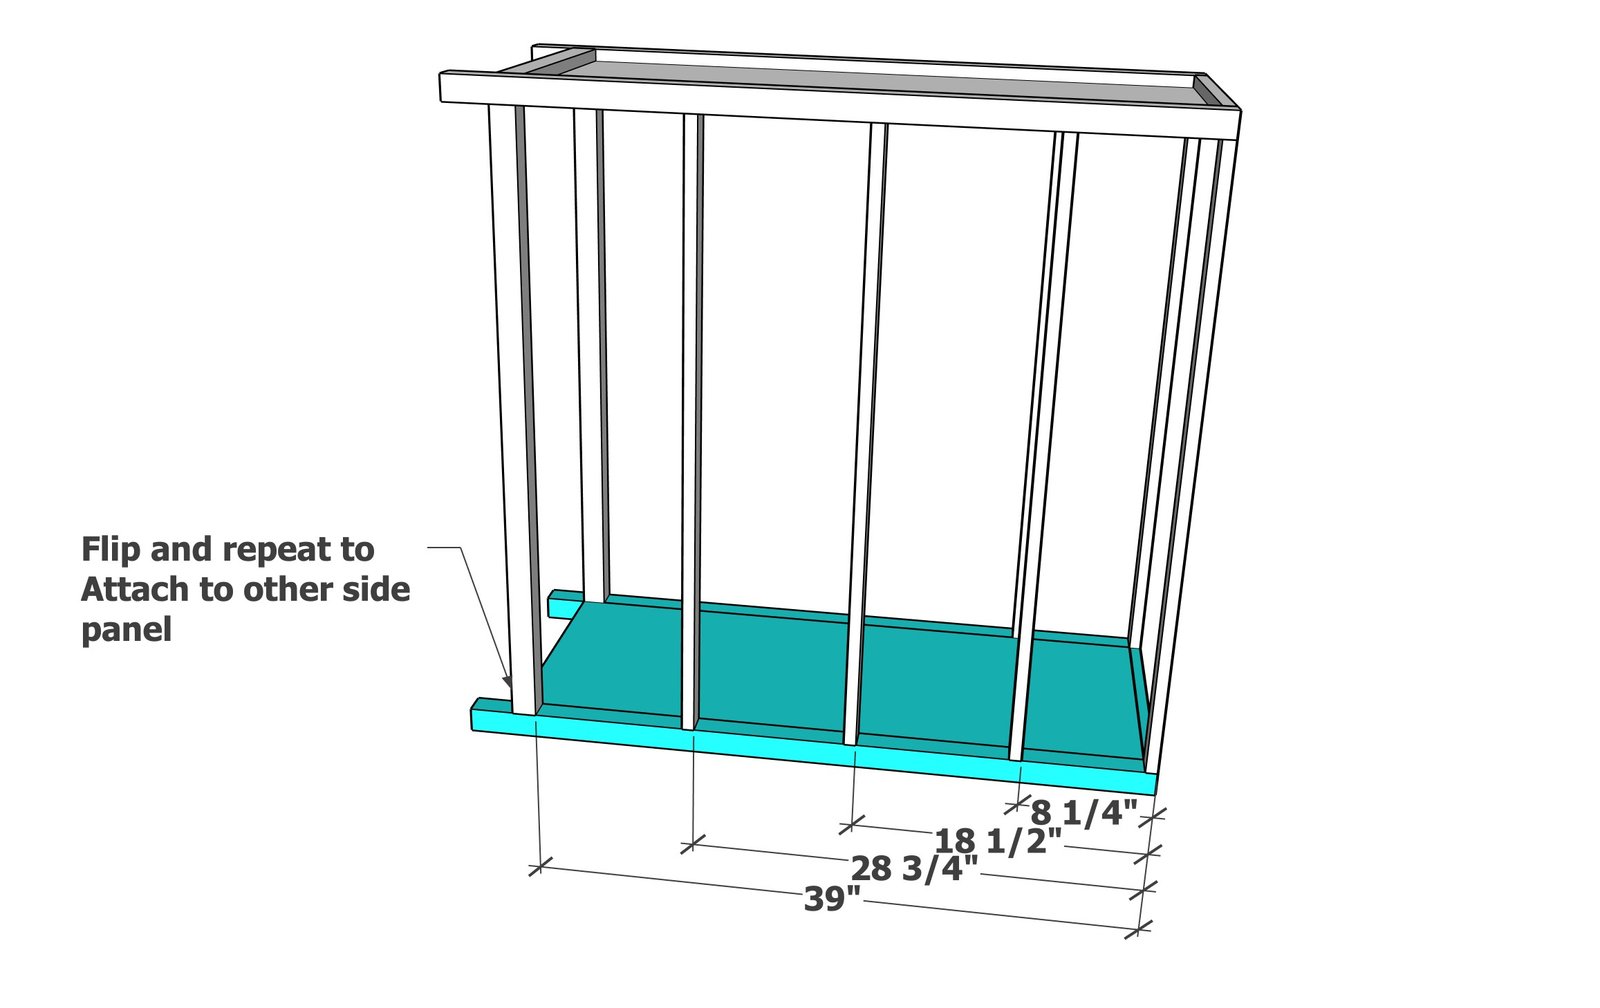
Flip and repeat to the attach to the second side panel.
Step 6
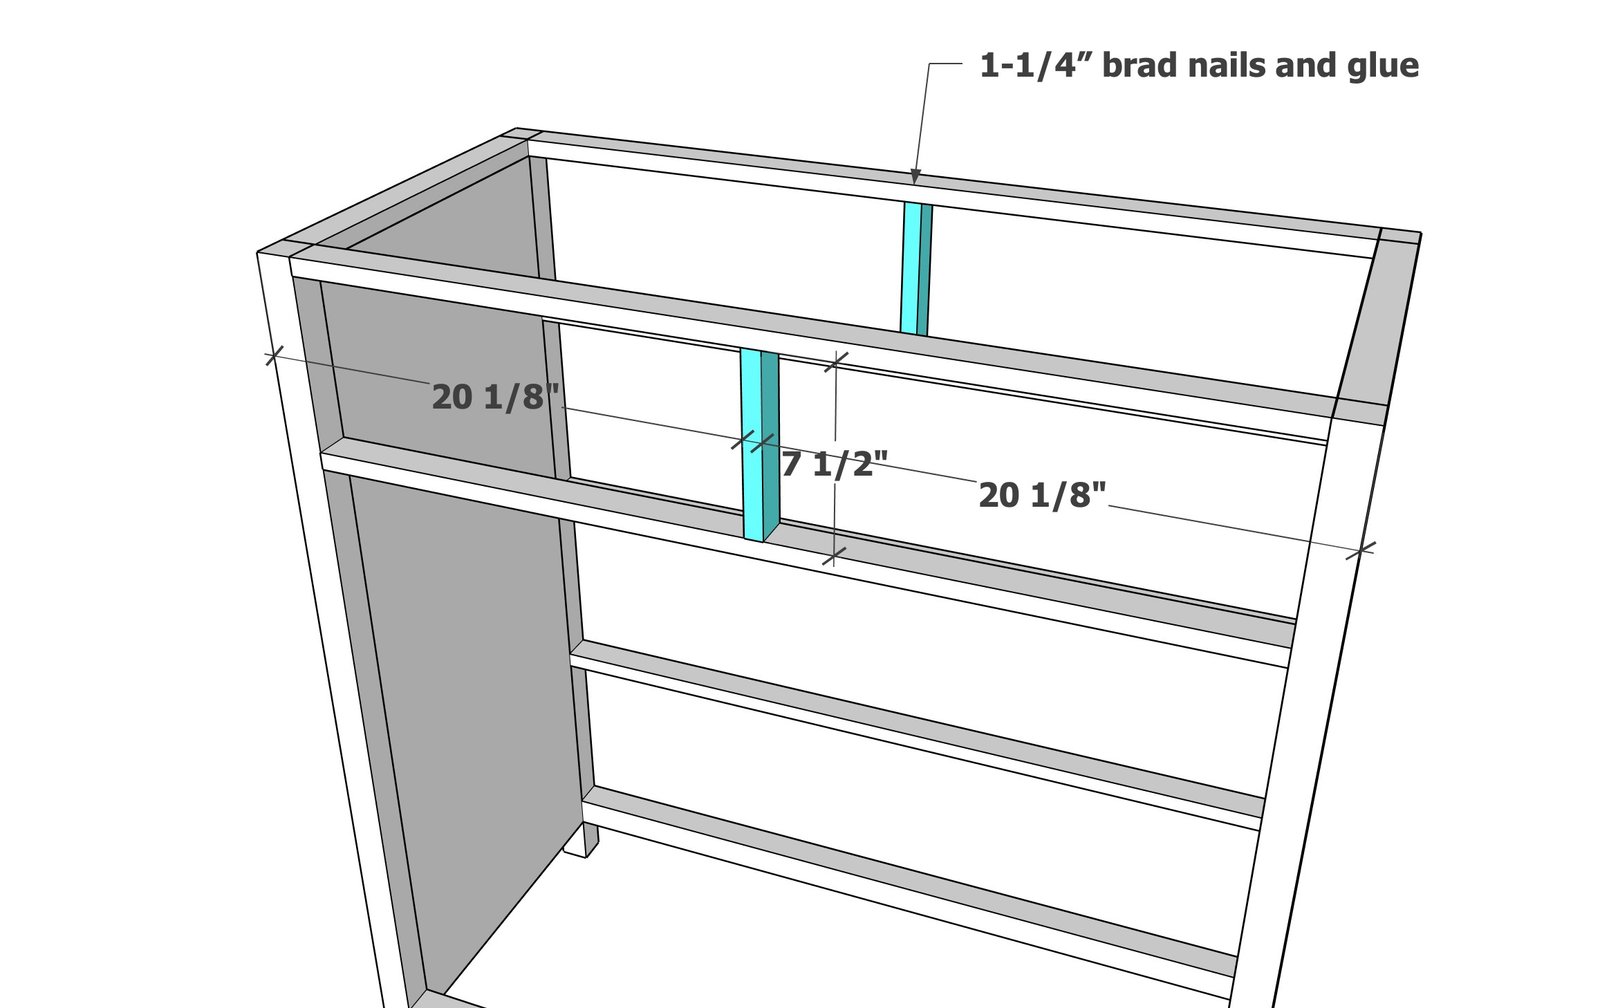
Carefully measure out the location of the center divider and attach with brad nails and glue.
Step 7
Cut the top and apply edge banding to the outer edges with an iron. Here is a my video tutorial on applying edge banding. NOTE: I used a 1x top in for my dresser, I used one 1x6 and two 1x8s joined edge to edge with pocket holes. Place the top on a flat level surface. Then place the dresser frame on the top, flush to the back, with even overhangs on the front and sides. Use the top to square up the dresser frame, making sure the overhangs are even on all sides, with frame lines running parallel to the top edges. This is very important step to get right. Attach with 1-1/4" pocket hole screws through the 1x2s at the top.
Measure the openings and check to make sure the opening match the diagrams.
Build the drawer boxes with 1-1/4" brad nails and glue, attach the 1/4" plywood bottoms with 3/4" brad nails and glue.
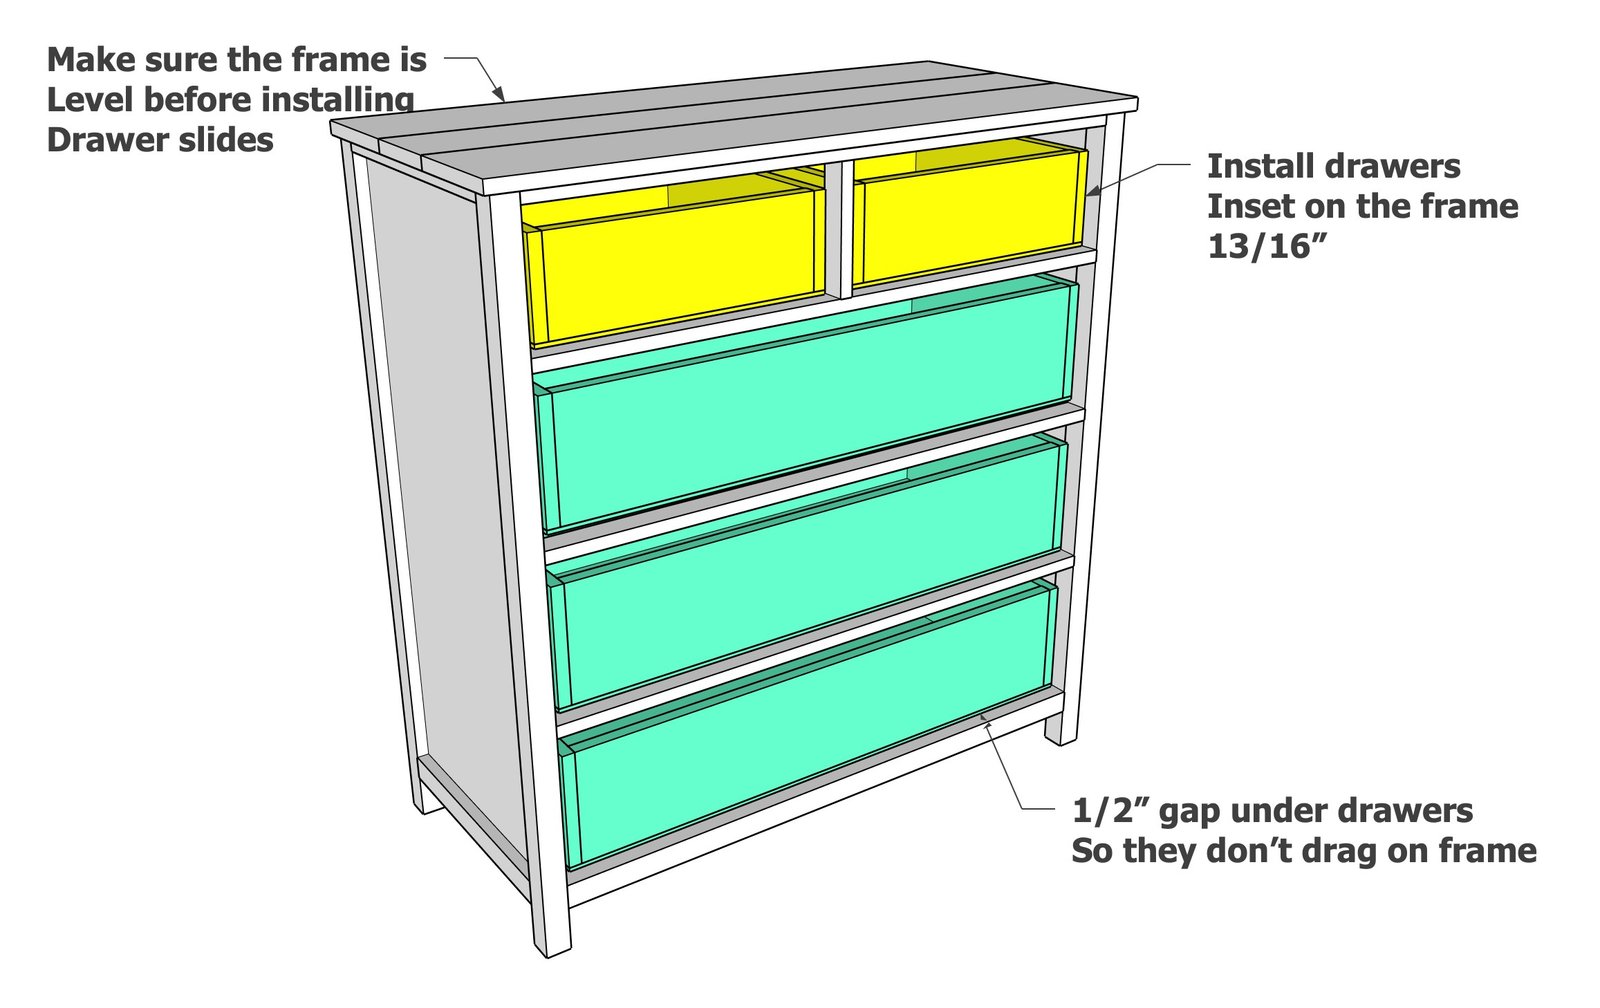
Here is my easy method for installing drawer boxes:
Use this method to install the drawer slides inset inside the frame by 13/16".
Step 10
Measure and cut the drawer faces about 3/16" smaller than the opening. Use shims to hold in place and center, so there is an even gap on all sides. Attach the drawer face to the drawer boxes with 1-1/4" brad nails, avoiding areas where hardware will be attached. Remove the drawers and secure from inside with 1-1/4" screws (I used pocket hole screws). The hardware in the center will help hold the drawer face to the box, so I only place screws in the four outer corners. I the drawer faces aren't setting right, the slides can be adjusted for a perfect fit. Install the pulls to the drawer fronts. Here is the pulls that I used (very pleased with this hardware company, not sponsored by them)
Finishing
Sand all surfaces, starting with a medium grit and finishing with fine. Wipe off the dust, fill any holes or gaps with wood filler, and sand smooth once dry. Apply primer if you're painting, then finish with your choice of paint or stain and seal with a durable clear topcoat. For outdoor projects, use exterior-rated primer, paint or stain, and sealer so the piece stands up to the weather.
Source (temporary): https://www.ana-white.com/woodworking-projects/mid-height-dresser-5-drawers-board-and-batten-collection