Midcentury Bar Console Cabinet
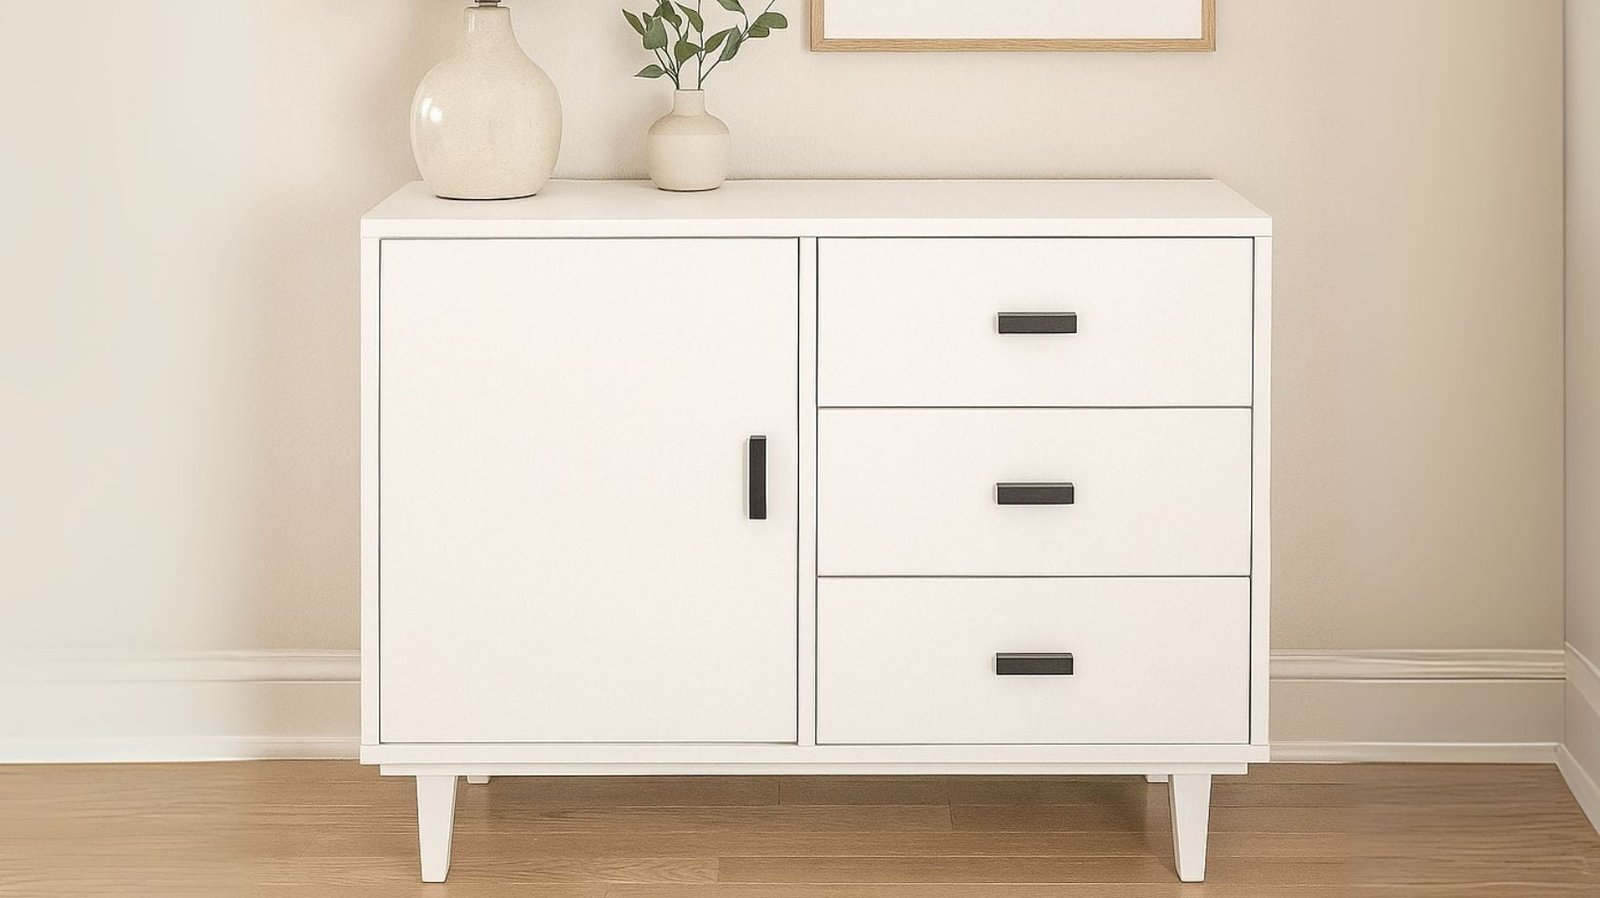
to build your own bar console cabinet! This stylish, compact piece features three drawers and a cupboard, frameless style with midcentury base, with a good sized top - perfect as a bar cabinet, compact console, or extra table surface! Step by step plans with diagrams, shopping list, cut list and reader photos - from
Specifications
| Project type | Wine Storage |
|---|---|
| Room | Storage Solutions |
| Style | Modern Style Furniture Plans |
| Difficulty | Intermediate |
| Estimated cost | $100-$150 |
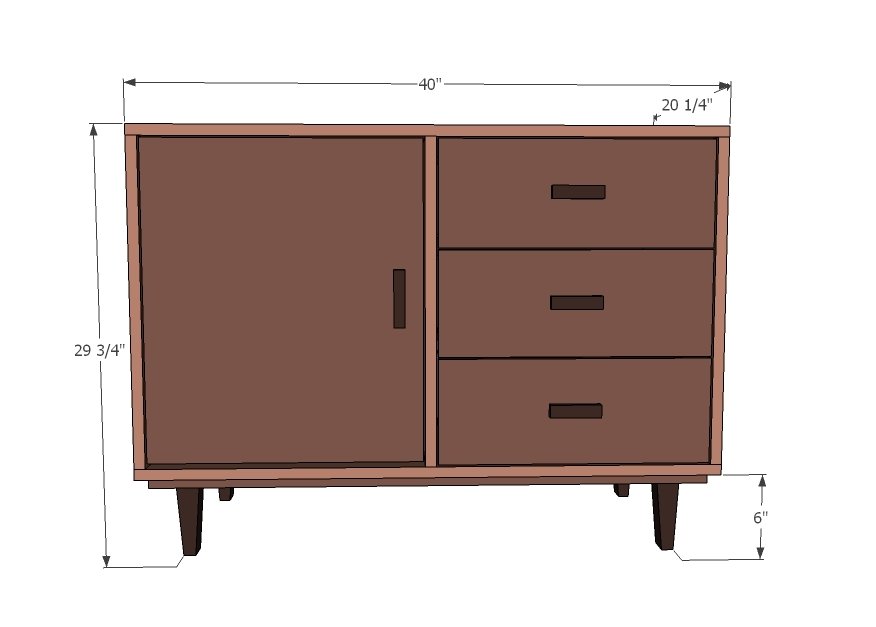
Dimensions
Use the size-specific shopping and cut lists below.
Shopping List
- 1 – Sheet 3/4" plywood ripped into strips 20” wide (The scrap strip can be ripped 7 1/4" wide to make The drawer faces and replace 1x8)
- 2 – 1x2 @ 8 feet long
- 1 – 1/4" plywood – full sheet if you put a back on it
- 2 – 10 foot long 1x6 boards
- 1 – 1x8 @ 5 feet long OR use scrap plywood
- 4 midcentury modern feet
- 1 set euro style inset hinges
- 3 sets euro style white bottom corner mount drawer slides
- 4 knobs or handles
- 1 1/4” pocket hole screws or 2” screws
- 1 1/4" finish nails
Cut List
- 2 – 3/4” plywood 20” wide x 40” long
- 3 – 3/4" plywood 20” wide x 22 1/4" long
- 2 – 1x2 @ 38 1/2" long
- 2 – 1x2 @ 15 1/2” long
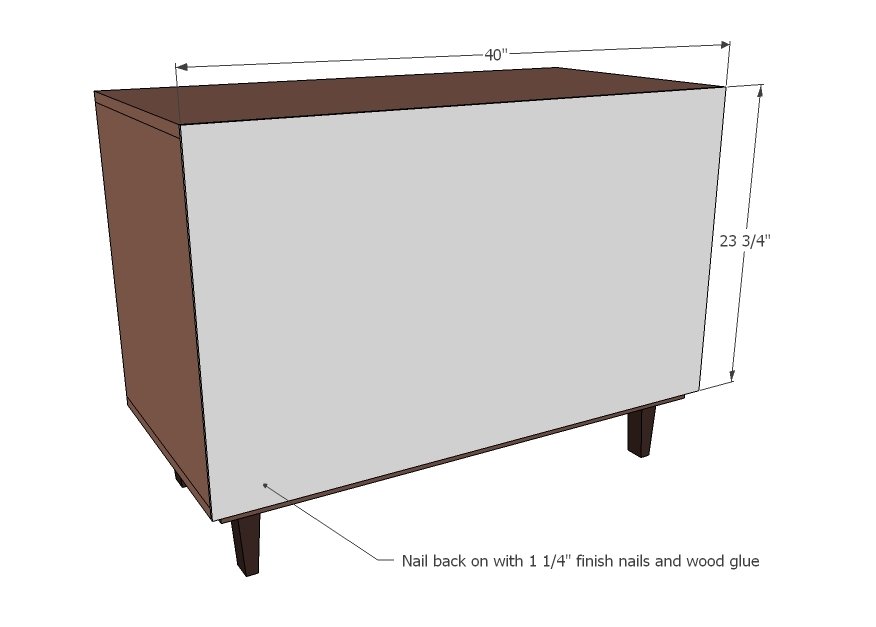
- 1 – 1/4" plywood @ 40” x 23 3/4"
DRAWERS AND DOOR
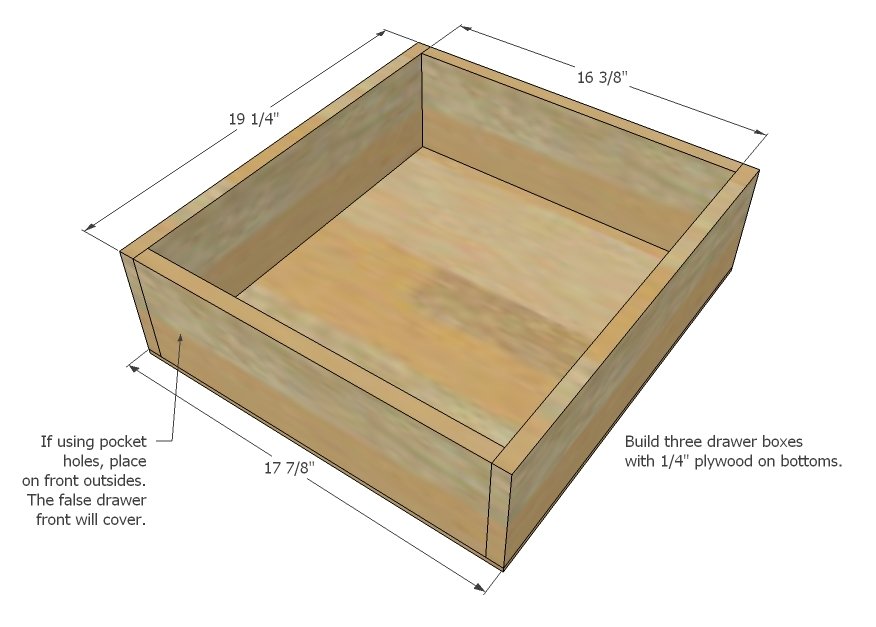
- 6 – 1x6 @ 19 1/4" long
- 6 – 1x6 @ 16 3/8” long
- 3 – 1/4" plywood @ 17 7/8” x 19 1/4"
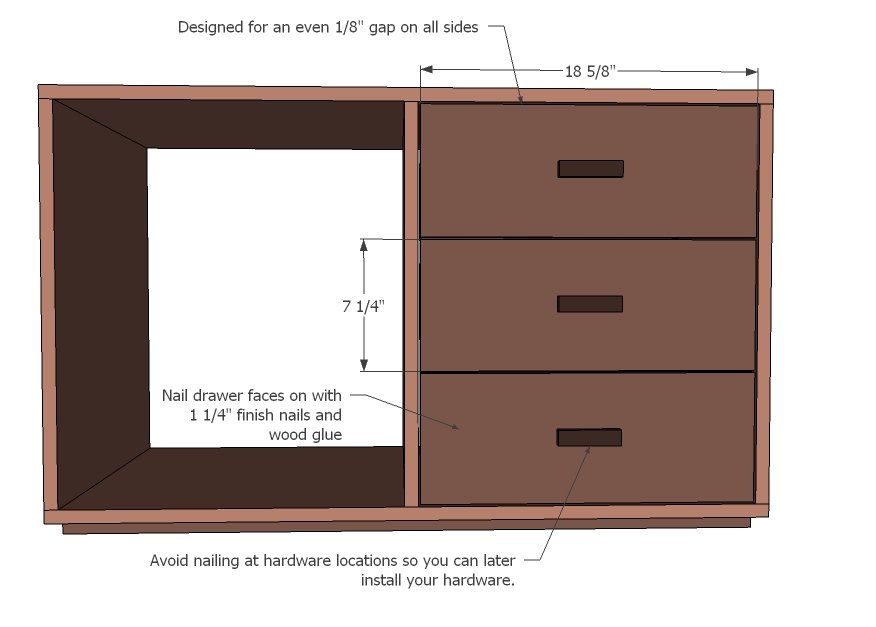
- 3 – 1x8 @ 18 5/8”
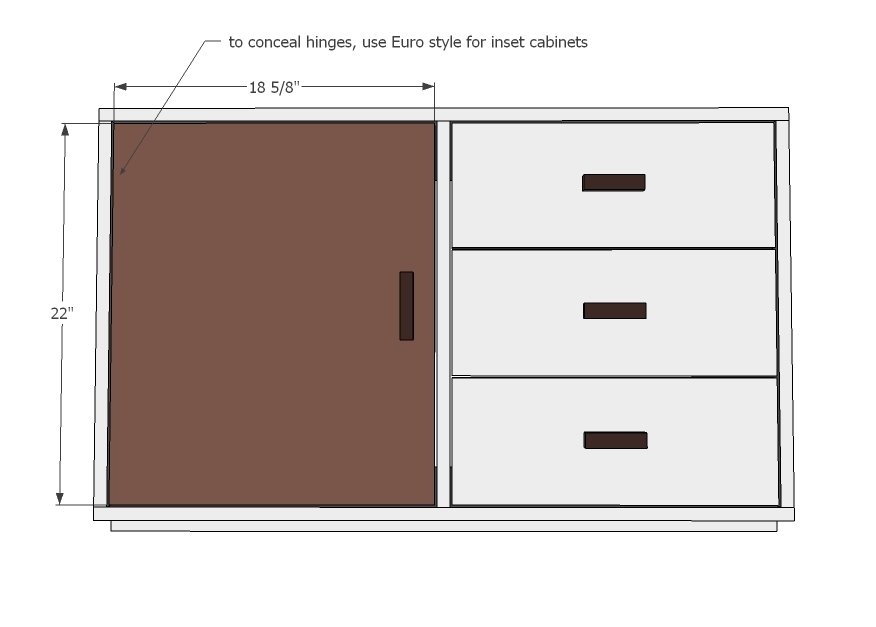
- 1 – 3/4" plywood @ 18 5/8” x 22”
Tools
- measuring tape
- square
- pencil
- safety glasses
- kreg-jig
- drill
- compound miter saw
- table saw
- nailer
- sander
Step-by-step Instructions
Step 1
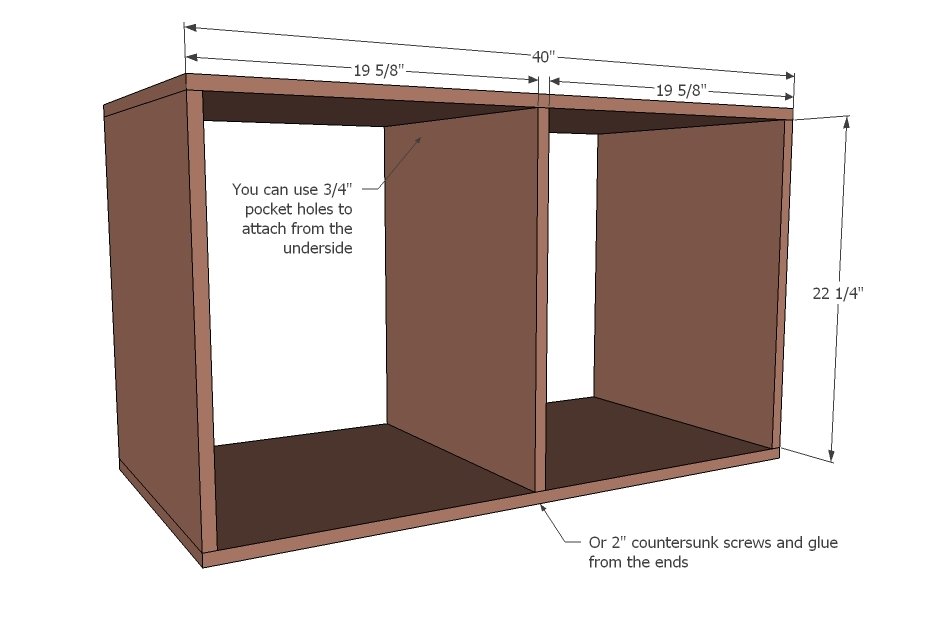
Build the box as shown in diagram. Make sure your cubbies are super square because we will be adding doors and drawers.
Step 2
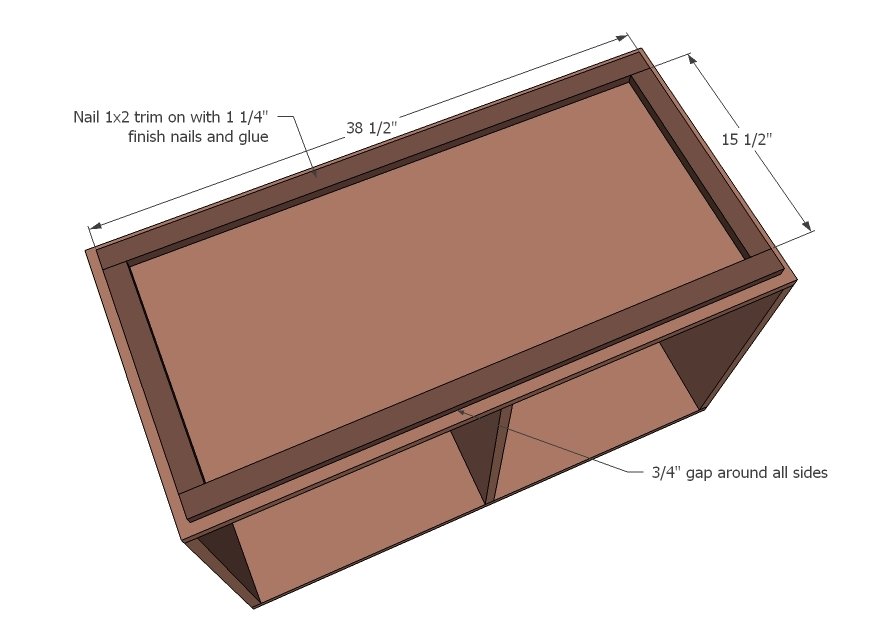
Now add the decorative base trim.
Step 3
You will need to build three drawer boxes. Double check to make sure your drawers are 1" less in width than the opening to account for standard drawer slides.
Step 4
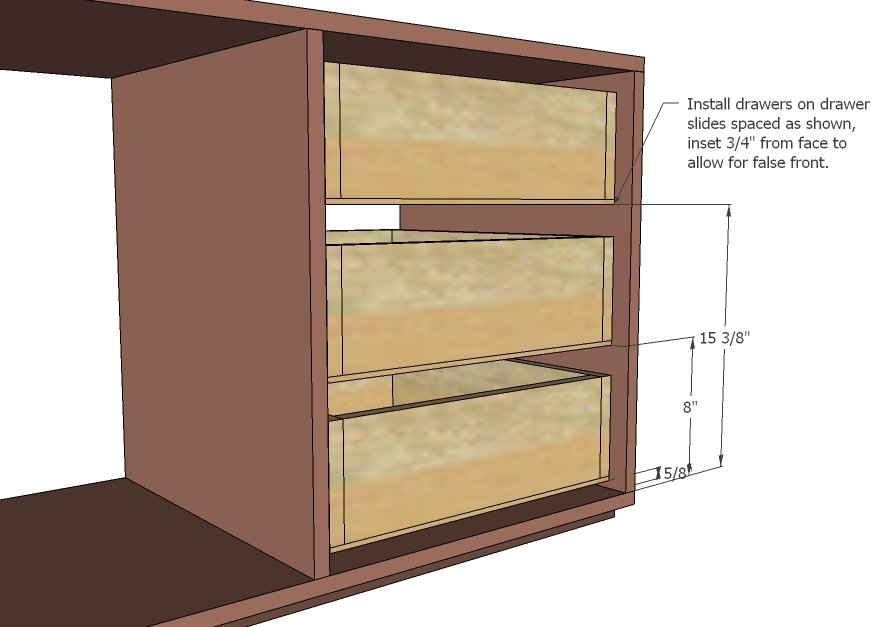
Insert drawers as shown in diagram with drawer slides.
Step 5
Step 6
Now the door itself. I recommend cutting from the strips of plywood, keeping the grain running vertical with the door.
Step 7
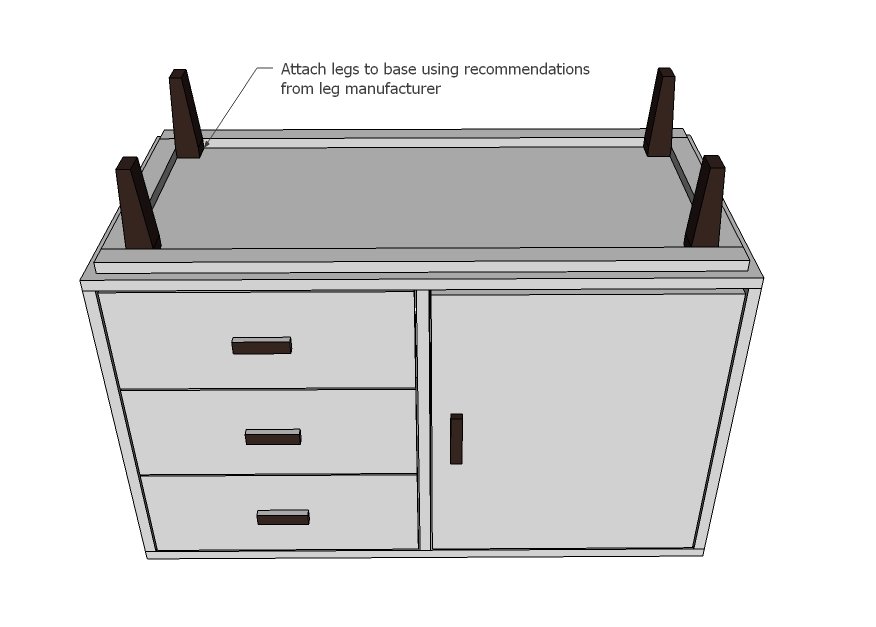
Now add the feet! And the hardware. This is the fun part!
And finally the back.
You can also add shelves to the large compartment.
Finishing
Sand all surfaces, starting with a medium grit and finishing with fine. Wipe off the dust, fill any holes or gaps with wood filler, and sand smooth once dry. Apply primer if you're painting, then finish with your choice of paint or stain and seal with a durable clear topcoat. For outdoor projects, use exterior-rated primer, paint or stain, and sealer so the piece stands up to the weather.
Source (temporary): https://www.ana-white.com/woodworking-projects/midcentury-bar-console-cabinet