Midcentury Modern Console / Buffet Cabinet
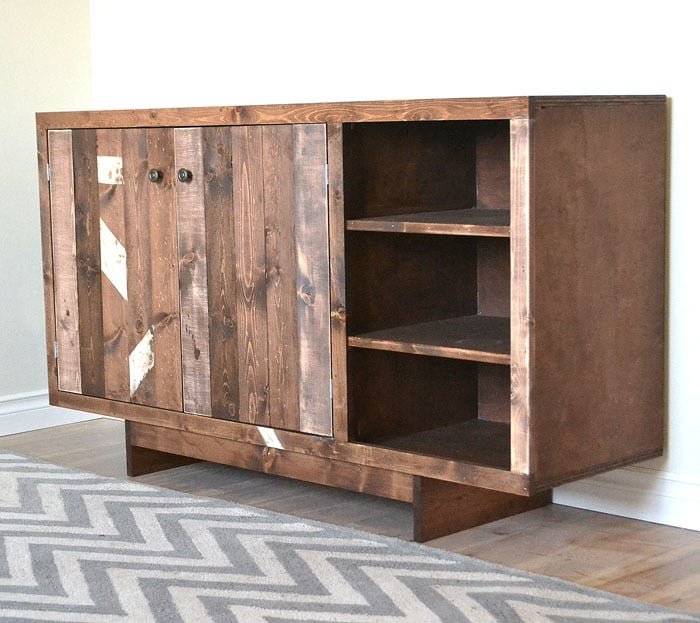
This easy to build console table or buffet cabinet adds style and storage to your space! from
Specifications
| Project type | Media and Entertainment Centers |
|---|---|
| Room | Storage Solutions |
| Style | Green or Eco-Friendly Style Furniture |
| Difficulty | Intermediate |
| Estimated cost | $50 - $100 |
Dimensions
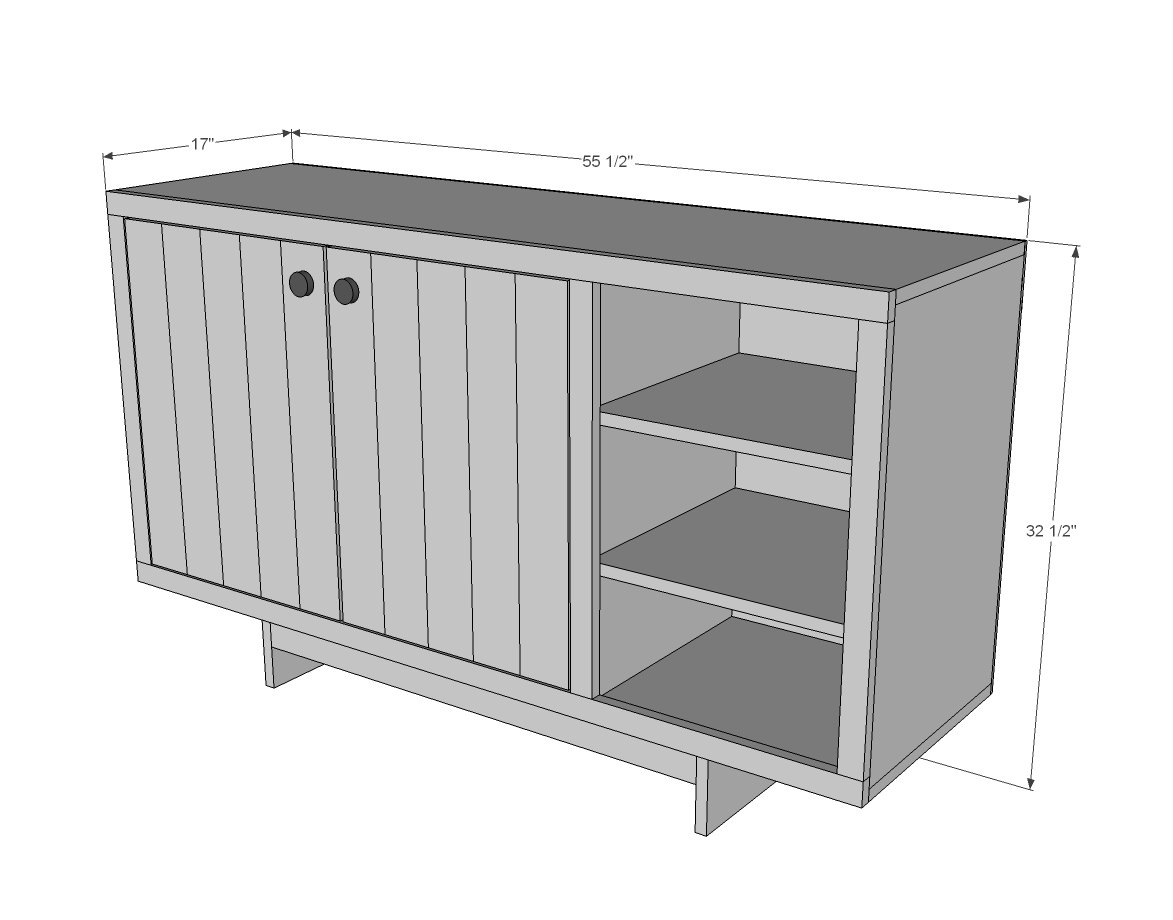
Use the size-specific shopping and cut lists below.
Shopping List
1 sheet 3/4" plywood ripped into strips 15 3/4" wide
3 - 1x2 @ 8 feet long
1 sheet 1/4" plywood or backerboard
1 - 1x6 @ 6 feet long
1 - 1x3 @ 3 feet long
2 - 1x4 @ 10 feet long
2 sets of butt hinges
magentic clasp or hasp (recommended)
2 knobs edge banding or 1x1 pine trim for finishing small shelf exposed plywood edges (I used pieces of 1x2 ripped in half)
Cut List
BOX 2 - 3/4" plywood @ 15 3/4" x 55 1/2" (top and bottom)
1 - 3/4" plywood @ 15 3/4" x 36 1/4" (main shelf - cut to fit)
3 - 3/4" plywood @ 15 3/4" x 25 1/2" (sides/dividers)
2 - 3/4" plywood @ 15 3/4" x 17" (small shelves - cut to fit)
1 - 1/4" plywood @ 55 1/2" x 27" FACE FRAME
2 - 1x2 @ 55 1/2"
3 - 1x2 @ 24" BASE
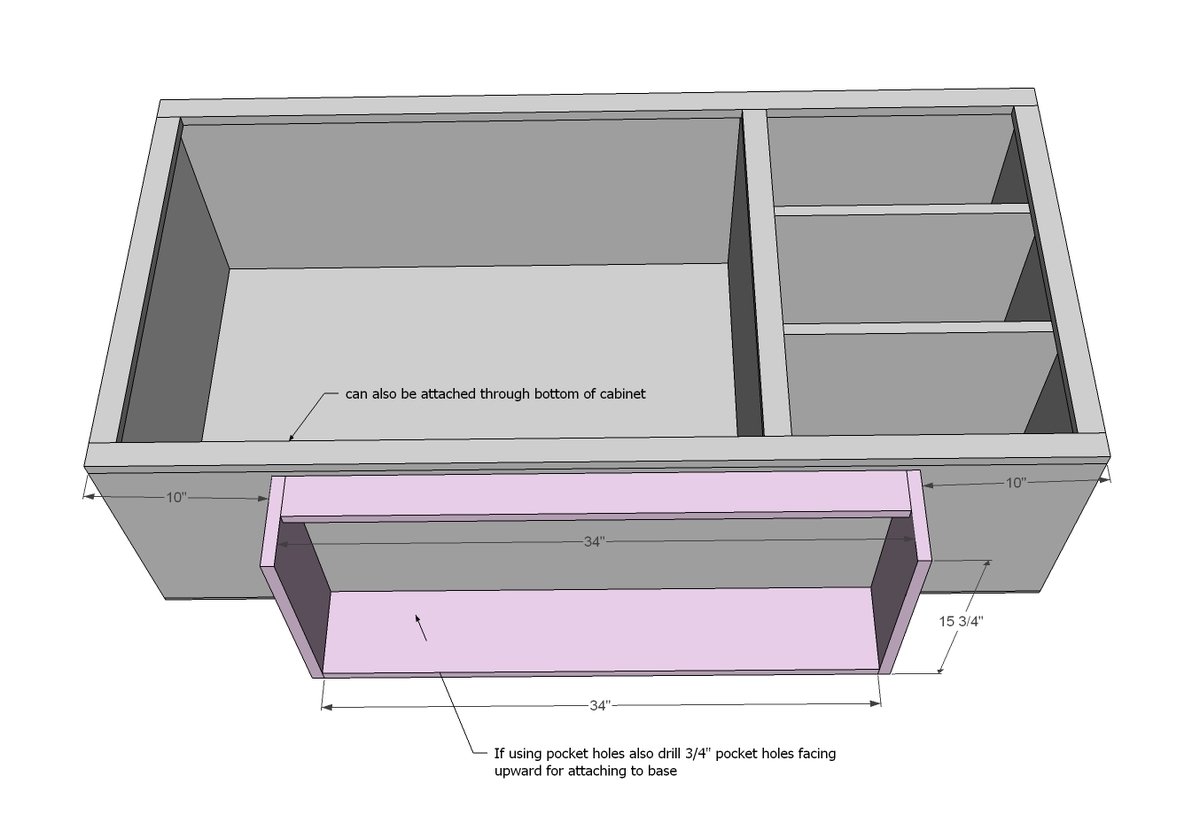
2 - 1x6 @ 15 3/4"
1 - 1x6 @ 34"
1 - 1x3 @ 34" DOORS
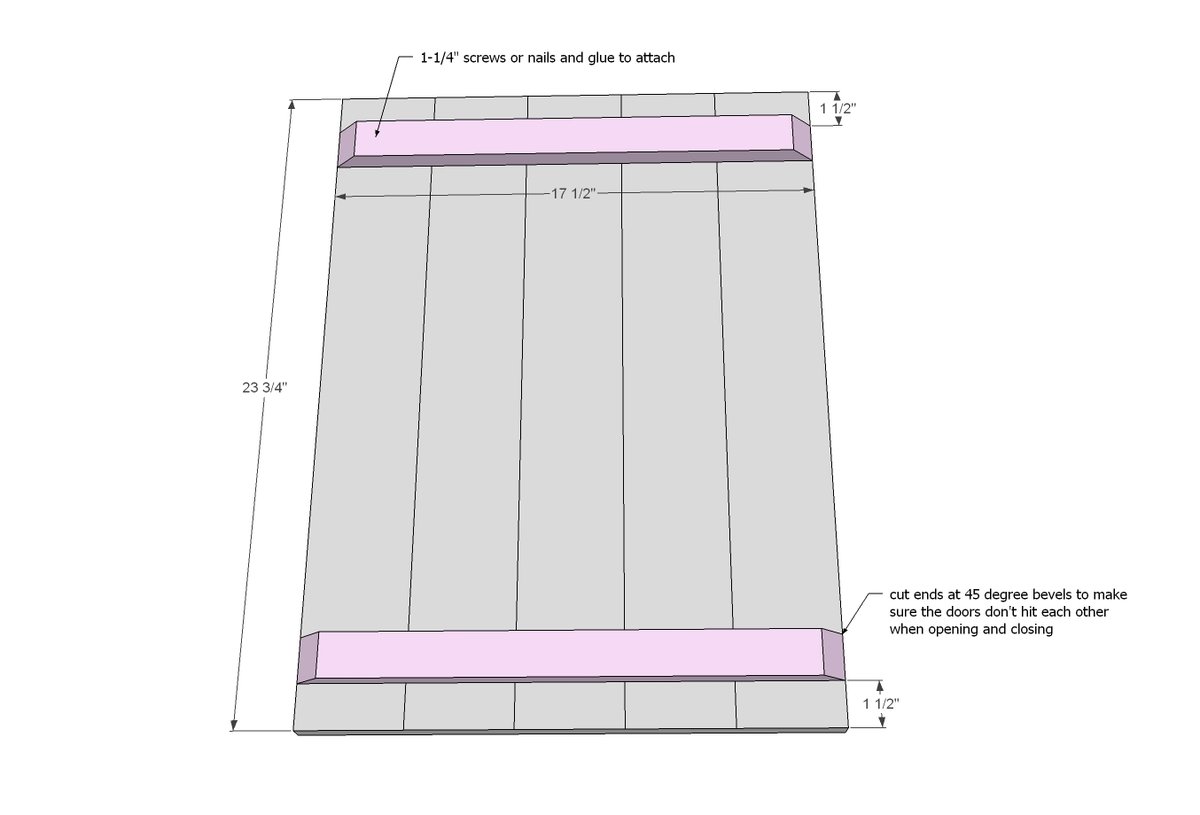
4 - 1x2 @ 17 1/2" (both ends beveled at 45 degrees off square, long point to long point)
5 - 1x4 @ 23 3/4"
TIP: Make sure you plan so all the plywood cuts fit on the same sheet of plywood. There's just enough - not alot of extra!
Tools
- measuring tape
- square
- pencil
- safety glasses
- hearing protection
- drill
- circular saw
- compound miter saw
- nailer
- sander
- countersink drill bit
Step-by-step Instructions
Step 1
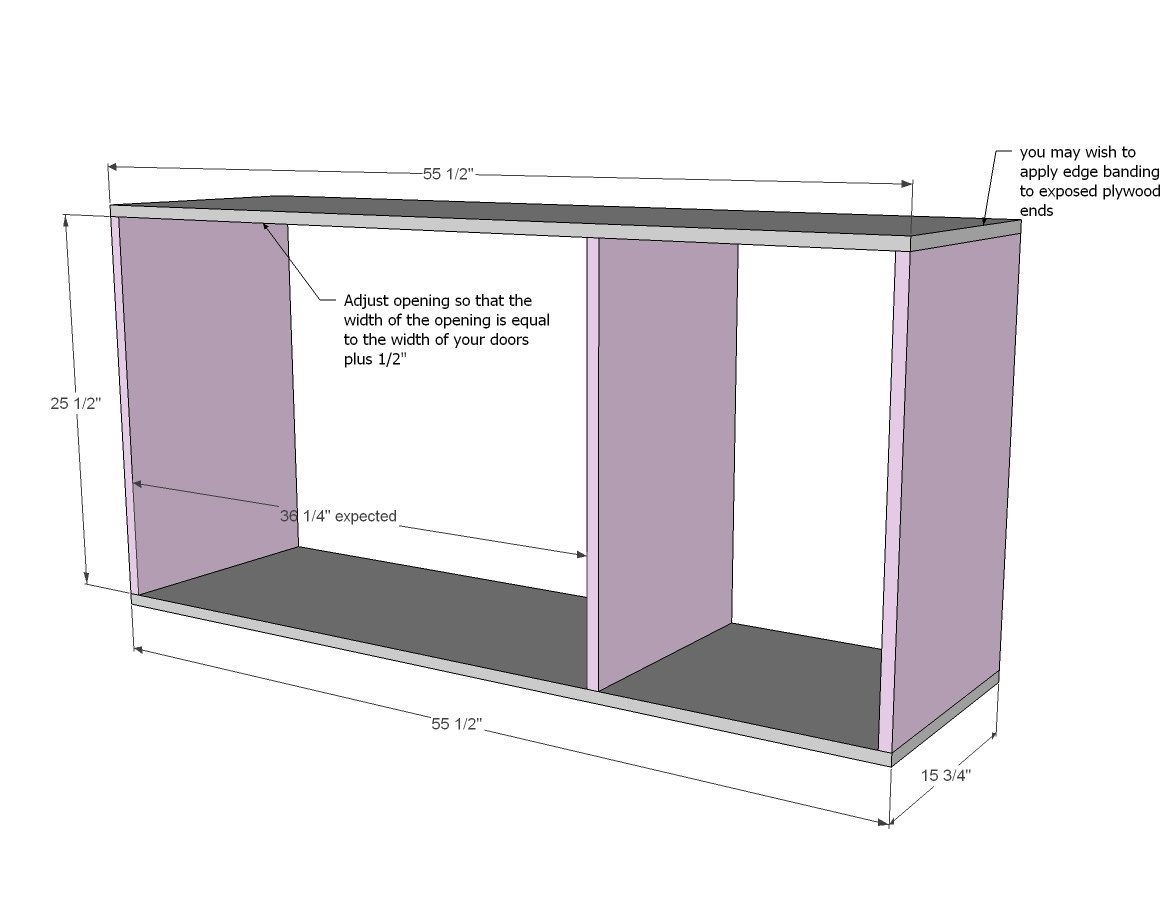
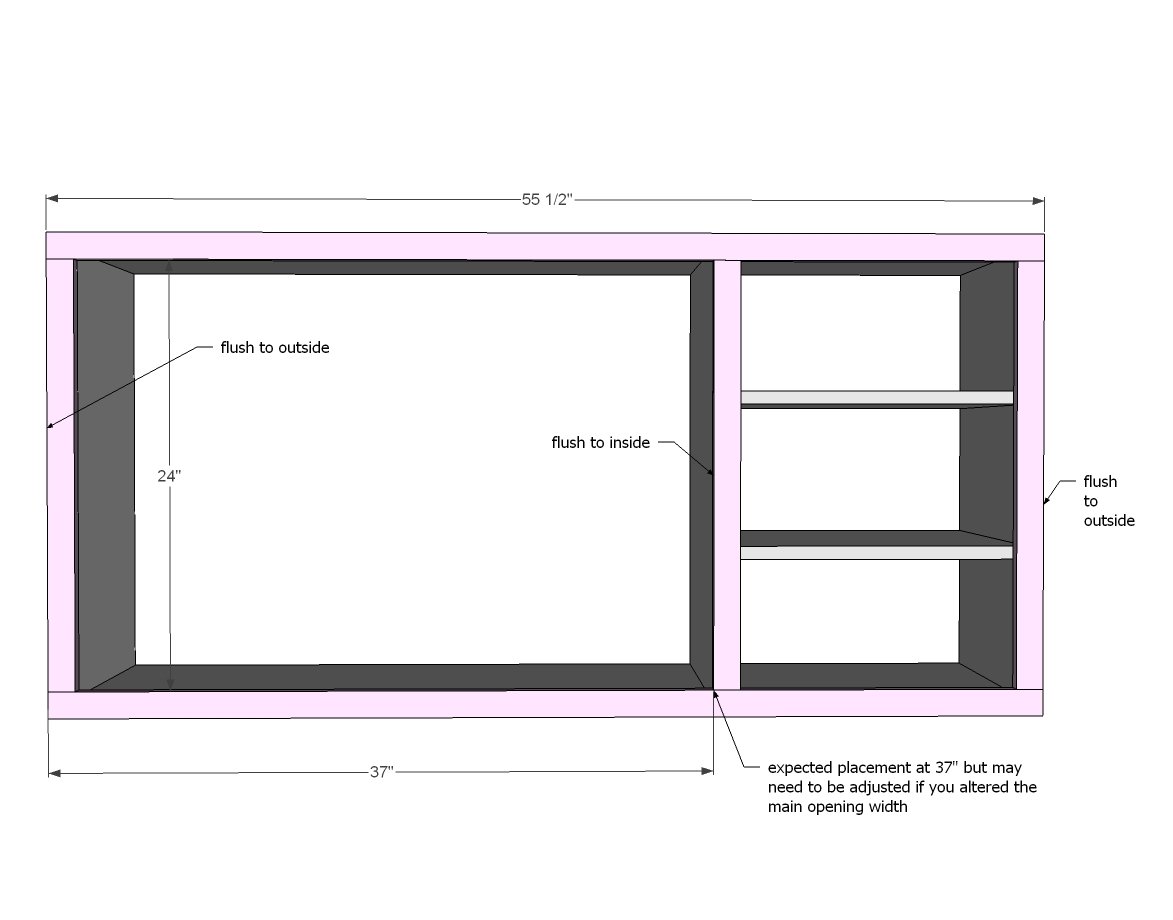
NOTE on getting doors to fit perfectly: So here's the deal - wood isn't always true to widths. Measure your 1x4 boards that you will use for the doors. If they measure 3 1/2' wide, then you can just proceed. If they don't, I recommend modifiying the main opening width to the width of your finished doors + 1/2" for clearance around doors + 1-1/2" for the face framing. You could also build your doors first (see step 6) and then measure the finished door, add 1/2", add another 1 1/2" for the face framing, and this will be the main opening width. Another option is if your 1x4 boards are a little on the narrow side, you could leave gaps between the 1x4s as you build the doors. If the 1x4 boards are too wide (not likely) you could build the door and then trim it down to fit. A final option is to just go ahead and build the box, but hold off on the middle 1x2 in the face frame (next step) until after you build the doors. Then attach the middle 1x2 in the face frame to give you just enough room for your doors. Just giving you options so your doors look beautiful when done with an even gap around them! So once you get that figured out, it's time to build the box. We use 3/4" pocket holes (3 per end of each of the sides and divider) and 1-1/4" pocket hole screws. Another option is 2" wood screws or nails and glue (nails aren't as strong but since this project is face framed with a full back and isn't for sitting or climbing on, would most likely be enough). The main shelf can be added at this step too.
Step 2
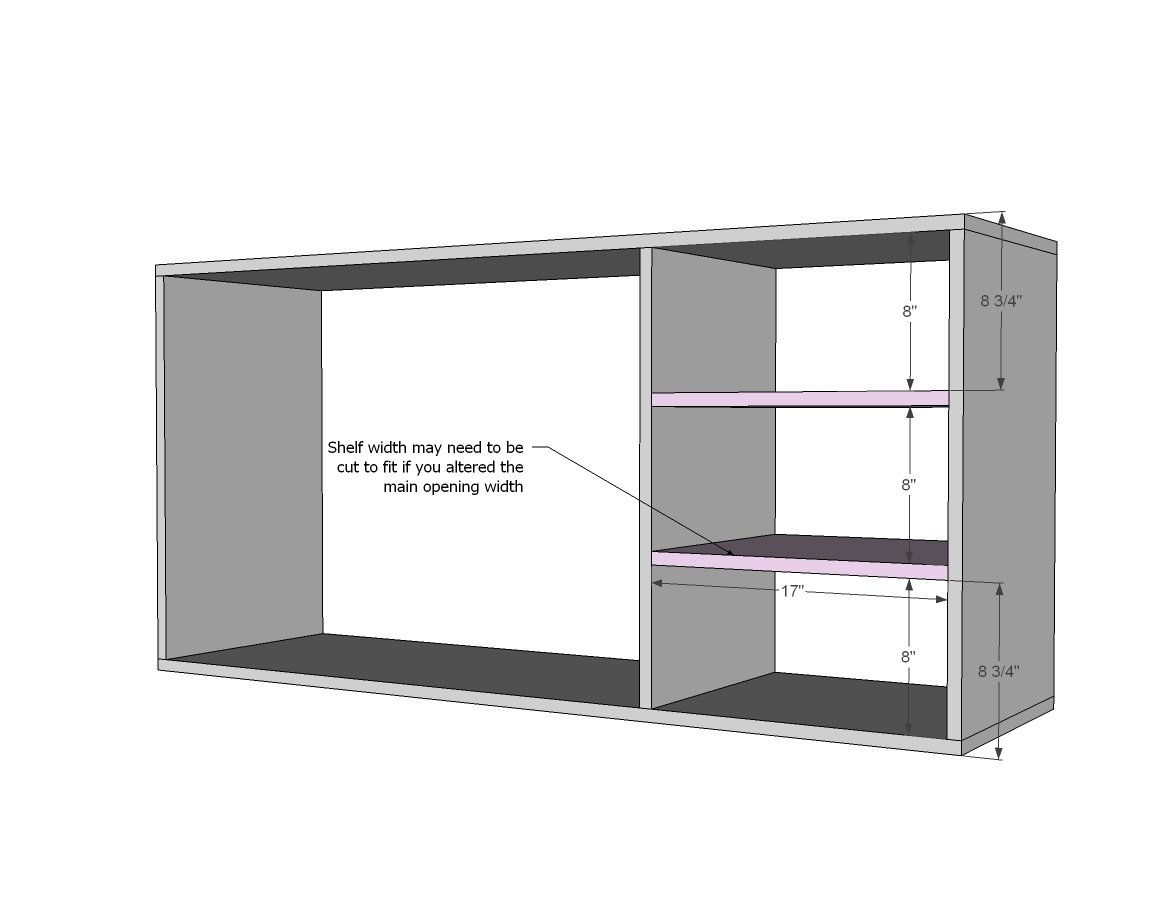
If you altered the width of your main opening, this will affect the width of your smaller shelves. Cut to fit and attach. We attached on the underside with 3/4" pocket holes and 1-1/4" pocket hole screws, but again, countersinking screws or nails would work too. Just don't forget the glue.
Step 3
We built our face frame first on the ground with 3/4" pocket holes and 1-1/4" pocket hole screws, then nailed the whole thing to the front of the project.
Step 4
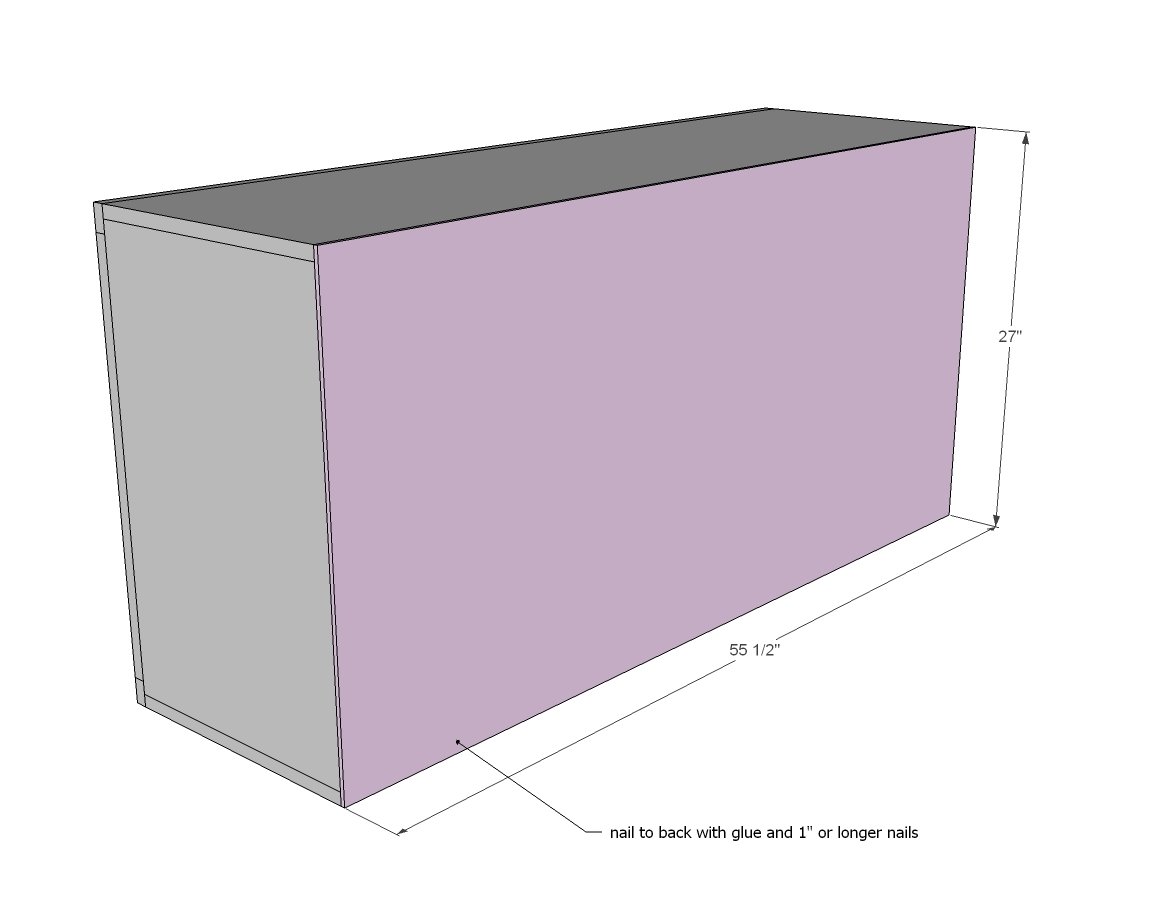
And then we added the back, nailing and gluing it to the project.
Step 5
Step 6
Now for those doors - be careful to build them square, so the ends match up. I glued between each 1x4 and also glued and nailed the back supports on.
Step 7
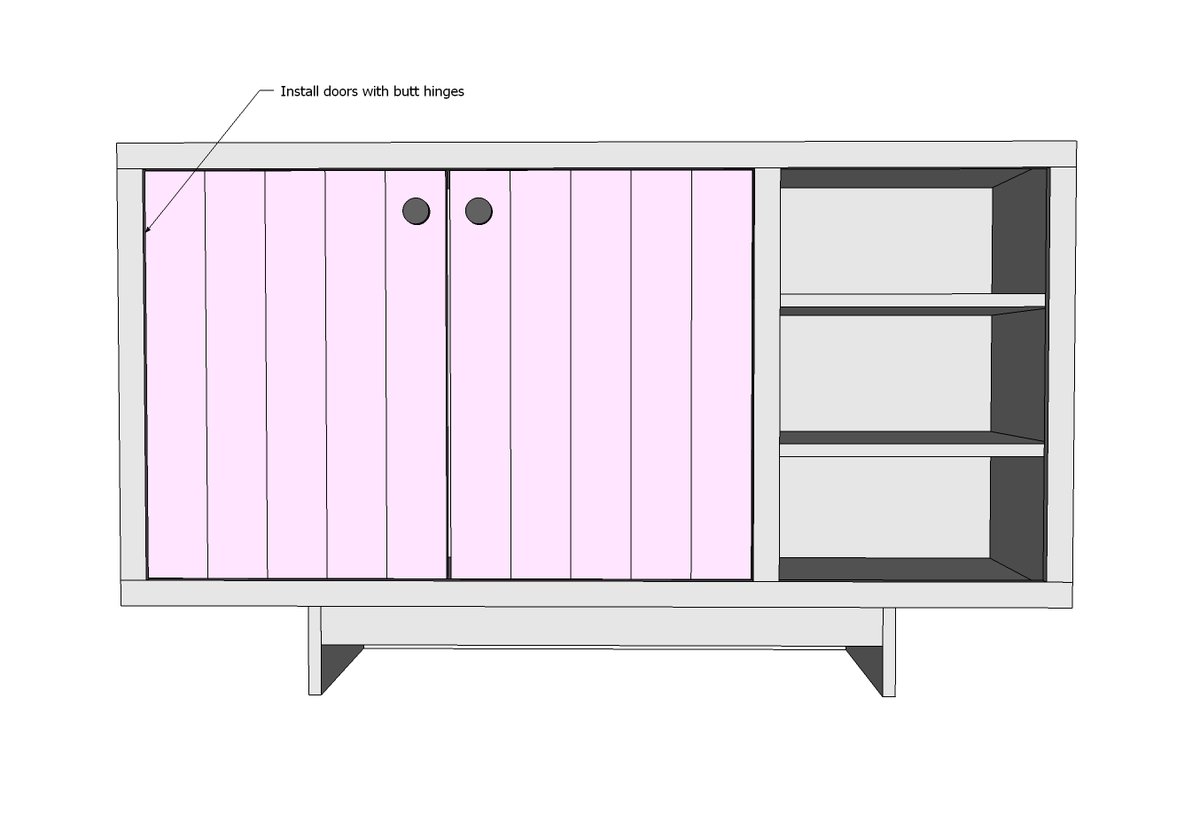
I attached the doors with simple butt hinges, in the crack between the door and face frame. The goal is 1/8" gap around all sides of the door. To keep the doors shut, add magnetic clasps or hasps.
Step 8
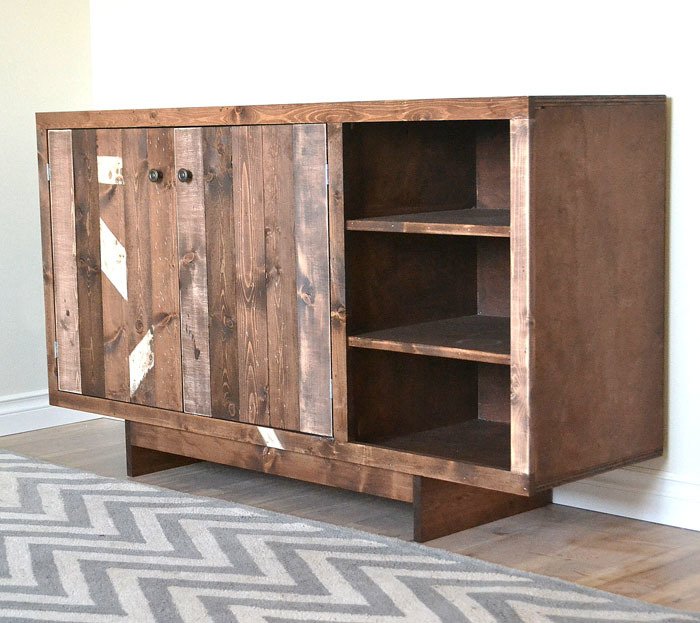
To achieve this stain, the entire cabinet was stained a medium stain. Then for the doors, selective boards were sanded down to remove some of the stain, lightening the boards. Other boards were given another layer of darker stain. And for the lighter areas, I taped off areas and sanded all the stain off to give the appearance of a past board to board joint.
Finishing
Sand all surfaces, starting with a medium grit and finishing with fine. Wipe off the dust, fill any holes or gaps with wood filler, and sand smooth once dry. Apply primer if you're painting, then finish with your choice of paint or stain and seal with a durable clear topcoat. For outdoor projects, use exterior-rated primer, paint or stain, and sealer so the piece stands up to the weather.
Source (temporary): https://www.ana-white.com/woodworking-projects/midcentury-modern-console-buffet-cabinet