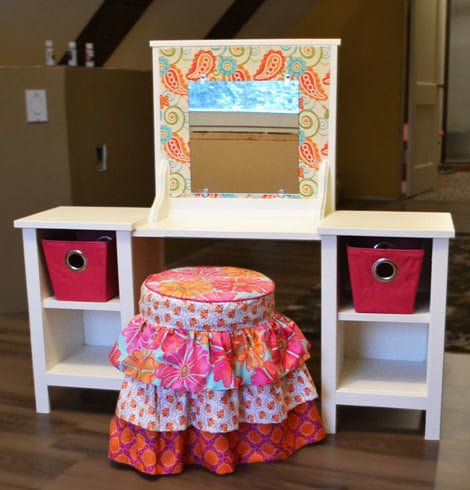
Mila Play Vanity
Hope you and yours had the Merriest of Christmases!
Specifications
| Project type | Toys |
|---|---|
| Room | Kids and Toys |
| Style | Children's and Kid's Room Furniture and Toy Plans |
| Difficulty | Intermediate |
| Estimated cost | $20 - $50 |
Dimensions
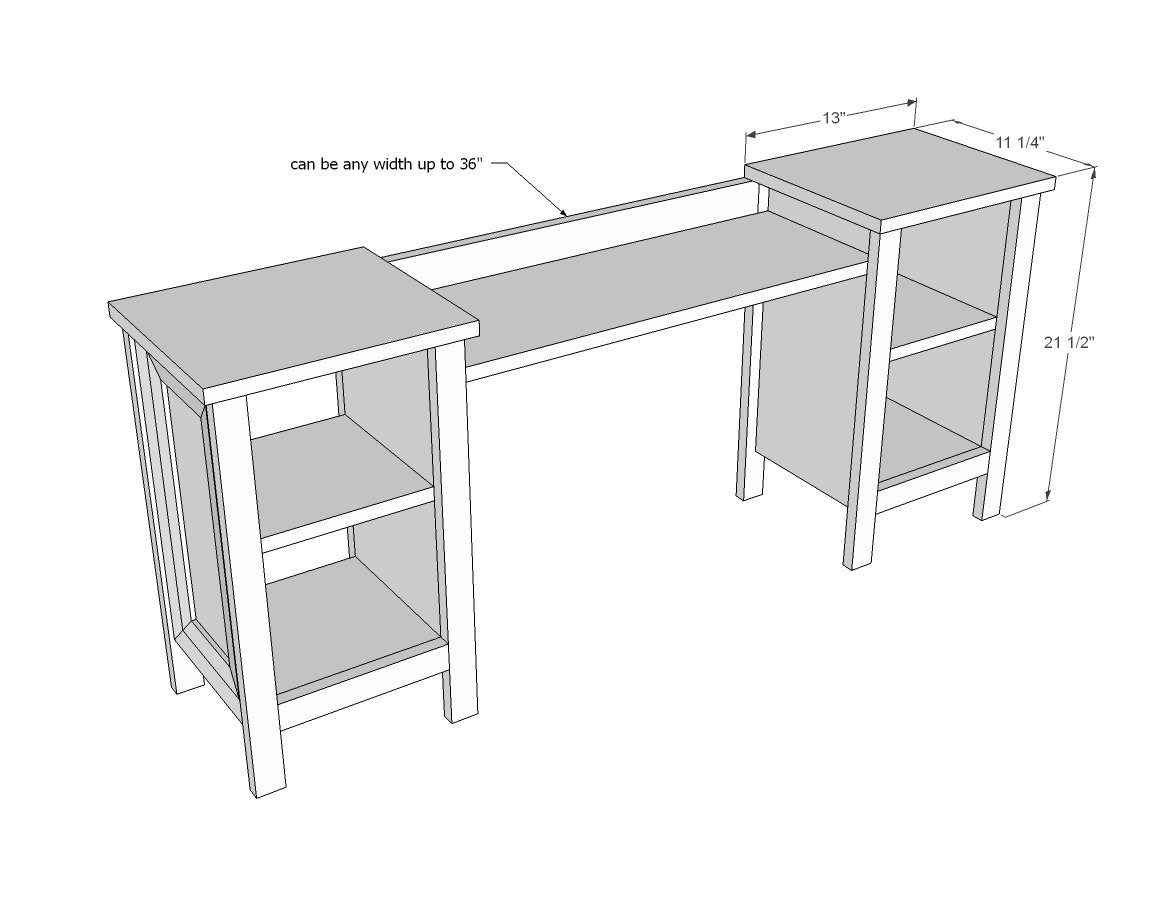
Use the size-specific shopping and cut lists below.
Shopping List
9+ feet of 1x10s (add more for center tabletop)
2 - 1x2s @ 8 feet long
1 - 1x12 - 27" long
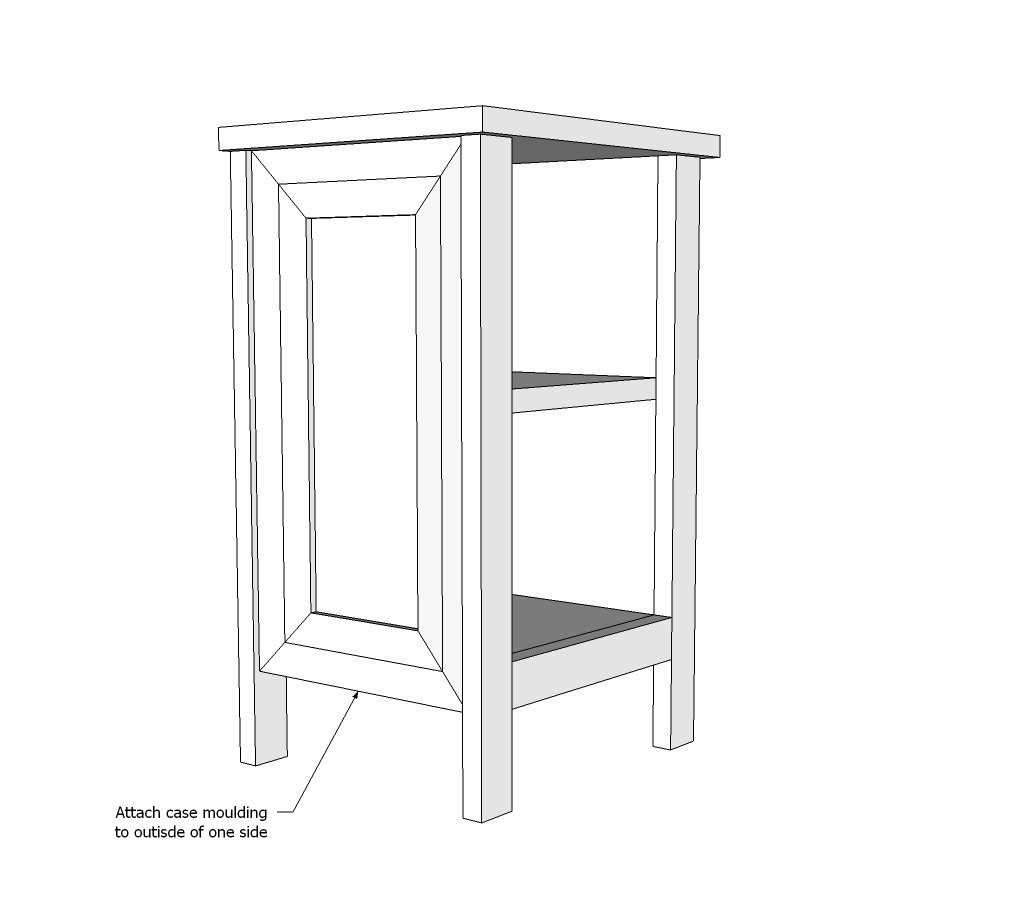
Base moulding and casing for trim on sides
1/4" plywood for backs (optional)
Cut List
4 - 1x10 @ 17 1/2”
4 - 1x10 @ 9”
8 - 1x2 @ 20 3/4”
4 - 1x2 @ 9”
2 - 1x12 @ 13”
Mitered casing to decorate ends
1x10 for center tabletop (cut to fit)
1x3 or 1x4 for back center tabletop (cut to fit)
Tools
- measuring tape
- square
- pencil
- safety glasses
- hearing protection
- kreg-jig
- drill
- circular saw
- nailer
- sander
Step-by-step Instructions
Step 1
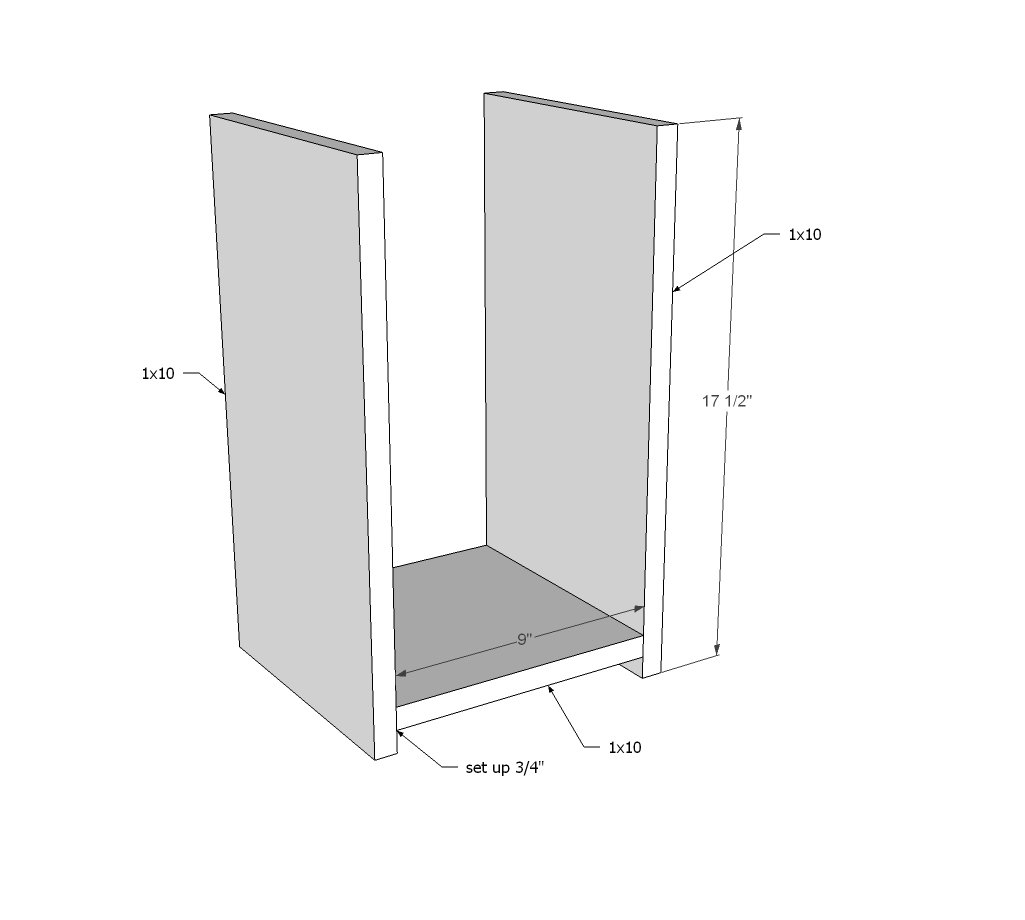
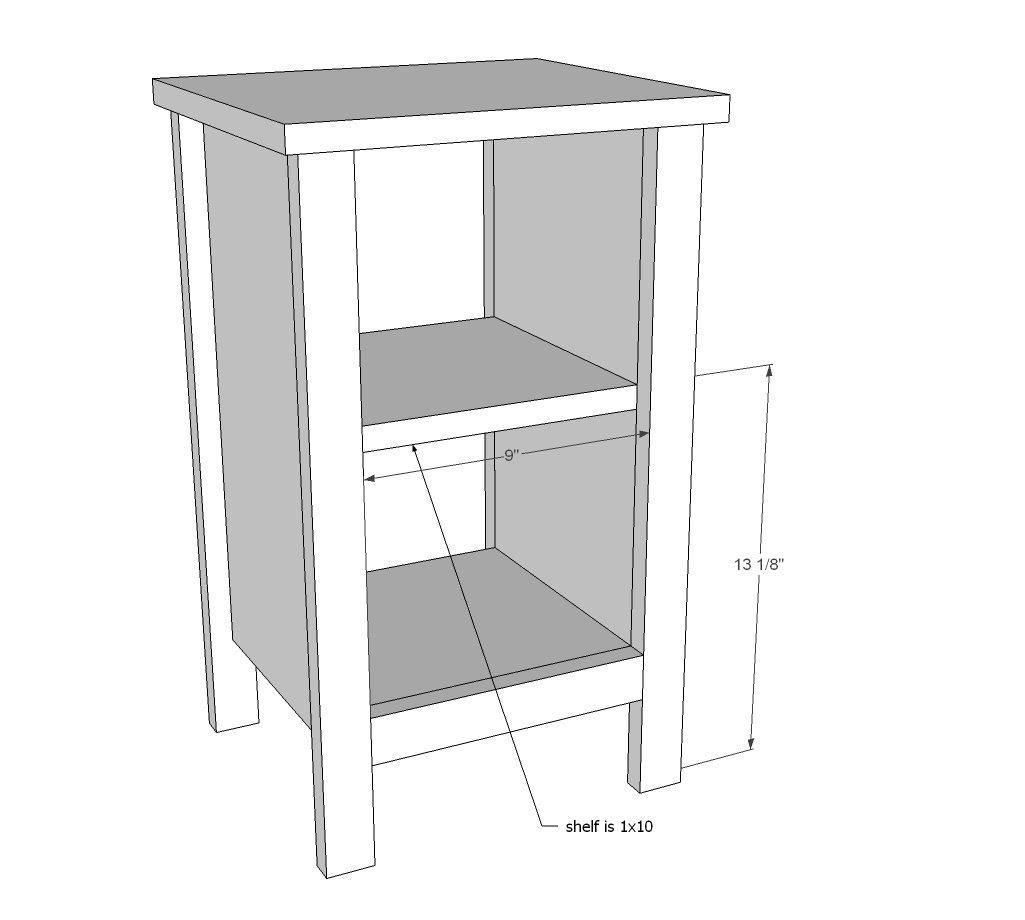
First, attach the two bottom shelves to the sides. You can also attach the middle shelf at this step too (see diagram 4 for placement).
Step 2
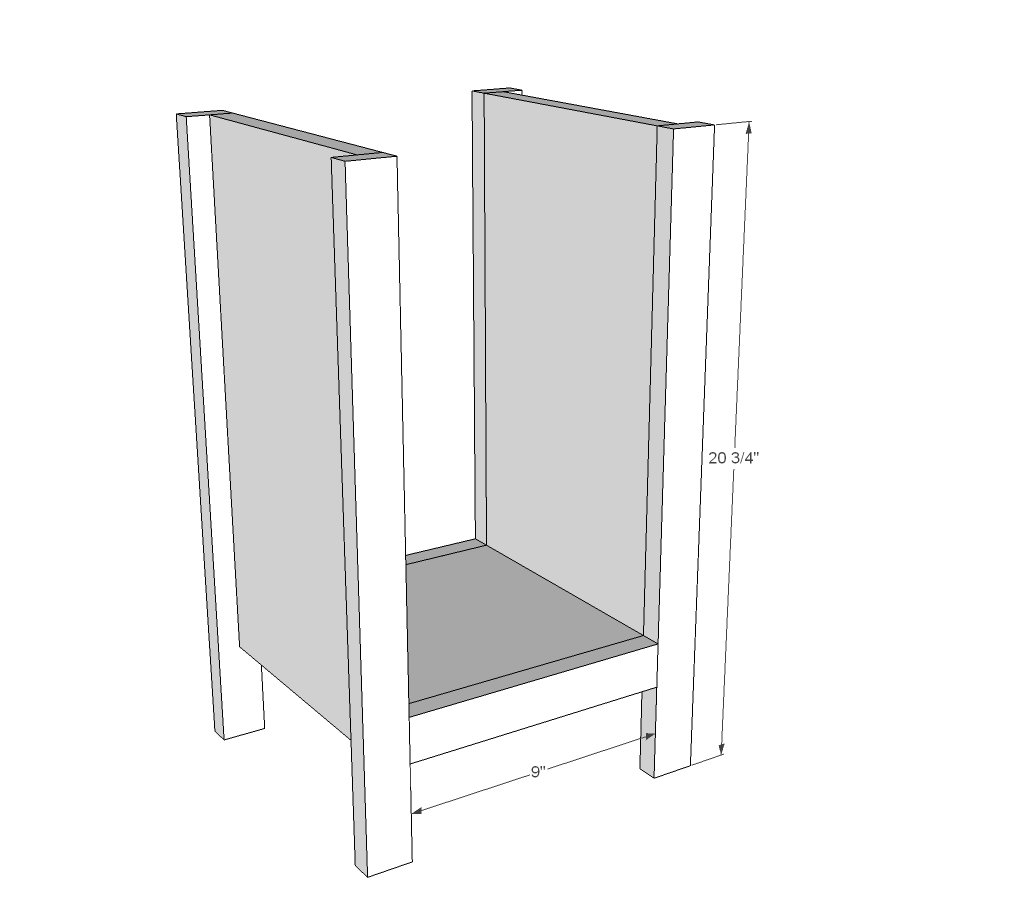
We attached the legs to the bottom trim first with 3/4" pocket holes and 1-1/4" pocket hole screws first (basically building mini face frames) and then attached the whole thing to the front of the 1x10 shelving and sides. Note that the face frame is flush to inside.
Step 3
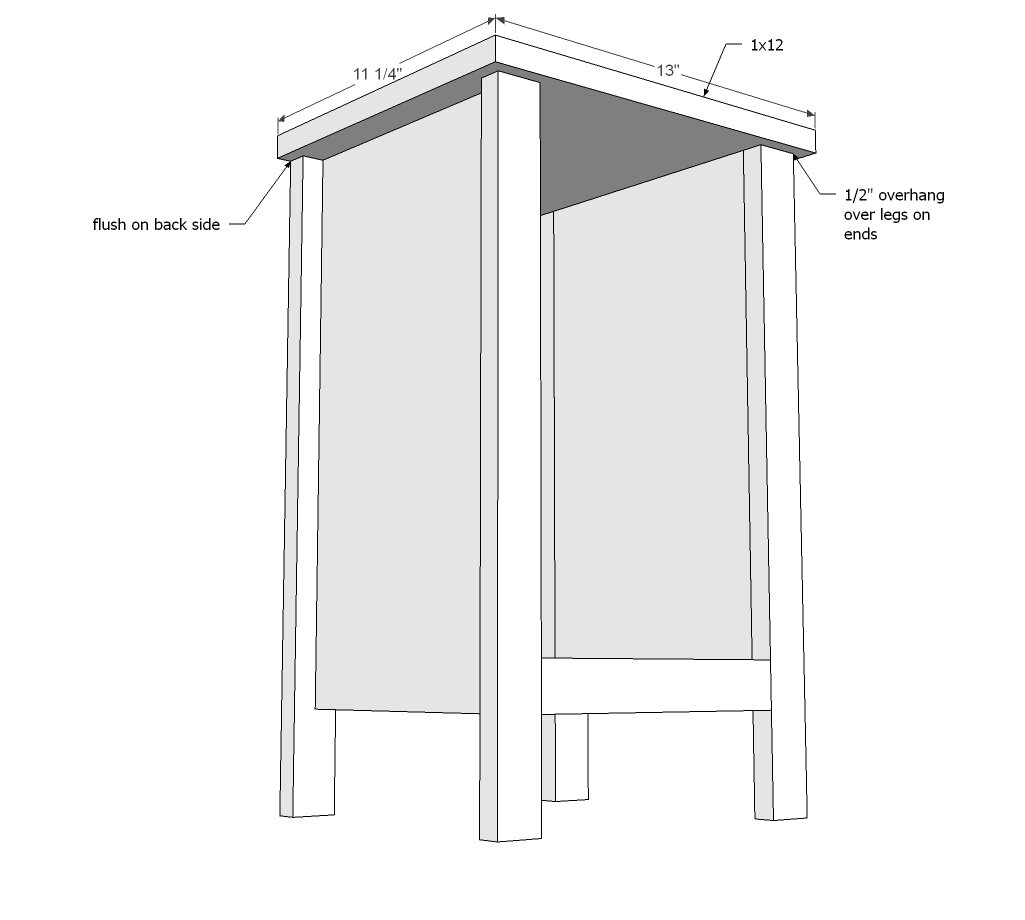
Then we added the top - flush to back.
Step 4
And then the shelf - just nailed in place.
Step 5
Step 6
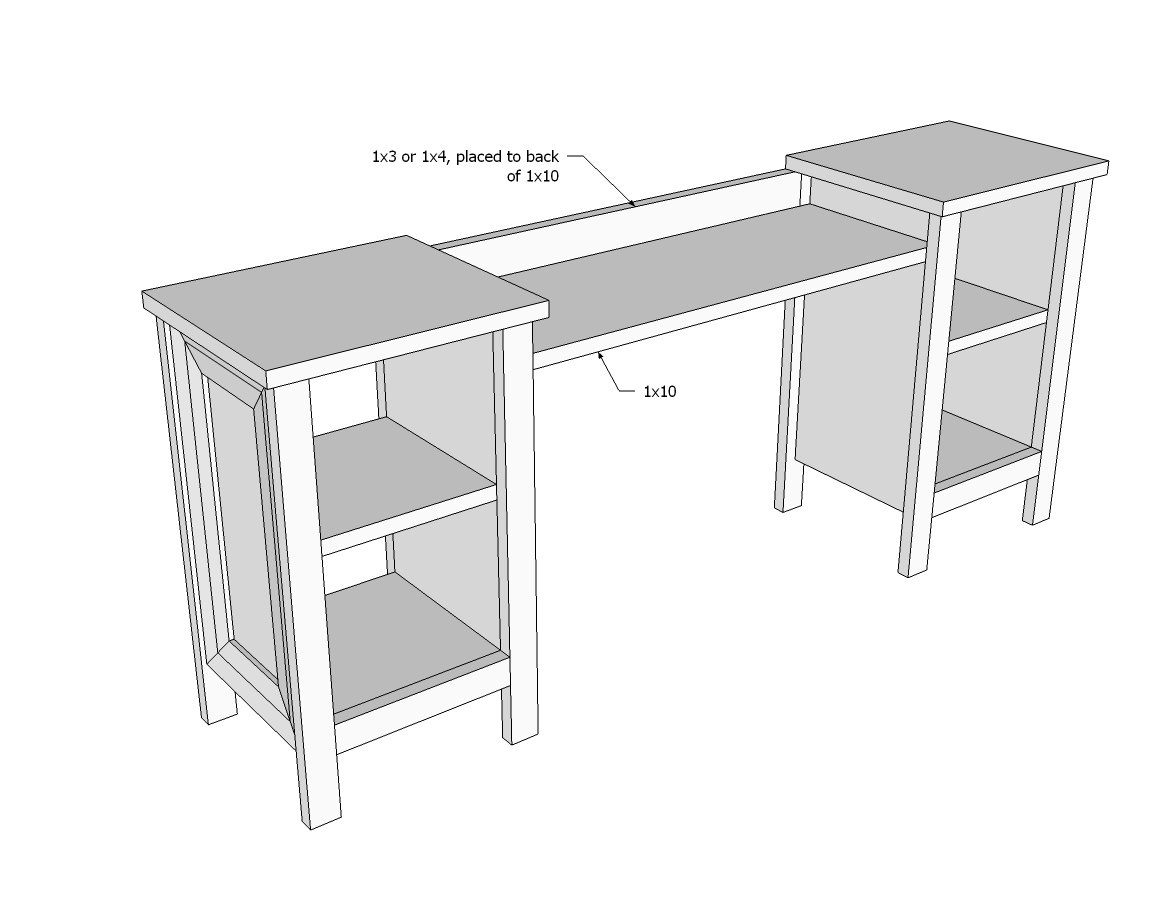
The vanity top can be made to any size, although any longer than 36" and you may have sagging issues. We attached with pocket holes, first attaching the 1x10 between the two towers, and then adding the back trim (cut to fit). NOTE: Jen choose to build her vanity top differently to accommodate her mirror - see below.
Step 7
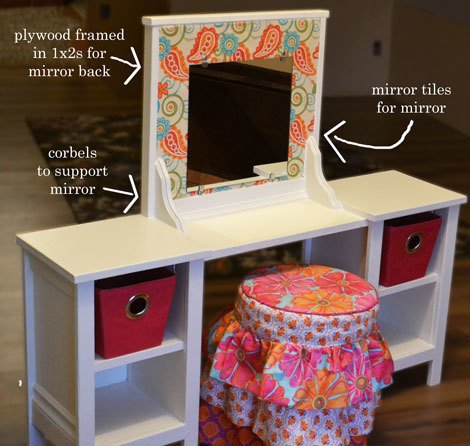
Jen created the mirror with 3/4" plywood trimmed on sides and top with 1x2s and casing along bottom. She supported it with store bought corbels (adds cuteness too!).
Finishing
Sand all surfaces, starting with a medium grit and finishing with fine. Wipe off the dust, fill any holes or gaps with wood filler, and sand smooth once dry. Apply primer if you're painting, then finish with your choice of paint or stain and seal with a durable clear topcoat. For outdoor projects, use exterior-rated primer, paint or stain, and sealer so the piece stands up to the weather.
Source (temporary): https://www.ana-white.com/woodworking-projects/mila-play-vanity