Mini Armoire Cabinet
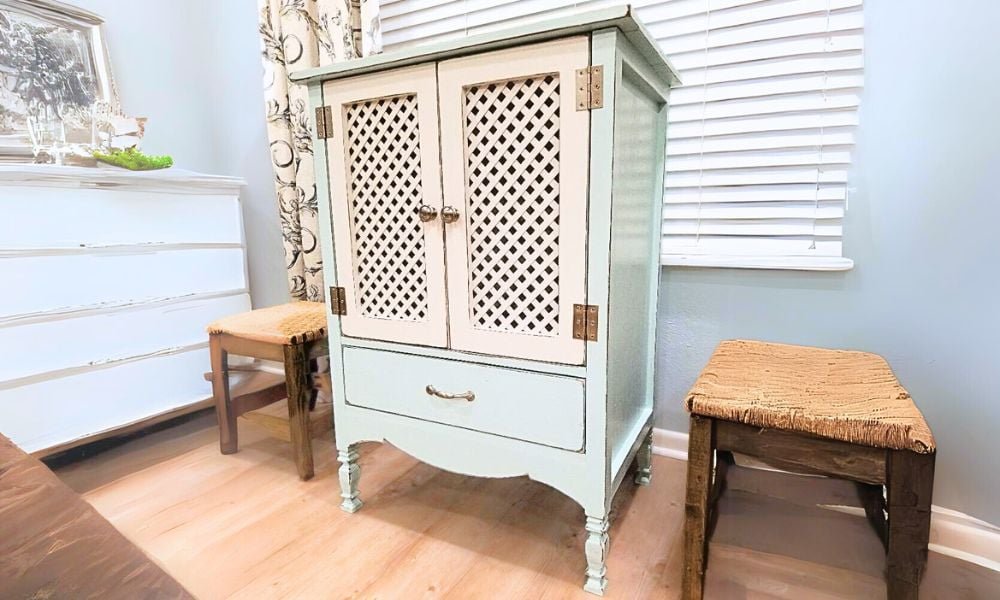
to build a DIY cabinet, inspired by Pottery Barn's Avery Cabinet. Simple vintage styling, pretty turned legs. Step by step plans include a cut list, shopping list, and detailed diagrams.
Specifications
| Project type | Dresser Plans |
|---|---|
| Room | Bedroom |
| Style | Cottage Style Furniture Plans |
| Difficulty | Advanced |
| Estimated cost | $100-$150 |
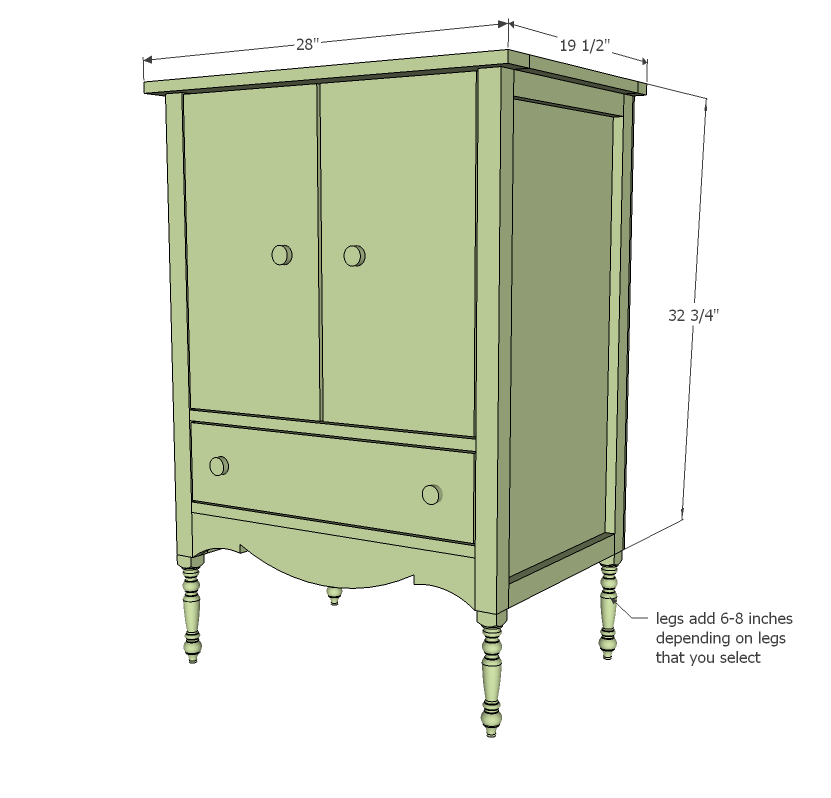
Dimensions
Use the size-specific shopping and cut lists below.
Shopping List
- 4 - Turned Feet, 6-8" in length (or extend
- 2 sets of Euro Style Inset Hinges (see step 9)
- 1 - set 16" Drawer Slides (see step 8)
- 4 - Knobs or handles
- 1 - full sheet 3/4" plywood
- 1 - half sheet of 1/4" plywood
- 1 - 1x6 @ 24" long
- 1 - 1x12 @ 48" long
- 2 - 2x2 @ 8 feet long
- 1 - 1x4 @ 8 feet long
- 1 - 1x3 @ 4 feet long
- 3 - 1x2 @ 8 feet long
Cut List
- 2 - 1x16 @ 32" (side panels)
- 4 - 1x2 @ 15 1/2" (width of side panels above)
- 4 - 2x2 @ 32" (Legs)
- 1 - 1x16 @ 23" (Shelf)
- 1 - 1x16 @ 28" (Top)
- 3 - 1x2 @ 23" (Shelf Trim)
- 1 - 1x2 @ 28" (Top Trim)
- 1 - 1x3 @ 28" (Top Trim)
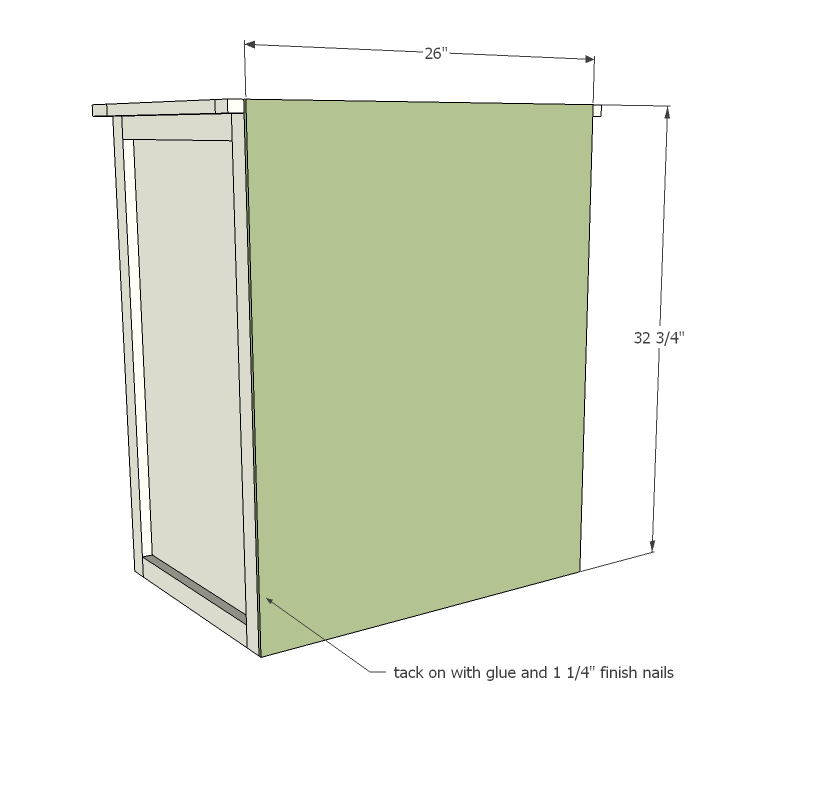
- 1 - 1/4" plywood or beadboard @ 32 3/4" x 26" (Back)
- 1 - 1x4 @ 23" Drawers
- 1 - 1x6 @ 22 3/4" (Face)
- 2 - 1x4 @ 16" (Sides)
- 1 - 1x4 @ 22" (Back)
- 1 - 1/4" Plywood @ 16 3/4" x 22" Doors
- 2 - 1x12 @ 21 1/4"
Tools
- measuring tape
- square
- pencil
- safety glasses
- hearing protection
- drill
- circular saw
- jigsaw
- nailer
- sander
- level
- countersink drill bit
Step-by-step Instructions
Step 1
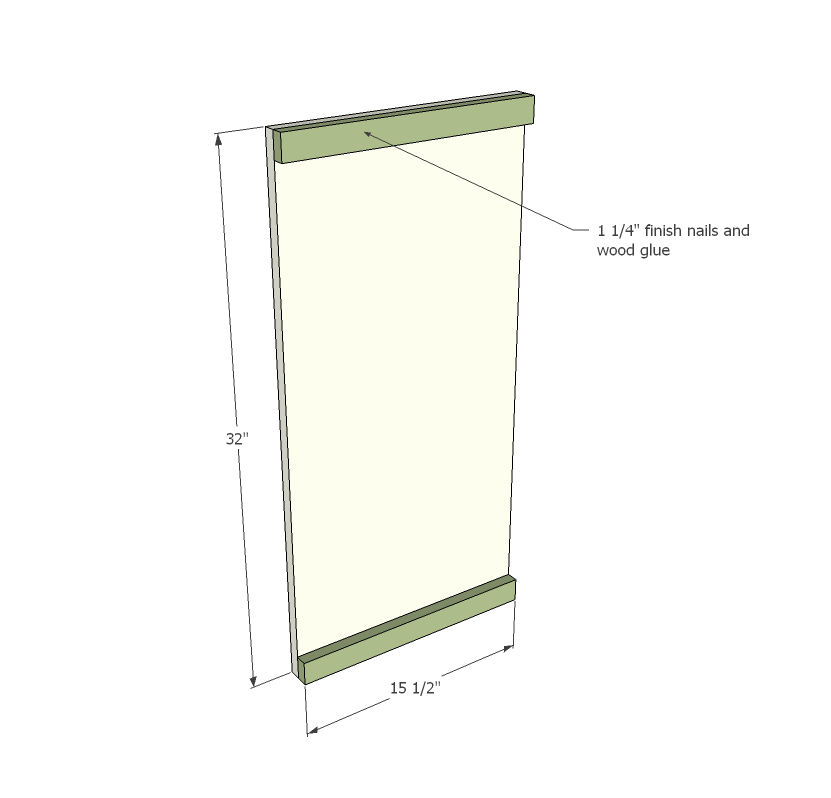
Nail the 1x2 trim to the tops and bottoms of the side panels.
Step 2
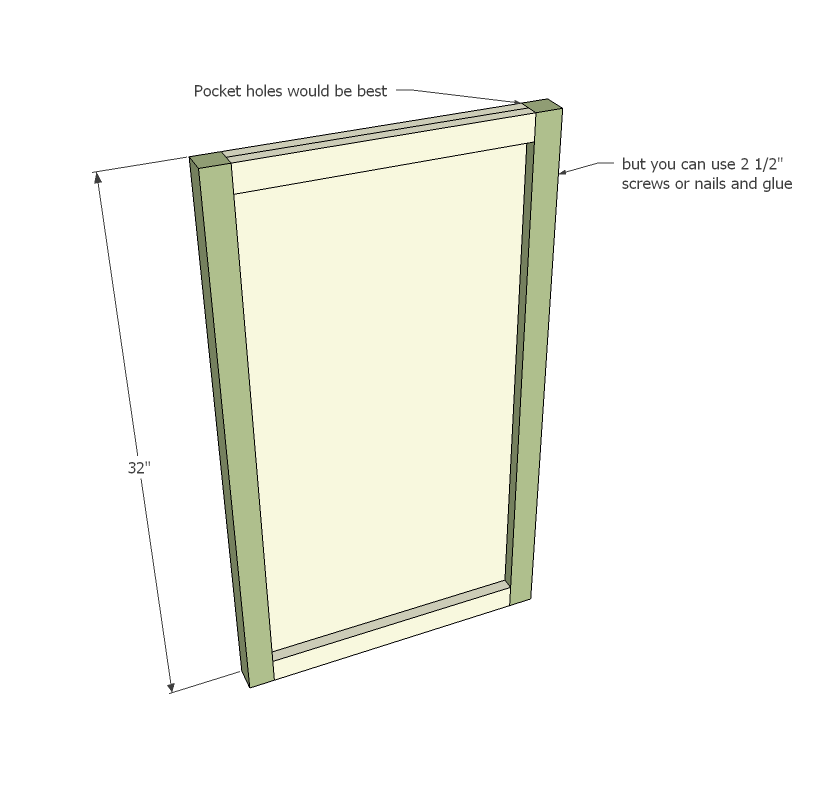
Now add the 2x2 legs to the side panels as shown above. Pocket hole screws set for 3/4" stock, 1 1/4" screws would be best, from the inside. If you don't have a pocket hole jig, carefully glue and screw in place as shown in diagram.
Step 3
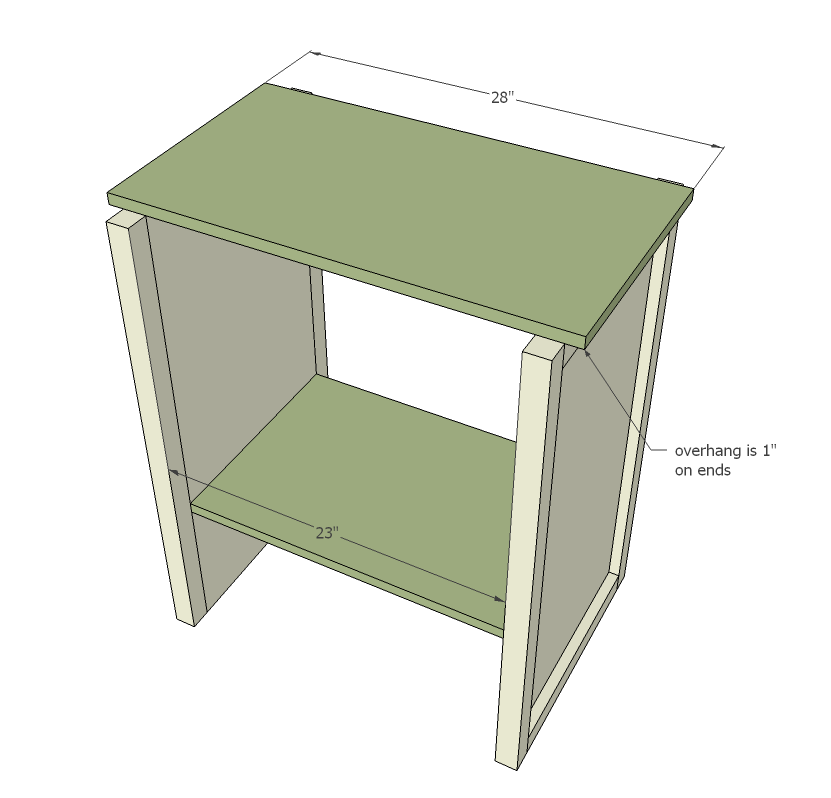
Once the sides are done, attach top in place, in line with the 1x16 side panels. Nail down with 2" finish nails and wood glue. Then mark 9 3/4" up from the bottom of the legs. Attach the shelf, above this mark (so there is a 9 3/4" gap BELOW the bottom shelf). You can use pocket holes, nails or screws and glue. IMPORTANT: Width of cabinet is designed to use 1x12s that measure 11 1/4" wide for the doors. If your 1x12s are not 11 1/4" wide, you will need to adjust the width of the cabinet. Here's the math - each 1x12 is 11 1/4" wide plus 1/8" clearance on both sides to equal 11 1/2". 11 1/2" x 2 = 23". Adjust these measurements to fit your 1x12 widths. You will need to adjust all horizontal boards if you do make an adjustment.
Step 4
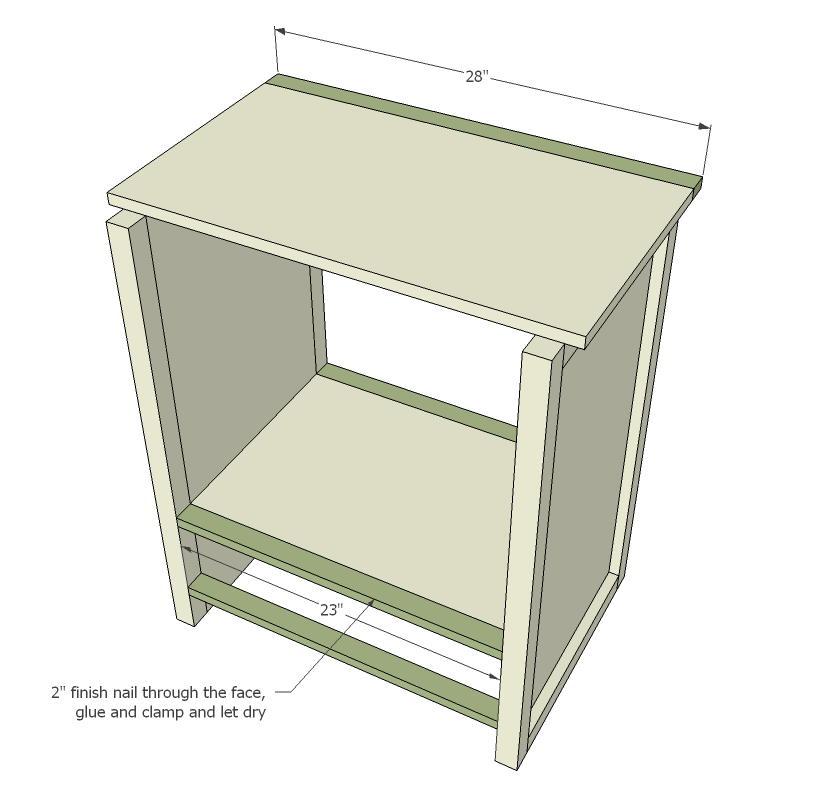
Attach top trim to top, glue and clamp in place for an even joint between the top board and trim. Do the same for the shelf trim. Measure down 5 3/4" from the shelf trim and attach the last trim board. We'll be adding support to this guy in a bit. IMPORTANT: This measurement assumes that your drawer face 1x6 is 5 1/2" wide, with a total of 1/4" clearance to equal 5 3/4". If your drawer faces are "off" adjust accordingly.
Step 5
Step 6
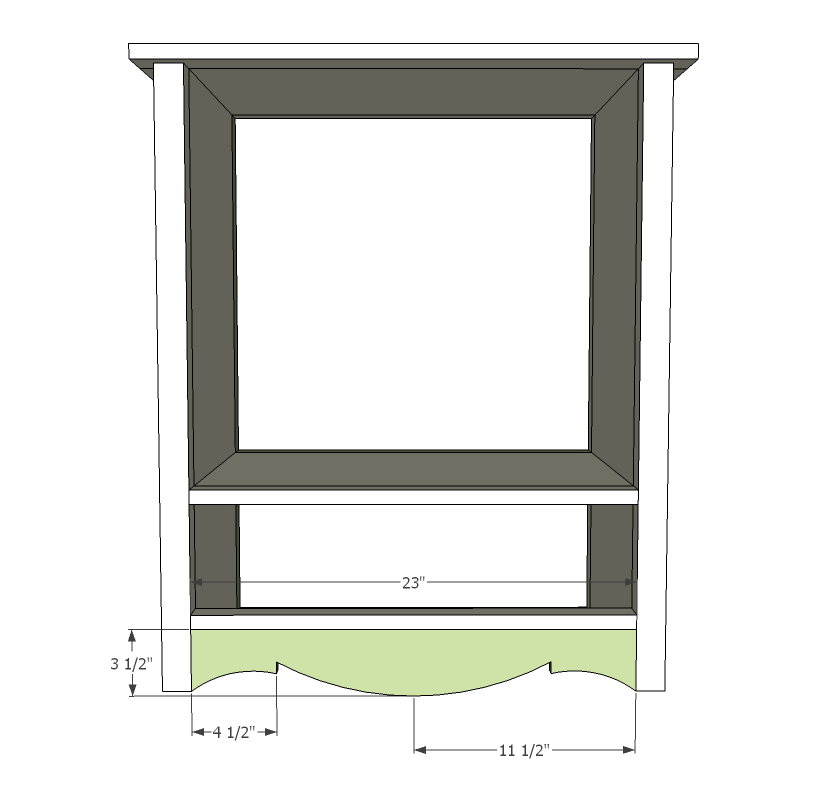
I find attaching first, and then cutting is easiest for me. Attach in place - should strengthen up that last trim board quite a bit - and then mark a pattern and cut out with a jigsaw.
Step 7
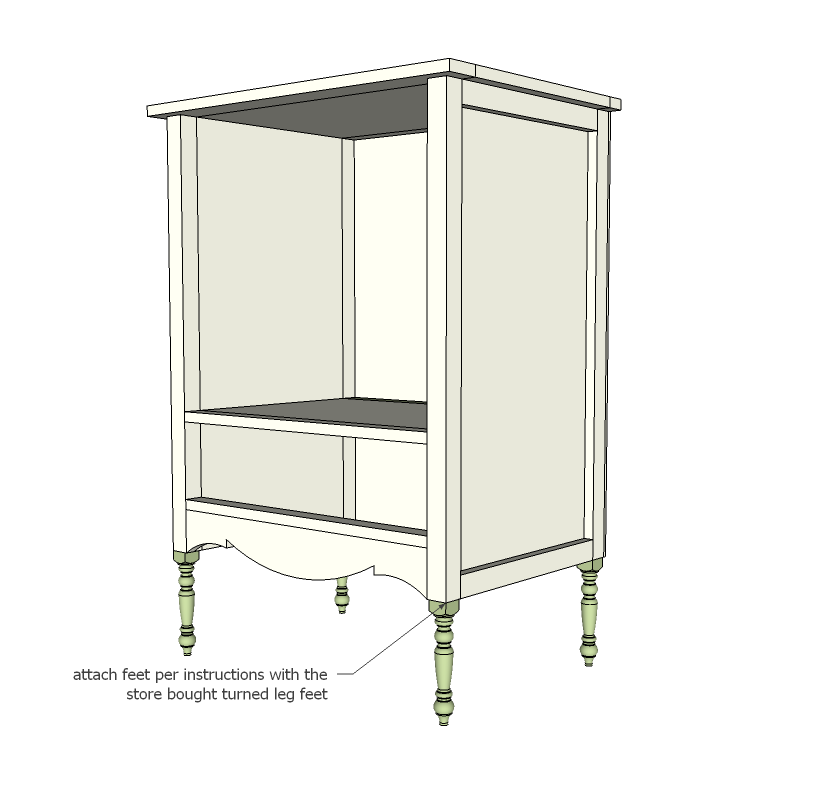
Now things are getting fun! Attach the legs per instructions with the feet.
Step 8
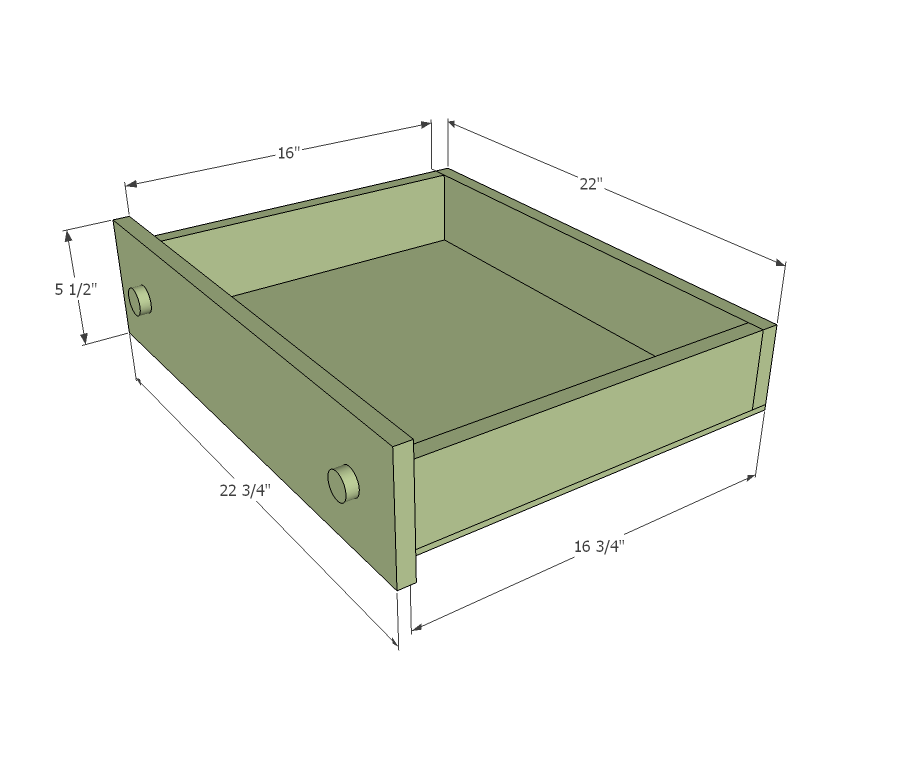
Build the drawer as shown above. The bottom is 1/4" plywood, sides are 1x4s and face is 1x6. The face overhangs sides by 3/8" and drawer face conceals the entire drawer box. Adjust for square. Once drawer is complete, attach to cabinet using 16" drawer slides like these: Available at both Blue and Orange in 16" lengths. I have a tutorial on these drawer slide here that might help.
Step 9
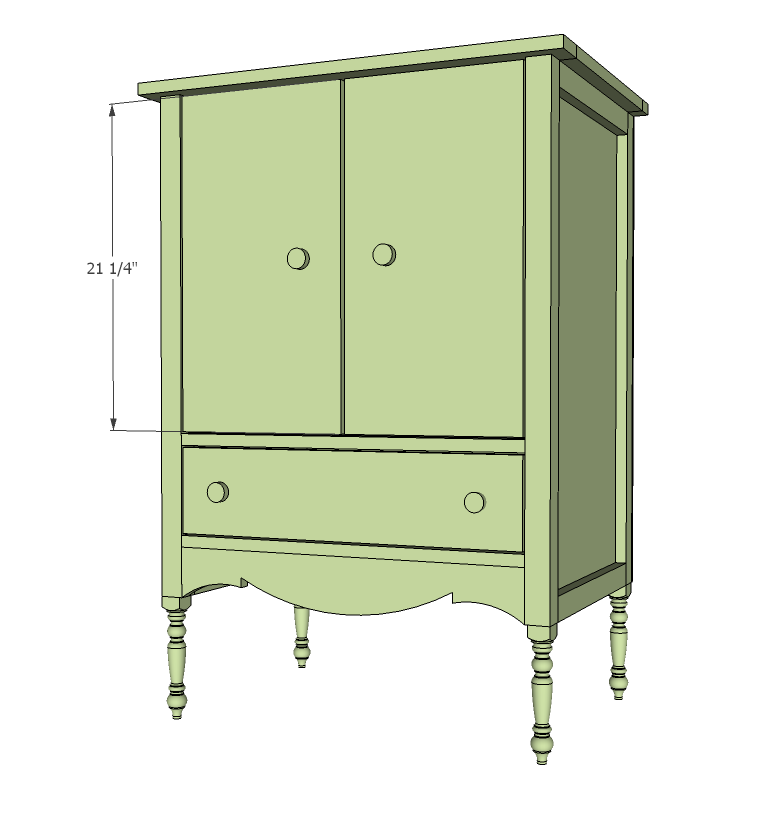
Doors - per step three, should fit nice, with an even 1/8" gap on all sides. Attach with hinges like these: They are available here at the Home Depot. I find them also at Lowes and online.
Finishing
Sand all surfaces, starting with a medium grit and finishing with fine. Wipe off the dust, fill any holes or gaps with wood filler, and sand smooth once dry. Apply primer if you're painting, then finish with your choice of paint or stain and seal with a durable clear topcoat. For outdoor projects, use exterior-rated primer, paint or stain, and sealer so the piece stands up to the weather.
Source (temporary): https://www.ana-white.com/woodworking-projects/mini-armoire-cabinet