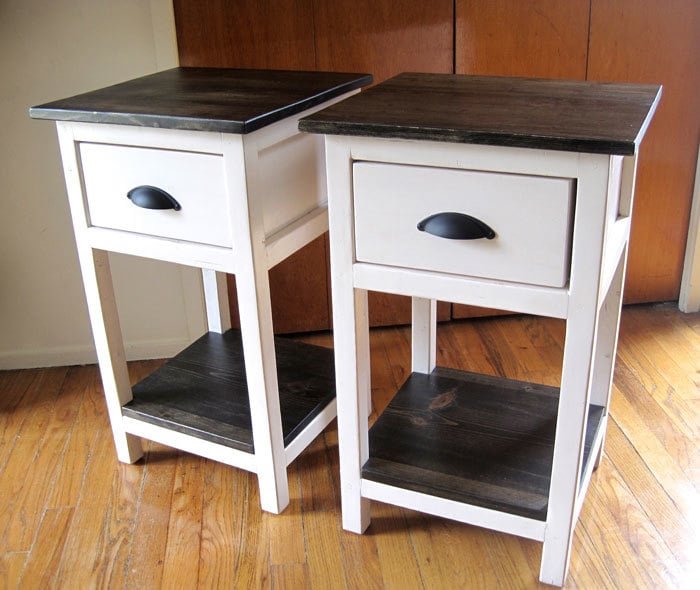
Mini Farmhouse Bedside Table
to build a mini farmhouse bedside table from
Specifications
| Project type | Nightstands |
|---|---|
| Room | Bedroom |
| Style | Farmhouse Furniture |
| Difficulty | Intermediate |
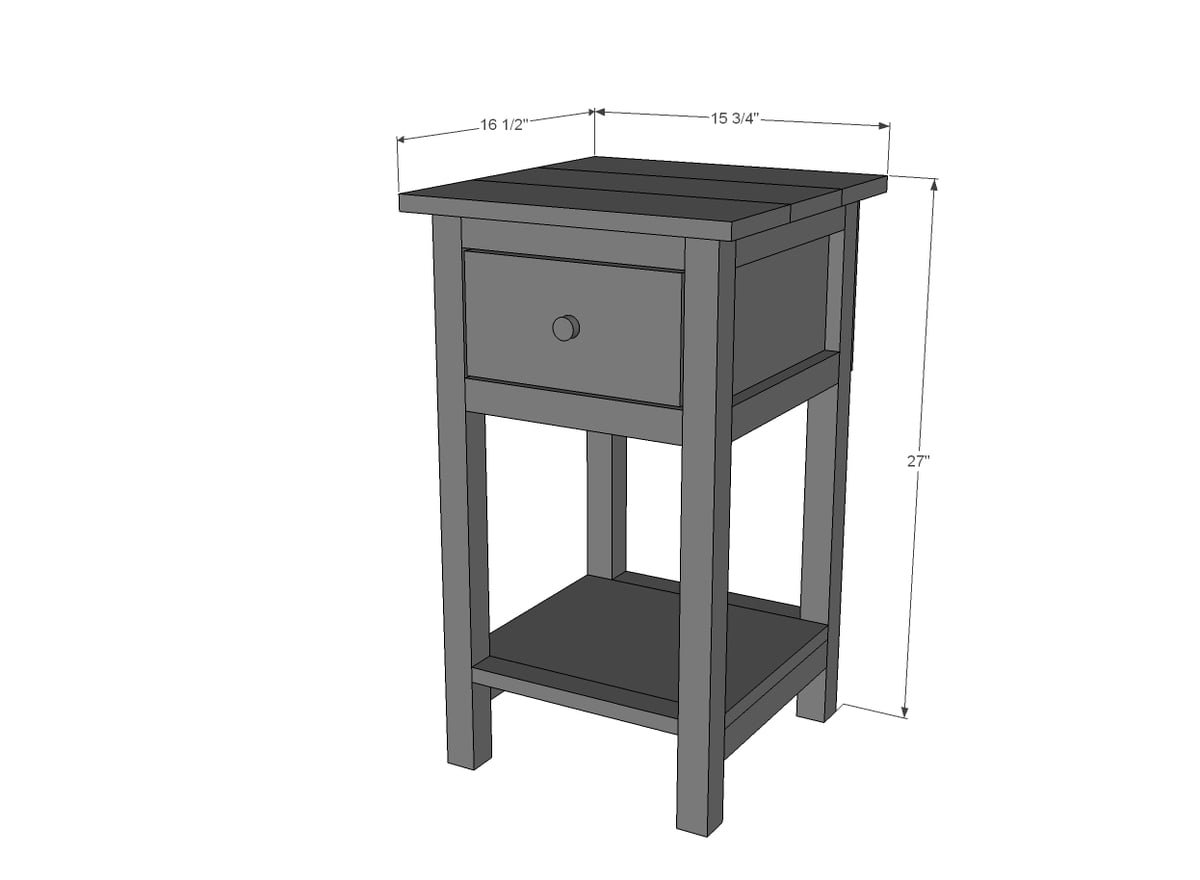
Dimensions
Use the size-specific shopping and cut lists below.
Shopping List
- 1 - 1x12 @ 4 feet long
- 1 - 1x2 @ 6 feet long
- 2 - 2x2 @ 8 feet long
- 1 - 1x6 @ 8 feet long scrap
- 1/4 plywood piece for back optional recommend
- 2 1/2" and 1 1/4" pocket hole screws for joinery
Cut List
- 2 – 1×12 @ 8 3/4″ (Sides)
- 4 – 1×2 @ 11 1/4″ (Side Trim – needs to be width of your 1x12s)
- 4 – 2×2 @ 26 1/4″ (Legs)
- 2 – 2×2 @ 11 1/4″ (Side Stretchers, same width as your 1x12s)
- 6 – 2×2 @ 10 3/4″ (Front/Back Trim)
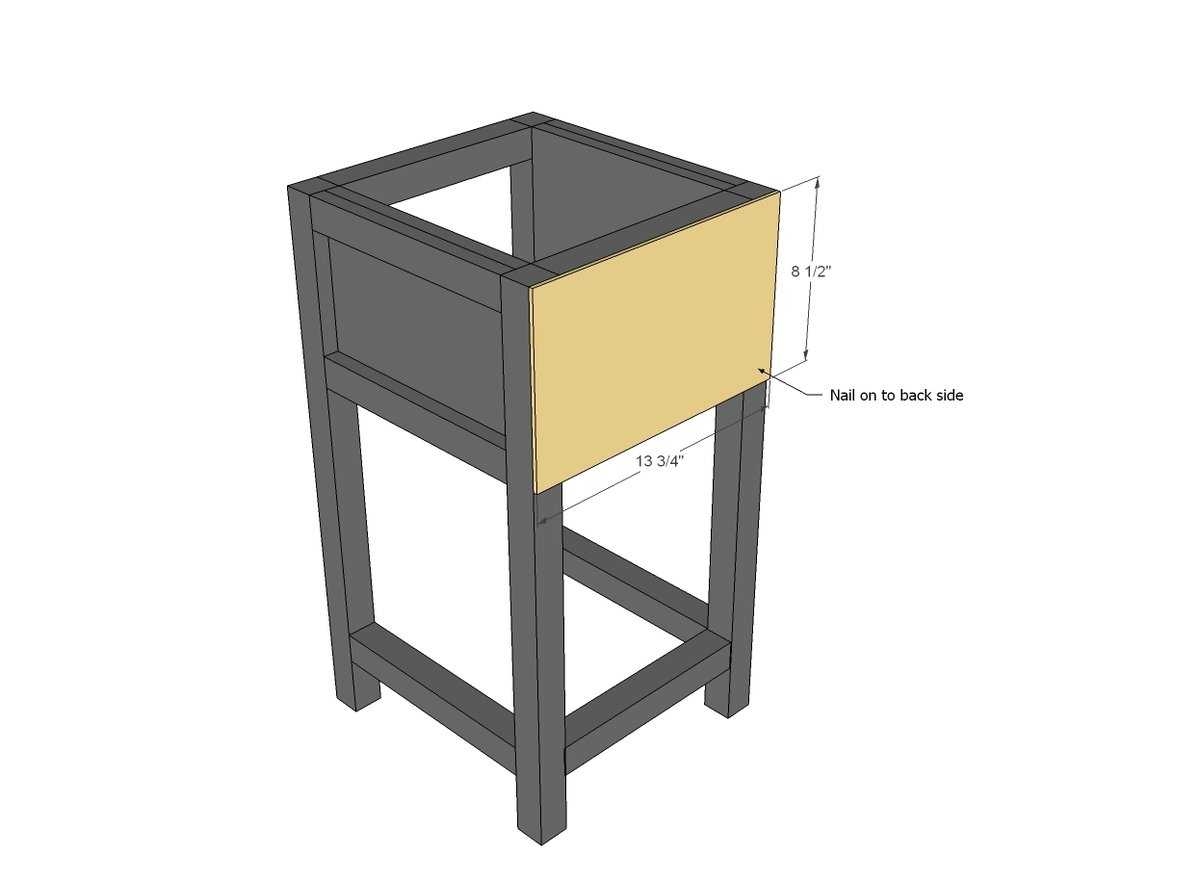
- 1 – 1/4″ Plywood or paneling or other sheet goods @ 13 3/4″ x 8 1/2″ (back, optional)
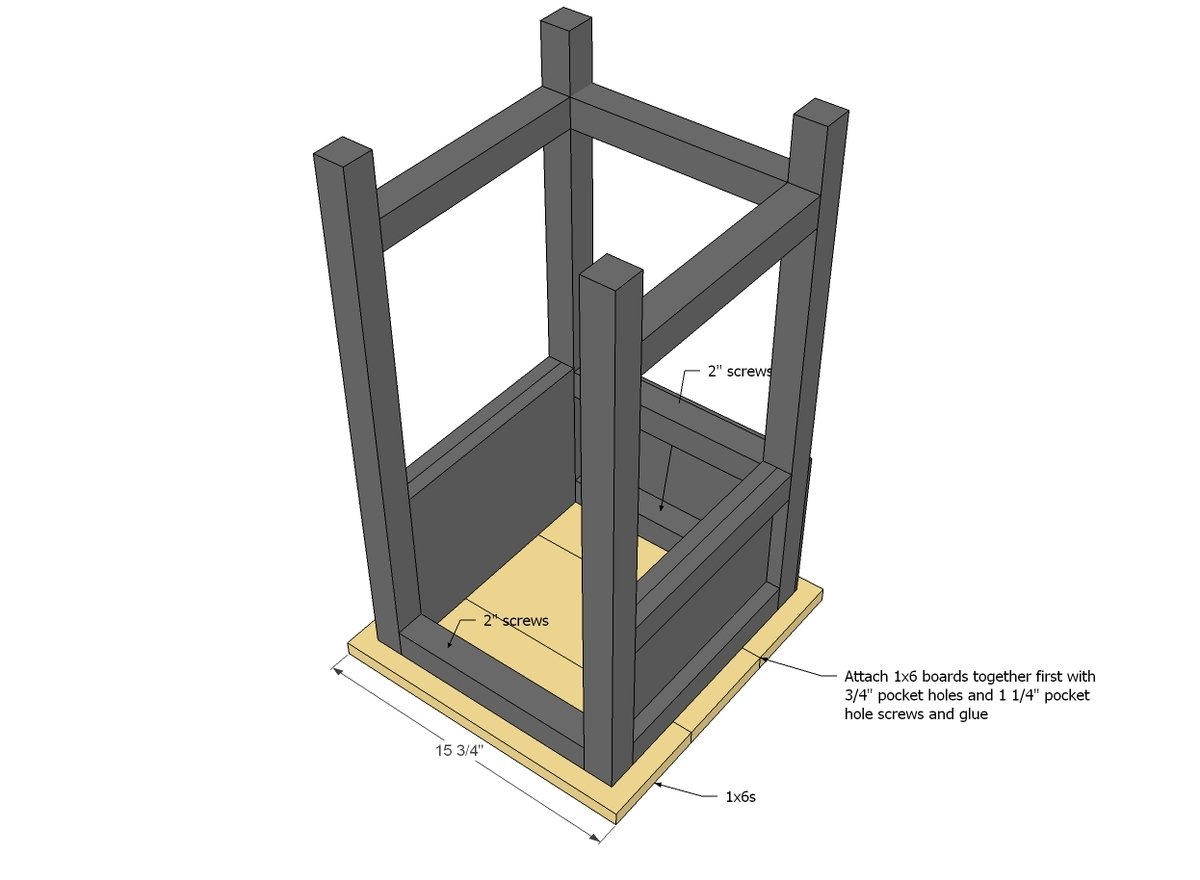
- 3 – 1×6 @ 15 3/4″ (Top)
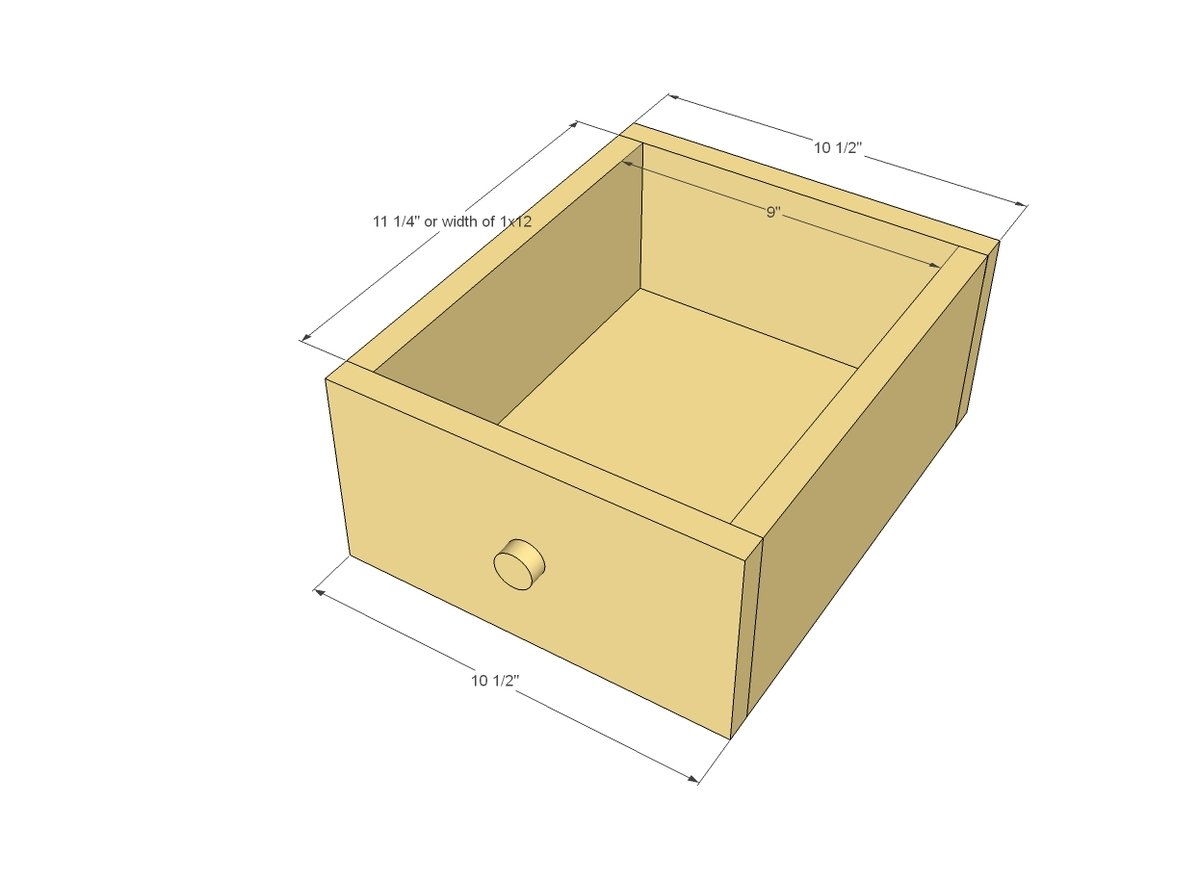
- 2 – 1×6 @ 10 1/2″ (Front and Back of Drawer)
- 2 – 1×6 @ 11 1/4″ (Width of 1×12 – Sides of Drawers)
- 1 – 1×12 @ 9″ (Bottom of drawer)
- 1 – 1×12 @ 13 3/4″ (Bottom Shelf)
- 2 – 1×2 @ 10 3/4″ (Bottom Shelf Trim)
Tools
- measuring tape
- square
- pencil
- safety glasses
- hearing protection
- kreg-jig
- drill
- compound miter saw
- sander
- countersink drill bit
Step-by-step Instructions
Step 1
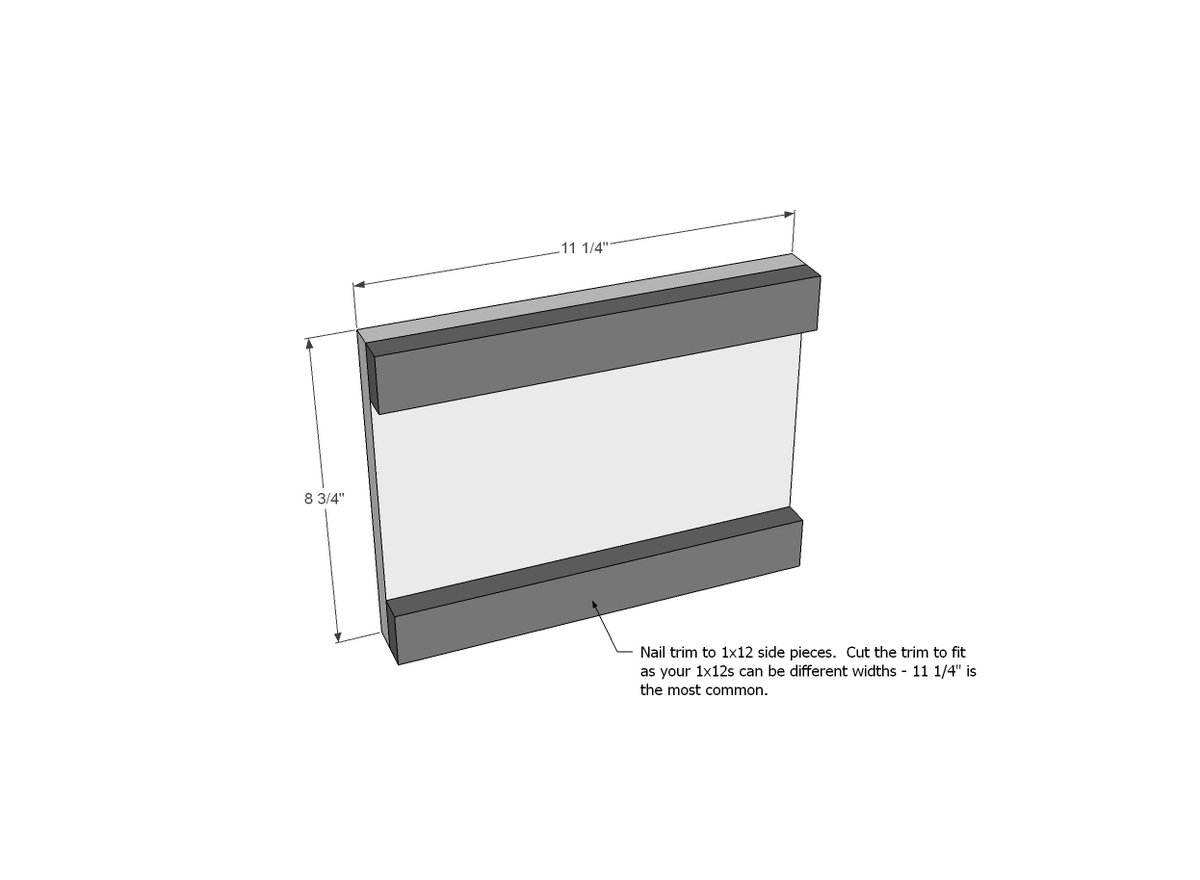
Start by attaching trim to the side 1x12 pieces - a nail gun from the inside will do the trick and keep nail holes hidden. Use 1 1/4" nails and glue. Do this for both sides.
Step 2
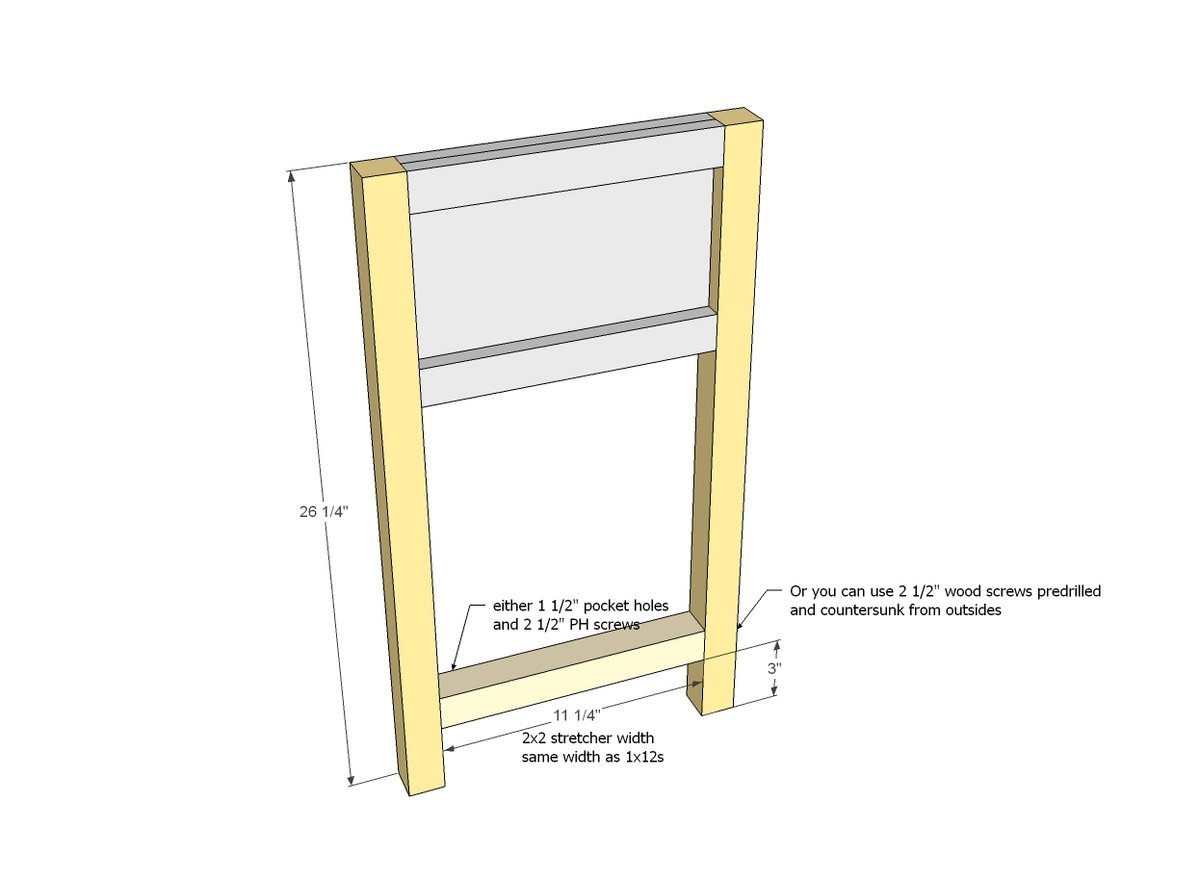
I recommend attaching the legs with a Kreg Jig - set it for 1 1/2" pocket holes when joining 2x2s together and use 2 1/2" pocket hole screws. For any joints with 1x boards, use the 3/4" setting and 1 1/4" pocket hole screws. Do this for both sides.
Step 3
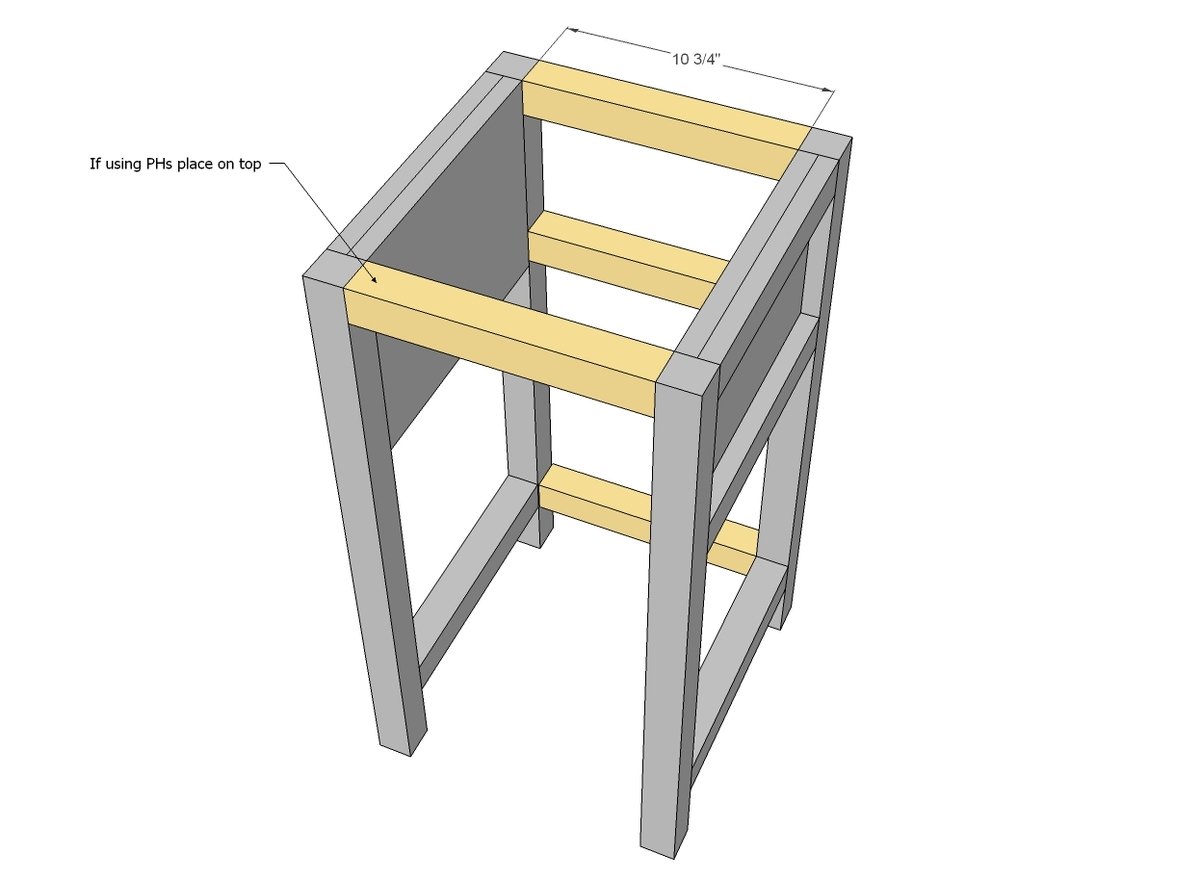
Then connect the sides together with the front/back trim boards.
Step 4
Attach 1/4" plywood to back with nails and glue.
Step 5
Step 6
Now build your drawers. The bottom is just another 1x12 to use materials you have on hand. Bottom can be attached on underside with 3/4" pocket holes and 1 1/4" pocket hole screws and glue.
Step 7
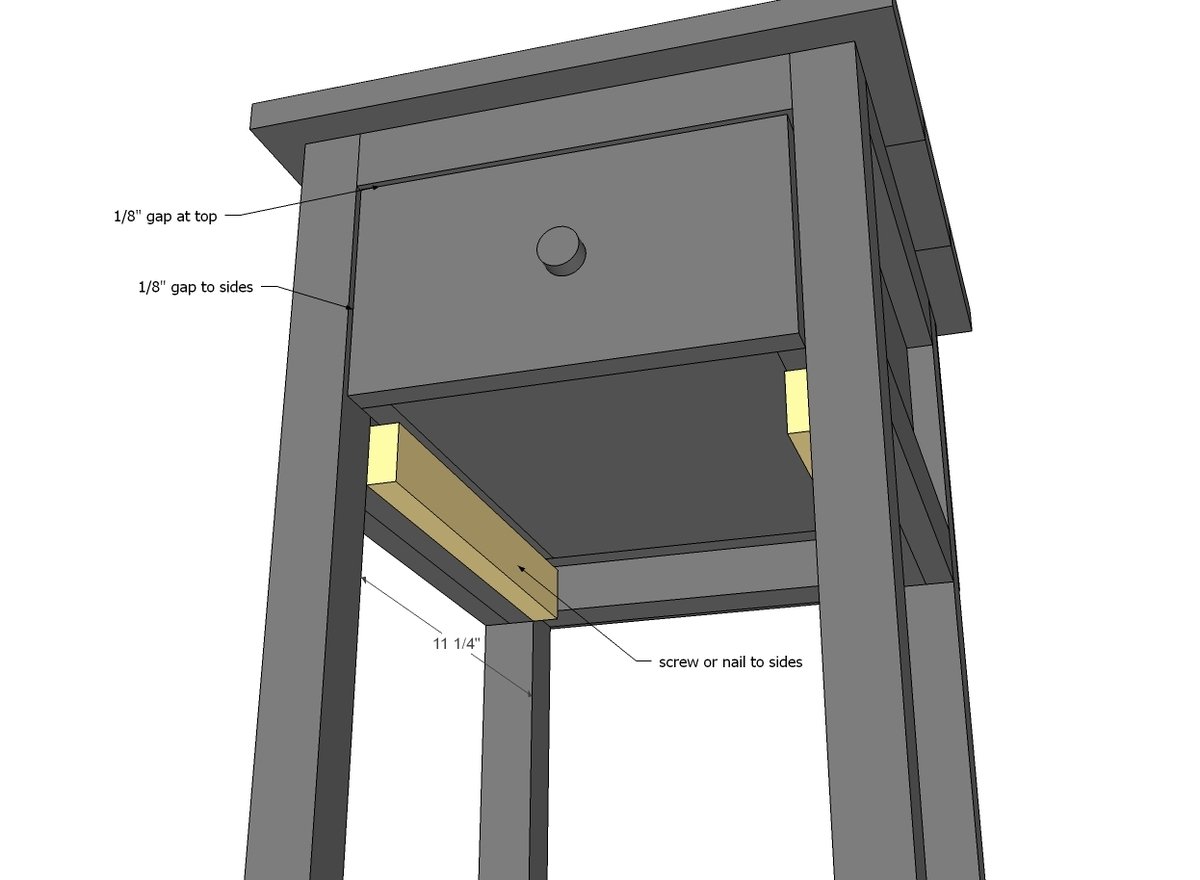
Now the slides.... remember, you'll want an 1/8" gap around all sides of the drawer face. So attach the slides so the drawer sits down about 1/8". Adjust the slides until your drawer slides easily. Candle wax on top will really help the drawer slide better.
Step 8
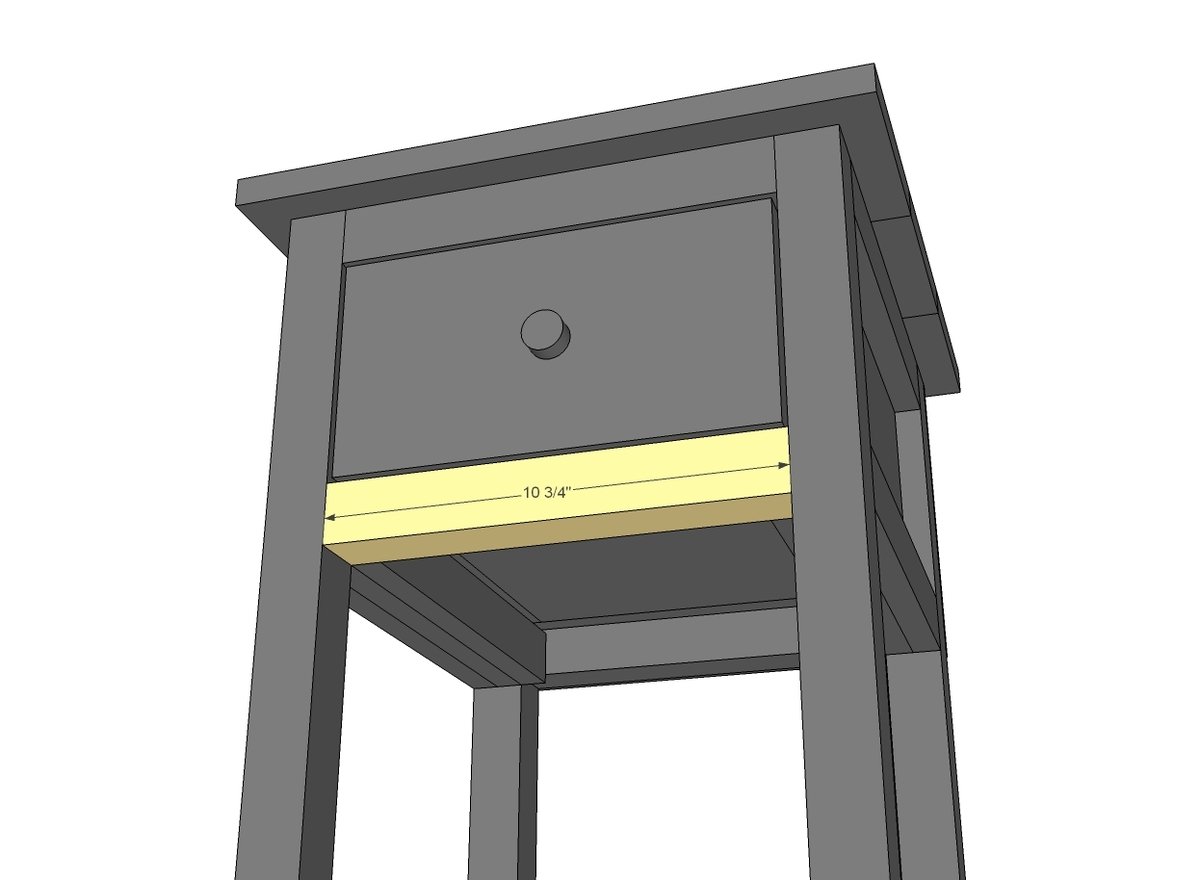
Then trim out the front with the remaining 2x2.
Step 9
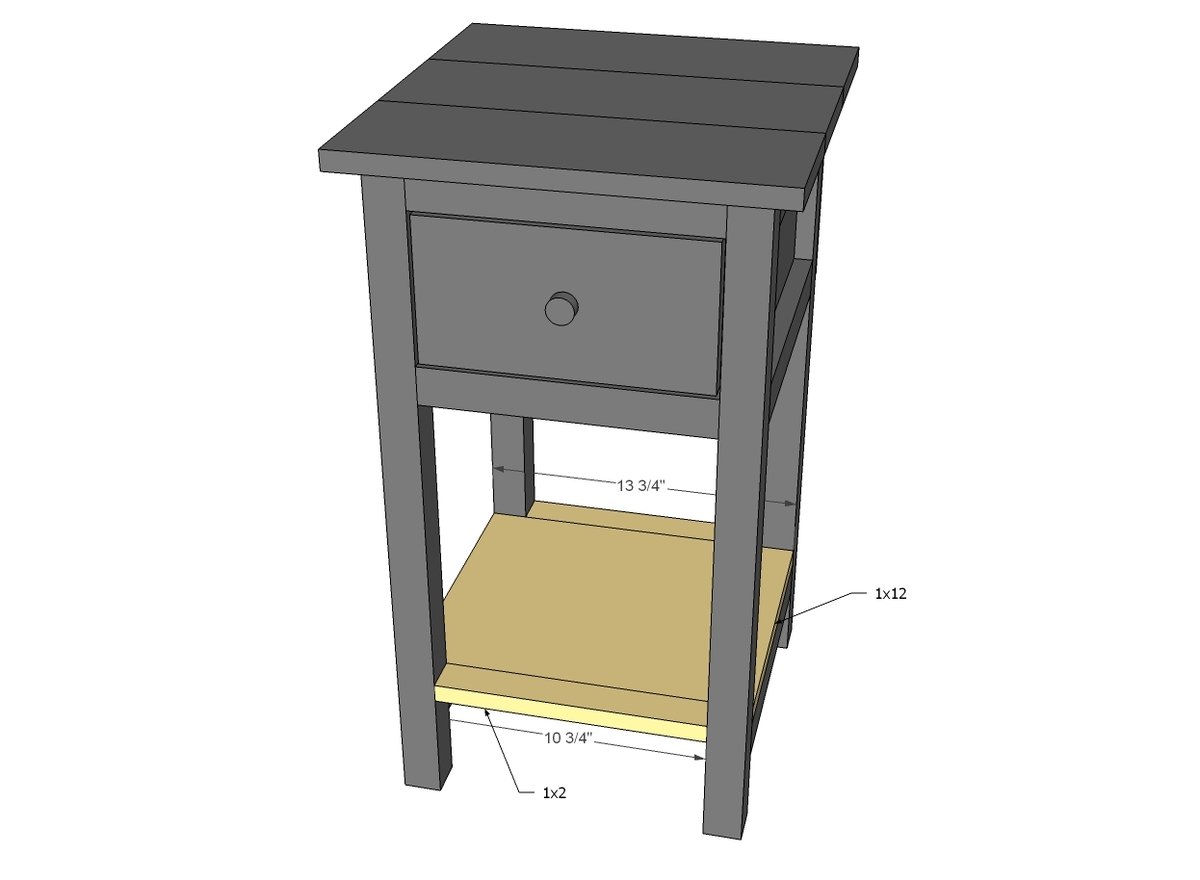
And then build your bottom shelf as you did the top with 3/4" PHs/1 1/4" PH screws and attach on top of the bottoms stretchers.
Finishing
Sand all surfaces, starting with a medium grit and finishing with fine. Wipe off the dust, fill any holes or gaps with wood filler, and sand smooth once dry. Apply primer if you're painting, then finish with your choice of paint or stain and seal with a durable clear topcoat. For outdoor projects, use exterior-rated primer, paint or stain, and sealer so the piece stands up to the weather.
Source (temporary): https://www.ana-white.com/woodworking-projects/mini-farmhouse-bedside-table-plans