Mini Fridge Snack Cabinet
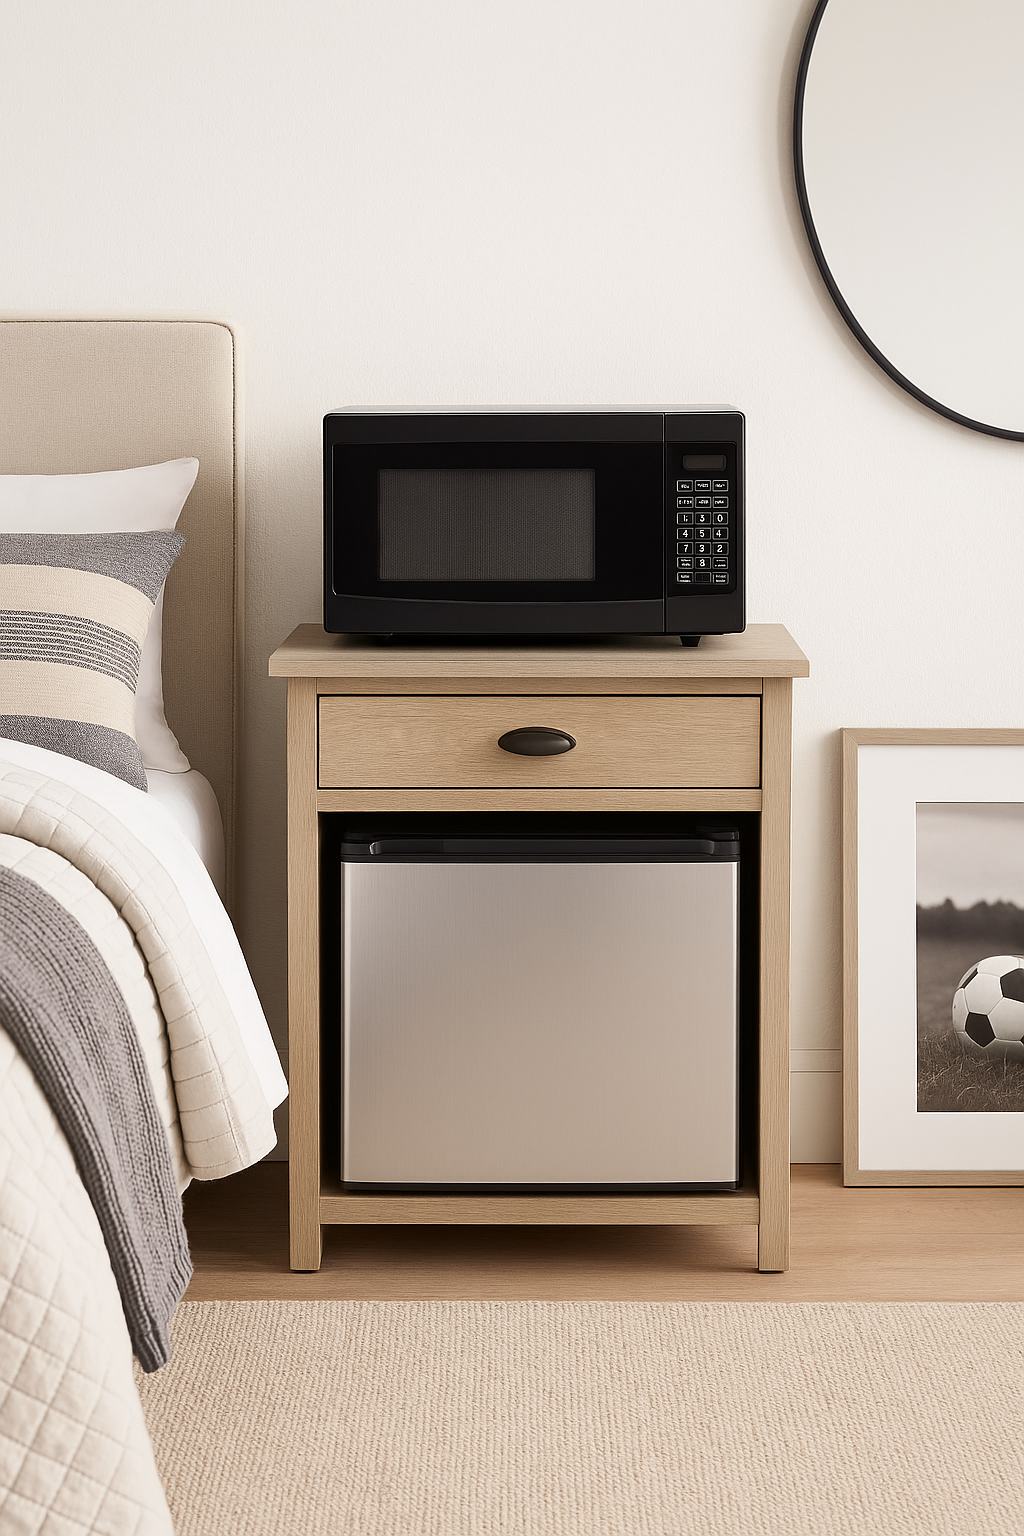
Free DIY Mini Fridge Cabinet Plans – Perfect for Dorms, Bedrooms, and Guest Rooms Upgrade your space with for a mini fridge cabinet – designed for both style and function. This compact yet sturdy cabinet is ideal for housing a mini fridge while offering a convenient top surface for a microwave, coffee maker, or everyday essentials. Whether you're furnishing a teen bedroom, college dorm, guest room, or a small studio apartment, this modern-farmhouse-inspired design blends seamlessly into any neutral décor. Key Features: • with detailed diagrams and cut lists • Fits standard compact mini fridges (including shorter models) • Includes a top drawer for storage – perfect for utensils, snacks, or supplies • Clean, modern lines with a farmhouse touch • Designed for beginner to intermediate woodworkers • Customizable finish to match any room style Build this stylish and functional microwave and mini fridge stand today and maximize your space the smart way. Ideal for DIYers looking to create furniture that’s both practical and beautiful. Download your free mini fridge cabinet plans now and start building a piece that’s as useful as it is good-looking!
Specifications
| Project type | Side and End Table Plans |
|---|---|
| Room | Storage Solutions |
| Style | Children's and Kid's Room Furniture and Toy Plans |
| Difficulty | Intermediate |
| Estimated cost | $50 - $100 |
Dimensions
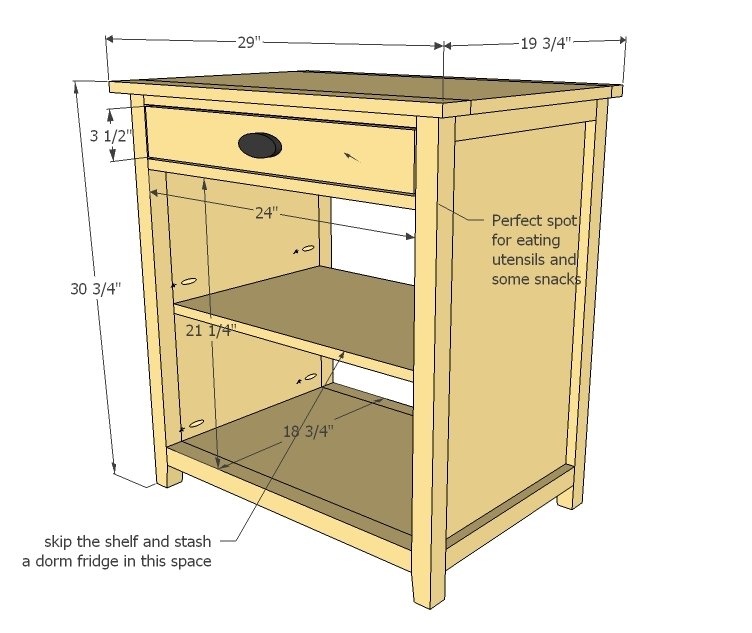
Use the size-specific shopping and cut lists below.
Shopping List
- 1 - Sheet of 3/4" Plywood or MDF or particle board (please go the Formaldehyde Free route!) cut into 15 3/4" x 8 foot long strips, referred to as 1x16s in this plan
- 1 - 1x3 @ 8 feet long
- 2 - 2x2 @ 8 feet long
- 1 - 1x2 @ 8 feet long
- 1 - 1x4 @ 2 feet long
- 1 knob or handle
- 1 set of 16" euro style white drawer slides (the ones that mount on the bottom corner of the drawer - should be the cheapest ones)
- Scrap piece of 1/4" plywood 23" x 16"
Cut List
- 2 - 1x16 @ 28" (Sides)
- 4 - 1x2 @ 15 3/4" (Side Trim)
- 4 - 2x2 @ 30" (Legs)
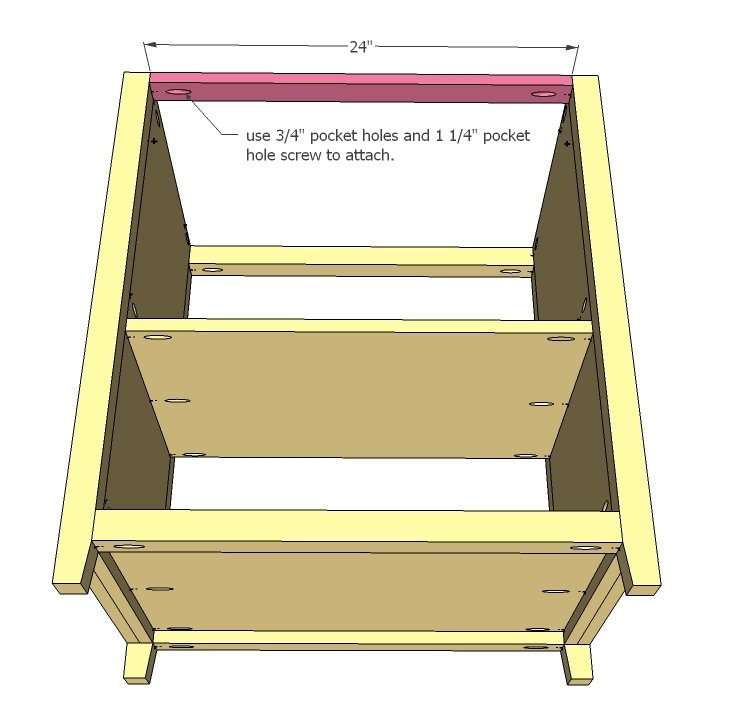
- 2 - 1x16 @ 24" (Shelves - one is optional)
- 3 - 2x2 @ 24" (Front/Back Trim)
- 2 - 1x2 @ 24" (Drawer Trim)
- 1 - 1x16 @ 29" (Top)
- 1 - 1x3 @ 29" (Top)
- 1 - 1x2 @ 29" (Top)
- 2 - 1x3 @ 21 1/2" (Drawer Front/Back)
- 2 - 1x3 @ 16" (Drawer Sides)
- 1 - 1/4" Plywood @ 16" x 23" (Drawer Bottom)
- 1 - 1x4 @ 23 3/4" (Drawer Face)
Tools
- measuring tape
- square
- pencil
- safety glasses
- hearing protection
- kreg-jig
- drill
- circular saw
- nailer
- sander
- level
Step-by-step Instructions
Step 1
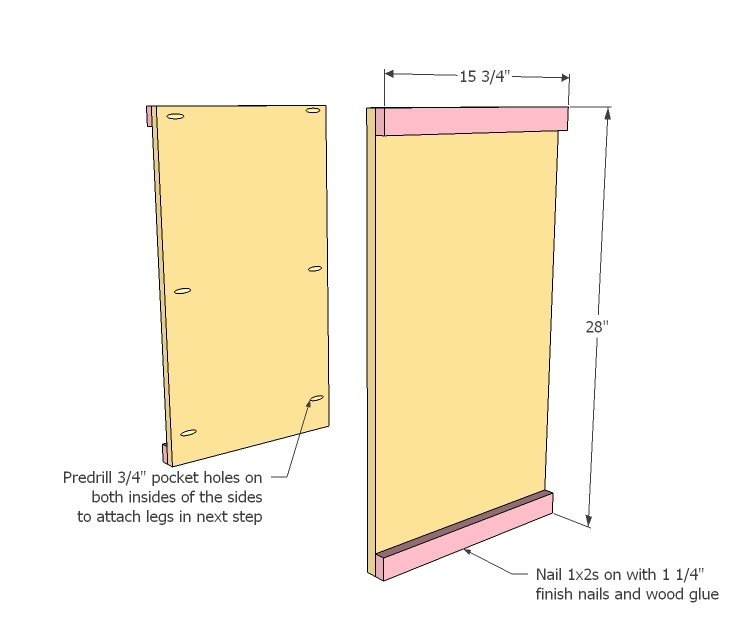
Attach trim to sides with 1 1/4" finish nails and wood glue as shown here.
Step 2
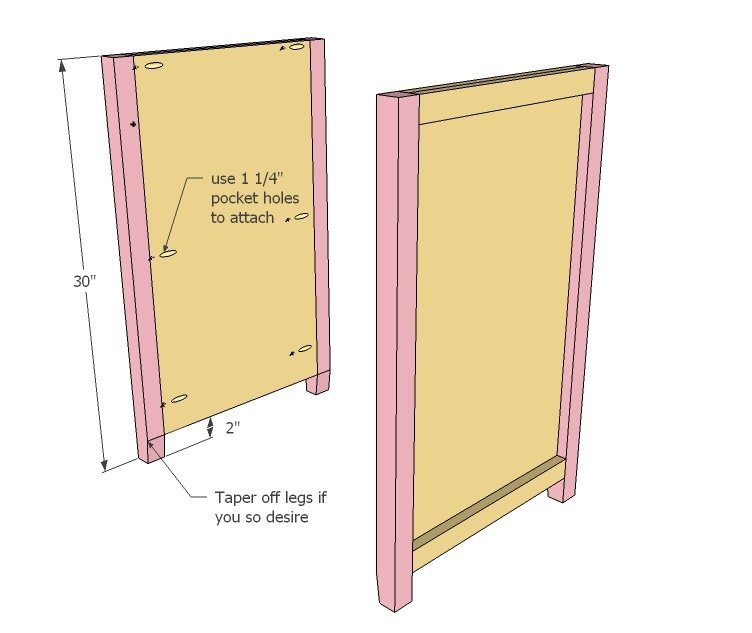
Then add the legs with the Kreg Jig as shown in diagram.
Step 3
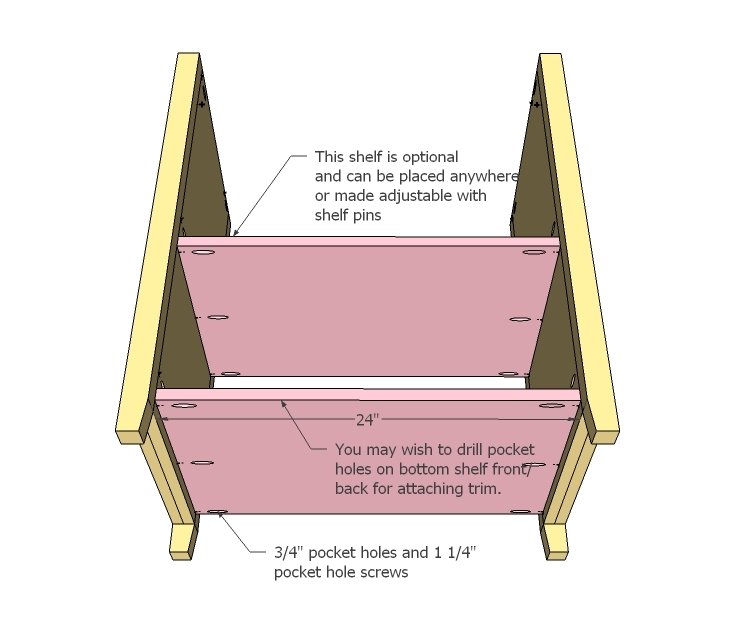
Now the shelves. The bottom shelf sits up 3/4" from the bottom of the sides. Attach bottom shelf fixed, but middle shelf can be made adjustable with shelf pins or left out for use as a fridge.
Step 4
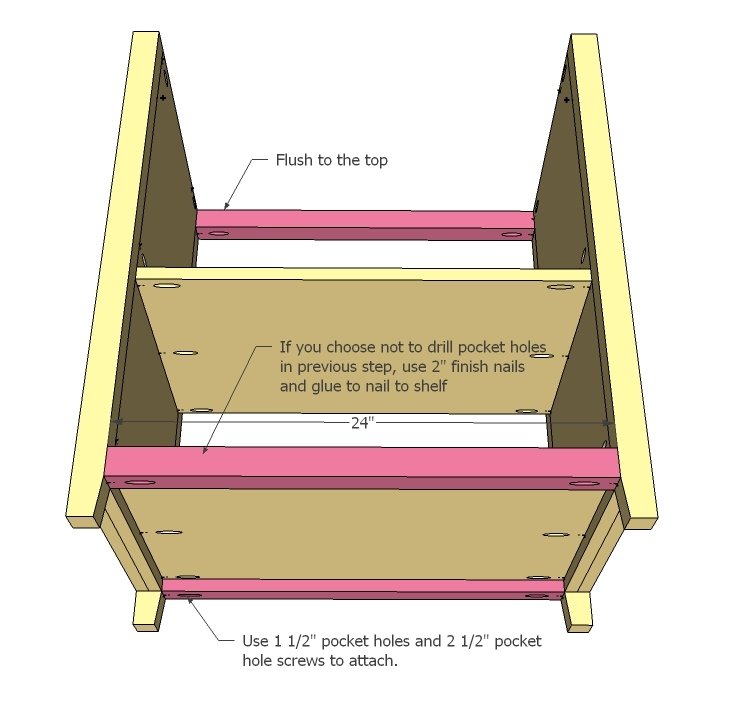
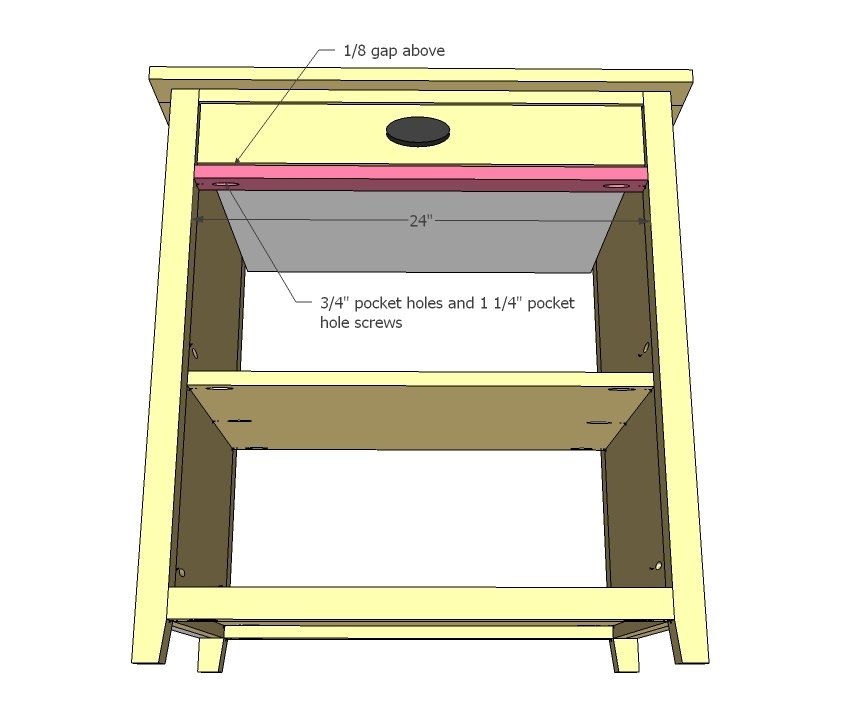
Trim bottom shelf and add top support as shown in diagram.
Step 5
Step 6
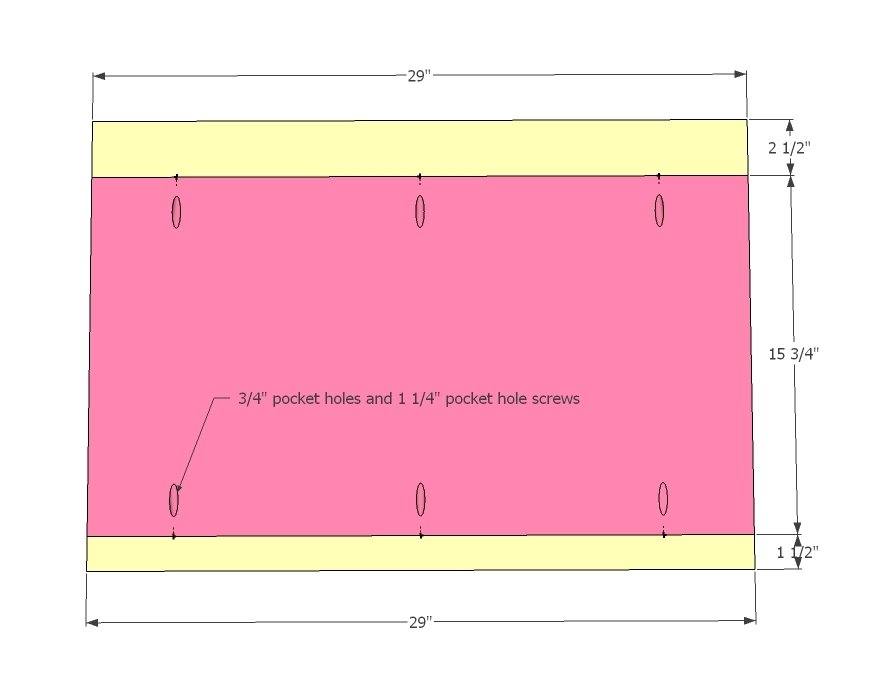
Build top as shown above, squaring up edges and making sure top is flush.
Step 7
Then attach top to cabinet. You can also use 2" screws from the 2x2s to attach top.
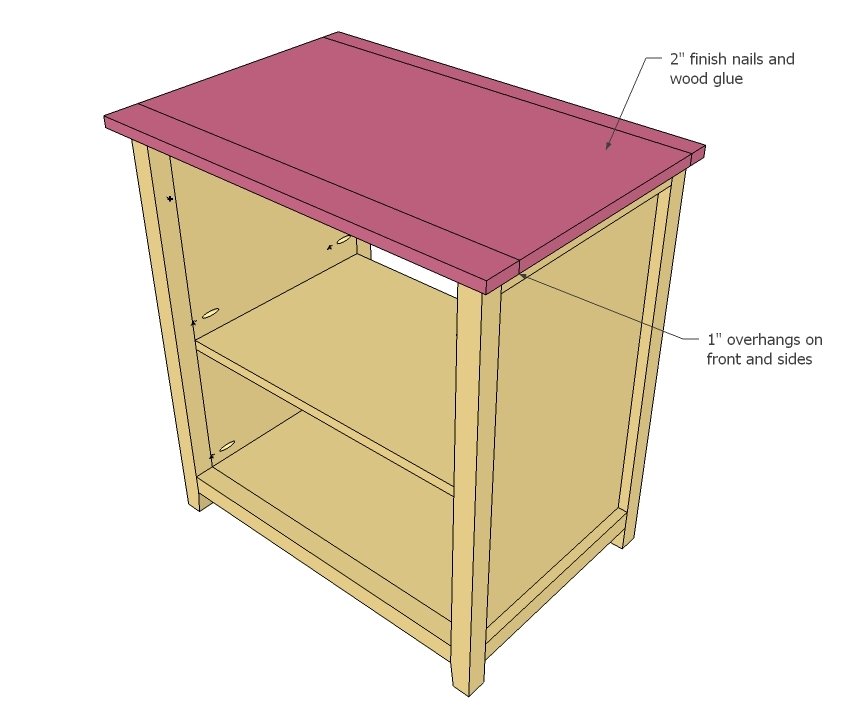
Step 8
Build drawer as shown above, adjusting for square and attaching plywood to bottom. Attach drawer members to drawer bottom as done in this plan.
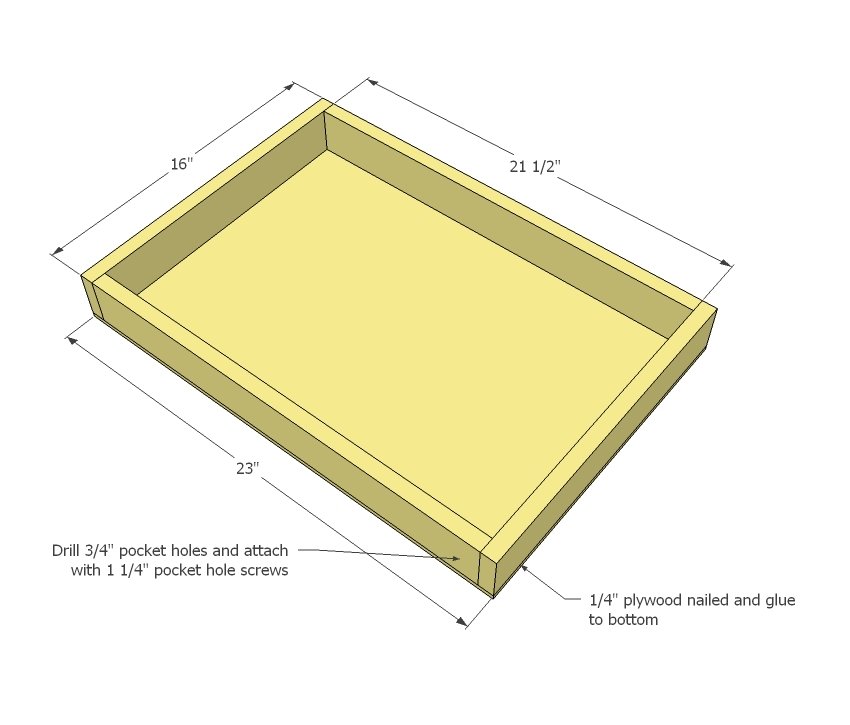
Step 9
Install cabinet members in cabinet with drawer in highest possible position. Fit drawer and make sure it slides nicely. Remember, the drawer needs to be inset 3/4" for the face of drawer to inset (see next step).
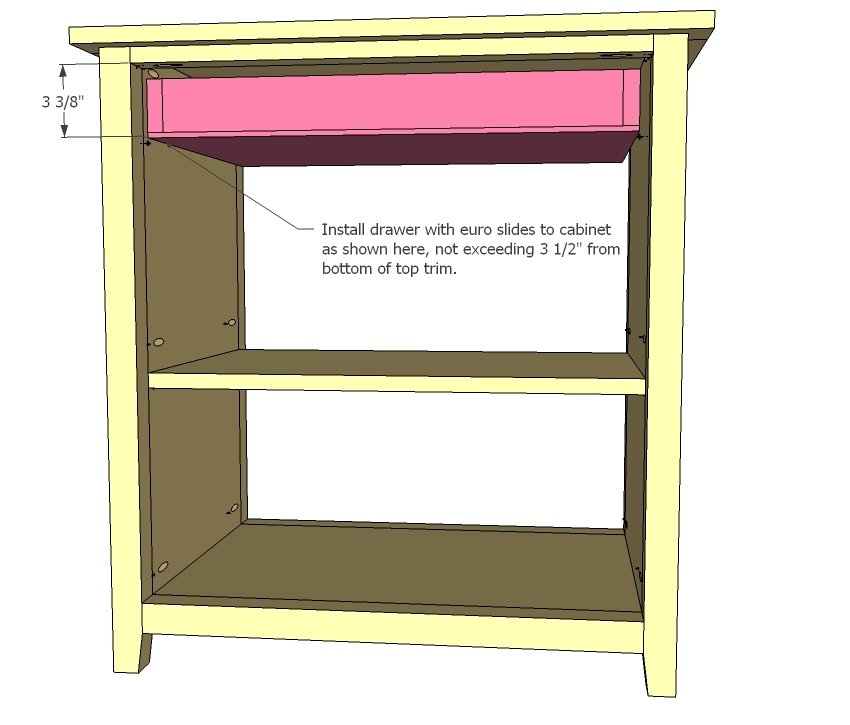
Step 10
Once happy with the drawer, attach face with an even gap around all sides with 1 1/4" finish nails and wood glue.
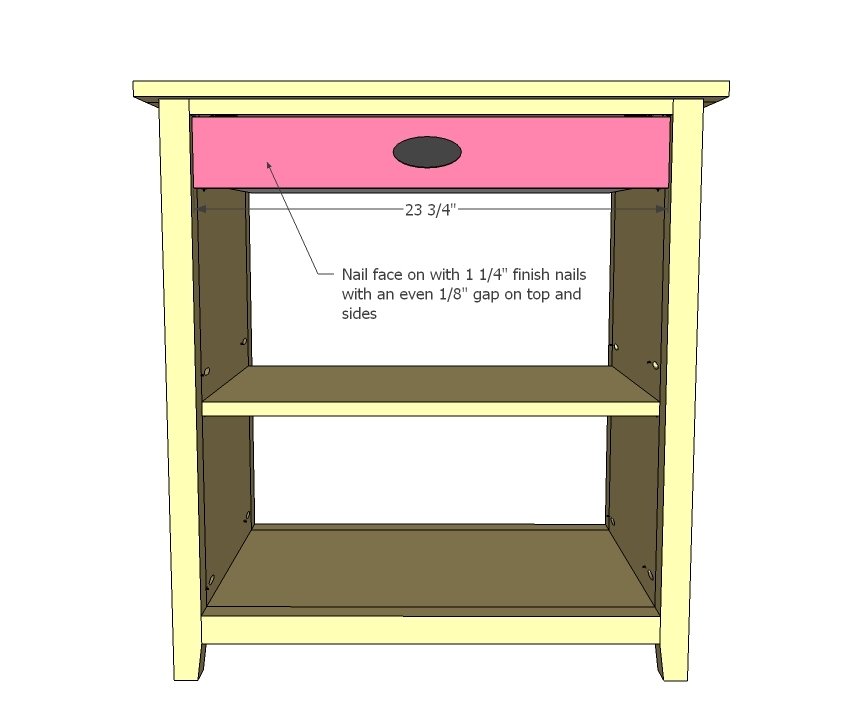
Step 11
Finally, add the bottom trim as shown above.
Finishing
Sand all surfaces, starting with a medium grit and finishing with fine. Wipe off the dust, fill any holes or gaps with wood filler, and sand smooth once dry. Apply primer if you're painting, then finish with your choice of paint or stain and seal with a durable clear topcoat. For outdoor projects, use exterior-rated primer, paint or stain, and sealer so the piece stands up to the weather.
Source (temporary): https://www.ana-white.com/woodworking-projects/mini-fridge-snack-cabinet