Mini Media Wall for Playhouse or Kids Room
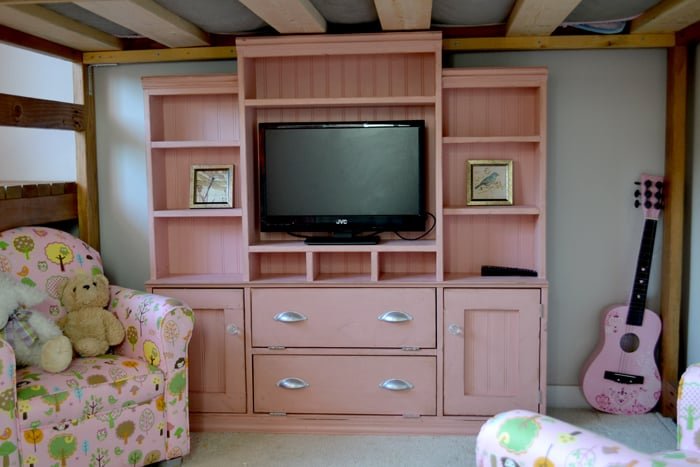
Build a kid sized media wall! from
Specifications
| Project type | Media and Entertainment Centers |
|---|---|
| Room | Kids and Toys |
| Style | Children's and Kid's Room Furniture and Toy Plans |
| Difficulty | Intermediate |
Dimensions
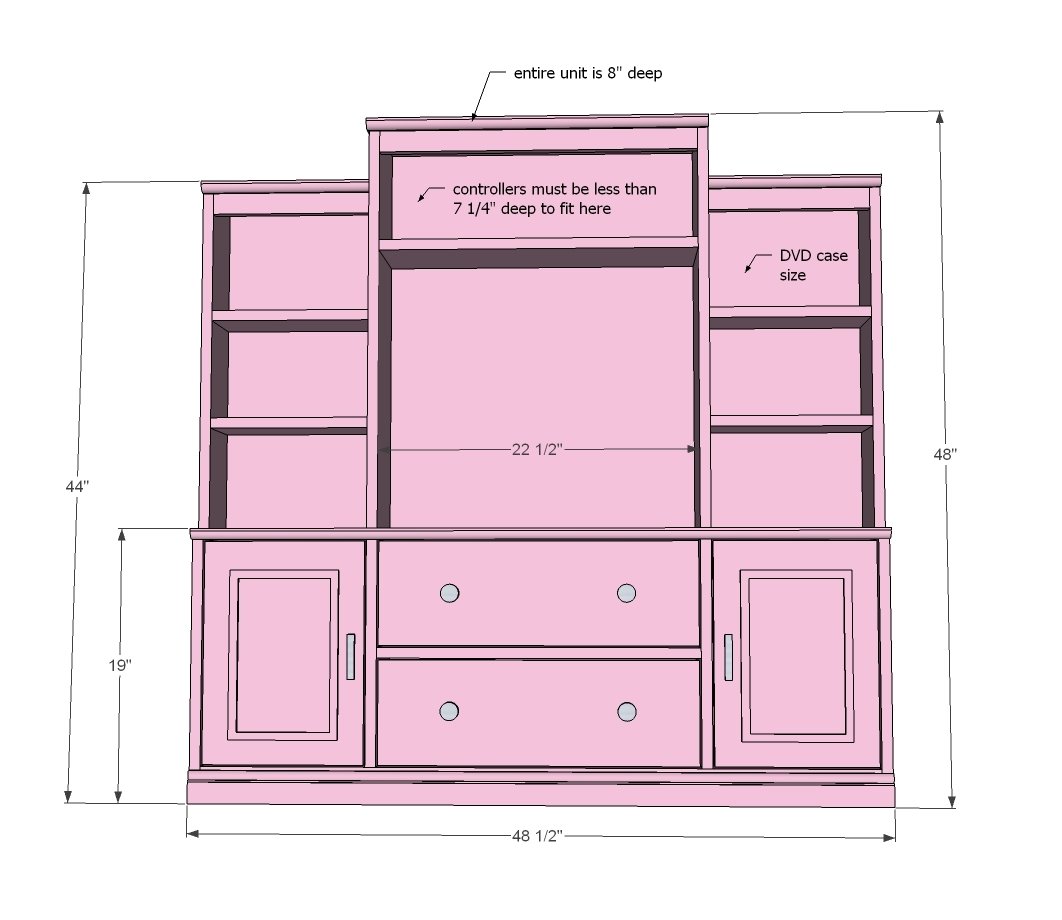
Use the size-specific shopping and cut lists below.
Shopping List
4 – 1x8 @ 8 feet long
2 – 1x6 @ 8 feet long
1 – 1x12 @ 3 feet long (for doors)
1 – 1x2 @ 8 feet long
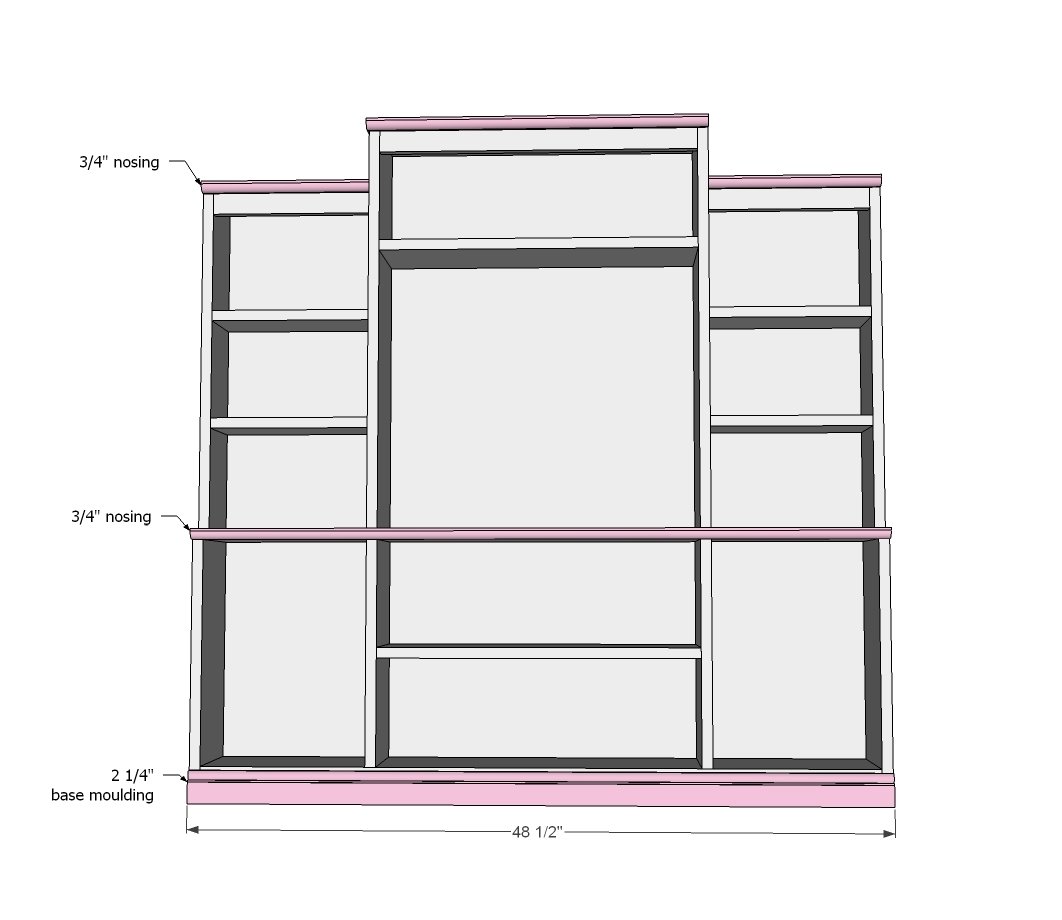
1 – 2 1/4” base moulding 6 feet long
2 – ¾” nosing 6 feet long
4 sets narrow profile hinges (smallest ones you can find)
6 knobs or handles
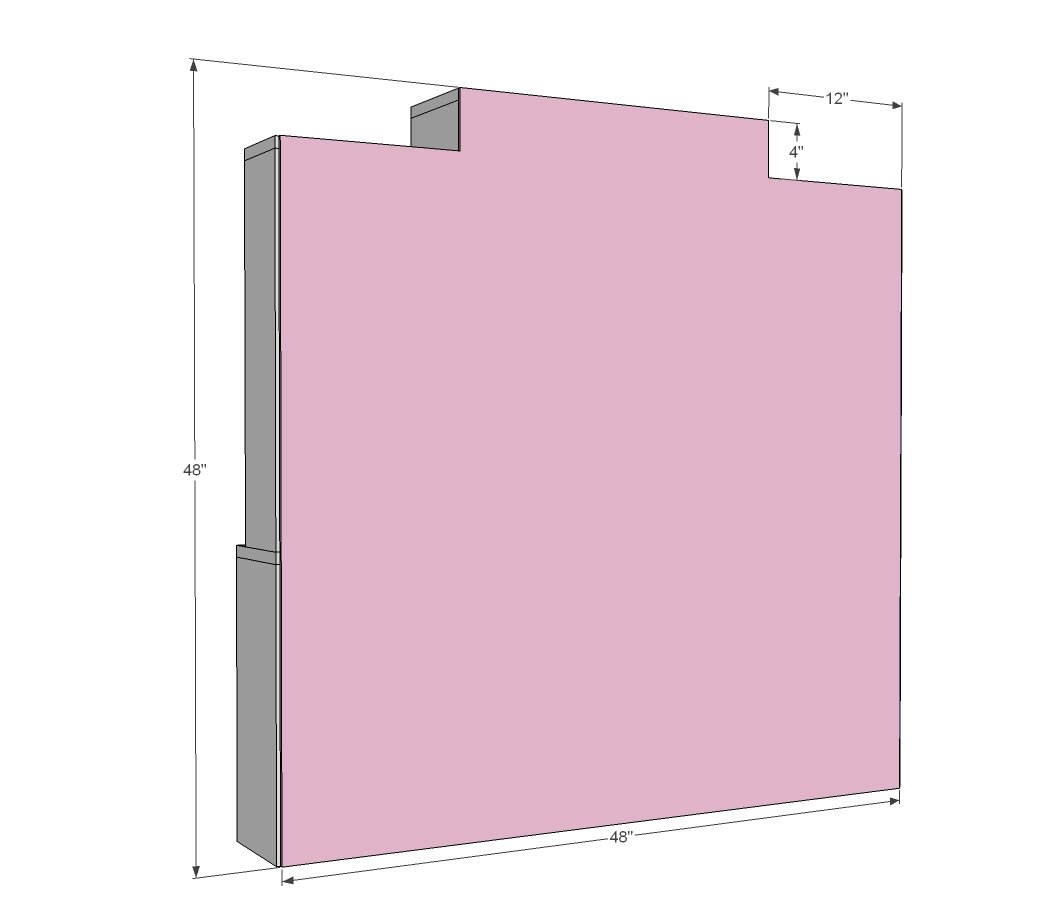
½ sheet ¼” plywood or beadboard for back
Cut List
1 – 1x8 @ 48 ½”
2 – 1x8 @ 18 ¼”
1 – 1x8 @ 47”
2 – 1x8 @ 15 ¾”
3 – 1x8 @ 22 ½”
2 – 1x8 @ 28 ¼”
1 – 1x8 @ 24”
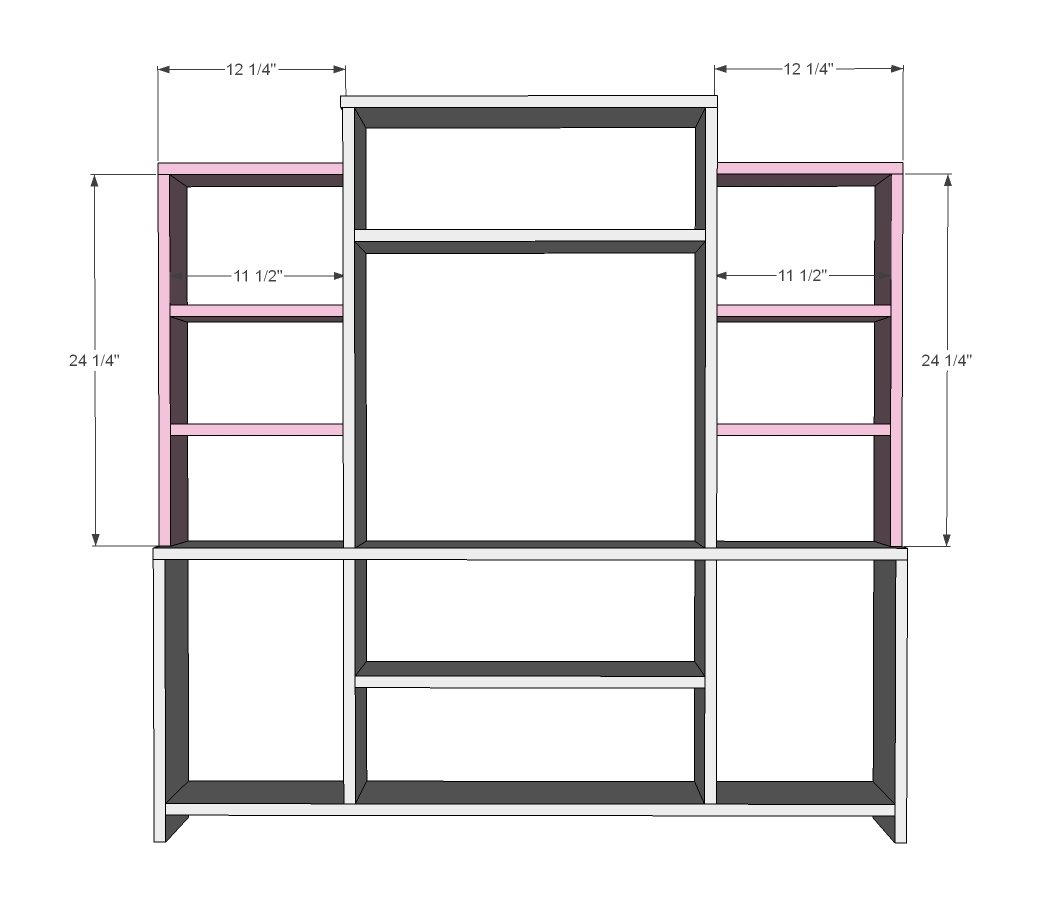
2 – 1x6 @ 24 ¼”
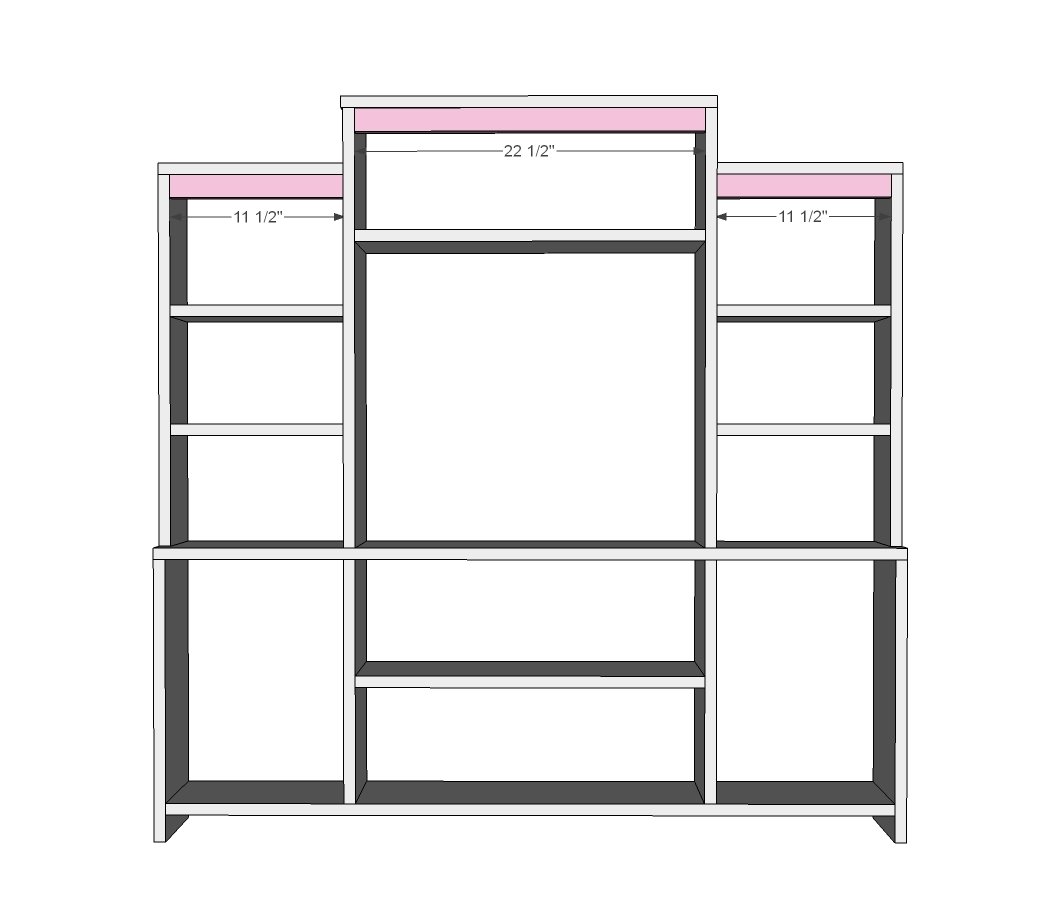
4 – 1x6 @ 11 ½”
2 – 1x6 @ 12 ¼”
2 – 1x2 @ 11 ½”
1 – 1x2 @ 22 ½”
2 – 1x12 @ 15 ½”
2 – 1x8 @ 22 ¼”
2 1/4” moulding cut to fit
¾” nosing cut to fit
Tools
- measuring tape
- square
- pencil
- safety glasses
- hearing protection
- kreg-jig
- drill
- circular saw
- nailer
- sander
- countersink drill bit
Step-by-step Instructions
Step 1
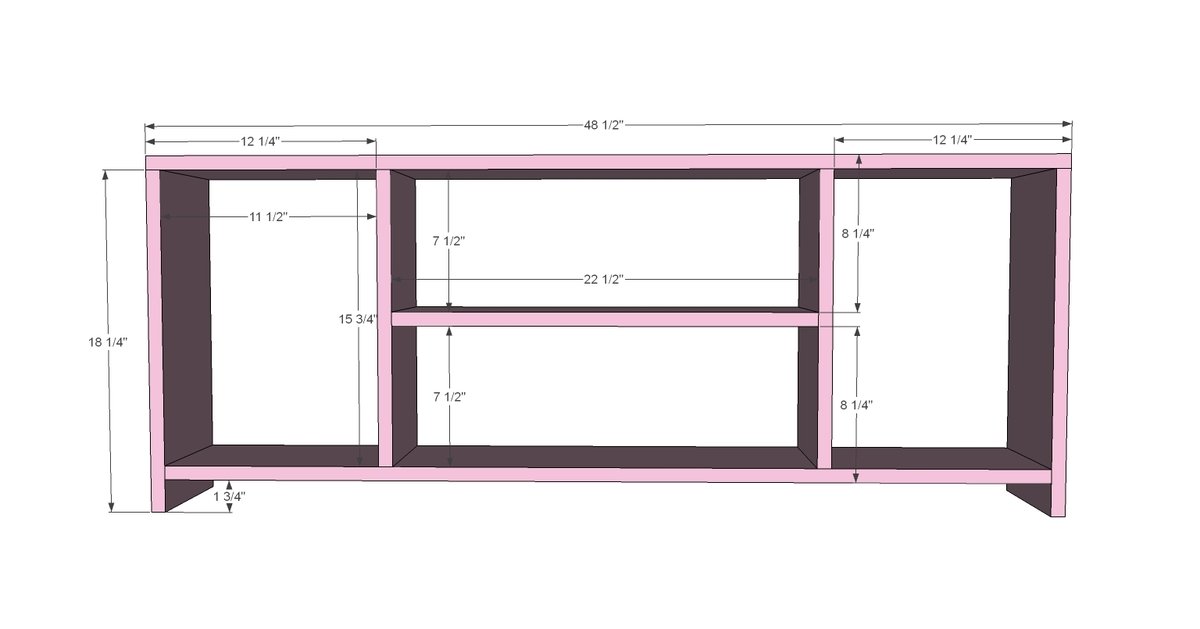
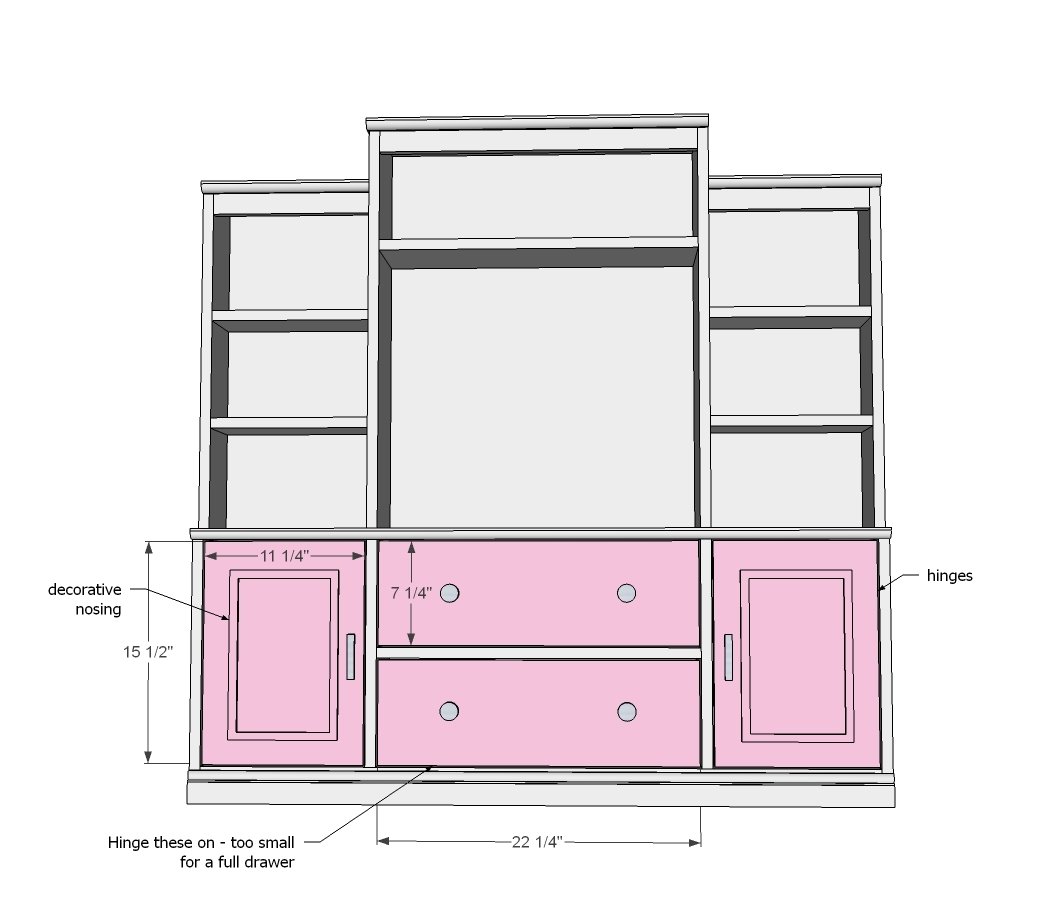
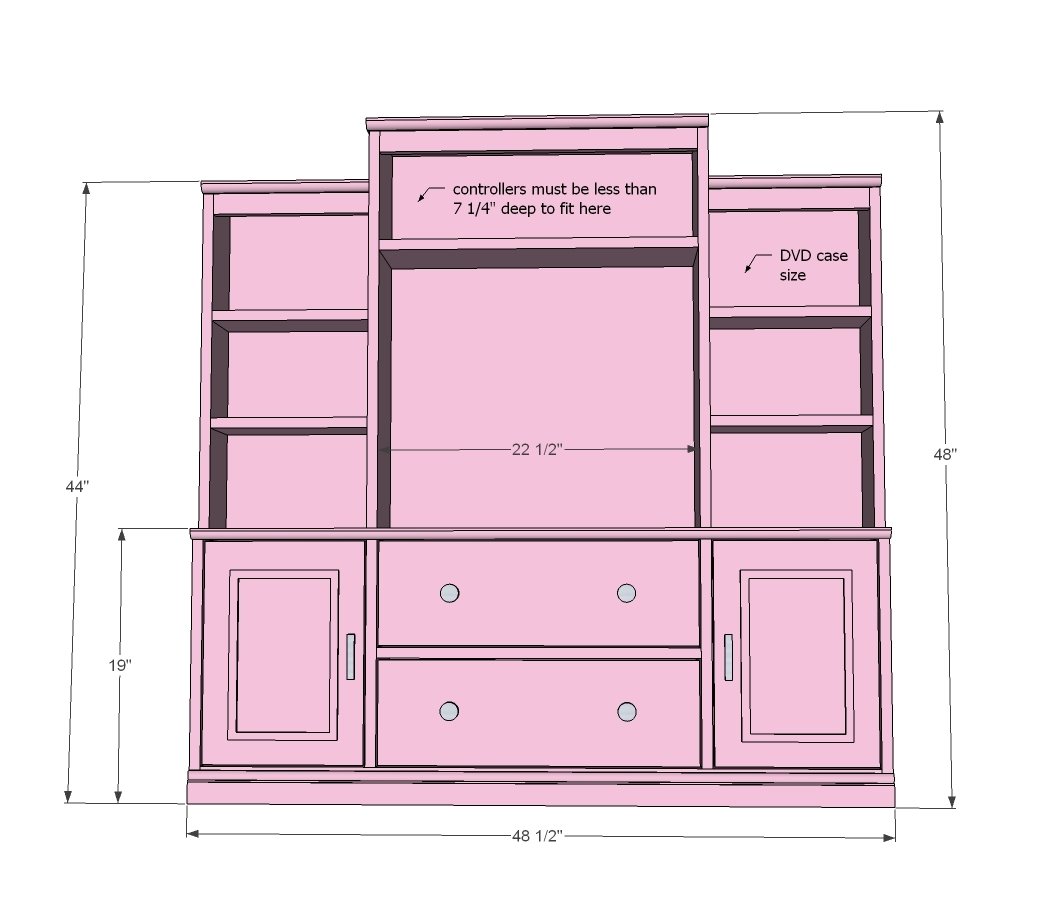
First, put the console part together. I used 3/4" pocket holes and 1 1/4" pocket hole screws. This part went together pretty fast, just following along the diagram. One thing to note, the console is designed for 1x8 and 1x12 door faces that measure 11 1/4" and 7 1/4" wide, with an 1/8" gap all the way around. If your 1x8s and 1x12s differ in width, you may need to adjust the console.
Step 2
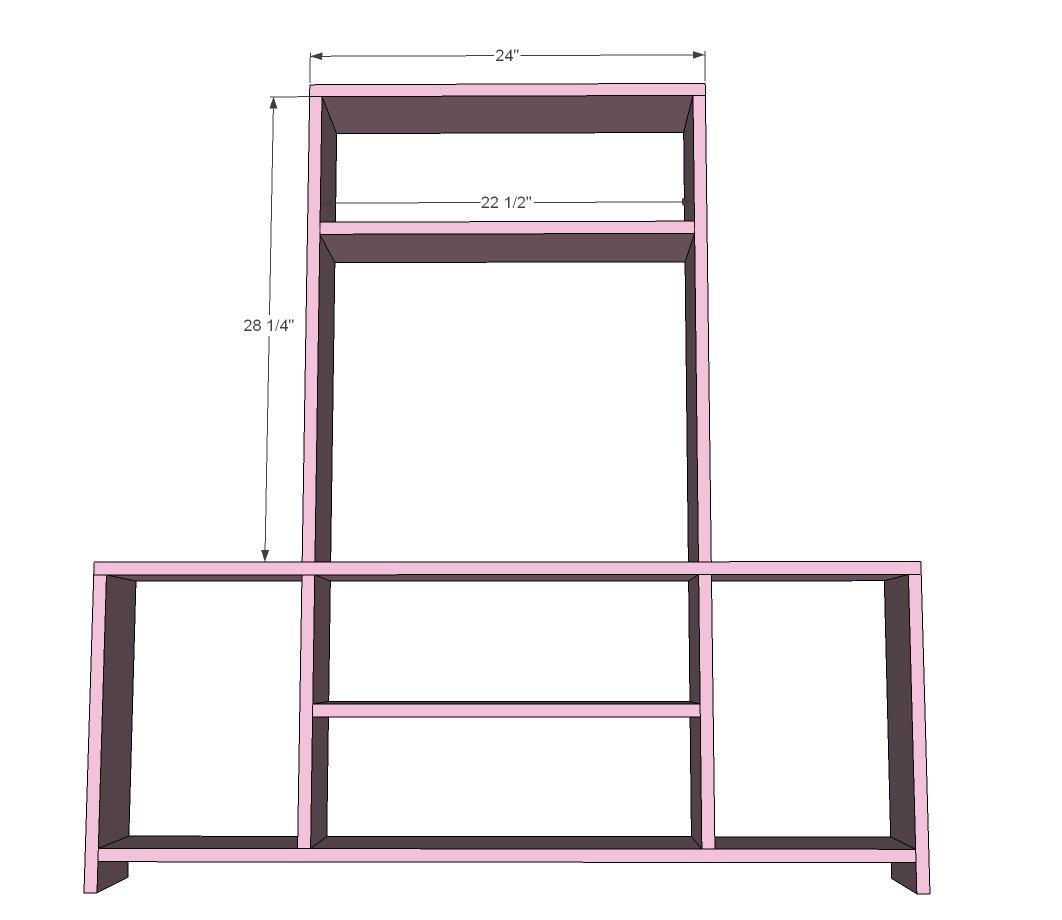
Then I just started adding the hutch part. You do not have to follow along an exact order, this just worked for me to go in this order.
Step 3
And then I added the side hutches, still using the 3/4" PHs/1 1/4" PH screws, keeping everything flush to back. Here's where I started using the 1x6s instead of 1x8s to add varying depths to the media wall.
Step 4
And then some support. I just nailed and glued these babies on.
Step 5
Step 6
And then add the moulding. Big regret for me is I did not wrap my moulding around the sides. Would have looked so much better! I highly recommend you considering mitering the corners and wrapping moulding around sides.
Step 7
The doors are just 1x12 and 1x8s hinged on with narrow profile hinges (the cheap, tiny, basic hinges that sit in the gap between the door and the cabinet opening). I was short on 1x12s so I made a frame from 1x3s and glued and nailed beadboard to the back for my larger doors.
Step 8
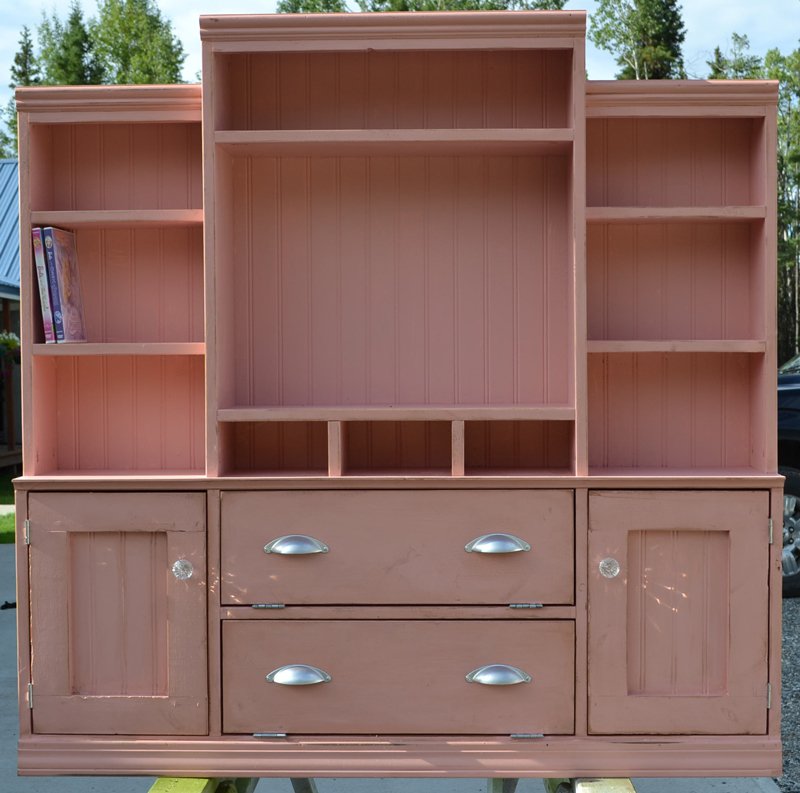
When I was done, I felt like the center needed a little something more...
Step 9
So I added a few shelves to the insides. Love this mod!
Finishing
Sand all surfaces, starting with a medium grit and finishing with fine. Wipe off the dust, fill any holes or gaps with wood filler, and sand smooth once dry. Apply primer if you're painting, then finish with your choice of paint or stain and seal with a durable clear topcoat. For outdoor projects, use exterior-rated primer, paint or stain, and sealer so the piece stands up to the weather.
Source (temporary): https://www.ana-white.com/woodworking-projects/mini-media-wall-playhouse-or-kids-room