Mini Mod Wine Bar
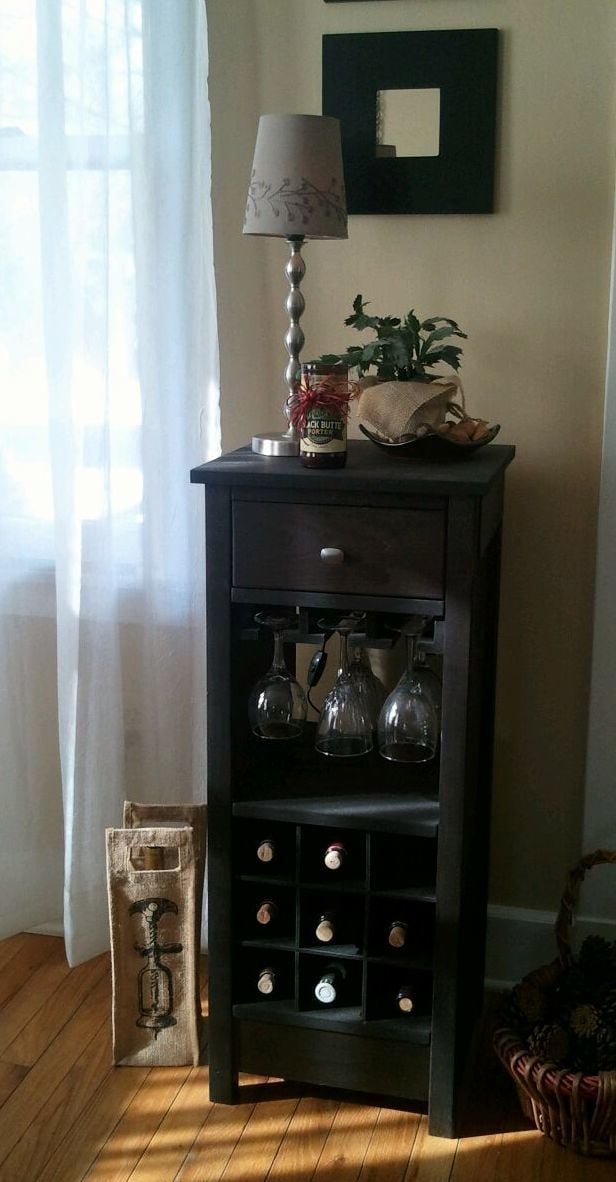
I loved Lady Goats Mod Wine Bar, but it was too large for my dining room. I was also inspired by a plan on that incorporated the stemware in the cabinet. I combined the best elements of each plan and came up with my "Mini Mod Wine Bar". I've built many plans from this site, so I thought it was time to contribute. After I built my original cabinet, I made some tweaks to the plan and the result is the plan below. This is my first published plan, so bear with me:) Please let me know if there are any errors, revisions needed or if you have any questions. Enjoy and good luck!
Specifications
| Project type | Wine Storage |
|---|---|
| Room | dining room |
| Difficulty | Intermediate |
| Estimated cost | $50 - $100 |
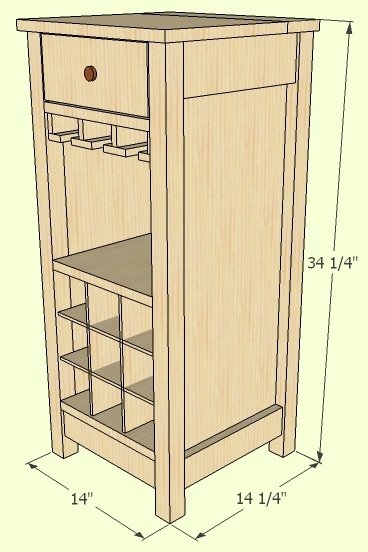
Dimensions
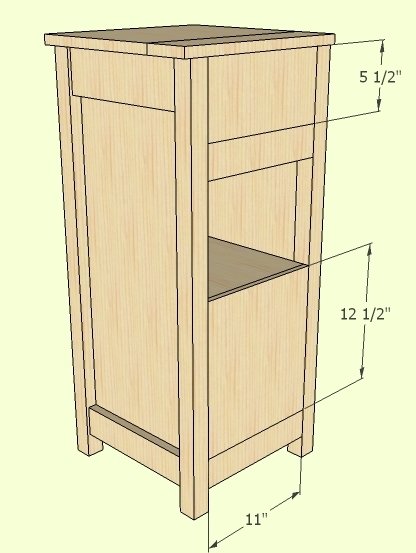
Use the size-specific shopping and cut lists below.
Shopping List
1 sheet 4'x8' 1/2" plywood (you'll have extra)
2 2x2x8
9 feet of 1x4 boards
8 feet of 1x3 boards
5 feet of 1x12 boards
1 foot of 1x5 boards
1 1/4" wood screws
1 1/4" finish nails
1" pocket screws
1 1/4" pocket screws
knob
wood glue
120 grit sandpaper
Cut List
2 - 1/2" plywood 11 1/4" x 31 1/2"
2 - 1x4 @ 11 1/4"
2 - 1x3 @ 11 1/4"
4 - 2x2 @ 33 1/2"
3 - 1x12 @ 11"
8 - 1x3 @ 11"
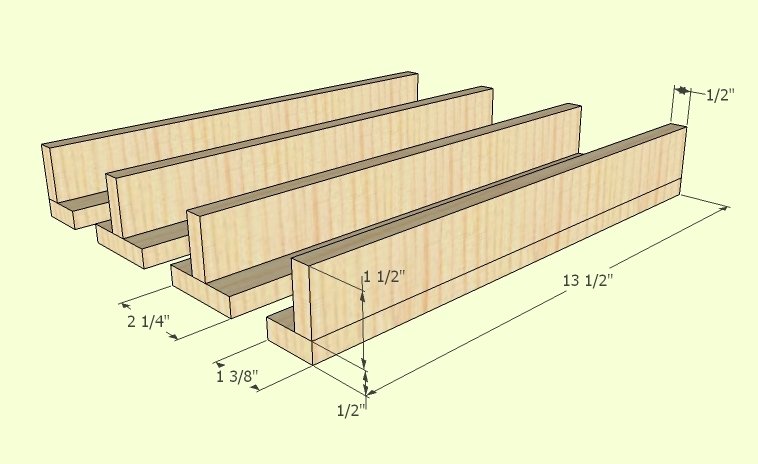
2 - 1/2" plywood 2 1/4" x 13 1/2"
2 - 1/2" plywood 1 3/8" x 13 1/2"
2 - 1/2" plywood 1 1/2" x 13 1/2"
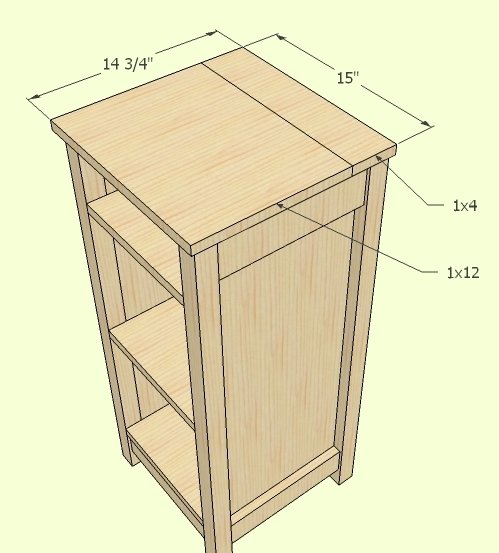
1 - 1x4 @ 15"
1 - 1x12 @ 15"
1 - 1/2" plywood 11" x 5 1/2"
1 - 1/2" plywood 11" x 12 1/2"
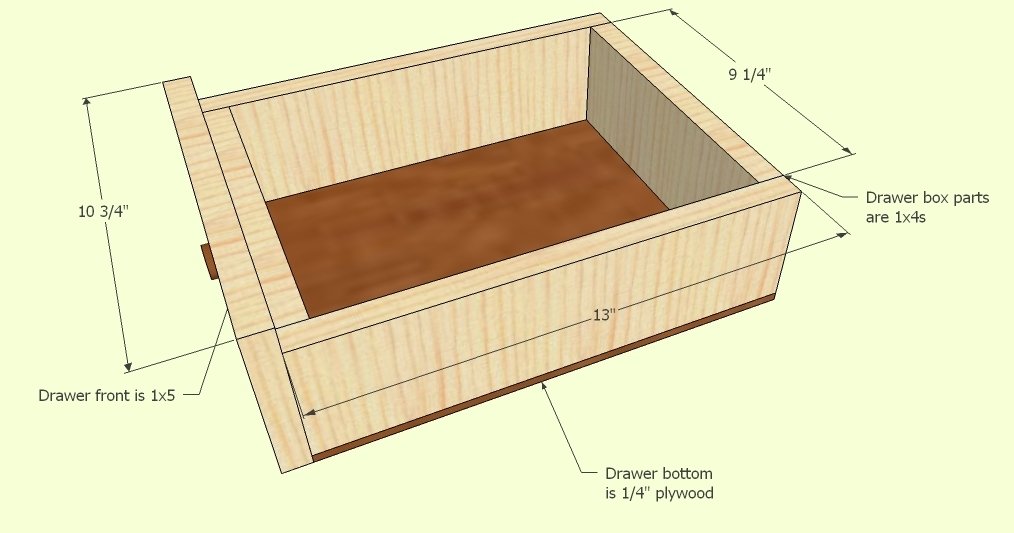
2 - 1x4 @ 13"
2 - 1x4 @ 9 1/4"
1 - 1x5 @ 10 3/4"
1 - 1/4" plywood 10 3/4" x 13"
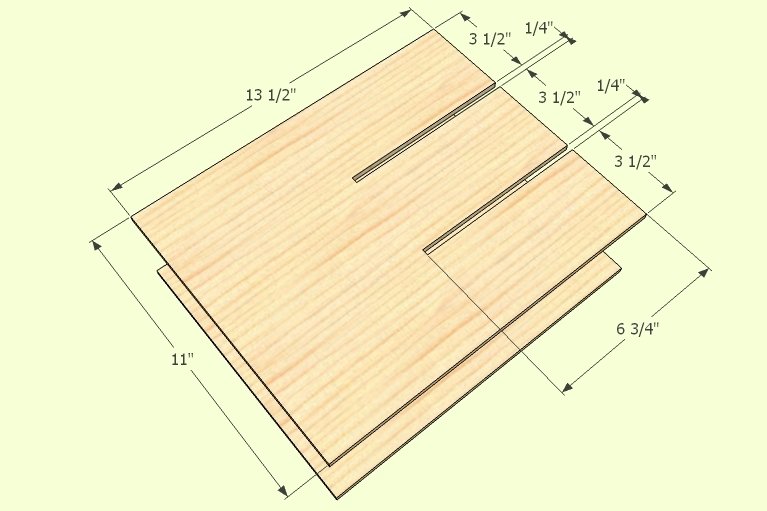
4 - 1/4" plywood 11" x 13 1/2"
Tools
- measuring tape
- square
- pencil
- hammer
- safety glasses
- hearing protection
- kreg-jig
- drill
- circular saw
- compound miter saw
- table saw
- nailer
- sander
Step-by-step Instructions
Step 1
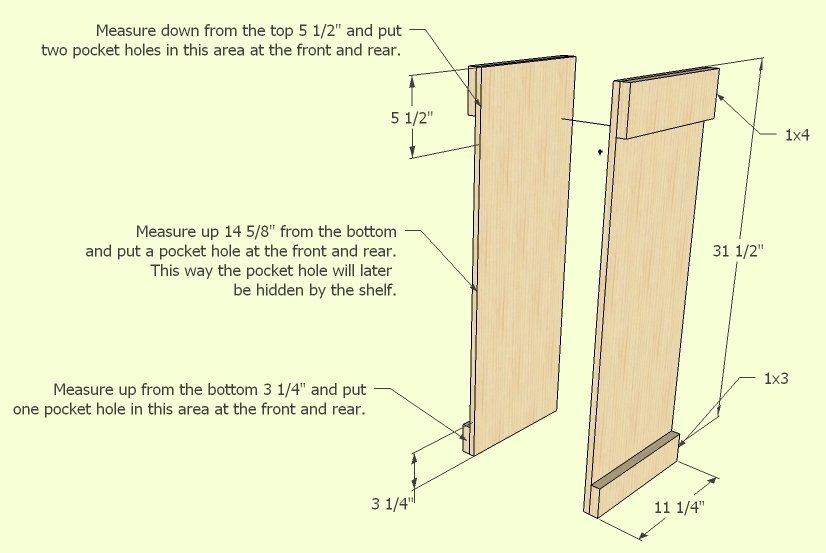
Build two side panels. First cut 1x2s and 1x4s to the width of the plywood side panel (11 1/4"), then attach with glue and 1 1/4" finish nails (nail from the inside to avoid nail holes on the outside of the piece). You'll also need to make pocket holes in the front and back edge of each side panel to attach the legs in step 2. Make pocket holes for 1/2" stock and position the holes so the will be hidden by other elements of the piece (see diagram). This way you'll avoid having to fill any pocket holes.
Step 2
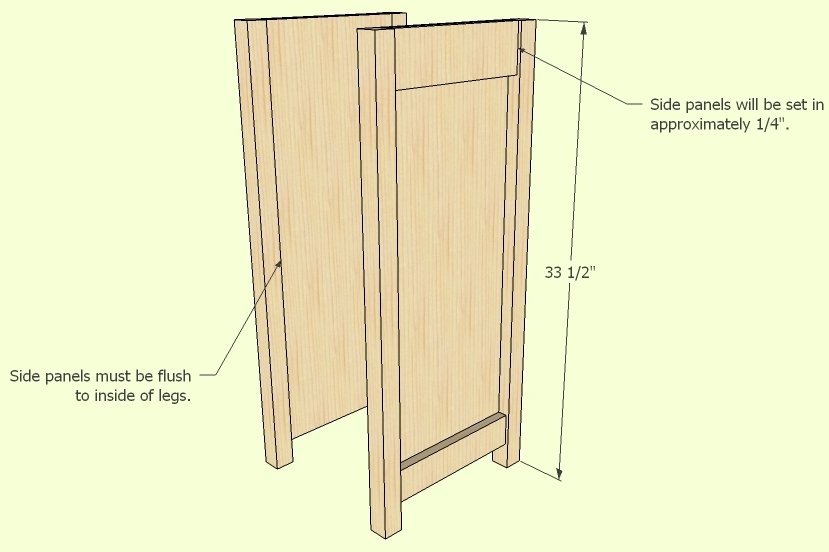
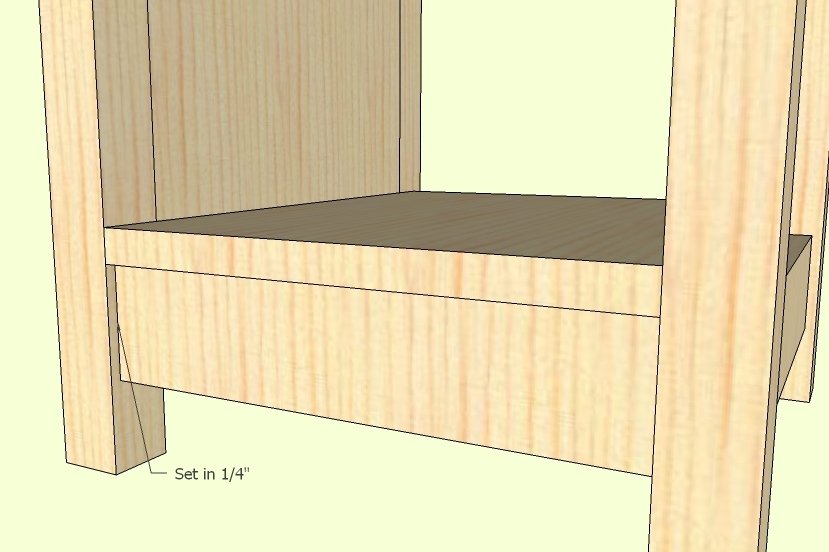
Cut four legs. Attach the legs using glue and 1" pocket screws using the pocket holes you made in Step 1. Be sure the side panels are flush to the inside of the legs. Side panels will be set in approximately 1/4" from the outside of the leg.
Step 3
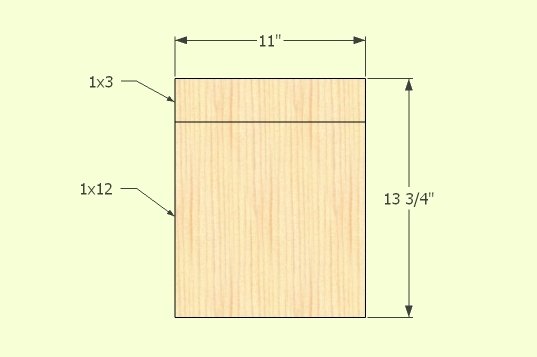
Cut shelf parts and assemble using glue and pocket holes set for 3/4" stock and 1 1/4" pocket hole screws.
Step 4
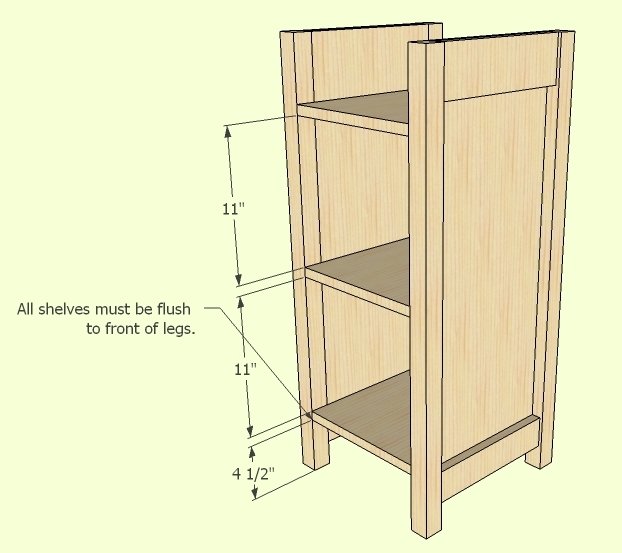
Attach completed shelves using pocket holes set for 1/2" stock and 1" pocket hole screws. Start with the bottom shelf and work up. For alignment purposes it's helpful to cut two pieces of scrap wood 4 1/2" tall. Clamp the scrap to the bottom of each side panel, then you can set the shelf on top of the scrap and attach the shelf with pocket screws. For the next shelf, cut two pieces of scrap wood 11" tall. Set the scrap on top of the first shelf and clamp to the side panel, then set the shelf on top of the scrap and attach the shelf with pocket screws. Repeat for the final shelf. NOTE: Be sure all shelves are flush to the front legs (the back of the shelf will be set in approximately 1/2" from the back of the legs to accept the back panels in Step 8)
Step 5
Step 6
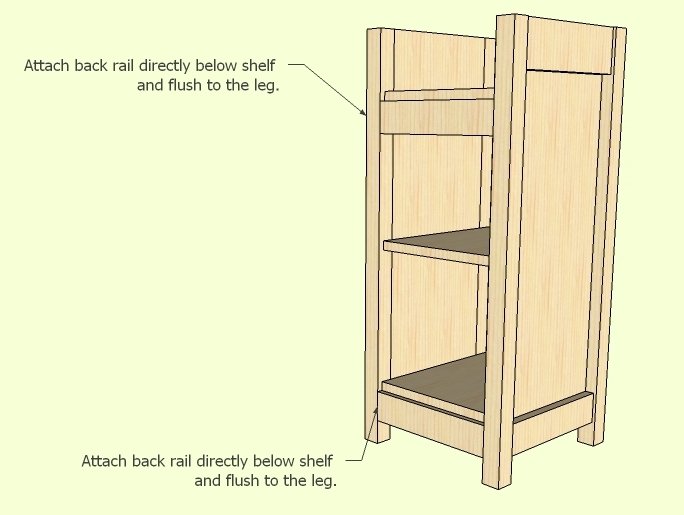
The back rails are attached flush to the legs (directly below the shelf).
Step 7
The stemware holders are made from 1/2" plywood. Rip parts to width and cut to length, attach using glue and 1 1/4 finish nails.
Step 8
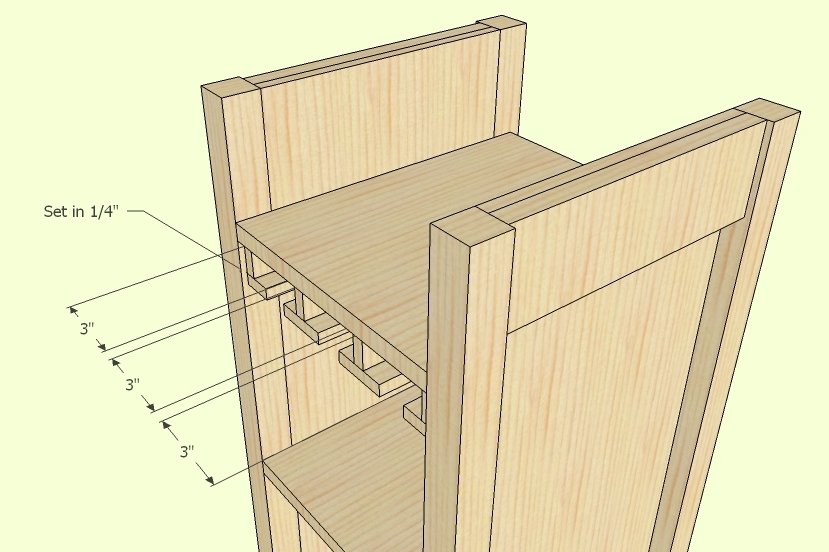
Once glue is dry, attach stemware holders beneath top shelf. Cut a piece of scrap wood to 3" to use a spacer to properly align the holders.
Step 9
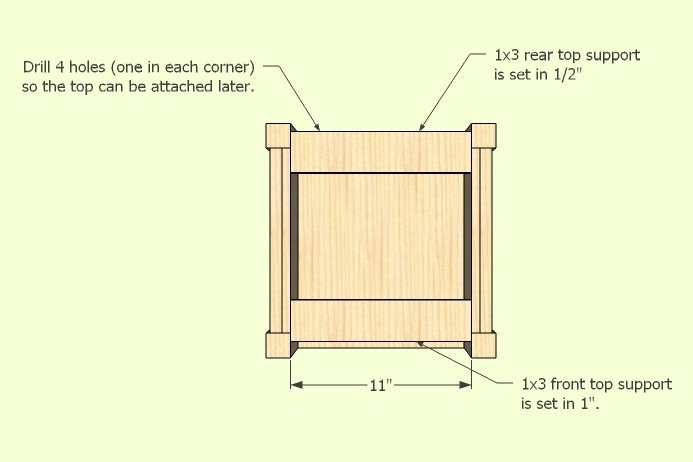
Cut top supports and attach using pocket holes set for 3/4" stock and 1 1/4" pocket hole screws. The front support is set in 1" from the front of the legs and the rear support is set in 1/2" from the back of the legs. Drill 4 holes, one in each corner, so the top can be installed in the next step.
Step 10
Cut top pieces attach using pocket holes set for 3/4" stock and 1 1/4" pocket hole screws. Attach top to base using 1 1/4" screws through the 4 holes drilled in the top supports.
Step 11
Cut top and bottom back panels and attach using 1 1/4 finish nails.
Step 12
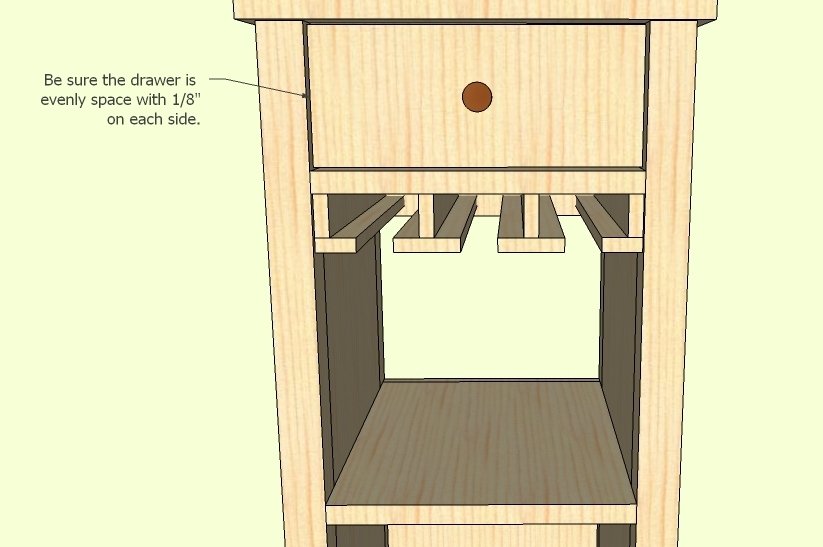
I hate drawer slides, so this plan doesn't use any! Measure the drawer opening before cutting any drawer parts. Please allow for 1/8 " on the right and left side of the drawer, so it will move freely. Adjust the dimensions of the drawer if necessary. Cut the drawer box part and assemble using pocket holes set for 3/4" stock and 1 1/4" pocket hole screws.
Step 13
Cut the drawer front (be sure to allow 1/8" on each side of the drawer front). Slide the drawer box into the opening and shim the drawer front so it's evenly spaced in the opening (coins make great shims!). Drill a hole for the knob, remove drawer front, drawer box and install the knob. Reinstall the drawer and adjust spacing around drawer front then tighten the knob screw. From inside the box use two 1 1/4" wood screws to secure the drawer front to the drawer box. Cut 1/8" hardboard and install to the bottom of the drawer with 1 1/4" finish nails.
Step 14
The four pieces that make up the bottle dividers are 1/4" plywood and are identical. The easiest way to make them is with a router table and a 1/4" straight cutting bit. Set the fence for 3 1/2" and make a pass to the 6 3/4" mark, then flip and make a second pass - that's it! Once cuts are made on all four pieces, assemble (it will be a snug fit, so glue isn't needed) and install in the bottle divider area.
Finishing
Sand all surfaces, starting with a medium grit and finishing with fine. Wipe off the dust, fill any holes or gaps with wood filler, and sand smooth once dry. Apply primer if you're painting, then finish with your choice of paint or stain and seal with a durable clear topcoat. For outdoor projects, use exterior-rated primer, paint or stain, and sealer so the piece stands up to the weather.
Source (temporary): https://www.ana-white.com/woodworking-projects/mini-mod-wine-bar