Minimal Waste 1x8 Shop Hutch
Build this simple wall hutch for practical storage almost anywhere in your home, garage, or workshop. The slim, space-saving design is especially handy in the shop for organizing tools, supplies, small parts, and extension cords without taking up much room. are optimized for minimal waste, so you can get the most out of your materials and build more with less.
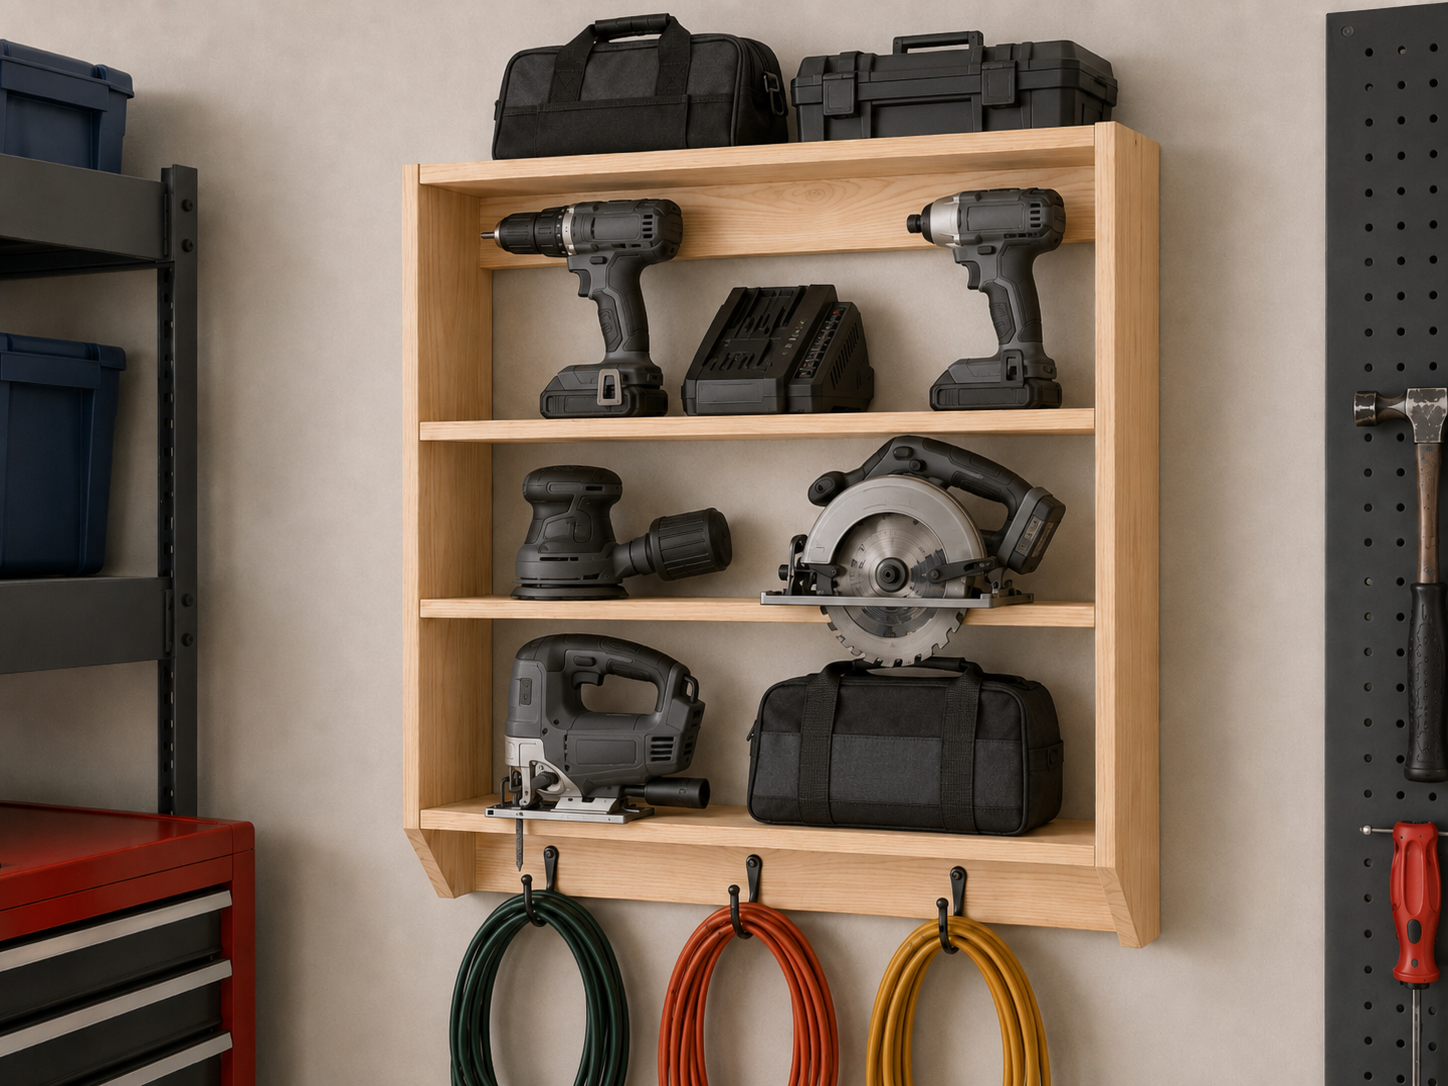
Specifications
| Project type | Workshop and Garage Plans |
|---|---|
| Room | Garage and Workshop |
| Difficulty | Beginner Projects |
Dimensions
Use the size-specific shopping and cut lists below.
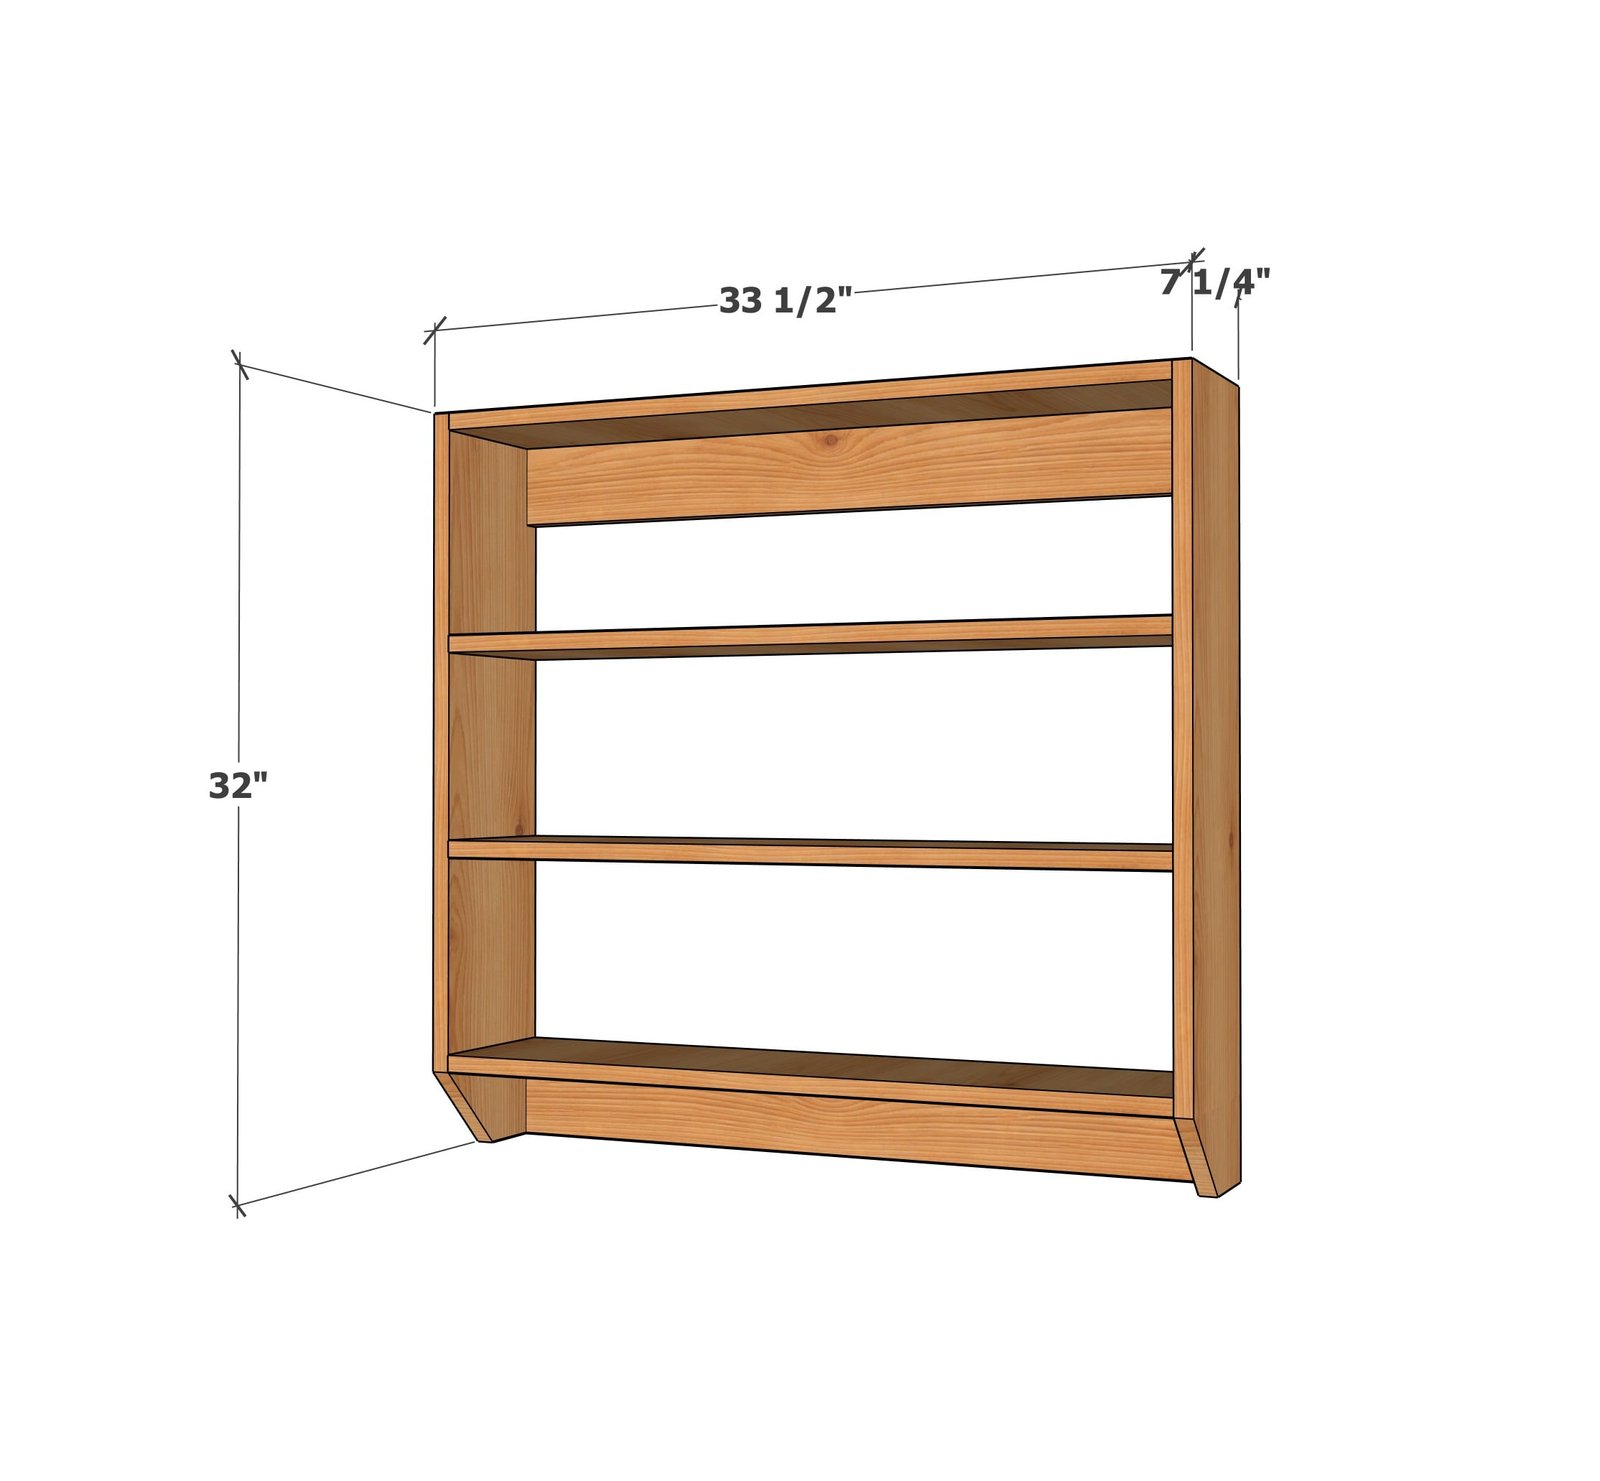
Shopping List
- 2 - 1x8 @ 8 feet long
- 1 - 1x4 @ 6 feet long
- hooks
- 1-3/4" self tapping trim screws
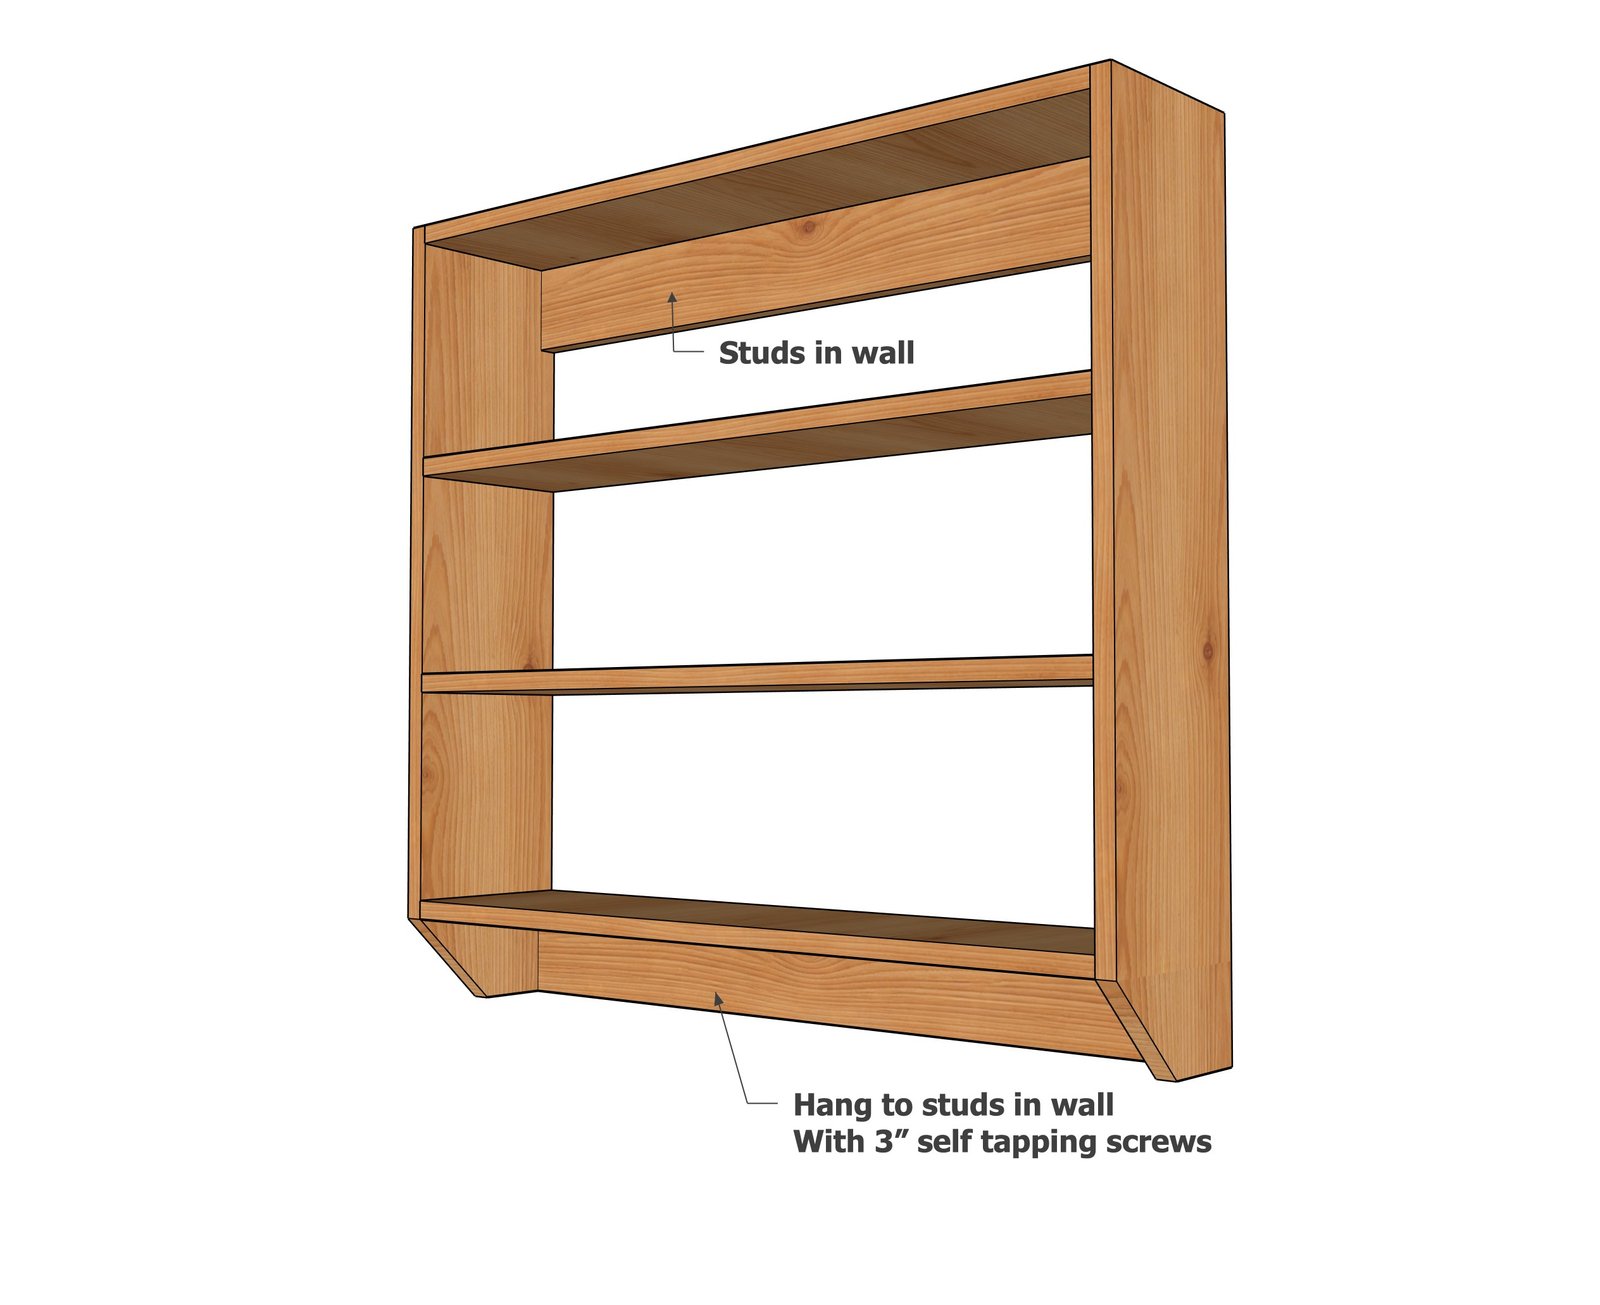
- 3" self tapping screws
Cut List
- 6 - 1x8 @ 31-3/4" - sides and shelves
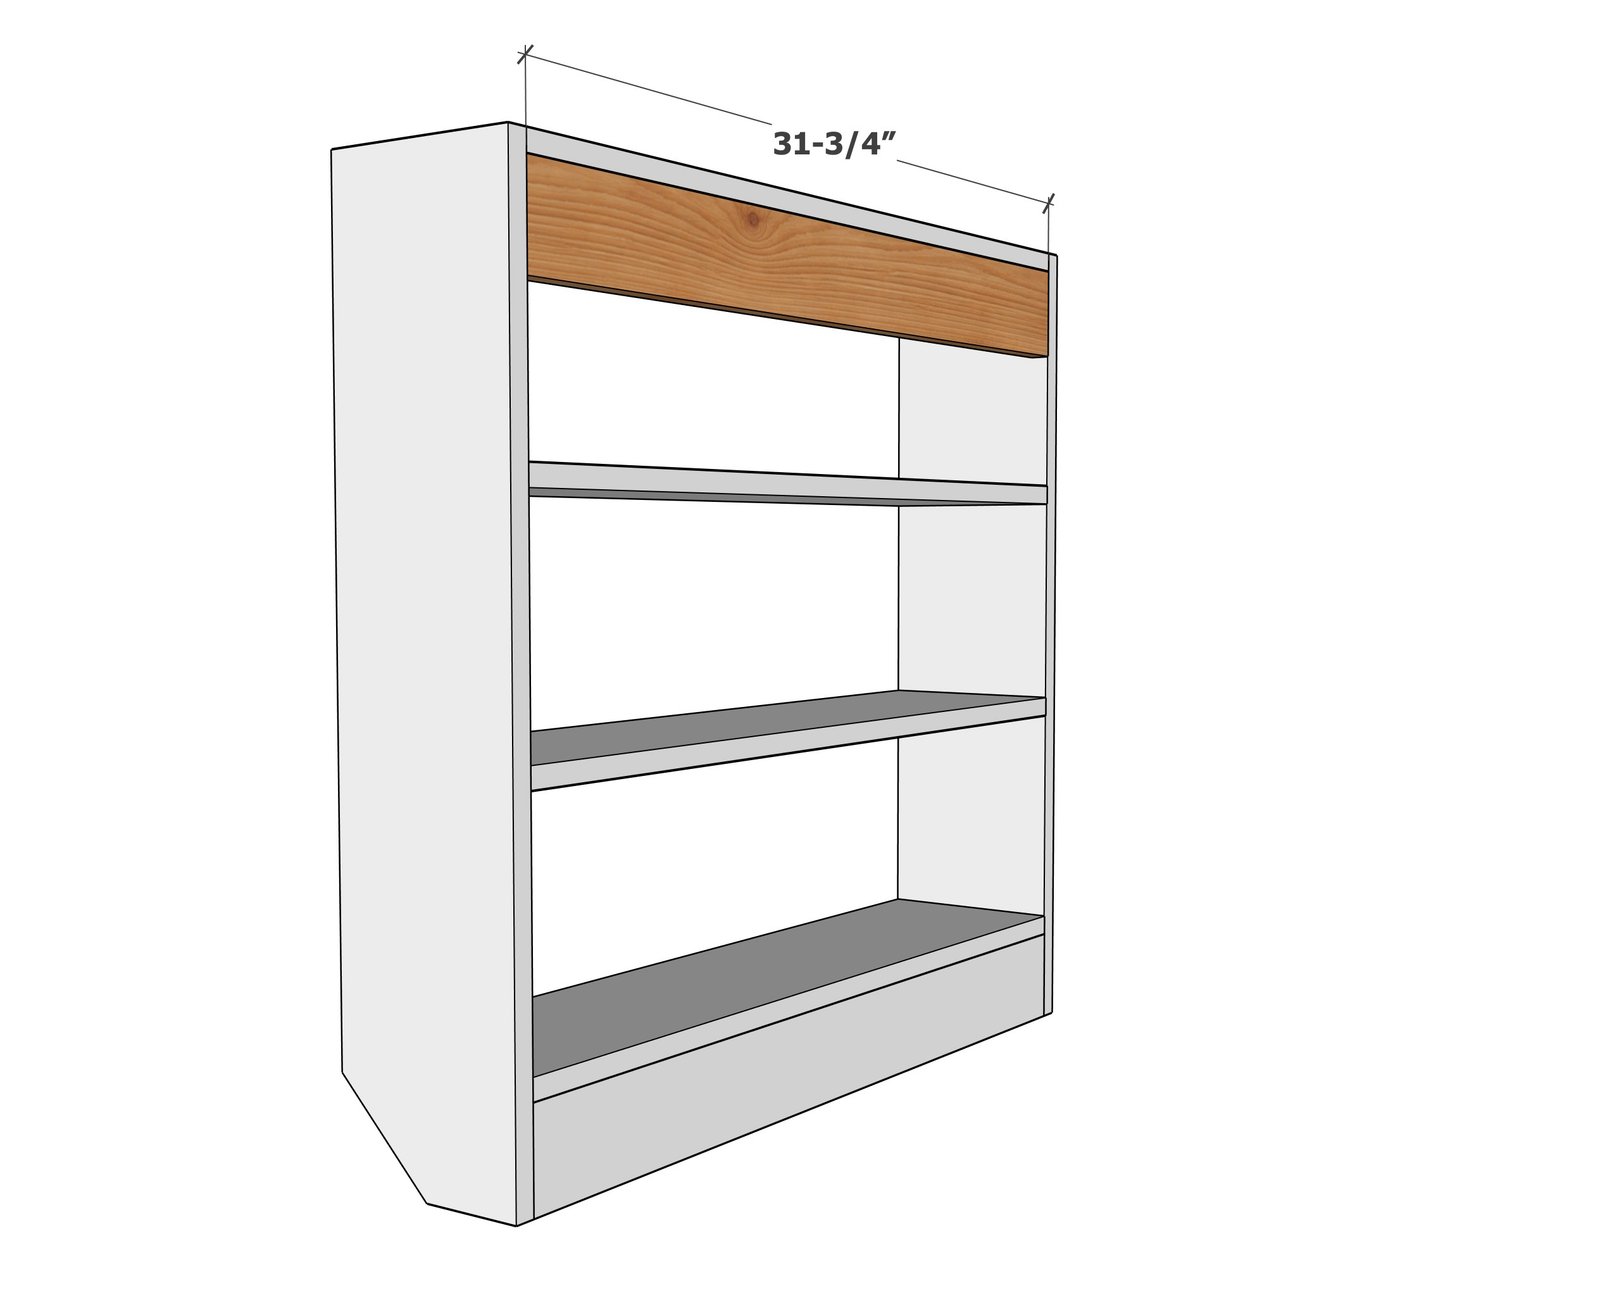
- 2 - 1x4 @ 31-3/4" - back supports
Tools
- measuring tape
- square
- pencil
- safety glasses
- drill
- circular saw
Step-by-step Instructions
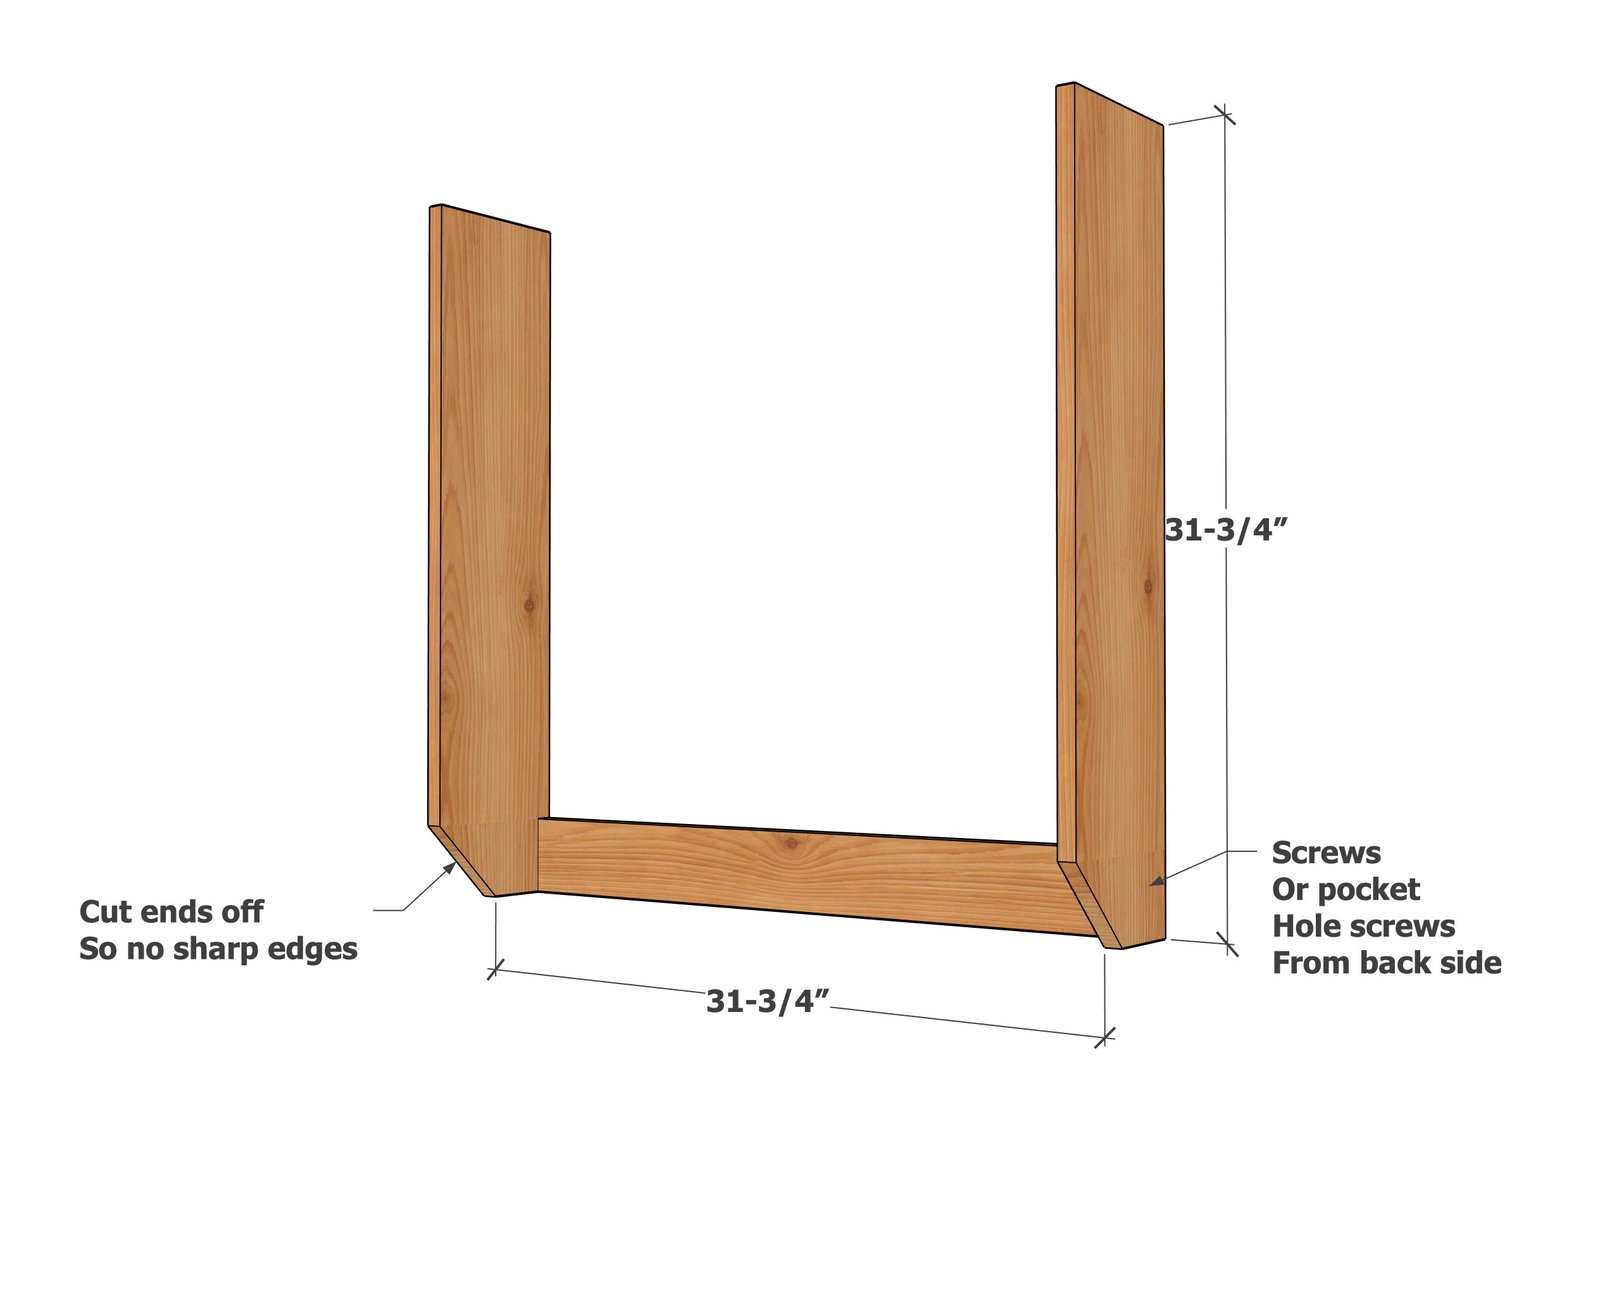
Step 1
For the two sides, soften the bottom edge by trimming back 2" and 2" as shown with a circular saw, jigsaw, or miter saw set to 45 degrees. Attach the 1x4 at the bottom.
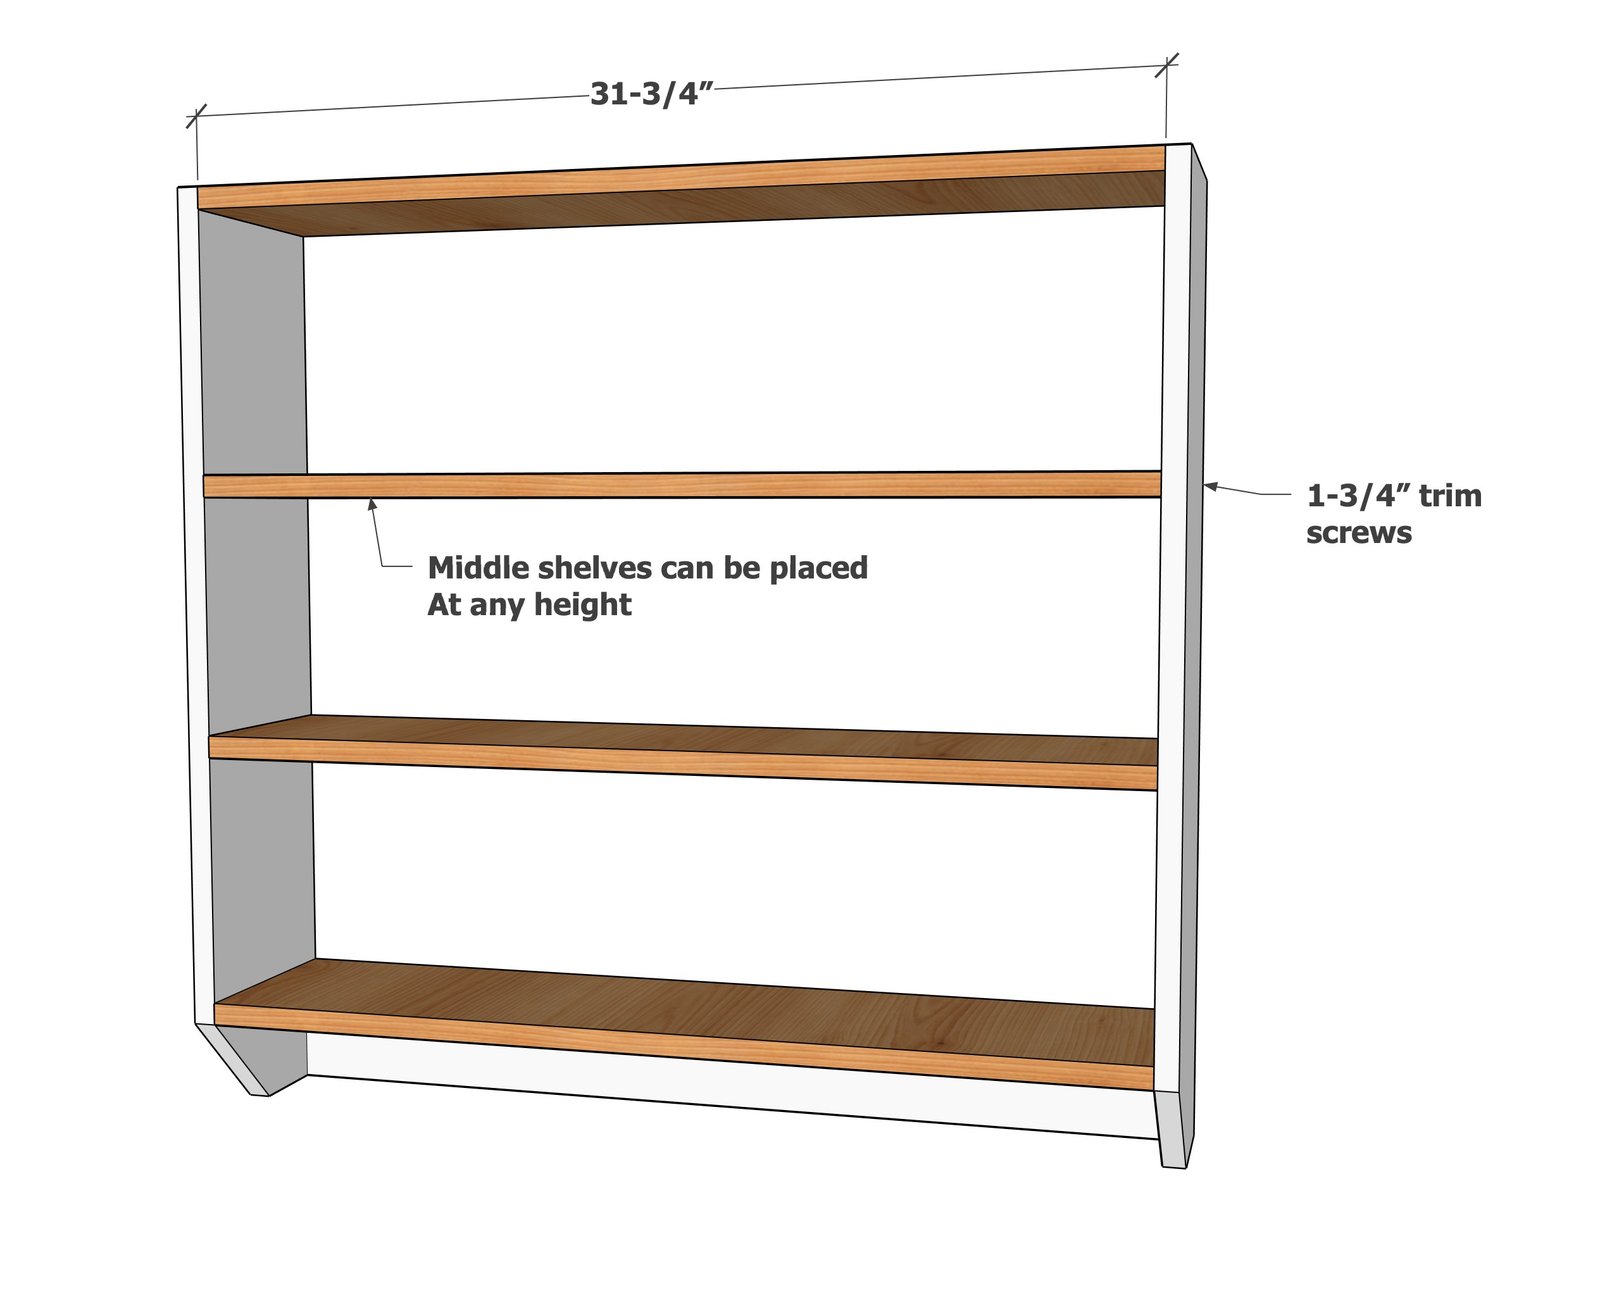
Attach all the shelves to the sides and the 1x4.
The middle shelves can be placed at different height to work with your needs.
Step 3
Add the back 1x4 inset with glue. This will be the handing system for the hutch.
Step 4
Attach hutch to the wall, directly screwing to studs in the wall.
Finishing
Sand all surfaces, starting with a medium grit and finishing with fine. Wipe off the dust, fill any holes or gaps with wood filler, and sand smooth once dry. Apply primer if you're painting, then finish with your choice of paint or stain and seal with a durable clear topcoat. For outdoor projects, use exterior-rated primer, paint or stain, and sealer so the piece stands up to the weather.
Source (temporary): https://www.ana-white.com/woodworking-projects/minimal-waste-1x8-shop-hutch