Mission Style Daybed
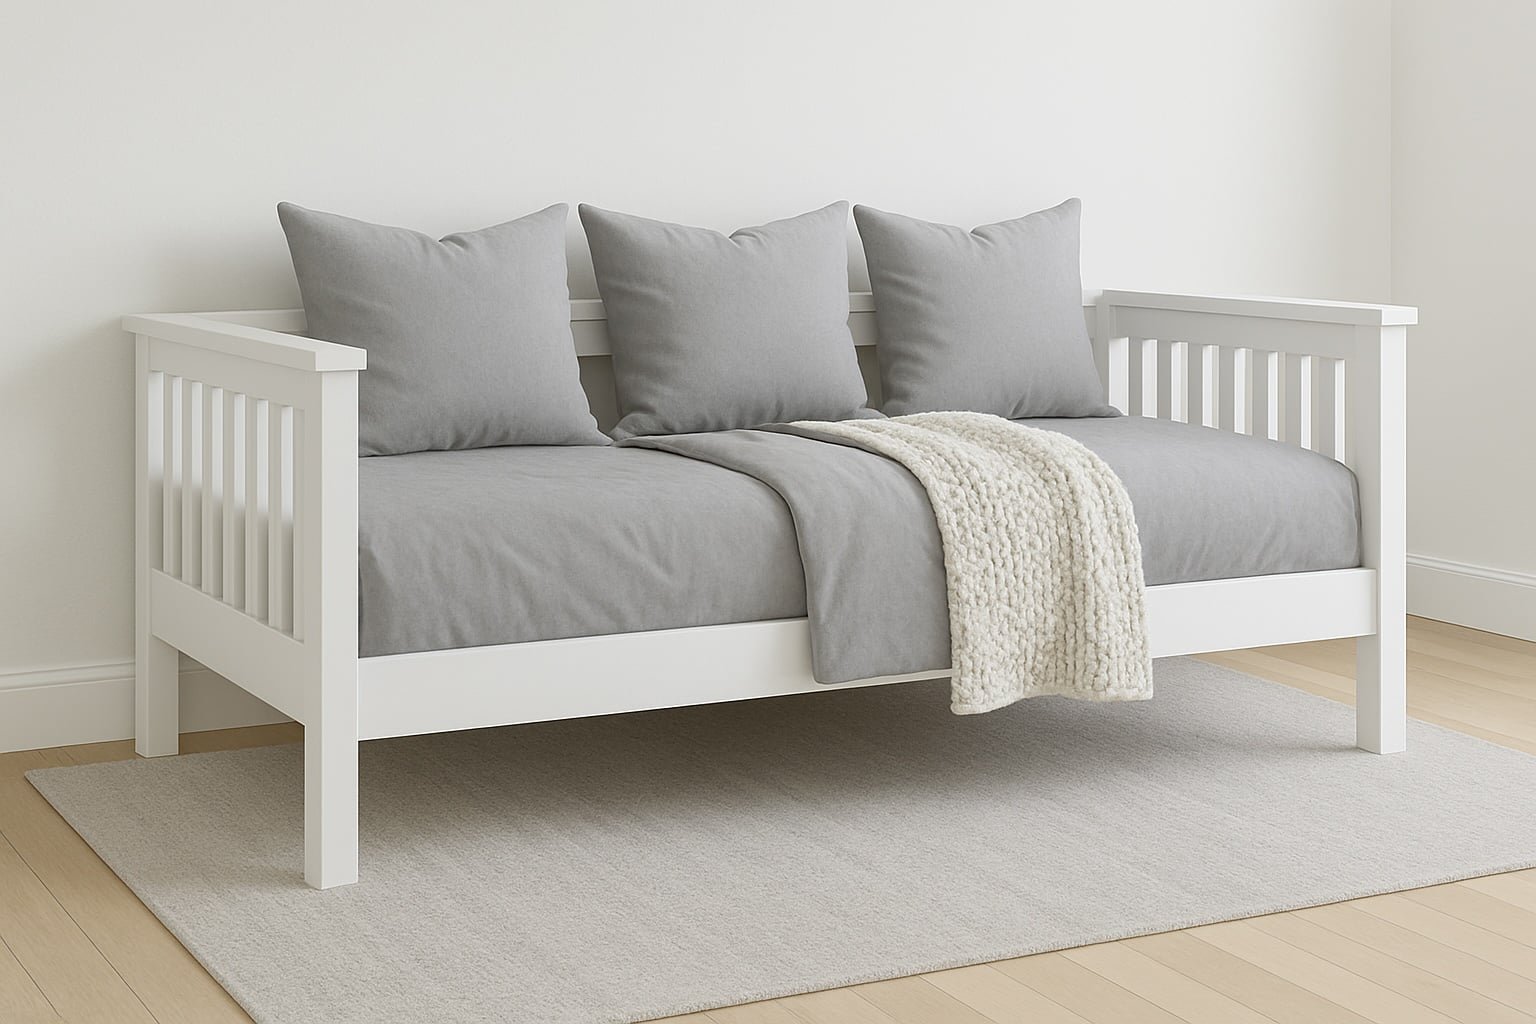
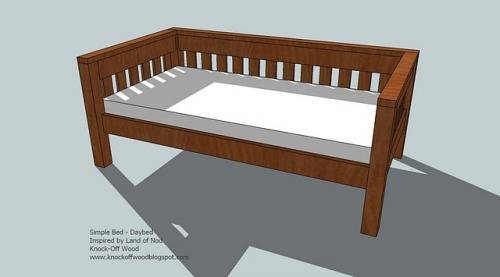
Build your own beautiful wood daybed with this! Inspired by classic Mission-style design, this daybed features clean lines, six-slat sides, and a solid frame built from simple, off-the-shelf lumber. It's the perfect project for beginner to intermediate woodworkers—easy to build, sturdy, and stylish. The twin size design works great for a guest room, kid’s room, or as a cozy couch alternative. include step-by-step diagrams, a cut list, and detailed instructions to guide you through the process.
Specifications
| Project type | Beds and Bed Frames |
|---|---|
| Room | Bedroom |
| Style | Children's and Kid's Room Furniture and Toy Plans |
| Difficulty | Intermediate |
| Estimated cost | $100-$150 |
Dimensions
Use the size-specific shopping and cut lists below.
Shopping List
In addition to the supplies needed for the Simple Bed, you will also need:
2 - 2x6 @ 8 feet or stud length
2 - 2x2 @ 8 feet
2 - 2x6 @ 8 feet
2 - 1x3 @ 8 feet
3 - 1x4 @ 8 feet
1 - 2x4 @ 8 feet or stud length
Cut List
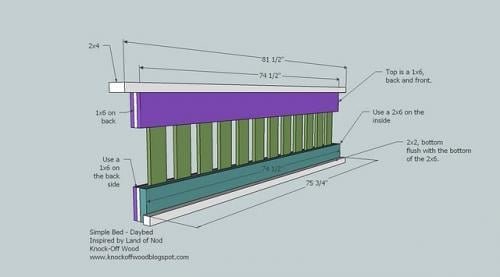
1 – 2×6 @ 74 1/2″ (Shown in blue above)
3 – 1×6@ 74 1/2″ (Shown in purple above)
26 – 1×3 @ 5 1/2″ (Shown in white, spacers between the slats)
12 – 1×4 @ 20 1/2″ (Rails, shown in green above)
1 – 2×4 @ 81 1/2″ (Top of Bed, shown in white above)
1 – 2×2 @ 75 3/4″ (Cleat for mattress supports, shown in white above)
1 – 2×6 @ 74 1/2″
1 – 2×2 @ 75 3/4″
Tools
- measuring tape
- square
- safety glasses
- hearing protection
- drill
- circular saw
- nailer
- sander
- level
Step-by-step Instructions
Step 1
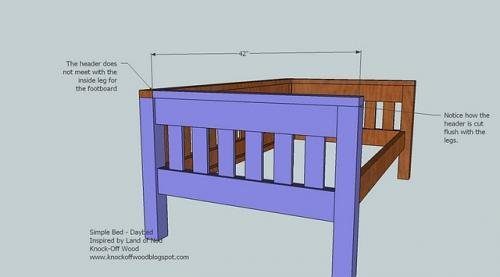
You will need to construct 2 footboards from the Simple Bed Plans. The only modifications you will need to make to the footboards is in the top piece, the 2×4 that finishes to top of the footboard. Cut this board at 42″ keep the front side flush with the front leg post. On the back side, keep the end edge of the 2×4 even with the end edge of the center panel of the footboard. This is shown above. Review the plans for the Simple Bed here. You will first need to build (2) footboards, as directed in the plans for the Simple Bed.
Step 2
Next construct the back panel in the same manner as you constructed the center panel for the footboards. Take not of the differences shown above. Make sure you leave a 3 1/2″ overhang on either end of the 2×4 top piece.
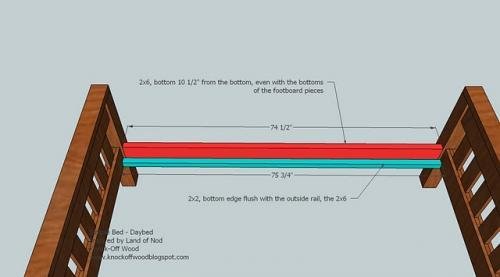
Construct the front rail piece, as shown above. You will need
1 – 2×6 @ 74 1/2″ 1 – 2×2 @ 75 3/4″ Leave a 5/8″ overhang on either end of the 2×2. Keep bottom edges flush. Attach this piece to the footboards by first screwing through the 2×2 into the corner posts (make sure you predrill first. Then predrill and screw through the outside of the legs into the end edges of the 2×6. The bottom edge of the side rail will sit 10 1/2″ up, or even with the bottom edge of the footboard center panel.
Step 4
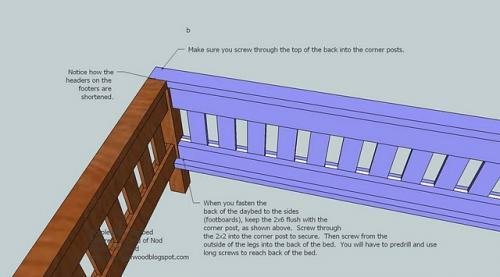
Fasten with screws the back panel to the side panels. This is shown above. Use long screws and predrill before screwing.
Finishing
Sand all surfaces, starting with a medium grit and finishing with fine. Wipe off the dust, fill any holes or gaps with wood filler, and sand smooth once dry. Apply primer if you're painting, then finish with your choice of paint or stain and seal with a durable clear topcoat. For outdoor projects, use exterior-rated primer, paint or stain, and sealer so the piece stands up to the weather.
Source (temporary): https://www.ana-white.com/woodworking-projects/mission-style-daybed-free-diy-plans