Mission style dining table
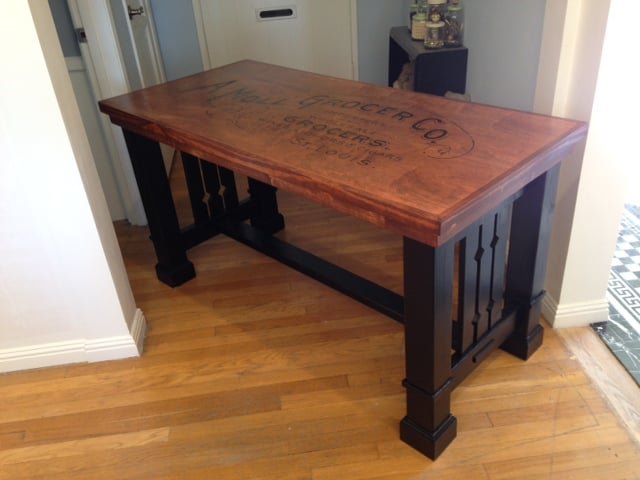
This mission-inspired table is sturdy and practical, and is made of standard lumber sizes.
Specifications
| Project type | Dining Table Plans |
|---|---|
| Room | kitchen |
| Difficulty | Intermediate |
| Estimated cost | $100-$150 |
Shopping List
1- 4x4 10 feet long
2- 2x4 8 feet long
2- 1x4 8 feet long
4- 1x2 8 feet long
1- 3.5" wide base molding - 8' long
1- 3/4" screen molding - 8' long
Cut List
4 pieces 4x4 - 29" long
4 pieces 2 x 4 - 17" long
6 pieces 1 x 4 -16.5" long
1 piece 2x4 - 49.5" long
2 pieces 1x4 - 26" long
1 piece 3/4" plywood 26x56
2 pieces 1x2 57.5" long
2 pieces 1x2 27.5" long
2 pieces 1x2 - 56" long
2 pieces 1x2 26" long
16 pieces base molding 5.5" long
16 pieces screen molding 5.5" long
2 pieces screen molding 3" long
Tools
- measuring tape
- square
- pencil
- safety glasses
- hearing protection
- kreg-jig
- drill
- jigsaw
- compound miter saw
- nailer
- sander
- level
Step-by-step Instructions
Step 1
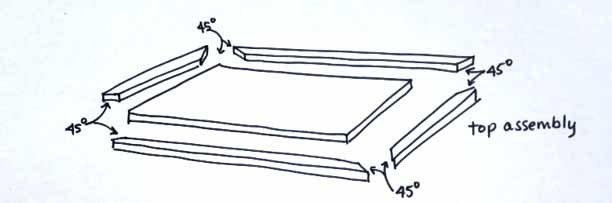
Assemble the top:Beginning with the table top: cut 45 degree ends on the 57.5 and 27.5 long 1x2s, glue and nail to frame the plywood top, flush with top. Fill holes and gaps with wood putty, sand.
Step 2
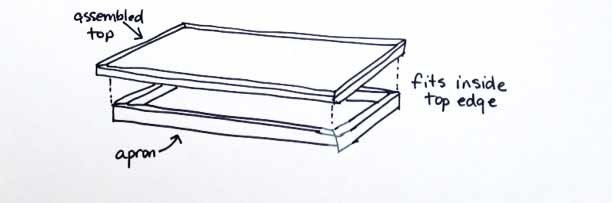
Cut 45 degree ends on the 26" and 56" 1 x2s, glue and nail to fit inside the edges of the box you just made, this will create an apron for the table top. Fill nail holes and any small gaps with wood putty, sand smooth.
Step 3
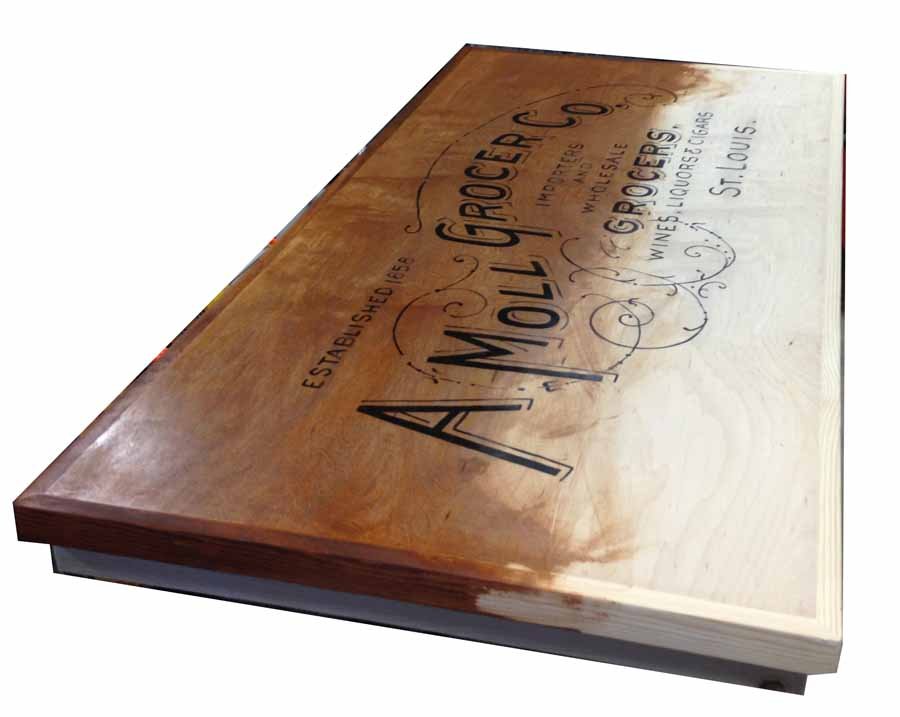
If you wish to create a typographic design on the table top, project an image (I found this one at ), trace with pencil and then use a fine brush and black acrylic paint to fill in. Let dry thoroughly, then sand lightly to age the graphics, being sure not to sand too much off. Stain to desired shade, then apply 3-6 coats of a poly varnish.
Step 4
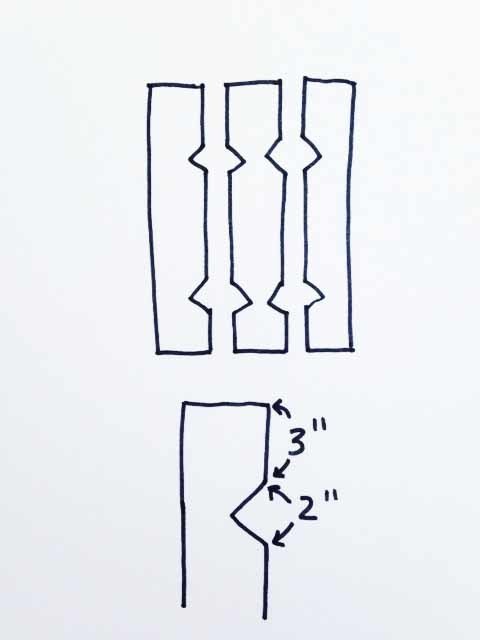
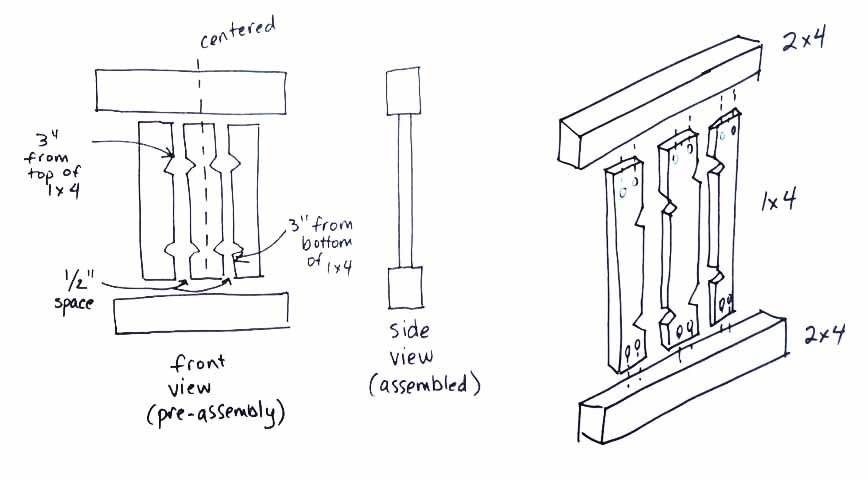
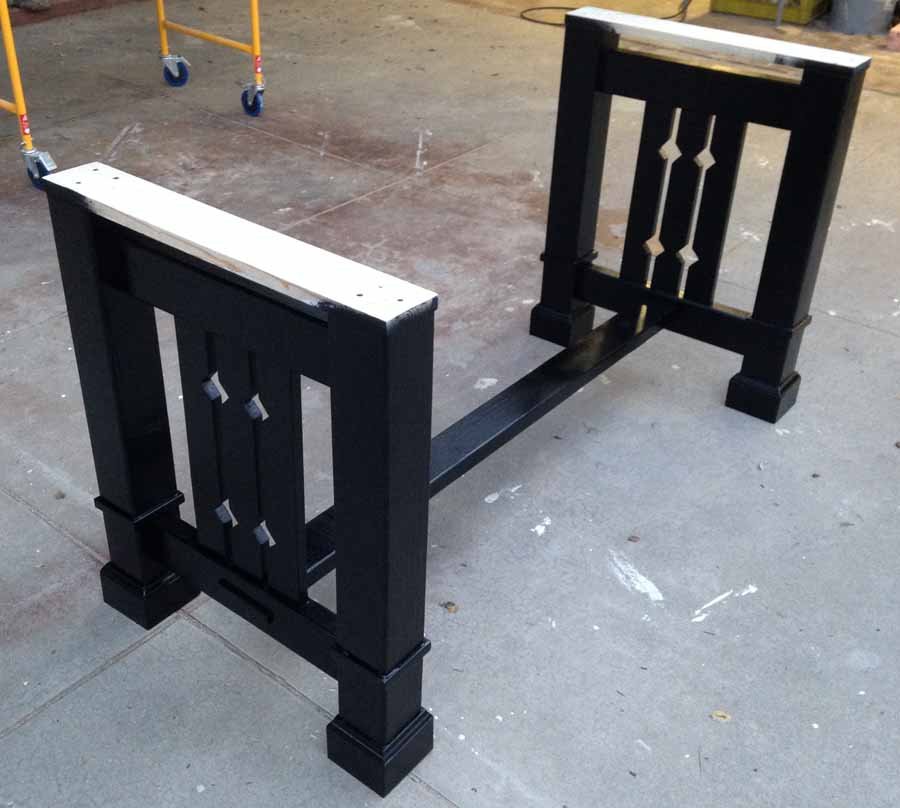
The base: Trace 2" diamonds 3" from top and bottom of 1x4 slats, placing the diamonds between the slats as shown in the photographs. Use a jigsaw and cut them out, then sand smooth.
Step 5
Step 6
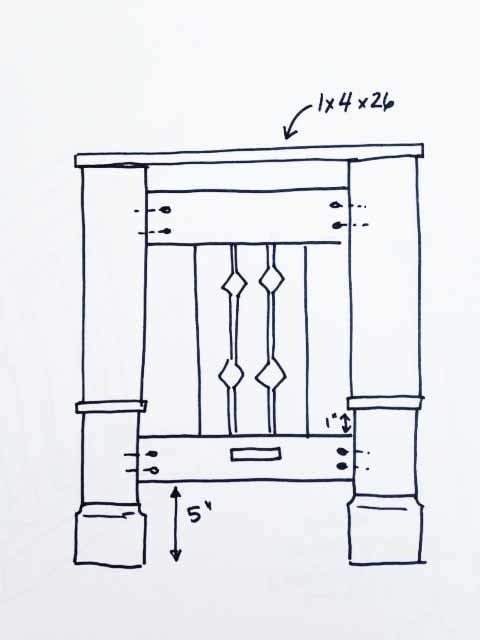
Using kreg jig, attach each unit between 4x4s, 5" from bottom, using 2 -2.5" screws on each 2x4. Check for level. Repeat for other side. Use 1x4x26 across top, glue and screw to top, centering. For decorative molding: on bottom of each leg, attach the base molding, mitering to fit and attaching with glue and nails. One inch above the bottom rail, attach screen molding, using glue and nails, mitering to fit.
Step 7
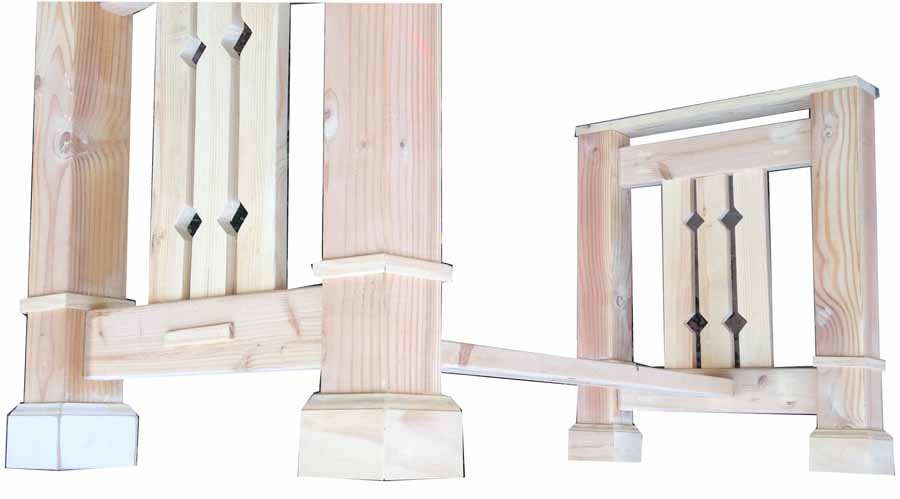
Attach 2x4x49.5" from bottom 2x4 on each side, centering on 2x4, glue and screw with 2.5" screw from outside. Check again for level.
Step 8
Attach 3" pieces of screen molding along bottom rail to cover screw heads, using glue and nails. Fill all gaps and holes with wood putty, sand thoroughly.
Step 9
Prime and paint base if desired, or you can stain.
Step 10
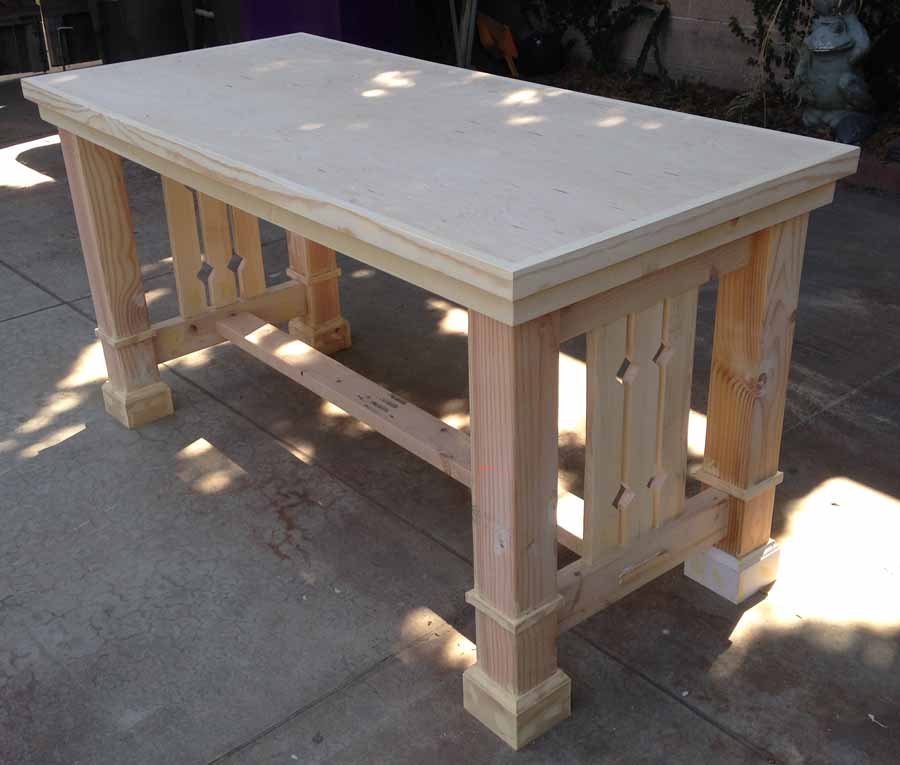
To attach top to base: Use glue and screw upwards from underneath, using 1 1/4" screws.
Finishing
Sand all surfaces, starting with a medium grit and finishing with fine. Wipe off the dust, fill any holes or gaps with wood filler, and sand smooth once dry. Apply primer if you're painting, then finish with your choice of paint or stain and seal with a durable clear topcoat. For outdoor projects, use exterior-rated primer, paint or stain, and sealer so the piece stands up to the weather.
Source (temporary): https://www.ana-white.com/woodworking-projects/mission-style-dining-table