Miter Saw Cart
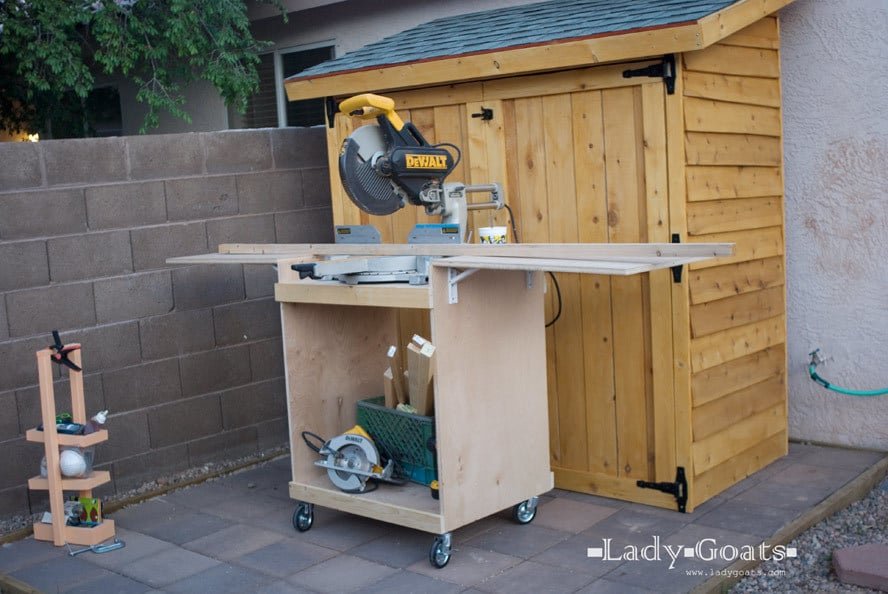
Make a miter saw cart from a single sheet of plywood! Has folding wings to stow away in tight spaces.
Specifications
| Project type | Workshop and Garage Plans |
|---|---|
| Room | Garage and Workshop |
| Style | Farmhouse Furniture |
| Difficulty | Beginner Projects |
| Estimated cost | $50 - $100 |
Dimensions
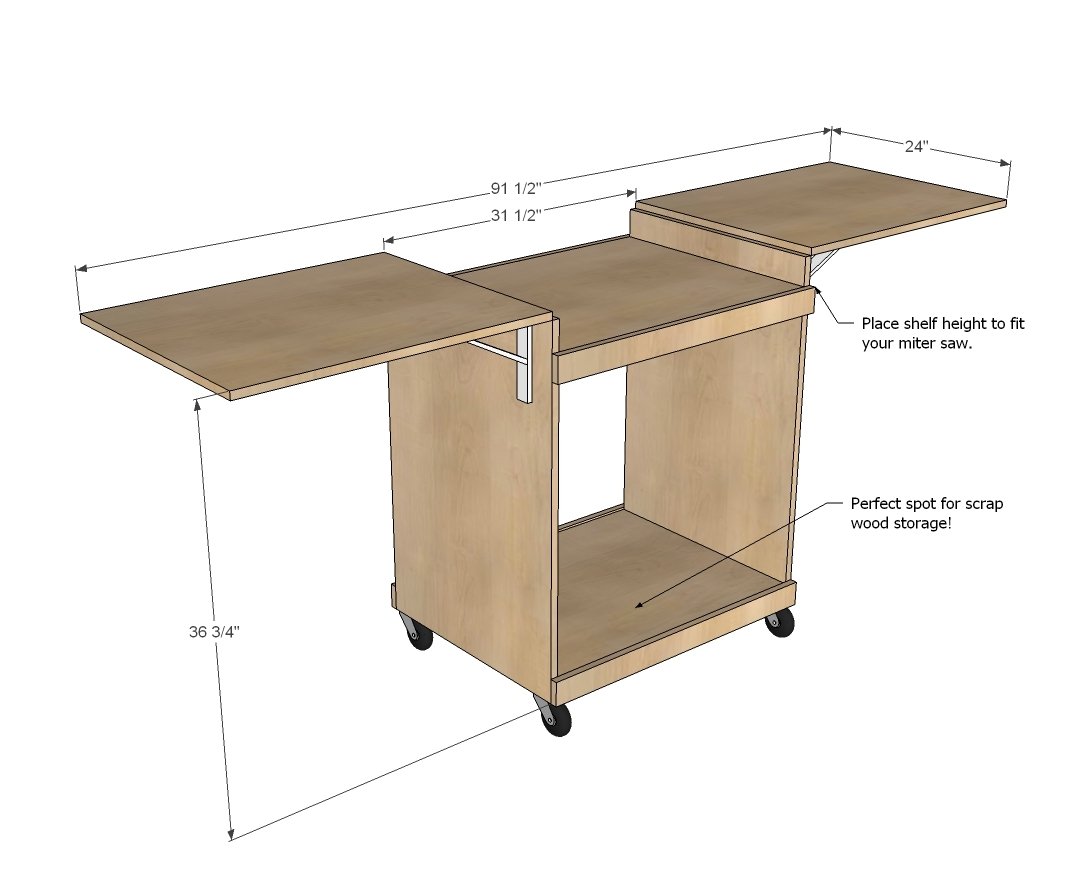
Use the size-specific shopping and cut lists below.
Shopping List
- 1 – sheet 3/4" plywood cut in half lengthwise into 24” x 96” strips.
- 1 – 2x2 @ 8 feet long
- 1 – 1x3 @ 12 feet long – or (2) 8 footers
- 4 – plate mount caster wheels with locking brakes
- 2 – shelf hinge supports NOTE: For use as an assembly table we recommend a locking support as well
Cut List
- 2 – 3/4” plywood @ 24” x 36” (sides)
- 2 – 3/4” plywood @ 24” x 30” (shelves)
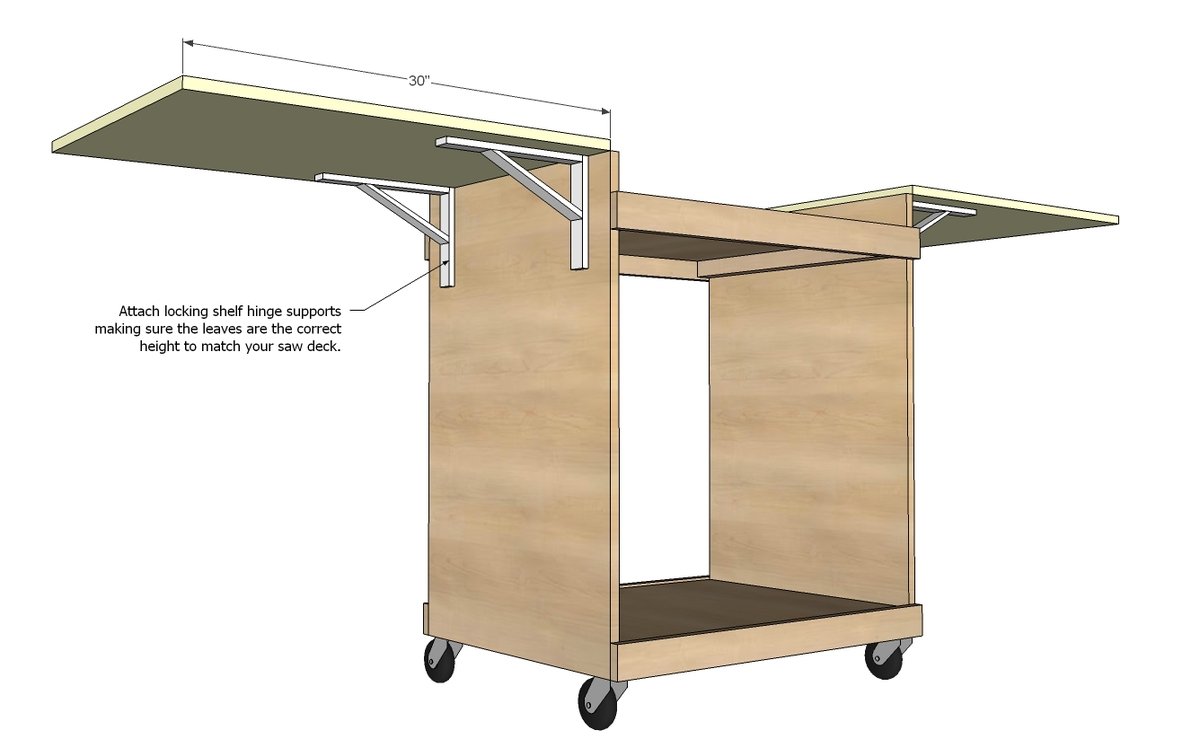
- 2 – 3/4" plywood @ 24” x 29 3/4" (leaves)
- 4 – 2x2 @ 24” (cleats)
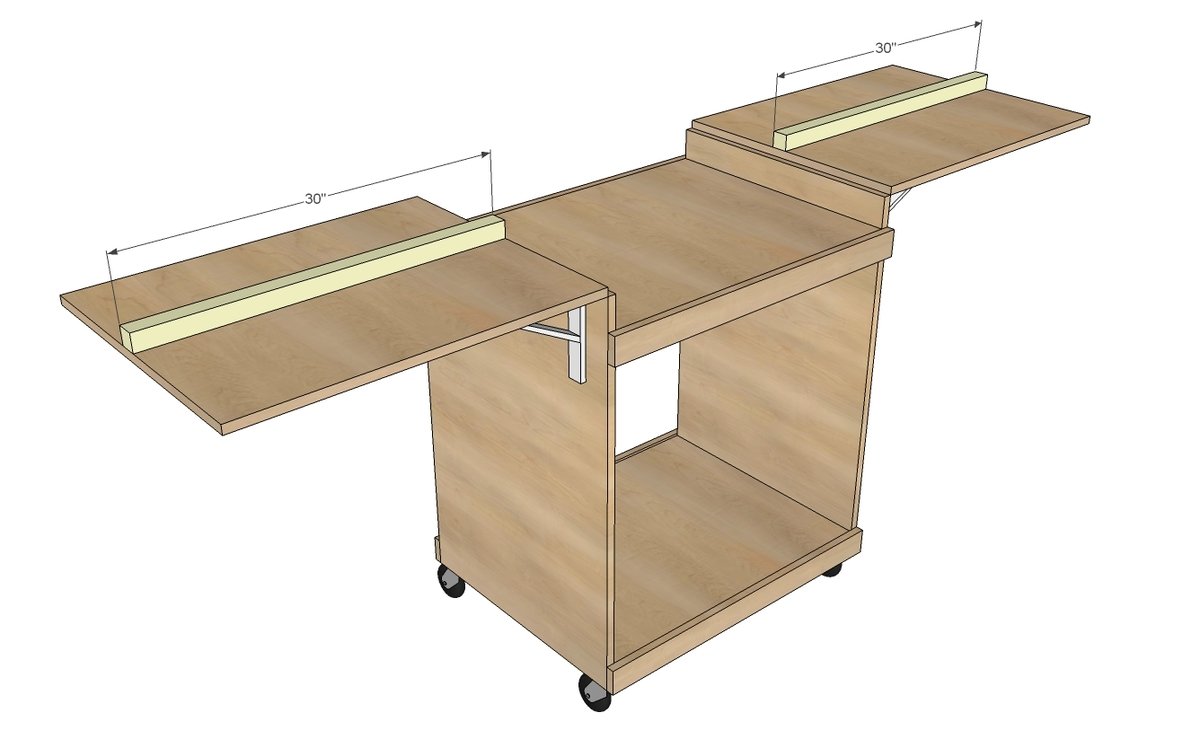
- 4 – 1x3 @ 31 1/2" (supports)
Tools
- measuring tape
- square
- pencil
- safety glasses
- hearing protection
- drill
- circular saw
- countersink drill bit
Step-by-step Instructions
Step 1
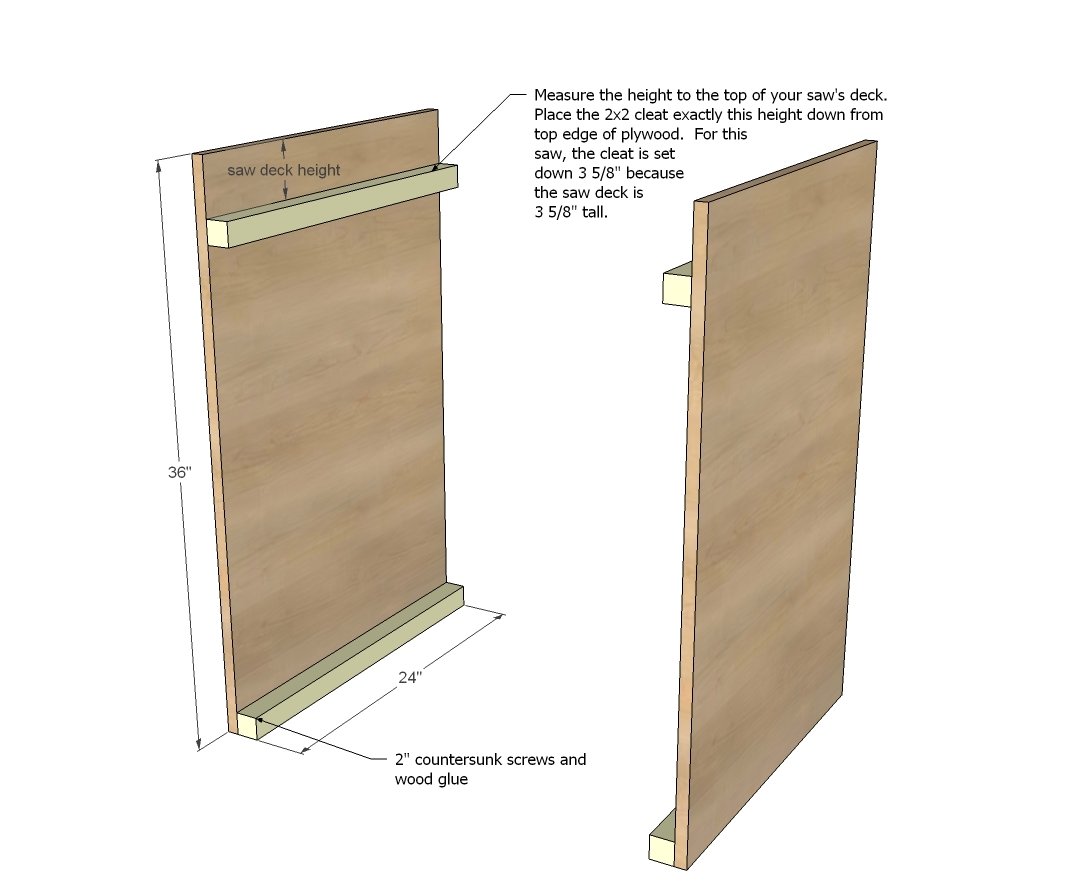
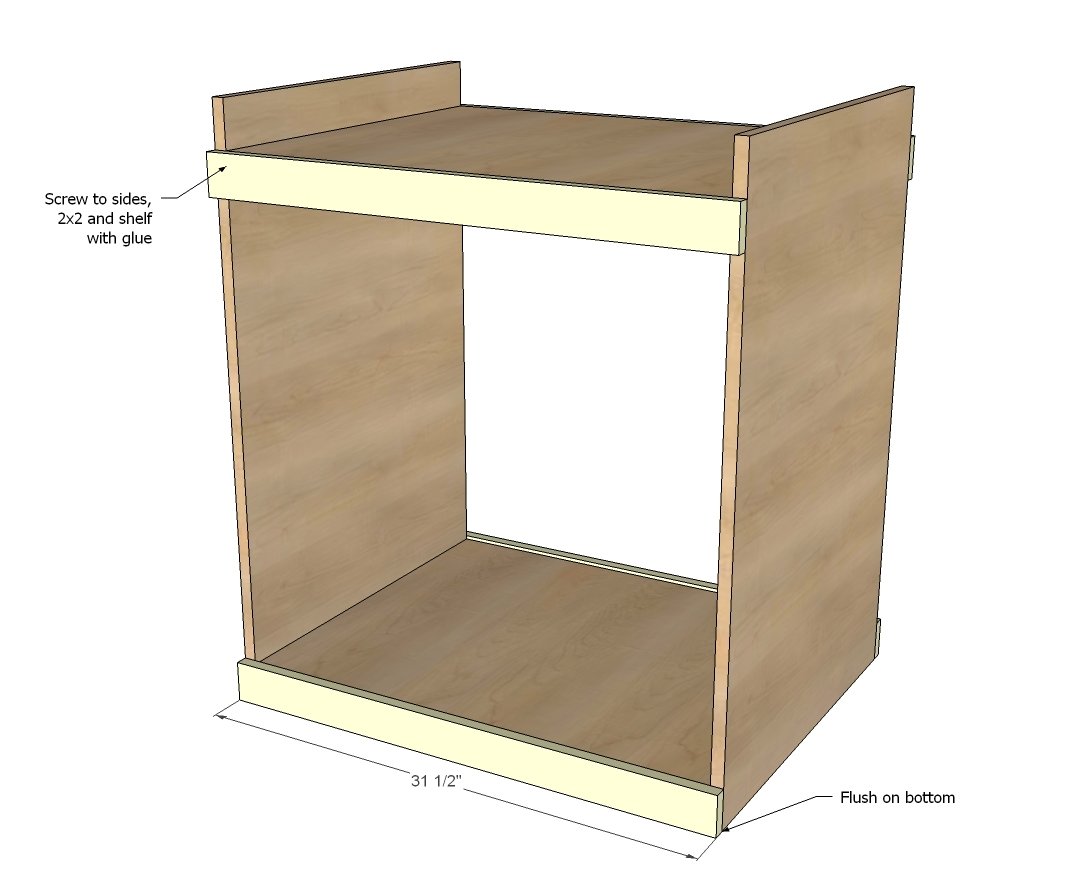
It is very important to place the cleat the distance down from the top of plywood edge equal to your saw deck height. Measure carefully.
Step 2
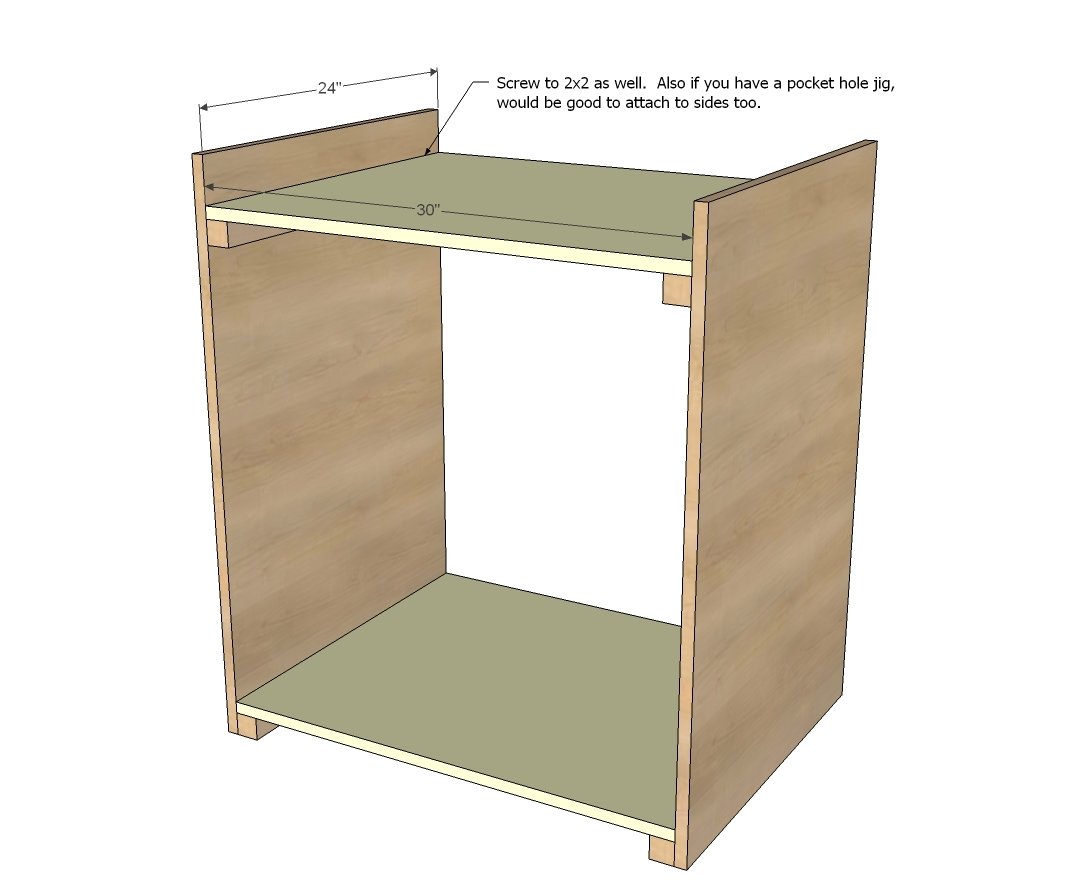
I'd also recommend attaching the shelves with 3/4" pocket holes and 1 1/4" pocket hole screws and glue, or brackets just to provide a little extra support. NOTE: You can add extra shelves as well.
Step 3
These will reinforce the joint. Another idea is to add more lower down, like a crate, and you could use the bottom shelf for scrap wood storage. Note that the bottom trim is mounted flush to bottom.
Step 4
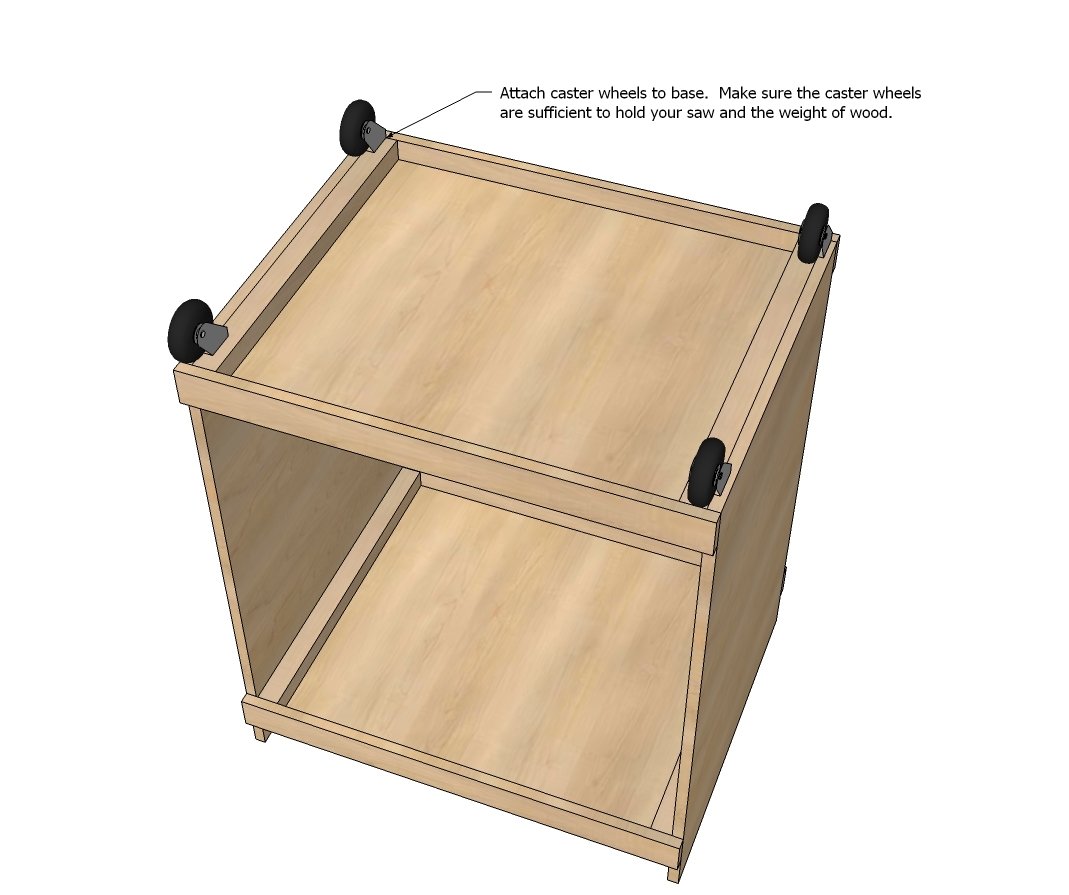
Mount your caster wheels to the bottom.
Step 5
Step 6
Finishing
Sand all surfaces, starting with a medium grit and finishing with fine. Wipe off the dust, fill any holes or gaps with wood filler, and sand smooth once dry. Apply primer if you're painting, then finish with your choice of paint or stain and seal with a durable clear topcoat. For outdoor projects, use exterior-rated primer, paint or stain, and sealer so the piece stands up to the weather.
Source (temporary): https://www.ana-white.com/woodworking-projects/miter-saw-cart