Mod Bar
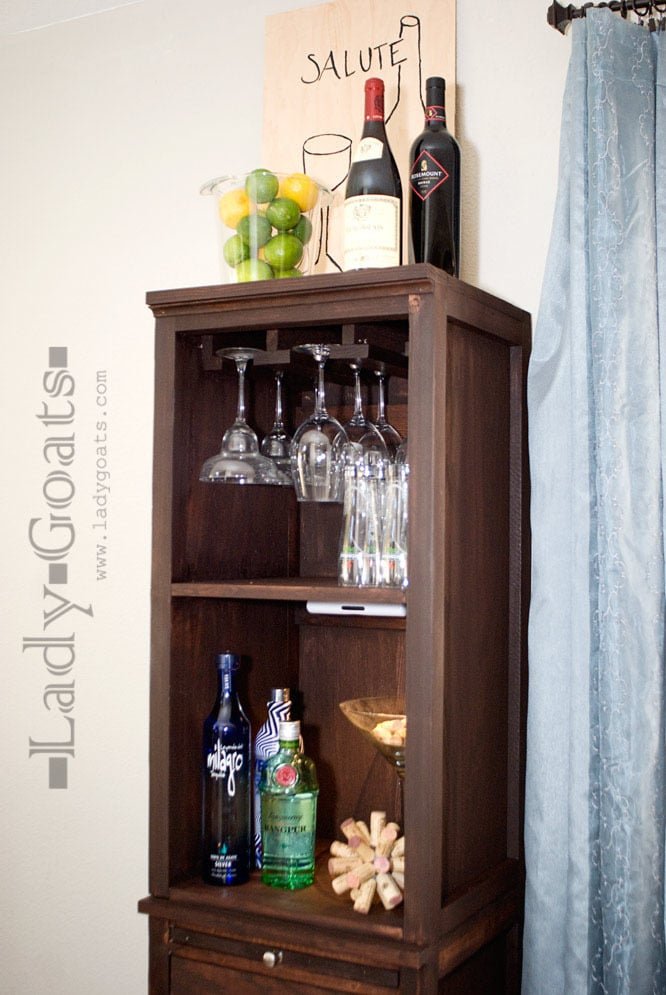
Plans to build a stemware hutch inspired by Pottery Barn's modular bar collection. Build your own with free, step-by-step plans.
Specifications
| Project type | Kitchen Cabinet Plan, Accessories and Serving |
|---|---|
| Room | dining room |
| Style | Modern Style Furniture Plans |
| Difficulty | Beginner Projects |
| Estimated cost | $20 - $50 |
Dimensions
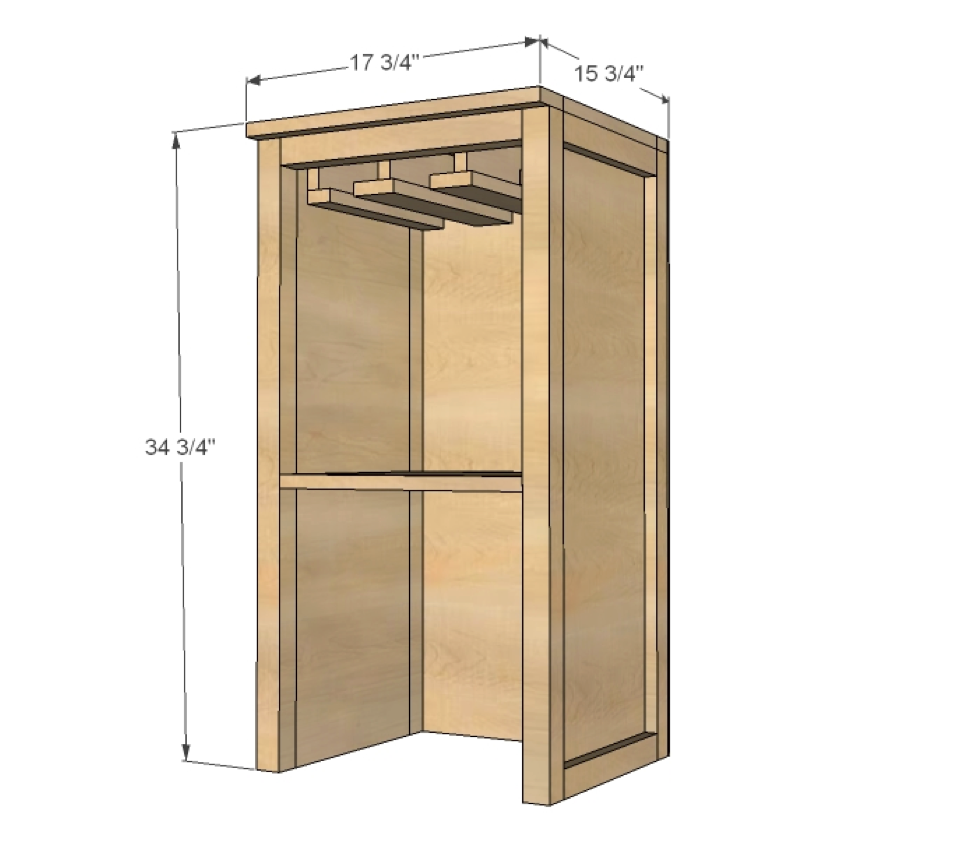
Use the size-specific shopping and cut lists below.
Shopping List
- 10 feet of 1x12 boards – for three hutches, use a single sheet of plywood cut into 11 ¾” wide strips 8 feet long. Make longest cuts first.
- 2 – 1x2 @ 8 feet long
- 1 – 1x3 @ 8 feet long
- 2 – 2x2 @ 8 feet long
- Use ¼” plywood from base to cover back.
Cut List
- 2 – 1x12 @ 34” (sides)
- 4 – 1x2 @ 11 1-4” (width of 1x12s)
- 4 – 2x2 @ 34”
- 6 – 1x3 @ 12”
- 2 – 1x2 @ 12”
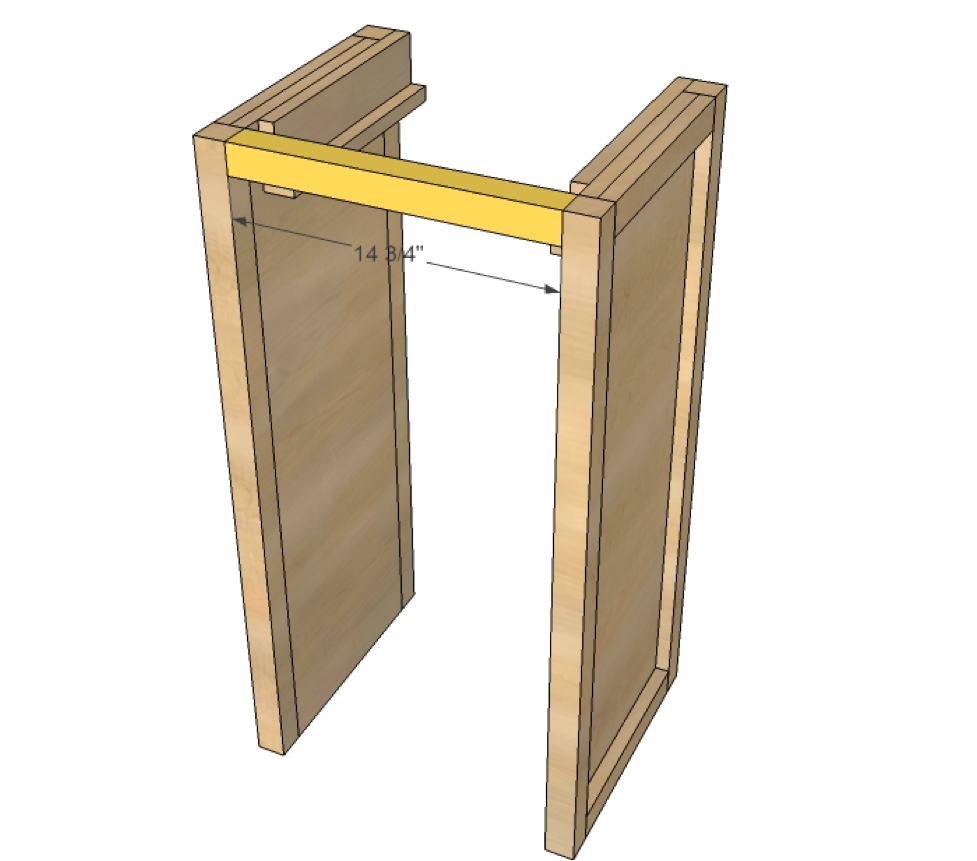
- 1 – 2x2 @ 14 ¾”
- 1 – 1x2 @ 17 ¾”
- 1 – 1x12 @ 17 ¾”
- 1 – 1x3 @ 17 ¾”
- 2 – 1x2 @ 14 ¾”
- 1 – 1x12 @ 14 ¾”
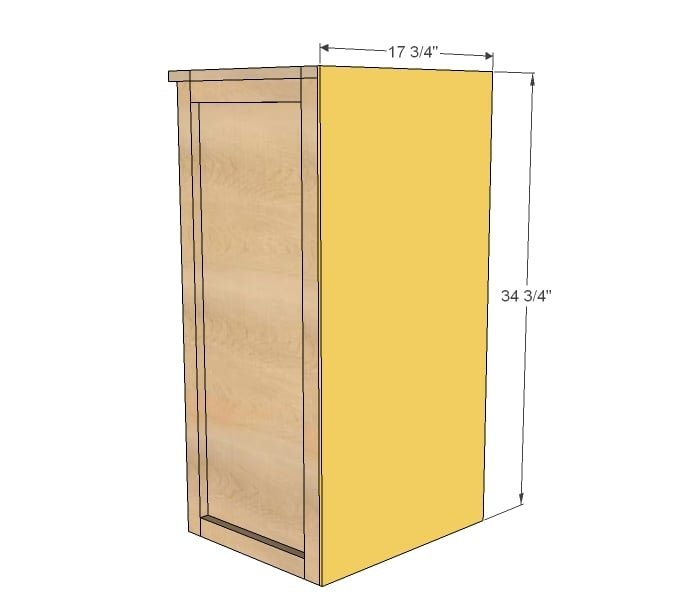
- ¼” plywood @ 17 ¾” x 34 ¾” (See base plan)
Tools
- measuring tape
- square
- pencil
- hammer
- safety glasses
- hearing protection
- kreg-jig
- drill
- circular saw
- jigsaw
- compound miter saw
- table saw
- nailer
- sander
- countersink drill bit
Step-by-step Instructions
Step 1
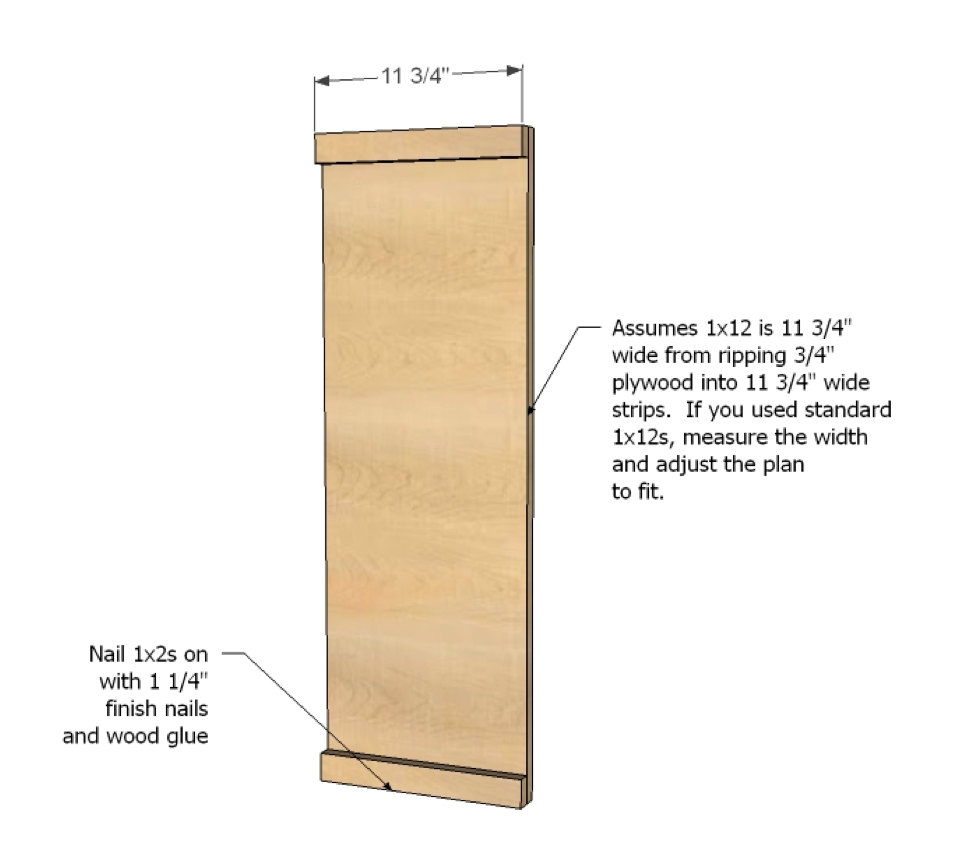
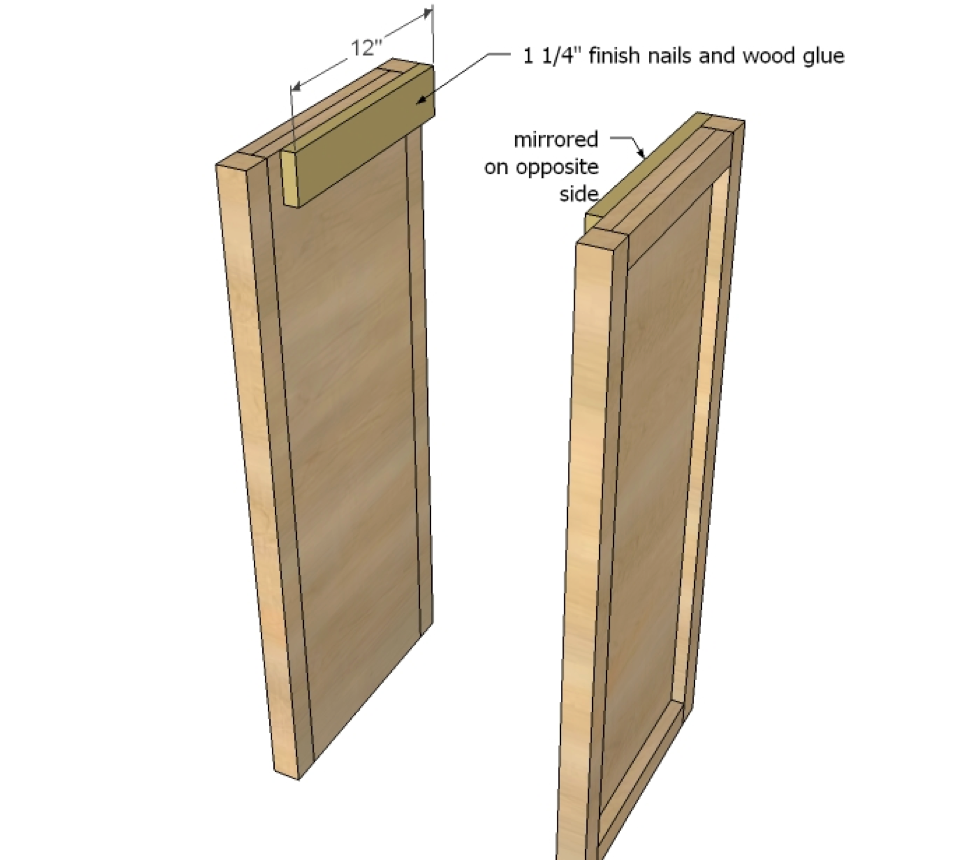
Cut your 1x2 trim to the width of your 1 x 12 boards, and nail to the sides using glue and 1 1/4" finish nails.
Step 2
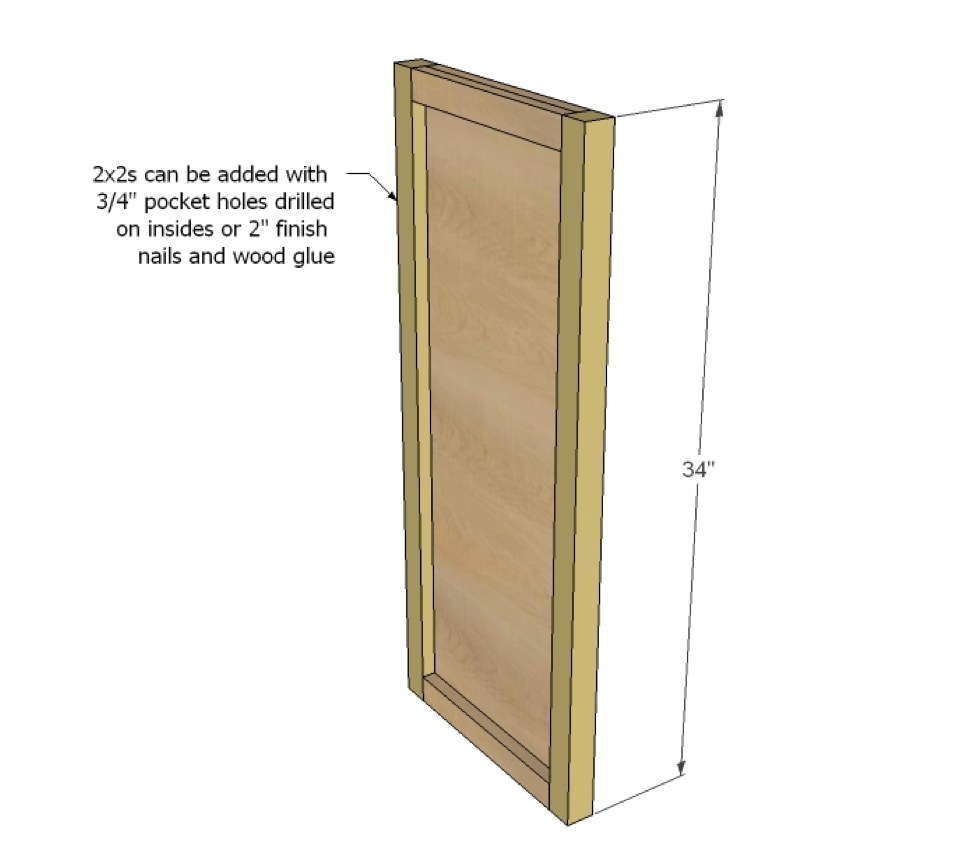
Attach the side trim with either pocket hole screws set for 3/4" stock and 1 1/4" pocket hole screws, or by nailing 2" finish nails through the sides.
Step 3
Nail 1x3s to the sides using glue and 1 1/4" finish nails. You may have to adjust it's length, depending on the width of your 1 x 12
Step 4
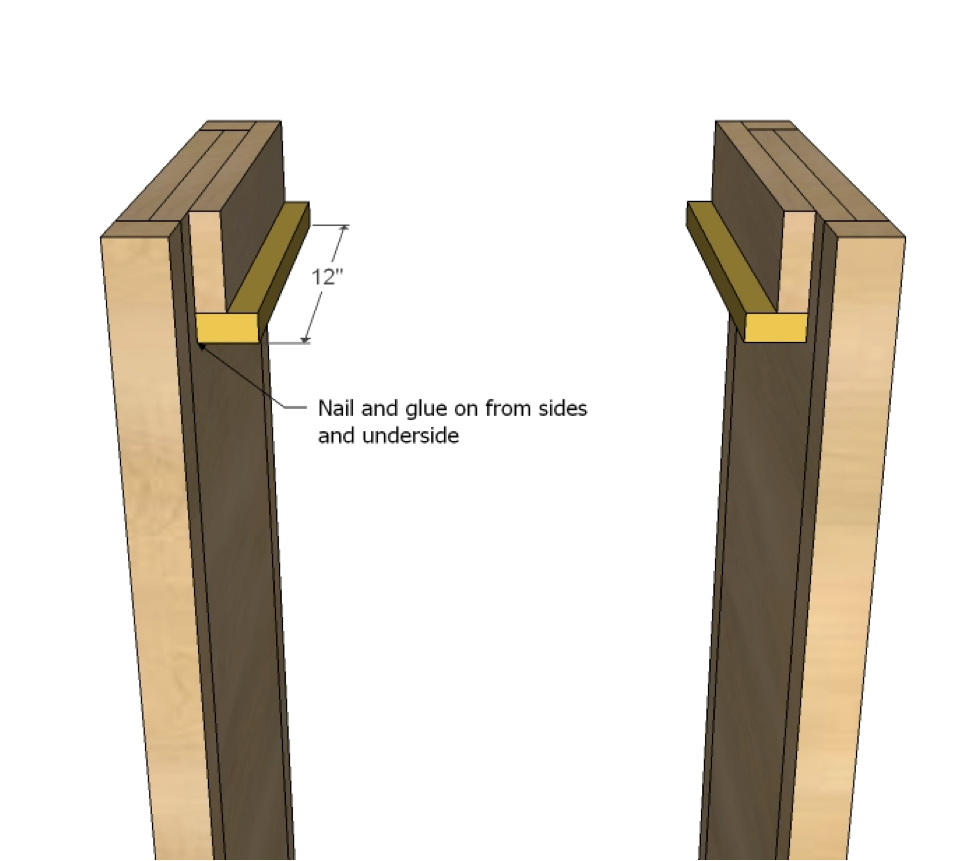
Nail 1x2s to the underside of the 1x3s added in the previous step using glue and 1 1/4" finish nails.
Step 5
Step 6
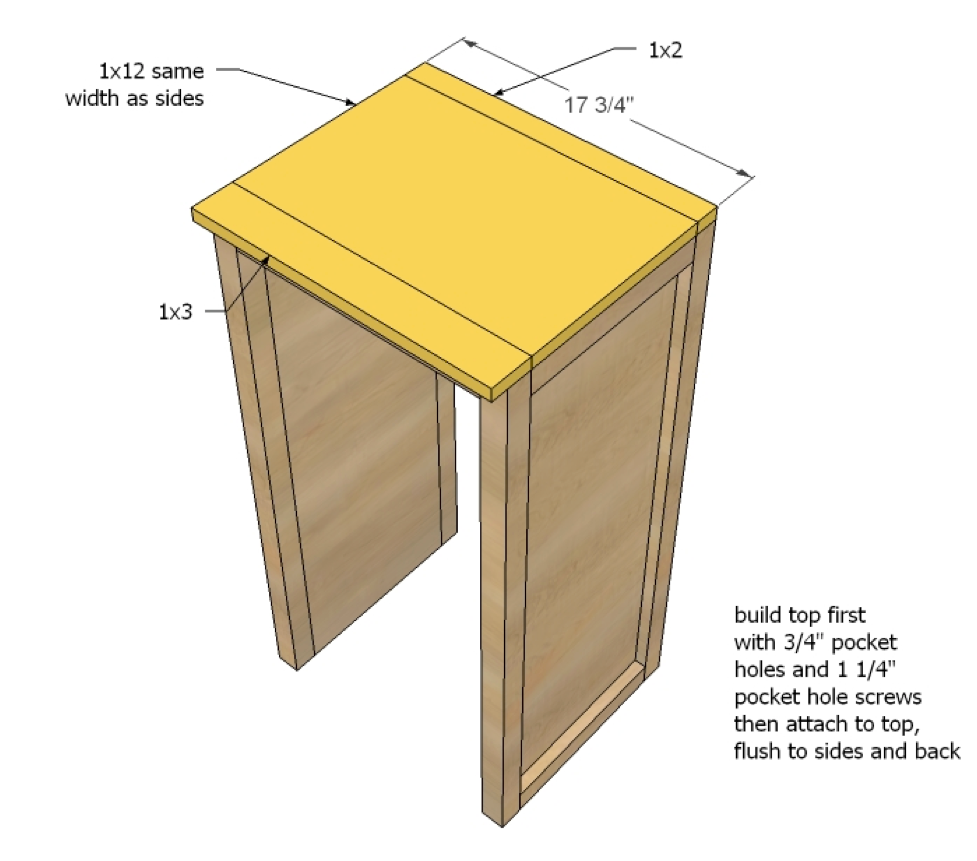
Using pocket holes set for 3/4" stock, build the top using 1 1/4" pocket hole screws. Then attach the top to the base with glue and 1 1/4" finish nails, keep the sides and back flush.
Step 7
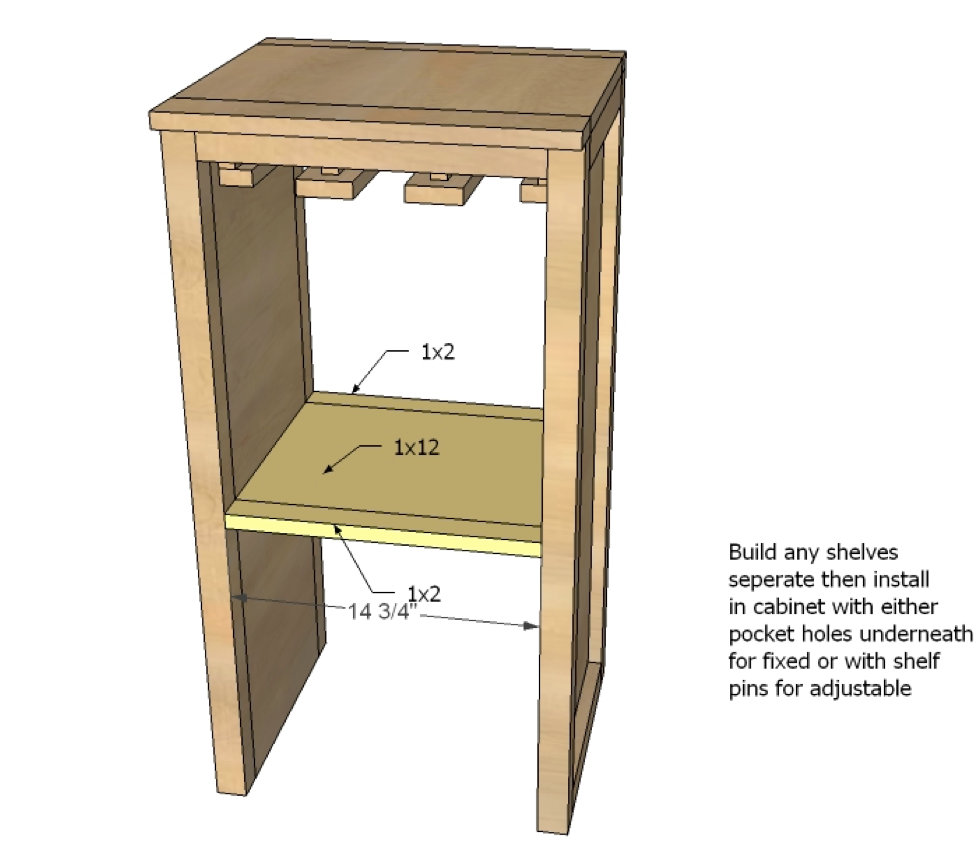
Build your shelves as shown above with pocket holes. Then you can attach them with pocket holes from the underside, or shelf pins for adjustable shelves.
Step 8
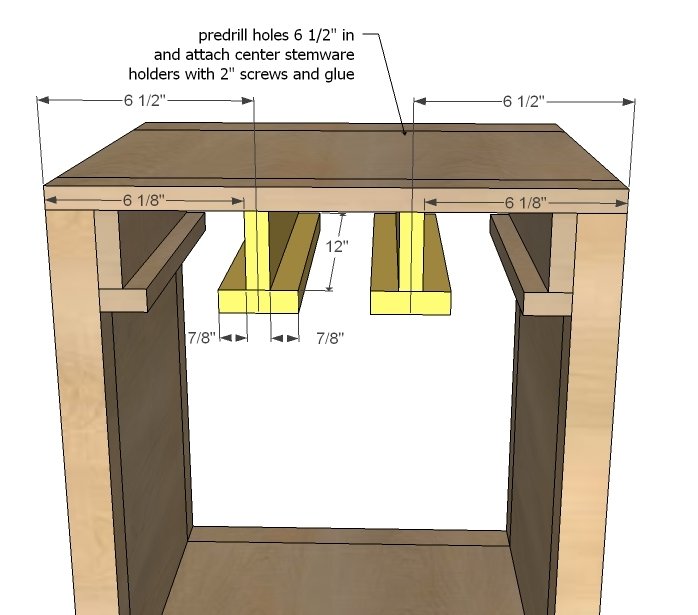
Build the remaining stemware pieces and attach to top.
Step 9
And finally, the back.
Finishing
Sand all surfaces, starting with a medium grit and finishing with fine. Wipe off the dust, fill any holes or gaps with wood filler, and sand smooth once dry. Apply primer if you're painting, then finish with your choice of paint or stain and seal with a durable clear topcoat. For outdoor projects, use exterior-rated primer, paint or stain, and sealer so the piece stands up to the weather.
Source (temporary): https://www.ana-white.com/woodworking-projects/mod-bar-stemware-hutch