Modern Adirondack Chair
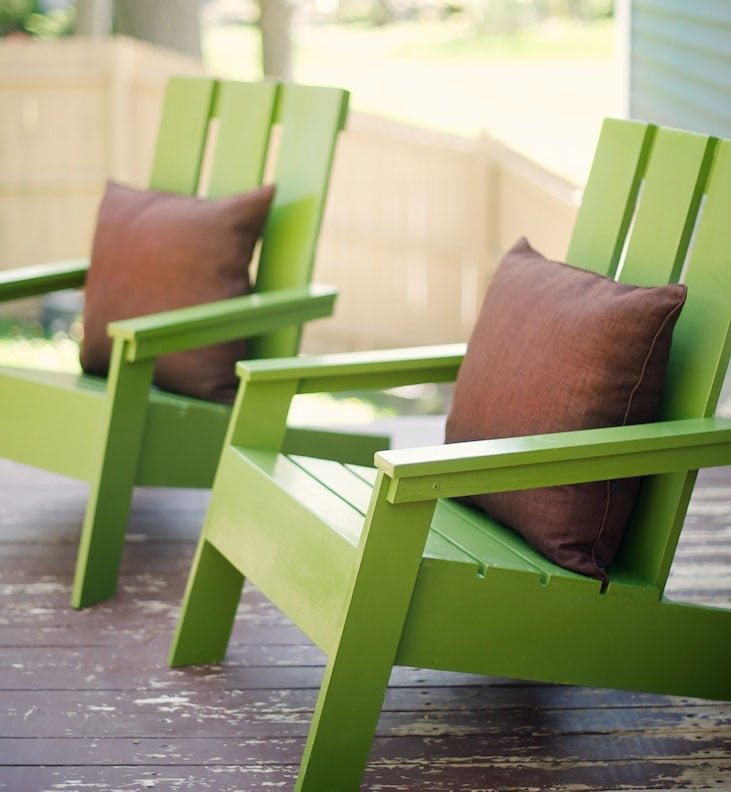
This modern style Adirondack chair plan features clean lines and simple materials. The base is sturdy and substantial 2x6s, so it will hold heavy weights and won't blow away in the wind. You'll love our step by step plans and diagrams.
Specifications
| Project type | Outdoor Seating, Lounging and Accents |
|---|---|
| Room | Outdoor |
| Style | Modern Style Furniture Plans |
| Difficulty | Beginner Projects |
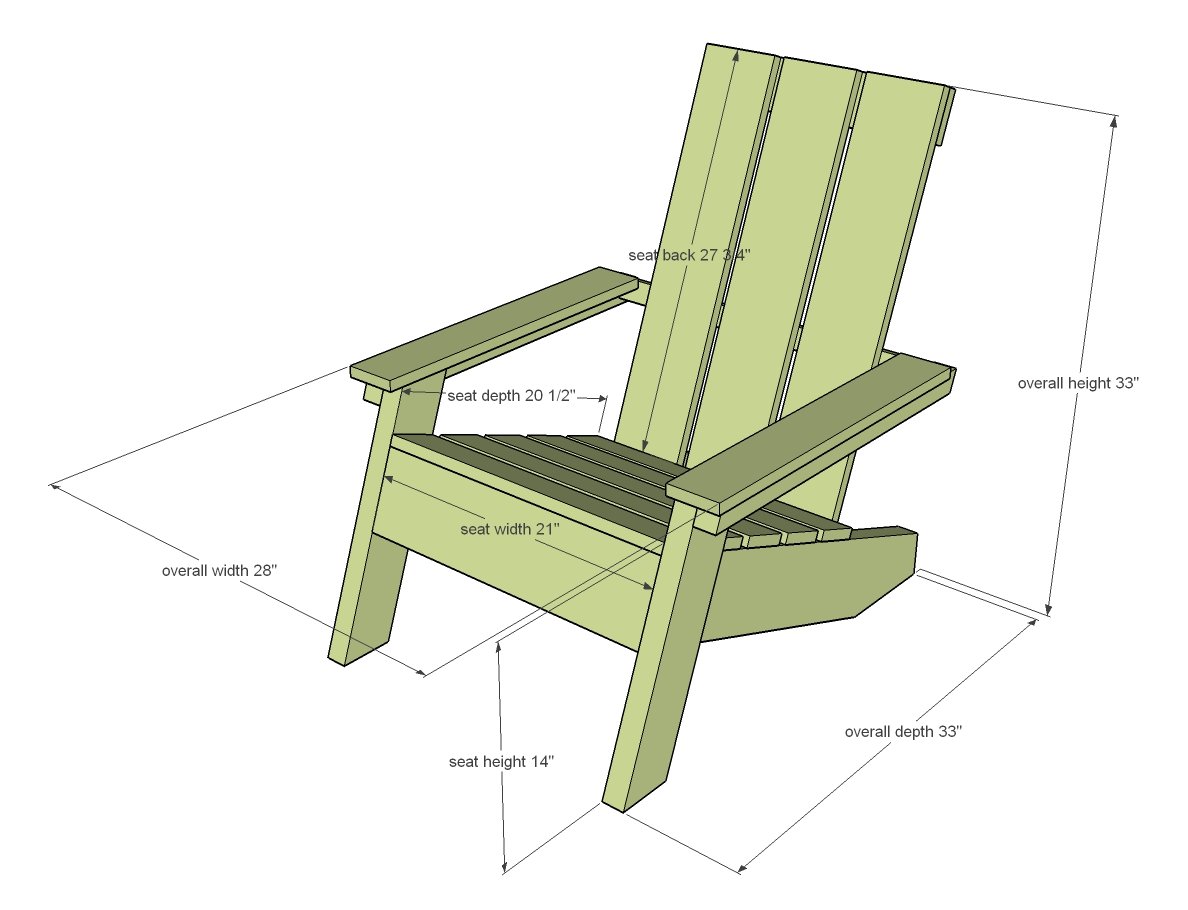
Dimensions
Use the size-specific shopping and cut lists below.
Shopping List
- Cedar wood or other exterior appropriate is recommended. You can use whitewood or spruce - just make sure the wood is finished well.
- 1 - 2x6 @ 9 feet long or 9 foot stud length
- 1 - 2x4 @ 4 feet long
- 1 - 2x2 @ 8 feet long
- 1 - 1x6 @ 8 feet long
- 2 - 1x4 @ 8 feet long
- 8 - 2-1/2" pocket hole screws (recommended but can substitute for 2-3/4" self tapping wood screws)
- 25 - 2-3/4" exterior self tapping wood screws
- 70 - 2" exterior self tapping wood screws
Cut List
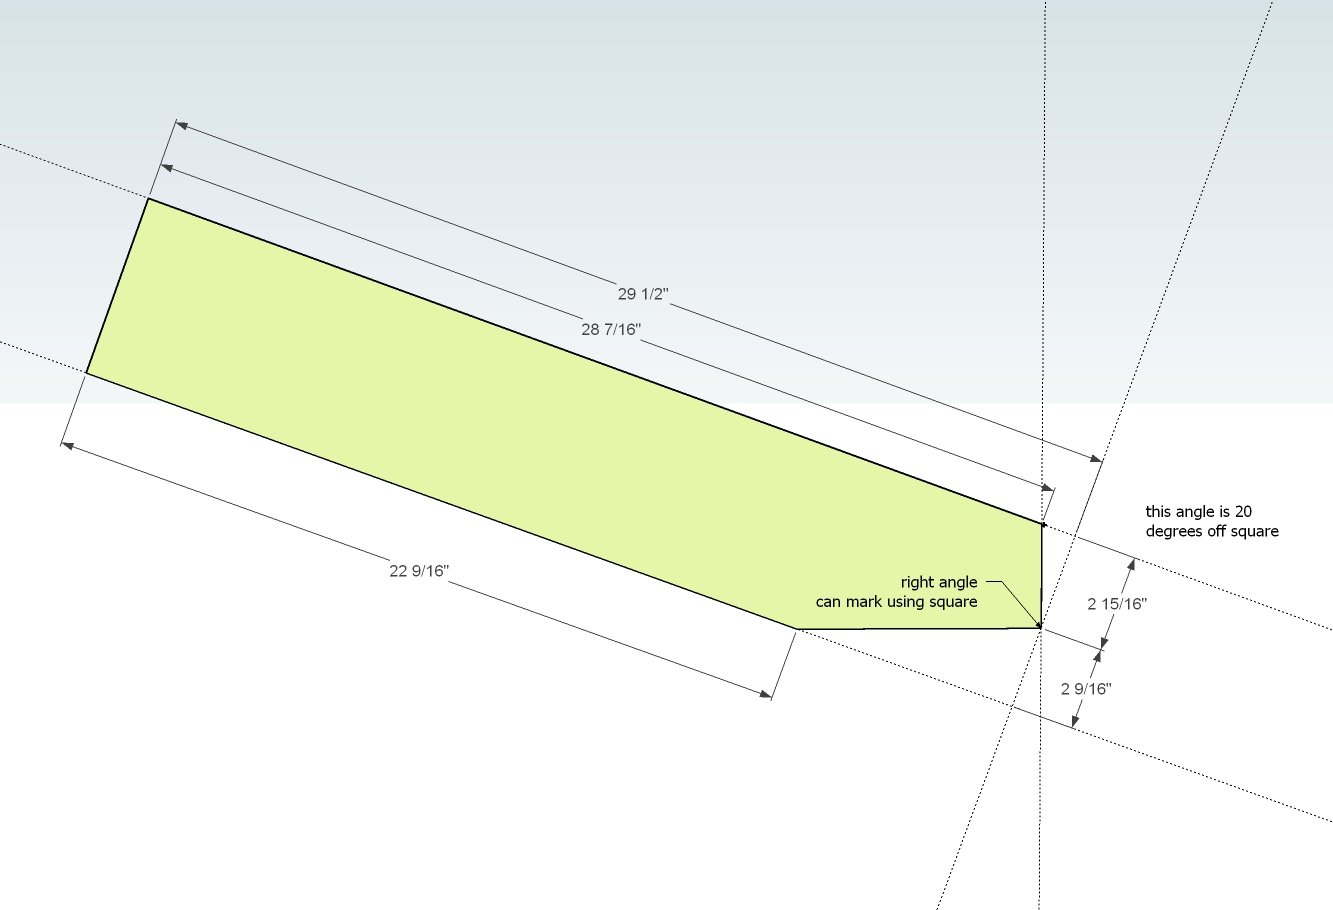
- 2 – 2×6 @ 29-1/2″ (Stringers, cut in step 1)
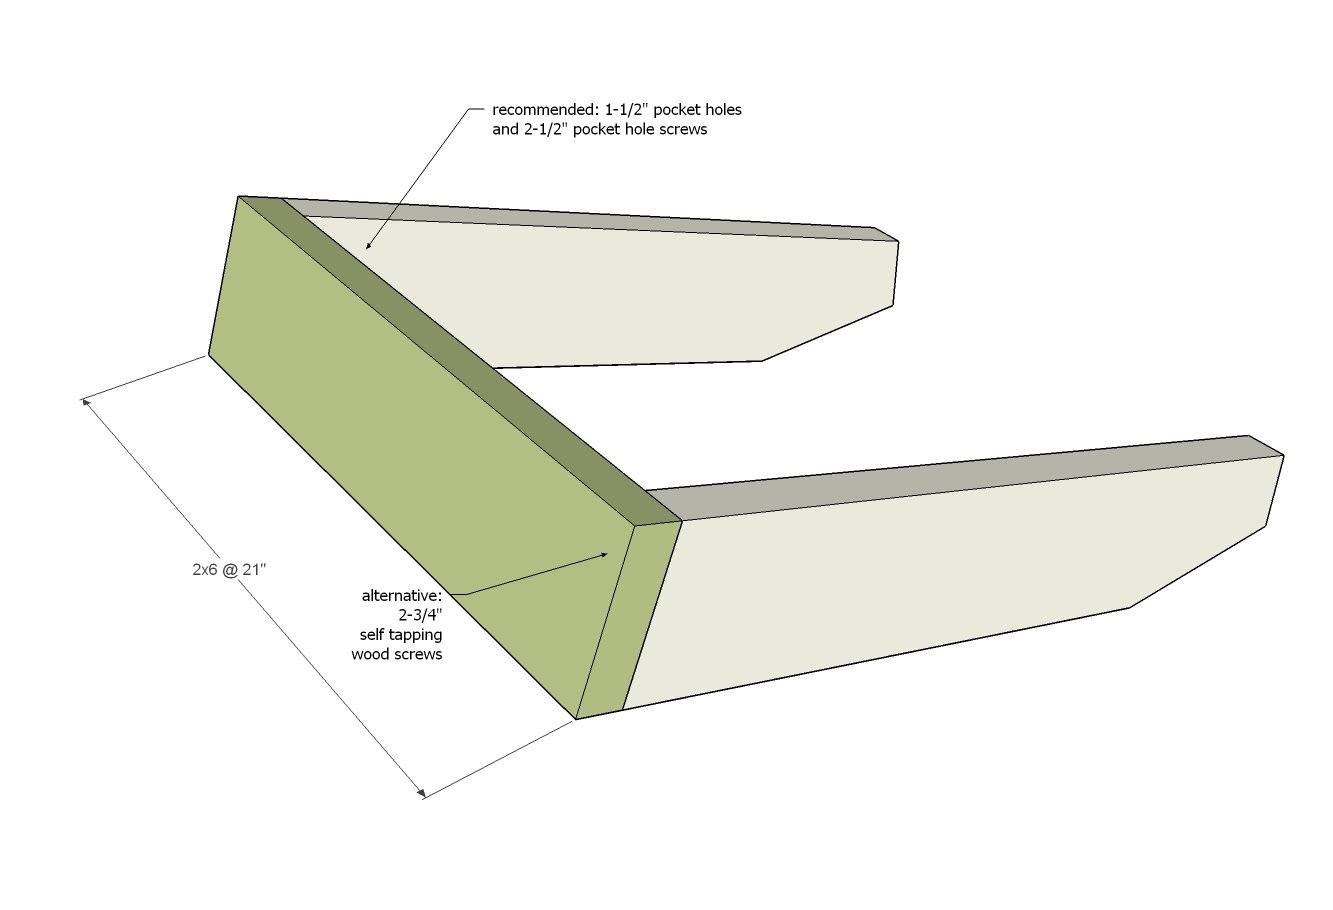
- 1 – 2×6 @ 21″ (Front Apron)
- 1 - 2x6 @ 18" - (Base Support)
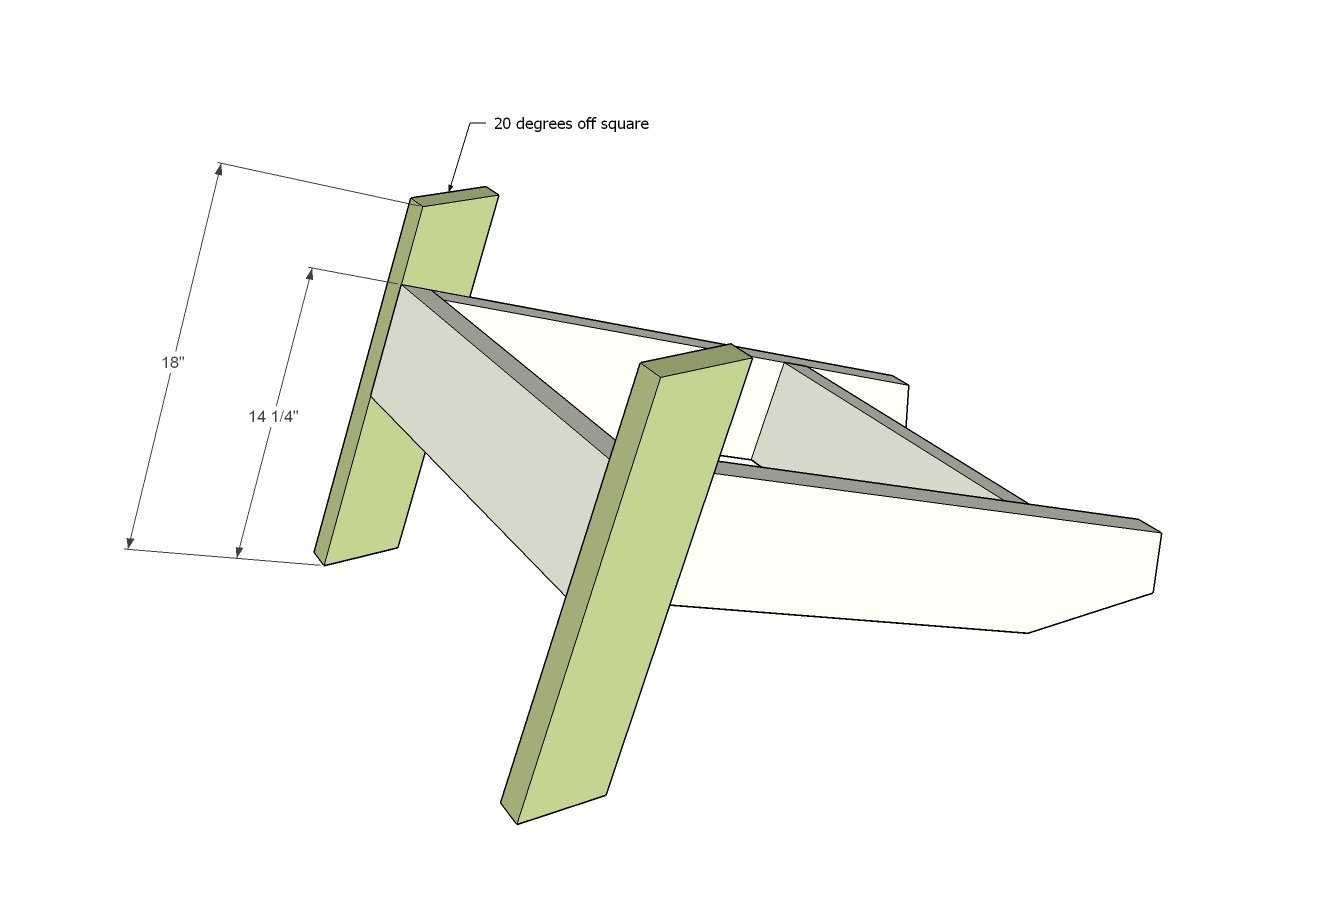
- 2 – 2×4 @ 18″ (Legs, ends cut at 20 degrees off square, ends ARE parallel, long point to short point measurement)
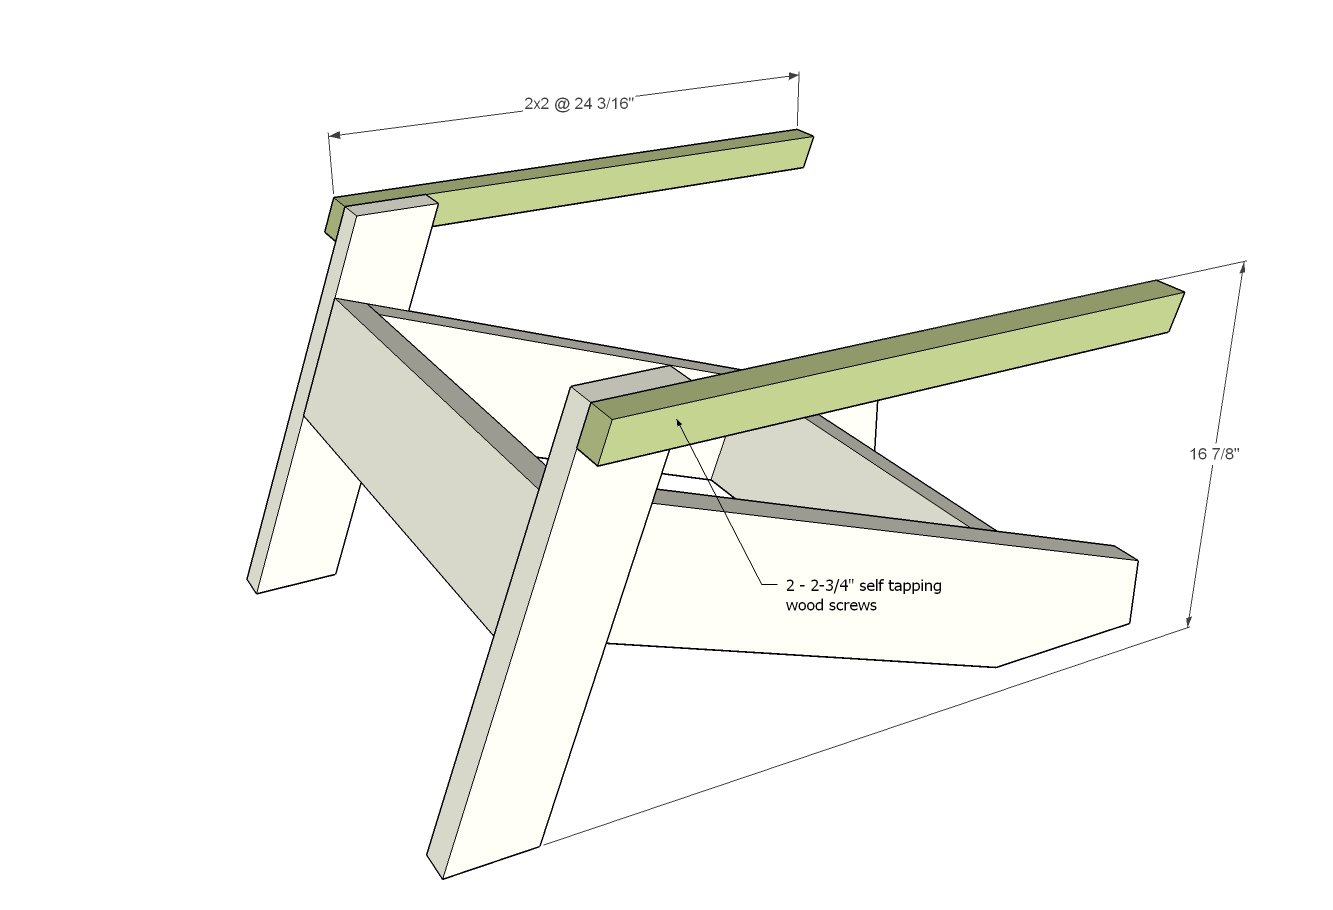
- 2 - 2x2 @ 24-3/16" - (Arm Supports, both ends cut at 20 degrees off square, long point to short point measurement, ends ARE parallel)
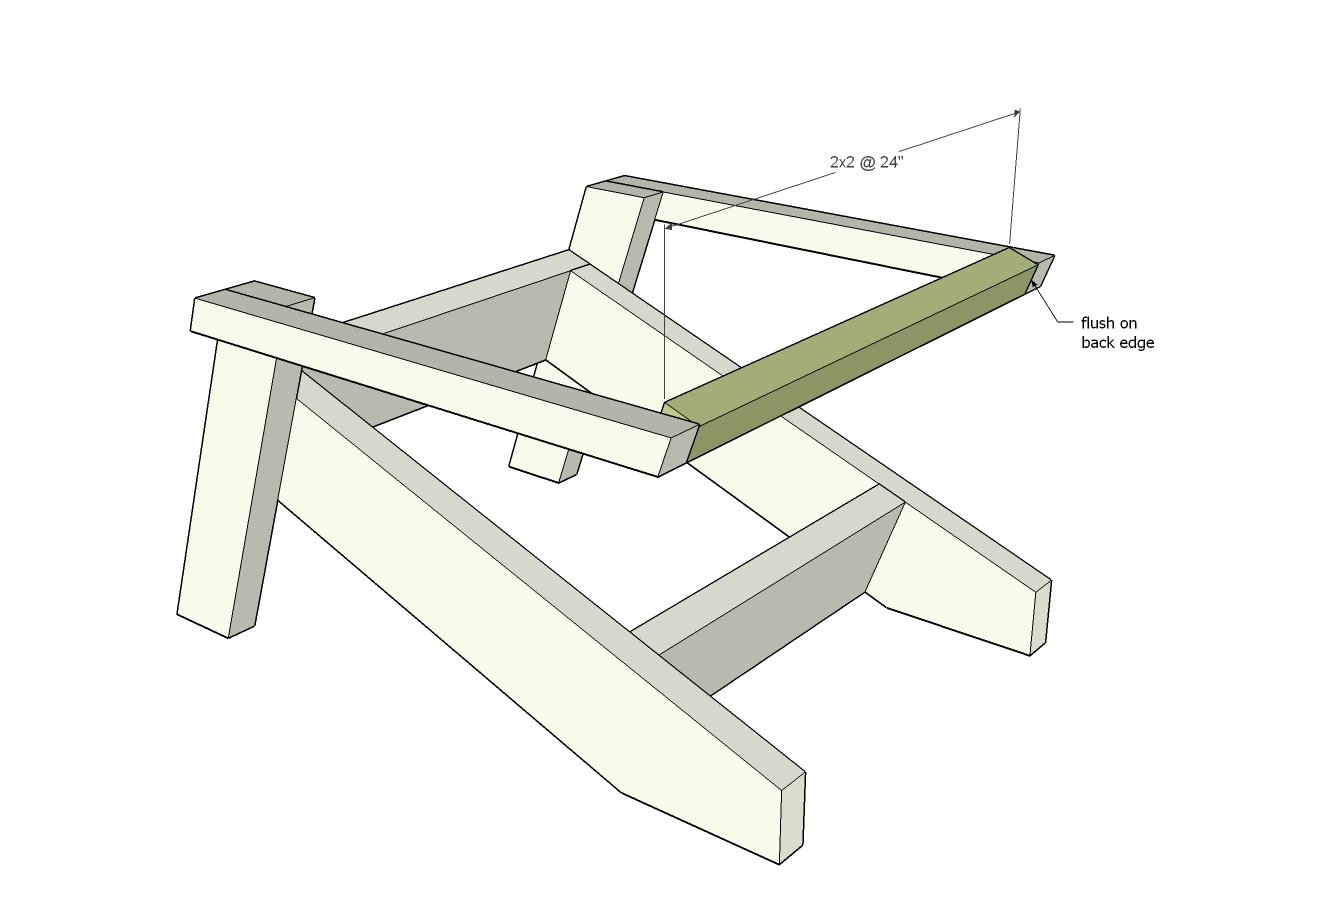
- 1 - 2x2 @ 24" - (Back Support)
- 3 - 1x6 @ 32" - (Back Slats)
- 1 - 1x4 @ 18" - (Seat Back Top)
- 5 - 1x4 @ 21" (Seat Slats)
- 2 - 1x4 @ 23-1/2" (Arm Rests)
Tools
- measuring tape
- square
- pencil
- safety glasses
- hearing protection
- drill
- circular saw
- compound miter saw
- sander
Step-by-step Instructions
Mark out the stringer pattern on 2x6 stringer boards.
Cut angles with a circular saw. Cut two matching.
Step 2
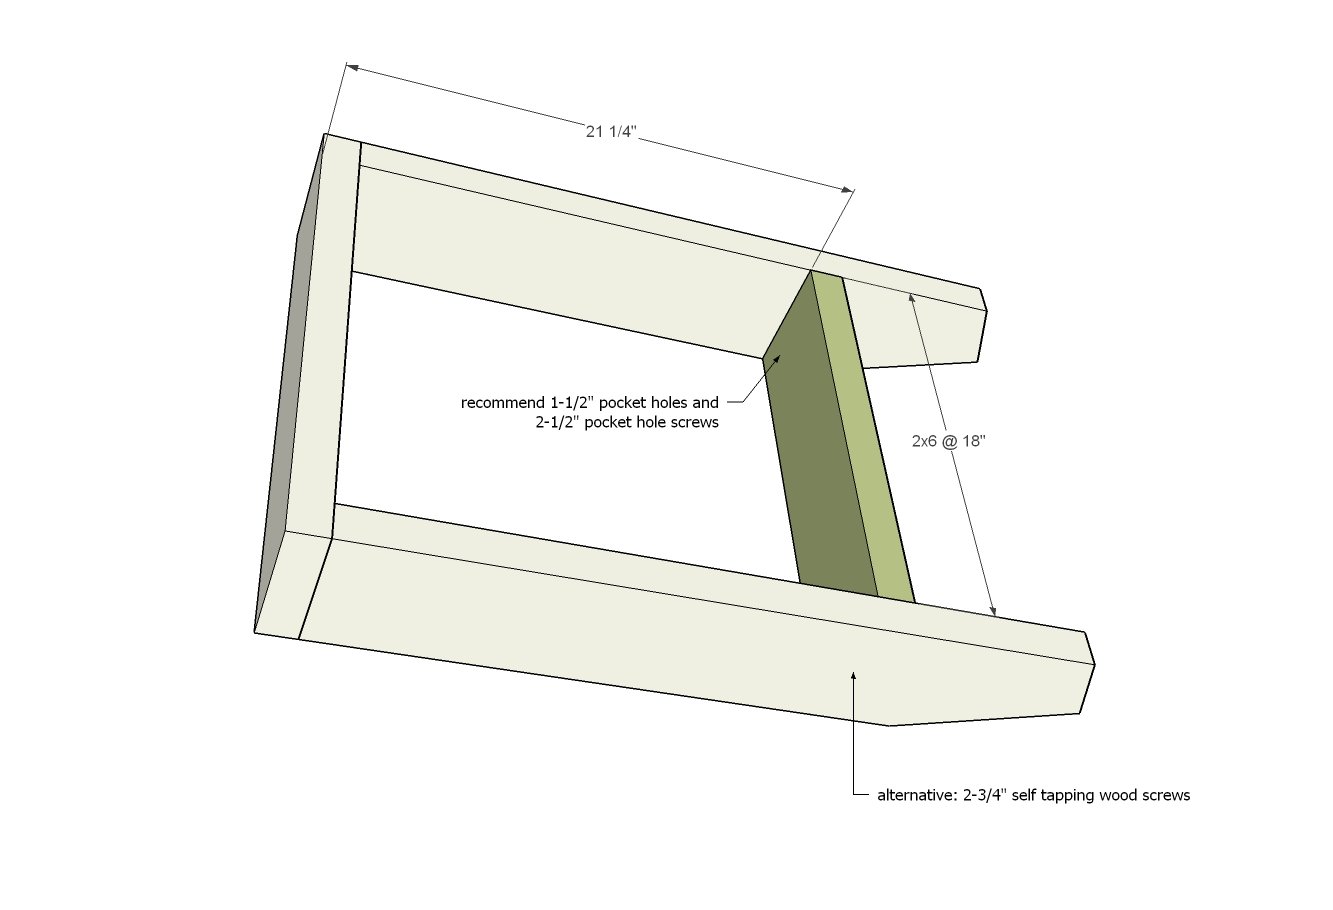
Attach stringer to front apron. Pocket holes would be hidden and recommended, but you can also use 2-3/4" self tapping wood screws.
Step 3
Add the back aprons support between the stringers.
Cut legs on compound miter saw.
Attach to the base with 2-3/4" screws.
Step 5
Attach 2x2 side supports with 2-3/4" screws, making sure the 2x2s are level all the way back.
Step 6
Use 2-3/4" screws to attach the back support between the arm supports.
Step 7
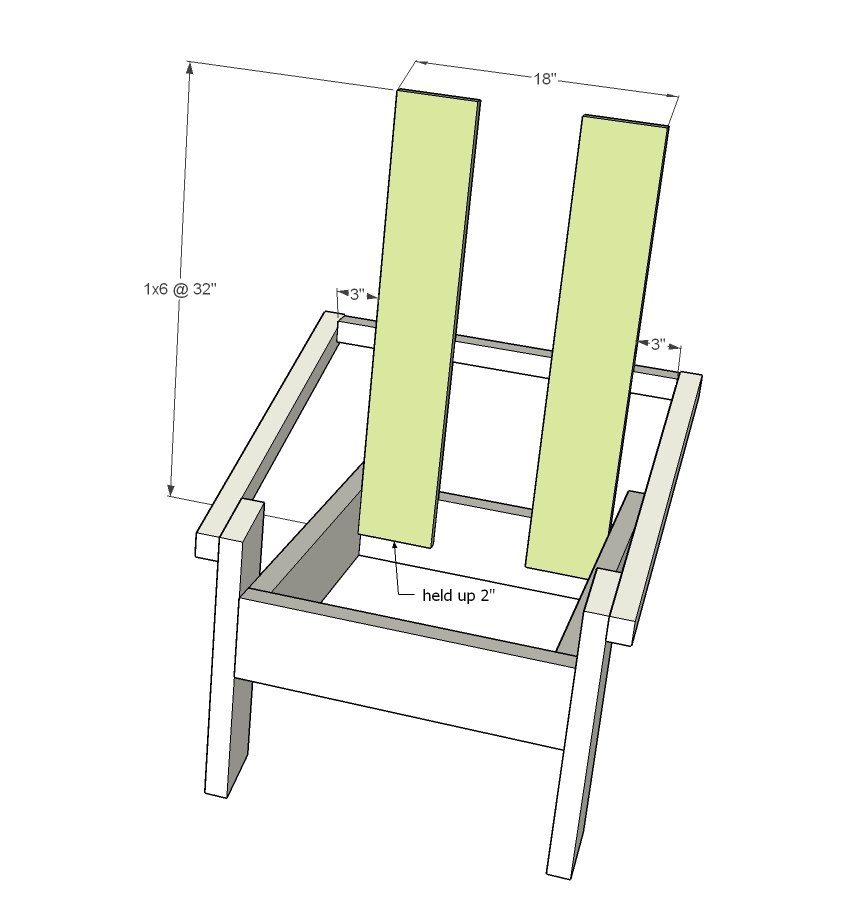
Add the two outside back slats with 2" self tapping wood screws.
Step 8
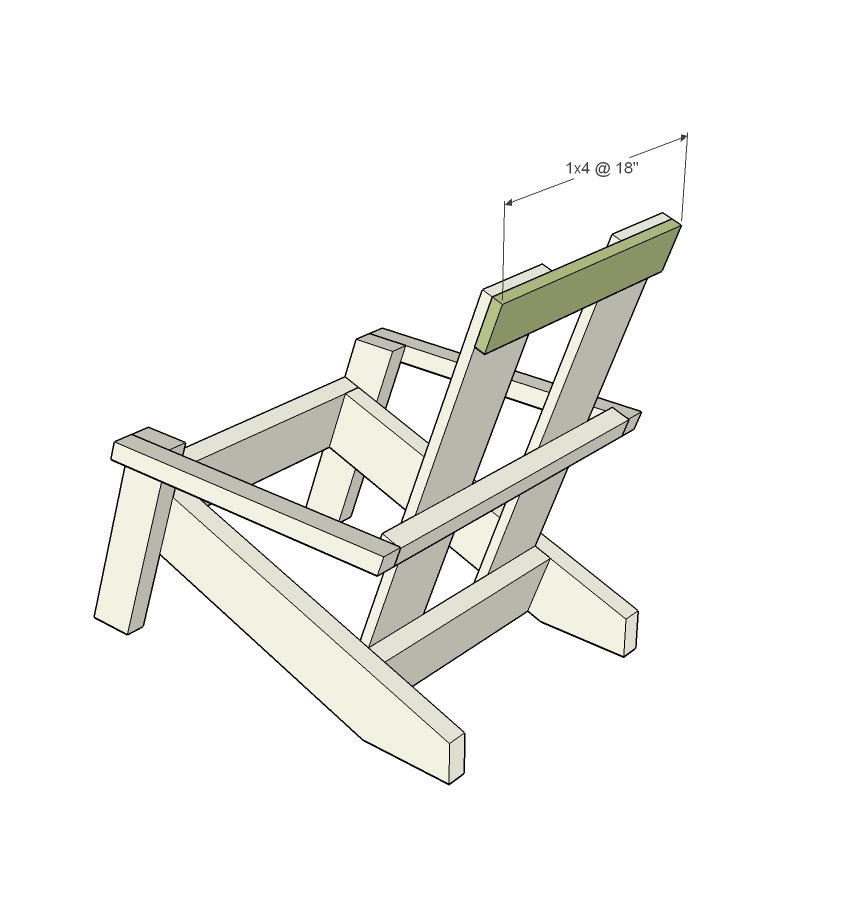
Attach top with 2" self tapping wood screws.
Step 9
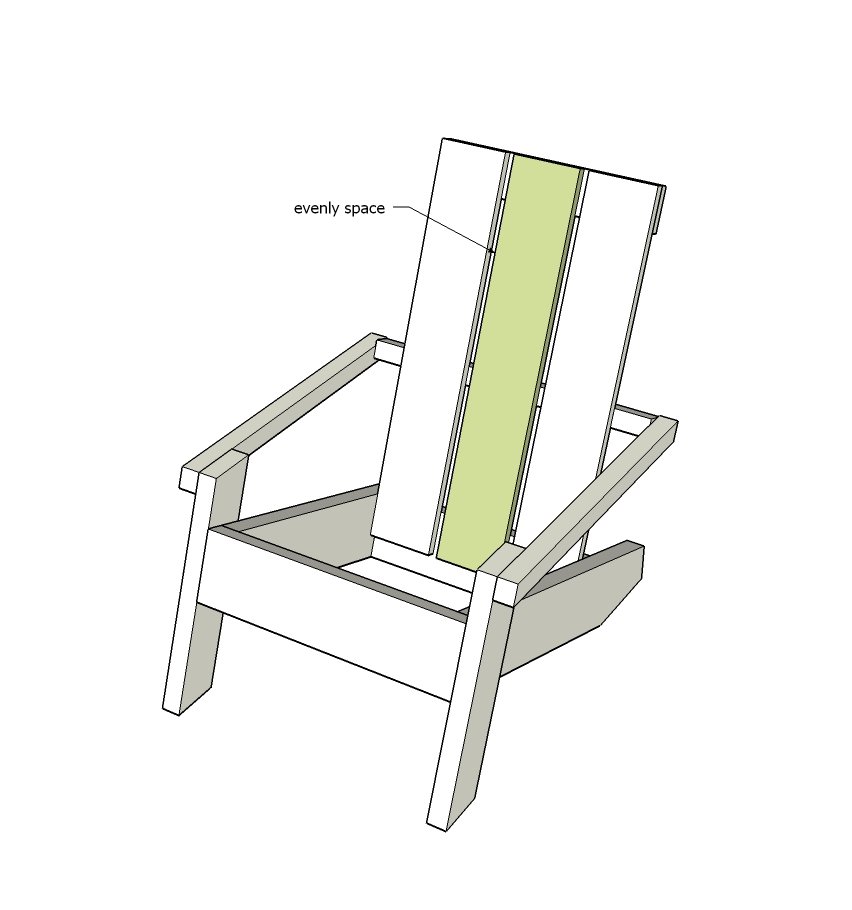
Center remaining back slat in between and attach with 2" self tapping wood screws.
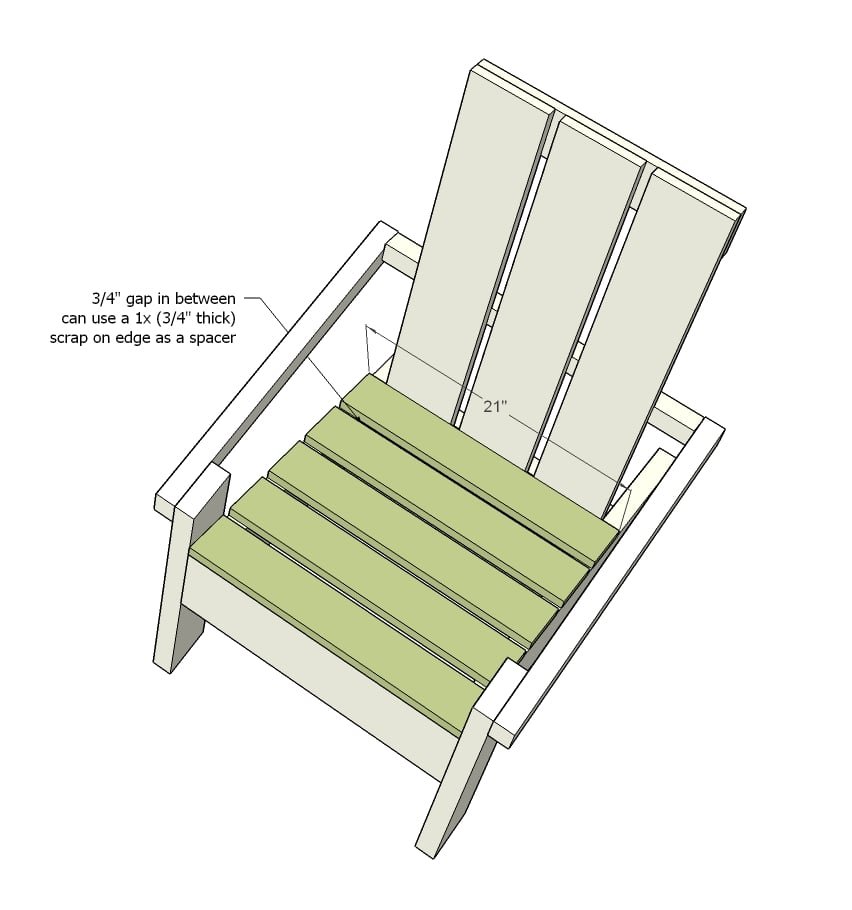
Lay seat slats and screw down with 2" self tapping wood screws.
TIP: Attach the front and back slats. Then attach the center slat. Then center the remaining two in between.
Finishing
Sand all surfaces, starting with a medium grit and finishing with fine. Wipe off the dust, fill any holes or gaps with wood filler, and sand smooth once dry. Apply primer if you're painting, then finish with your choice of paint or stain and seal with a durable clear topcoat. For outdoor projects, use exterior-rated primer, paint or stain, and sealer so the piece stands up to the weather.
Source (temporary): https://www.ana-white.com/woodworking-projects/modern-adirondack-chair