Modern Cedar Outdoor Storage Bench
Do you need some outdoor storage that looks nice and doubles as seating? For about $40 you can build this cedar outdoor storage bench!
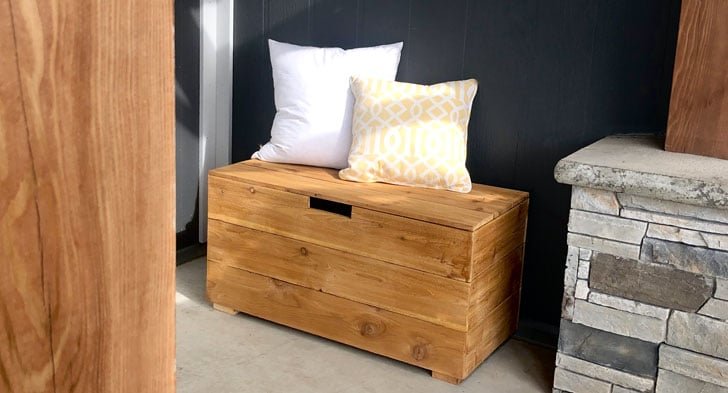
Specifications
| Project type | Outdoor Seating, Lounging and Accents |
|---|---|
| Room | Outdoor |
| Style | Modern Style Furniture Plans |
| Difficulty | Beginner Projects |
Dimensions
Use the size-specific shopping and cut lists below.
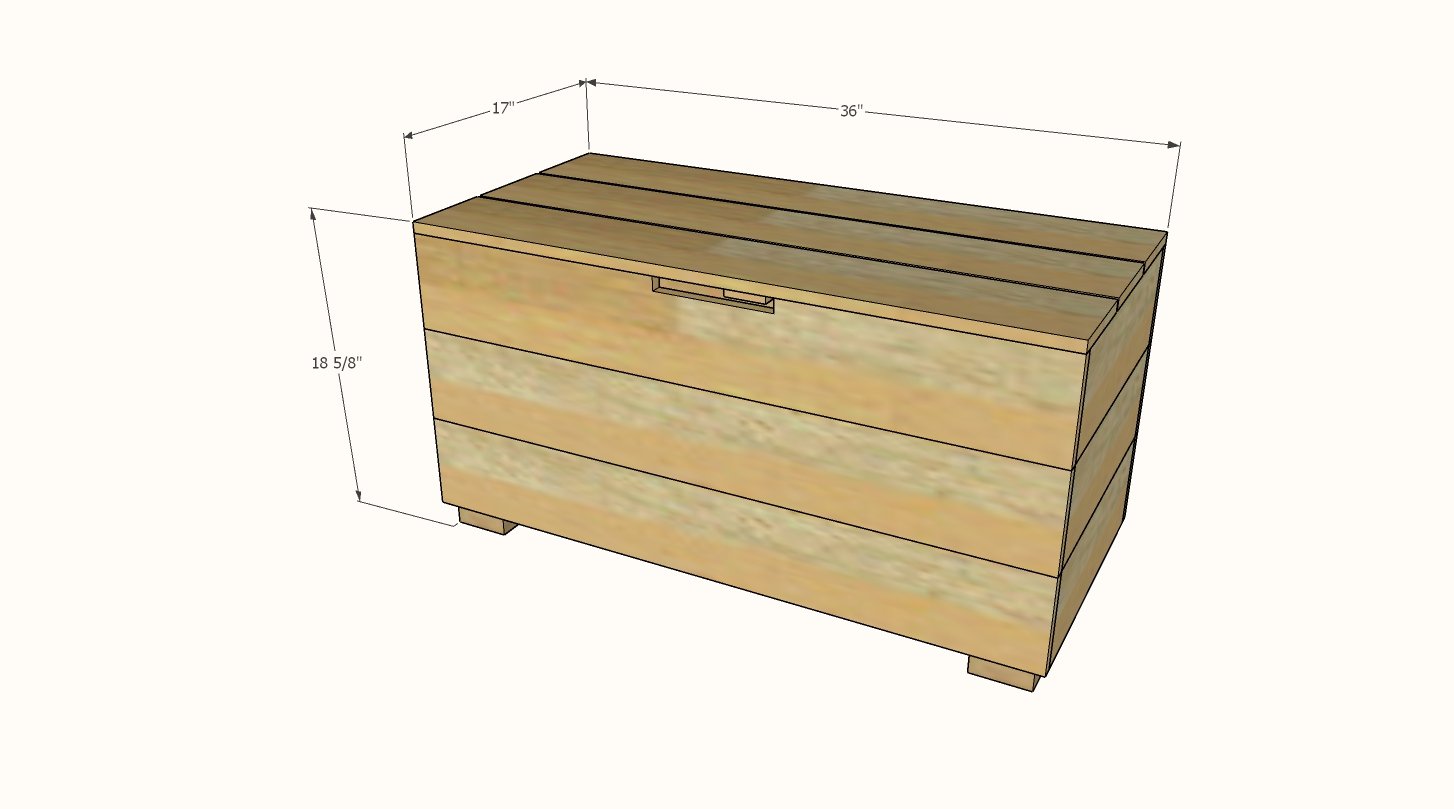
Shopping List
- 7 - cedar fence pickets 5-1/2" wide x 72" long, not dogeared (can also use 1x6 boards)
- 1 - 2x4 @ 8 feet long
- 1 - 1x2 @ 8 feet long
- 1 - 1x3 @ 8 feet long
- 1 - Set of hinges, suitable for exterior use
- 8 - 2-1/2" long exterior self tapping screws (recommend star bit) I used these
- 80 - 1-1/4" long exterior self tapping screws (recommend star bit) I used these
NOTE: Can substitute the 1-1/4" long screws for staples or brad nails in matching lengths
Cut List
- 6 - 2x4 @ 15-3/4" - Frame boards
- 9 - 5-1/2" wide cedar fence pickets or 1x6 boards @ 35-3/4" - Front and Back Paneling
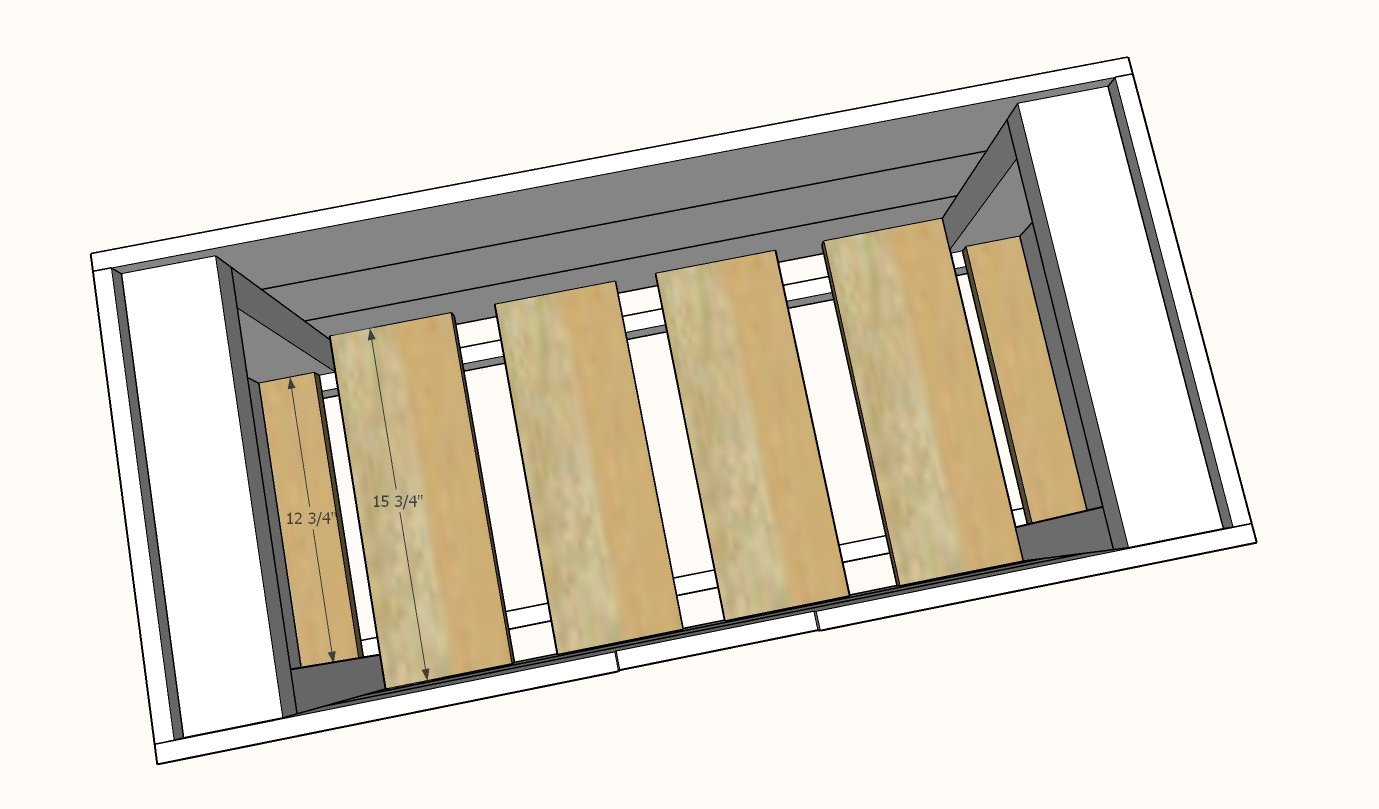
- 10 - 5-1/2" wide cedar fence pickets or 1x6 boards @ 15-3/4" - End Paneling and Floor Slats
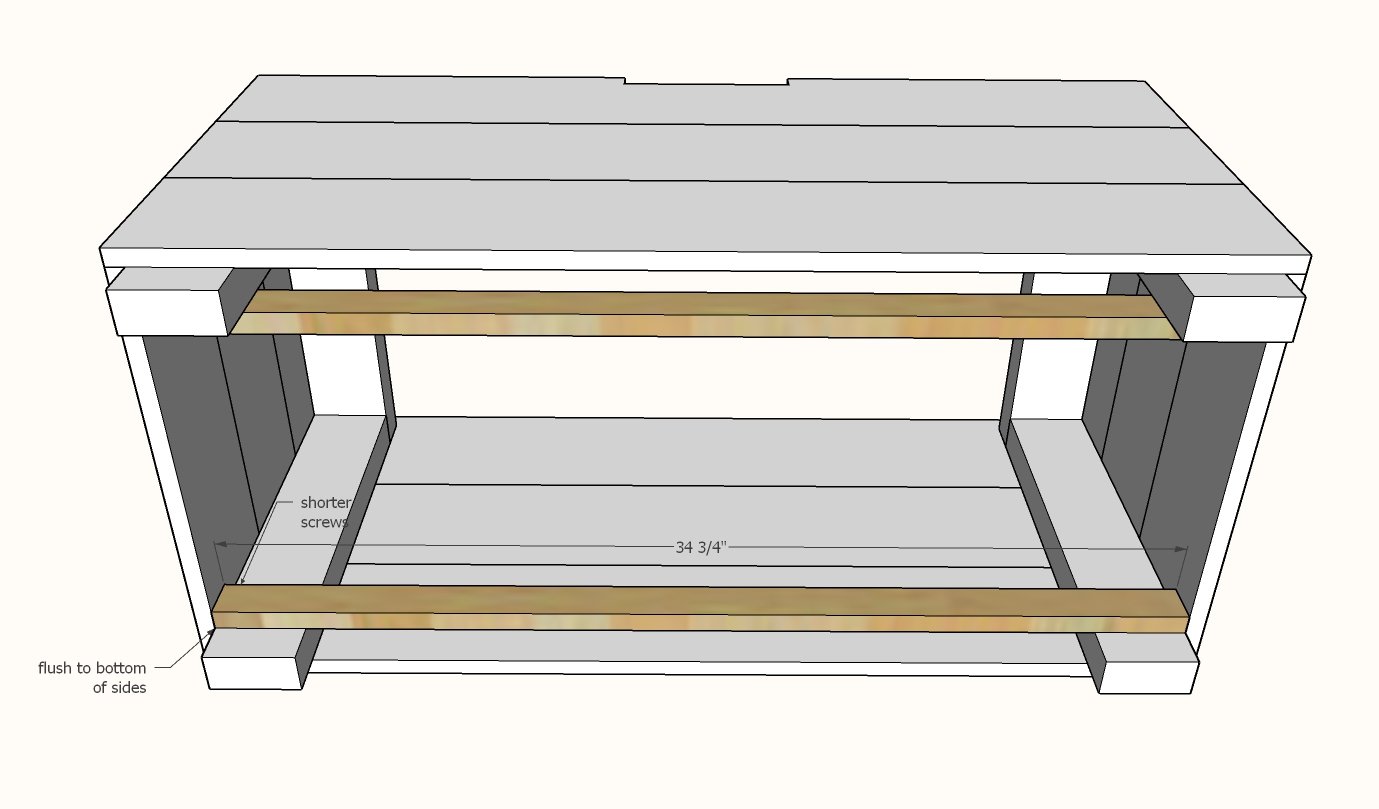
- 2 - 1x2 @ 34-3/4" (may need to measure and cut to fit) - Cleats
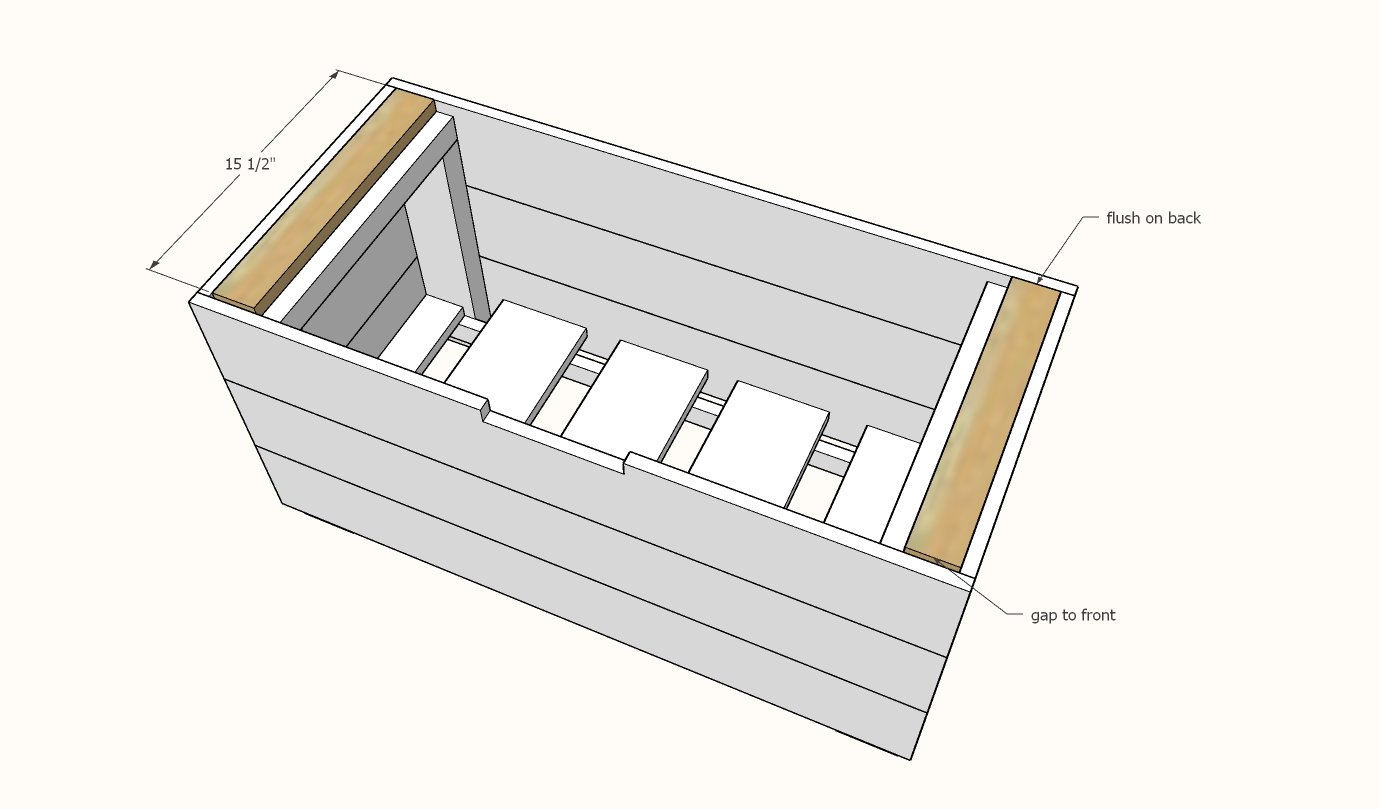
- 2 - 1x3 @ 15-1/2" - Lid supports
- 2 - 1x2 @ 12-3/4" - Floor slats
Tools
- measuring tape
- pencil
- safety glasses
- drill
- jigsaw
- compound miter saw
- sander
Step-by-step Instructions
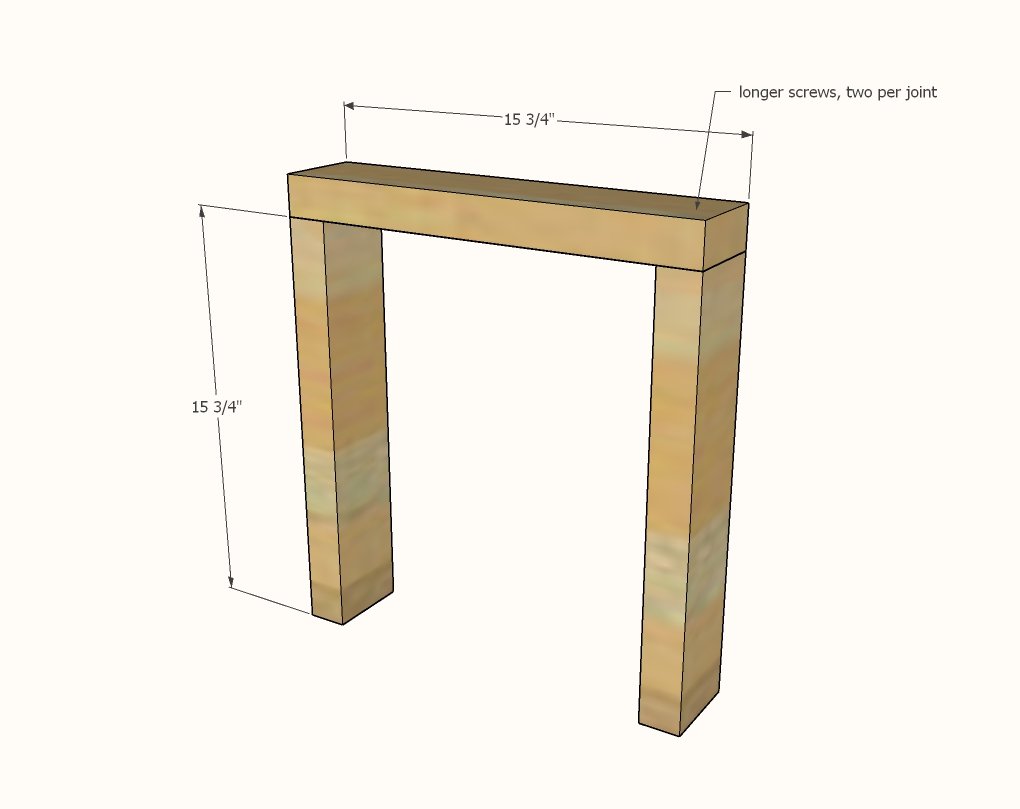
Start by building the structural side frames for the outdoor storage bench.
Attach 2x4s together with the longer screws, two per joint, build two identical.
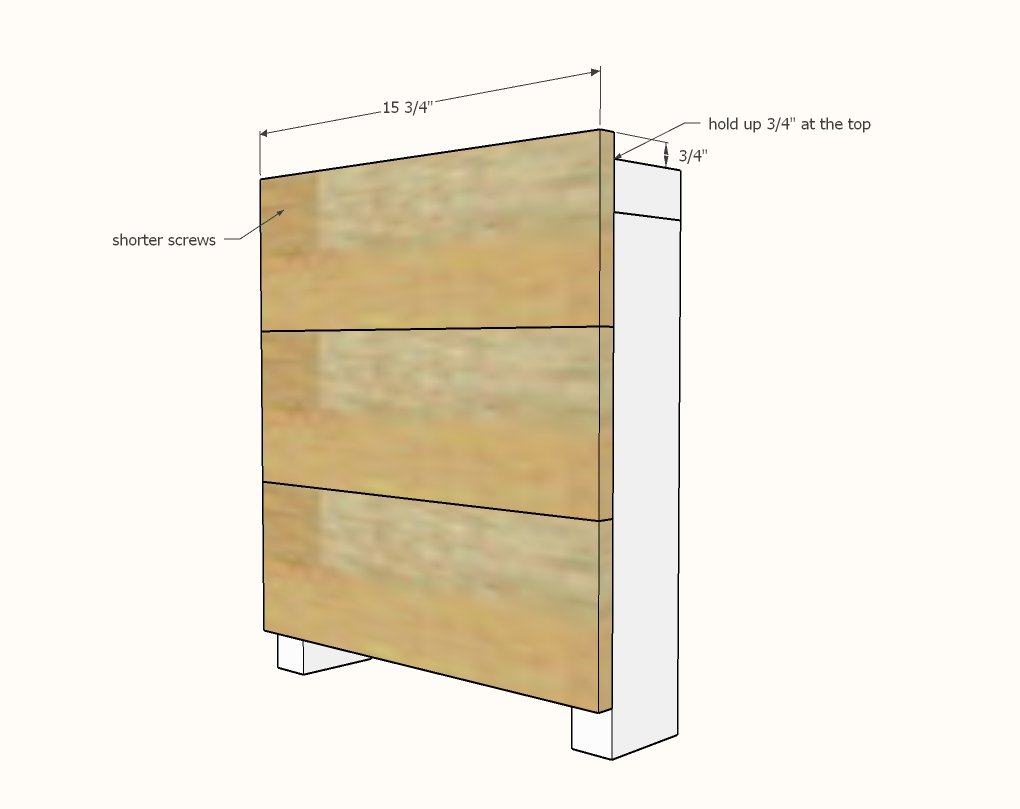
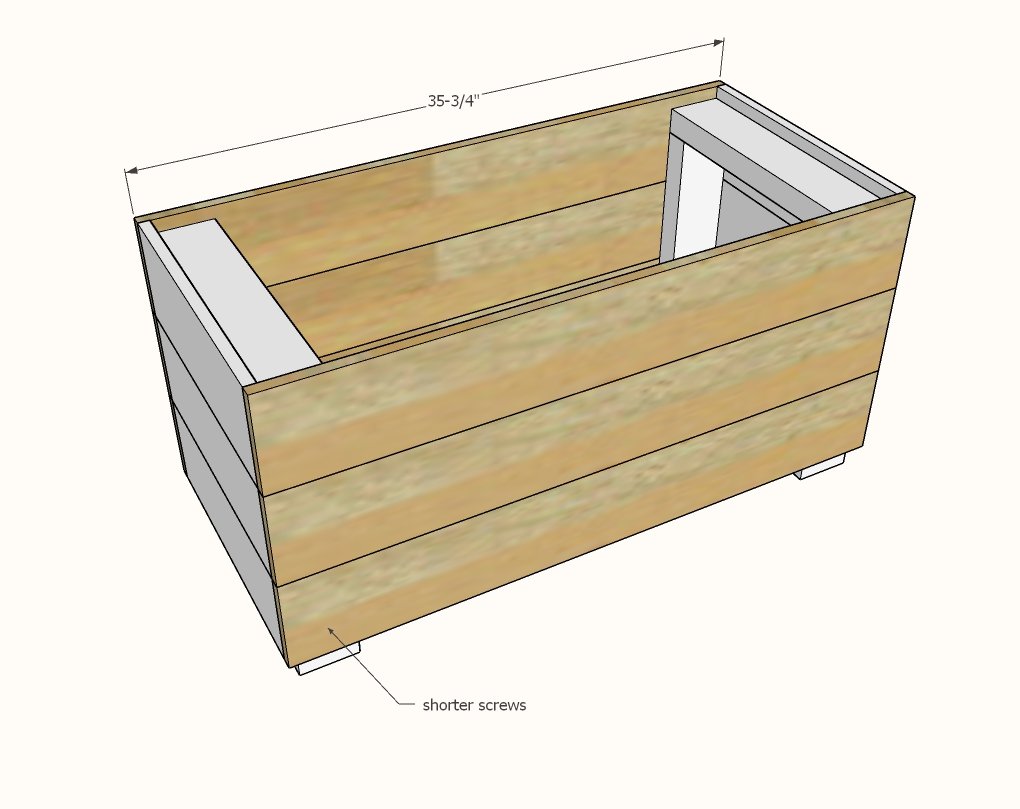
Now add the cedar fence pickets to the outside with the shorter screws, two per end.
Hold the first cedar fence picket up by 3/4".
Step 3
Attach the front and back cedar fence pickets to the frame with the shorter screws, matching the side cedar fence picket placement.
Step 4
Attach 1x2s to the inside with the shorter screws to create cleats for the bottom of the outdoor storage bench.
Step 5
Place the slats on the cleats and screw or nail (or staple) down. Nail or staple length is 1-1/4".
Step 6
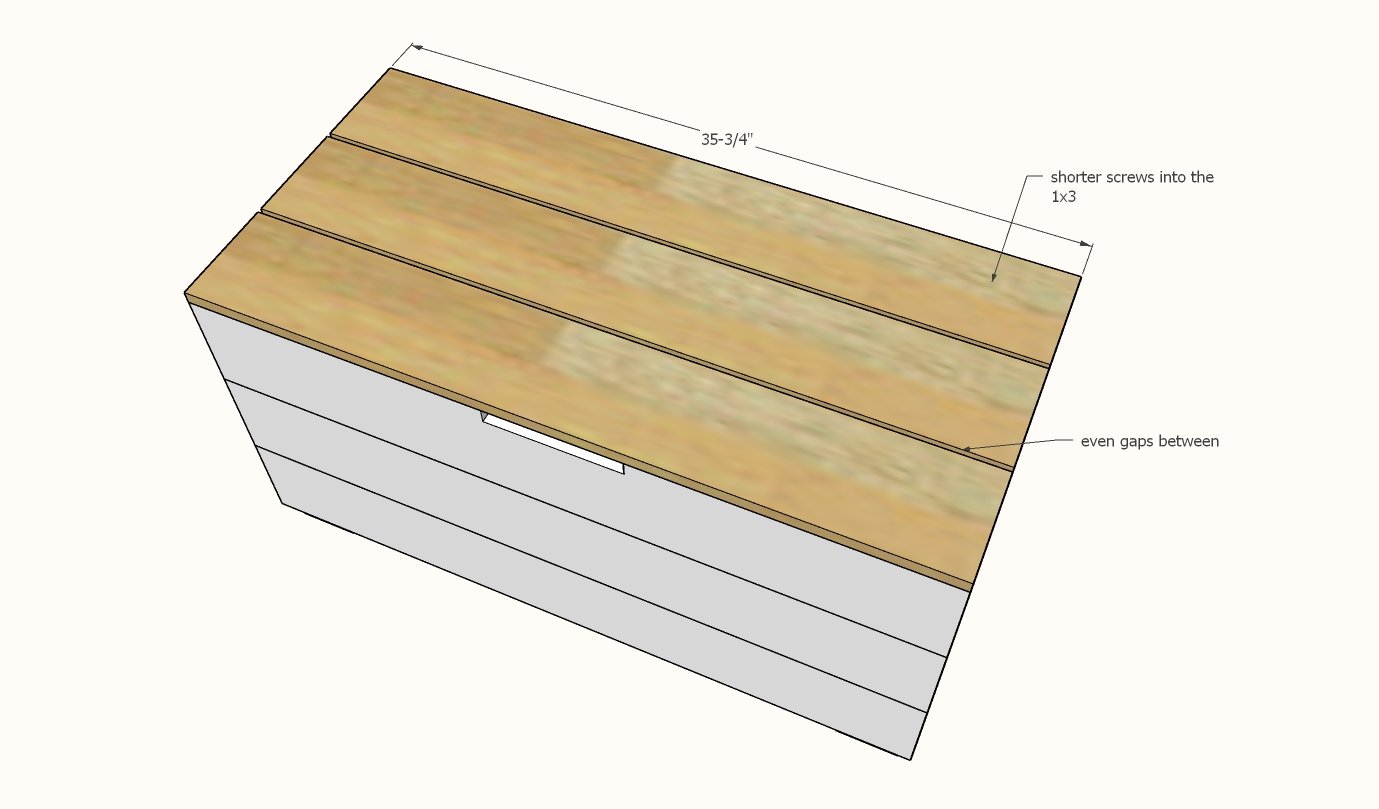
Lay the 1x3 board top support boards down on top of the 2x4s, held to the back but with a small gap on the front. DO NOT ATTACH to the box, this is part of the hinged lid.
Step 7
Lay the lid boards on top of the 1x3 lid supports and attach the lid boards to the 1x3 with either screws, staples or nails. Attach the lid to the back with small hinges. Cut out the front access for lifting the lid.
Finishing
Sand all surfaces, starting with a medium grit and finishing with fine. Wipe off the dust, fill any holes or gaps with wood filler, and sand smooth once dry. Apply primer if you're painting, then finish with your choice of paint or stain and seal with a durable clear topcoat. For outdoor projects, use exterior-rated primer, paint or stain, and sealer so the piece stands up to the weather.
Source (temporary): https://www.ana-white.com/woodworking-projects/modern-cedar-outdoor-storage-bench