Modern Cottage Mudroom
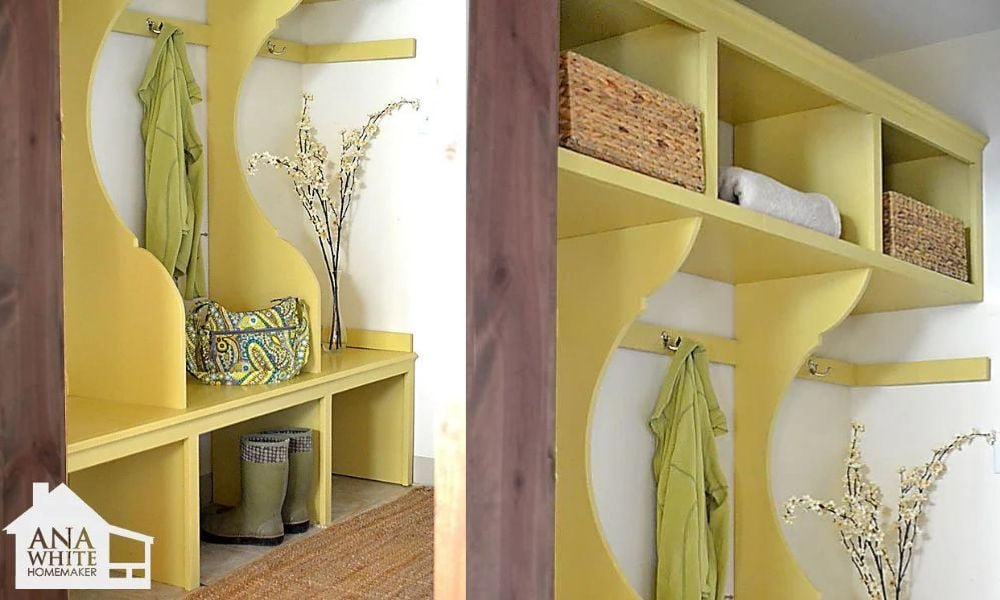
This mudroom cabinet system is DIY and I spent less than $150 (back in 2011) on it! Check out the full tutorial, you will be amazed at how easy it is to build yourself! with step by step diagrams, shopping and cut lists from
Specifications
| Project type | Lockers |
|---|---|
| Room | Closets |
| Style | Cottage Style Furniture Plans |
| Difficulty | Intermediate |
| Estimated cost | $150 - $200 |
Dimensions
Use the size-specific shopping and cut lists below.
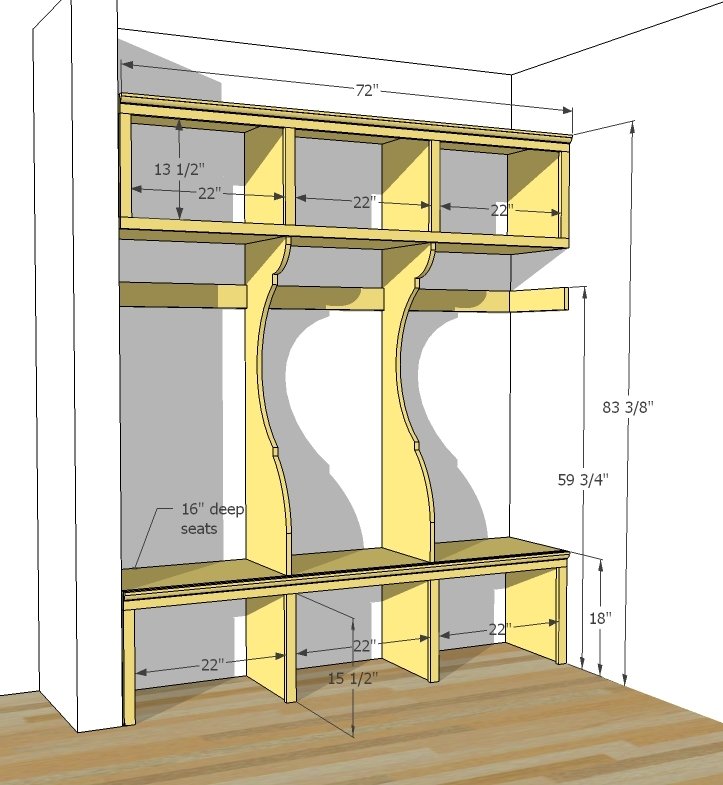
Shopping List
- 2 - Full Sheets 3/4" thick hardwood plywood
- 3 - 1x3 @ 8 feet long
- 4 - 1x2 @ 8 feet long
- 1 - strip small crown moulding, 6 feet long
- 1 - edge moulding, 6 feet long
- Hooks
Cut List
TOP SHELF CUT LIST
- 2 - 1x16 @ 72"
- 4 - 1x16 @ 16"
- 1 - 1x3 @ 72"
- 1 - 1x2 @ 72"
- 4 - 1x2 @ 13 1/2"
- 1 - Crown Moulding Strip @ 72"
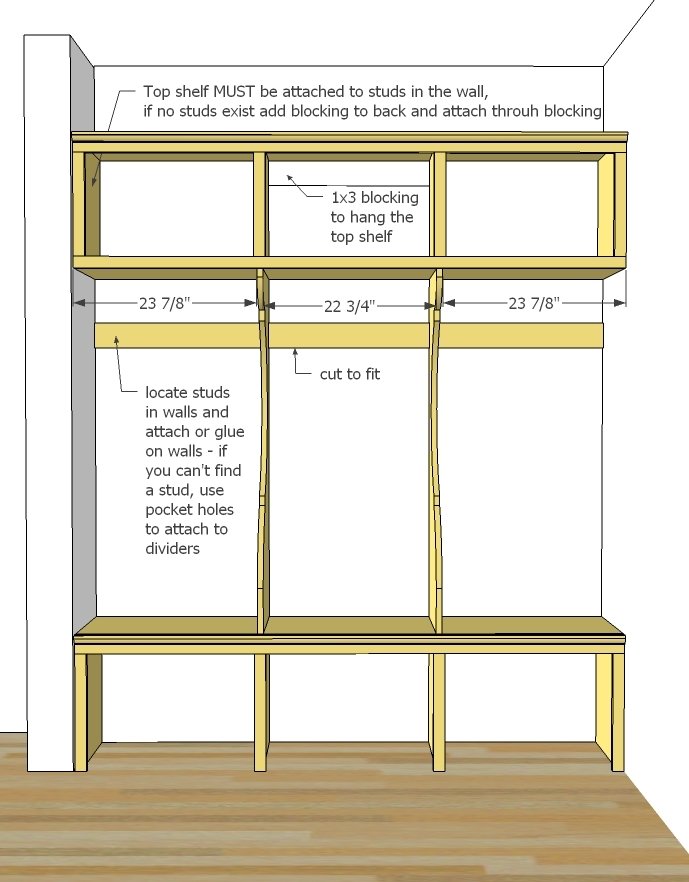
- 2 - 1x3 @ 23 1/8" (Sides - Optional if need to support shelf from back)
- 1 - 1x3 @ 22 3/4" (Center - Optional if need to support shelf from back)
BENCH CUT LIST
- 1 - 1x16 @ 72"
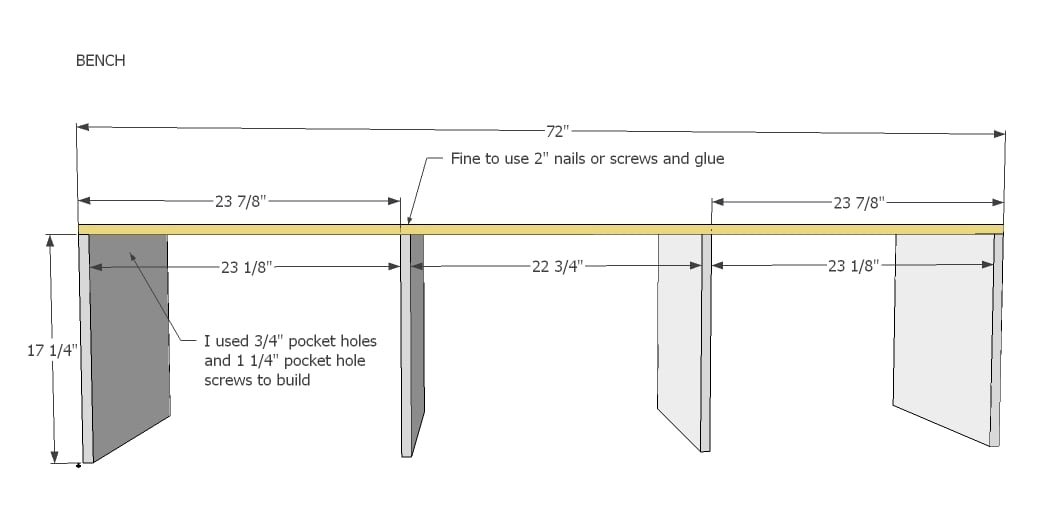
- 4 - 1x16 @ 17 1/4"
- 1 - 1x3 @ 72"
- 4 - 1x2 @ 15 1/2"
- 1 - Edge Moulding Strip @ 72"
CENTER CUT LIST
- 2 - 1x16 @ 47 7/8"
- 2 - 1x3 @ 23 7/8" (cut to fit)
- 1 - 1x3 @ 22 3/4" (cut to fit)
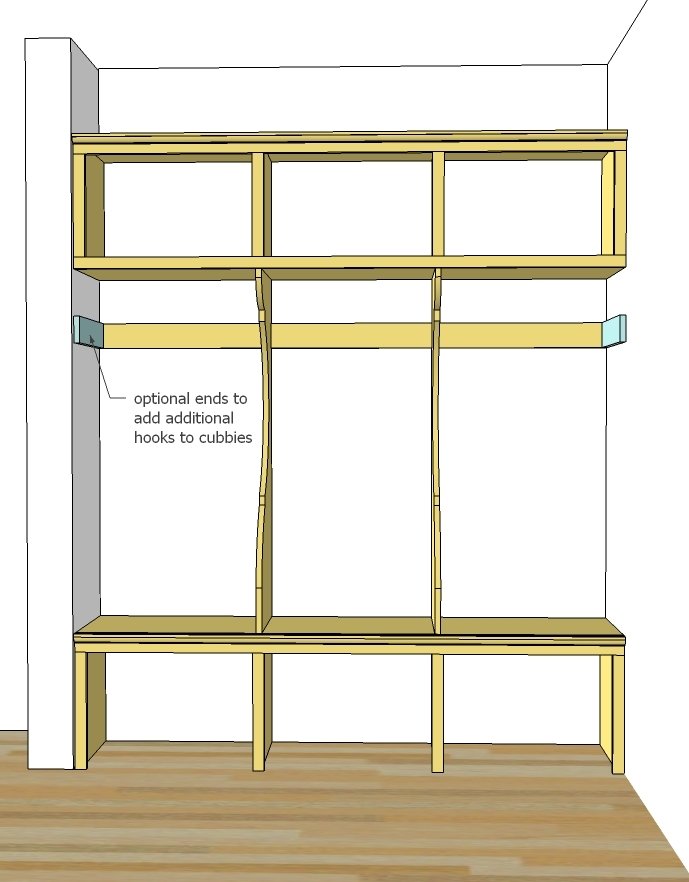
- 2 - 1x3 @ 14 3/4" (Optional sides for extra hooks)
Tools
- measuring tape
- square
- pencil
- safety glasses
- hearing protection
- kreg-jig
- drill
- circular saw
- jigsaw
- nailer
- sander
- level
Step-by-step Instructions
Step 1
Build the box. This is the basic frame for the upper shelf. It will be fully framed, so nailgun lovers, nail away. I used Kreg Jig pocket holes, but you can also use 2" screws or nails - just adjust for square and use glue.
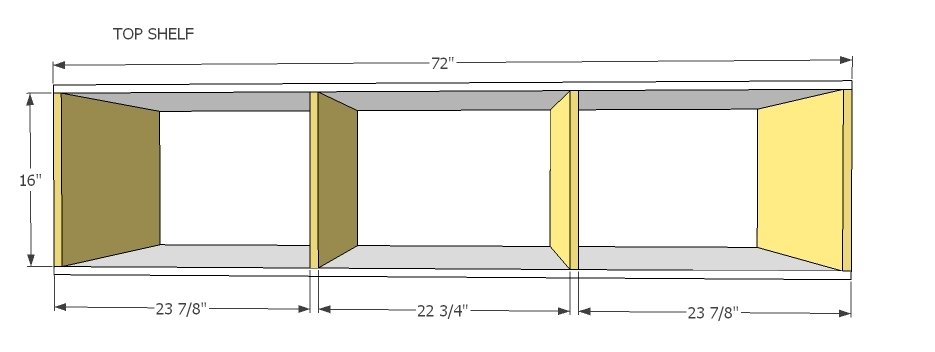
Step 2
On your shelf, nail the tops and bottom on. One thing I don't like about my shelf is the bottom trim makes pulling baskets straight out impossible - there's a little lip. This could be a good thing for you, I'll let you make the call.
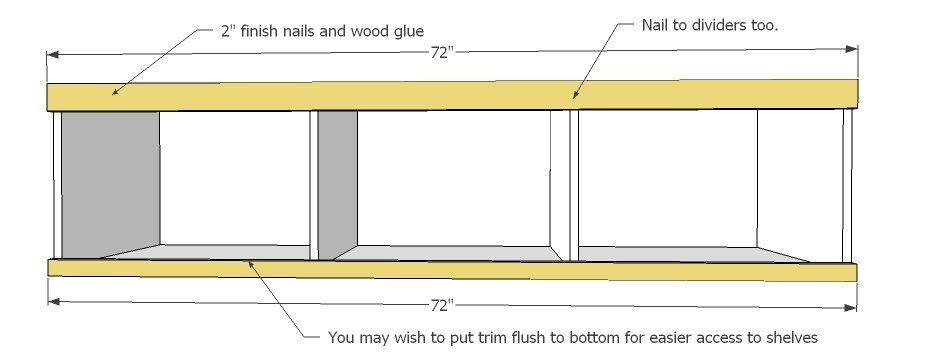
Step 3
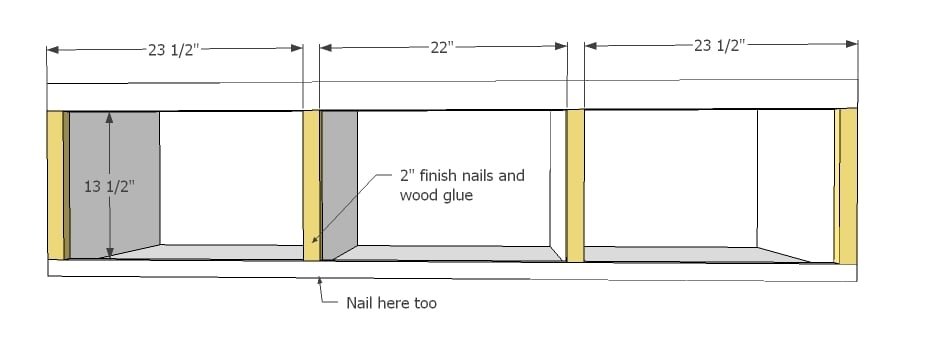
Trim exposed shelf dividers as shown above.
Step 4
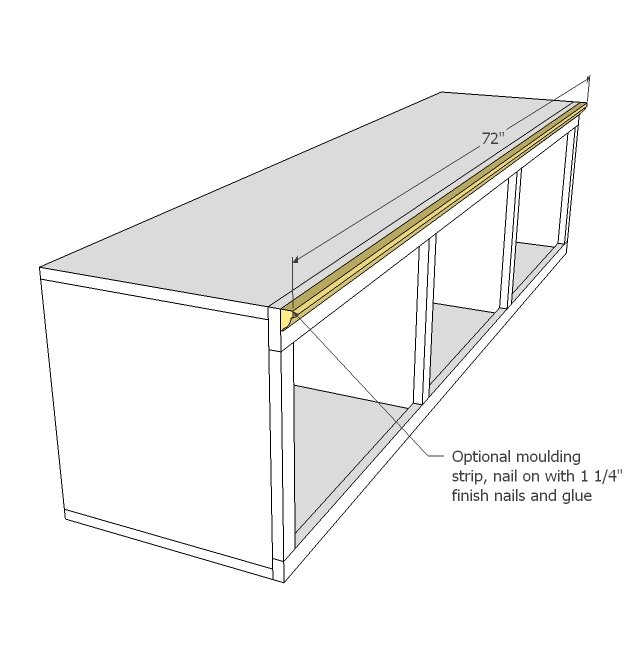
And tack on some moulding for an added touch of fancy.
Step 5
Step 6
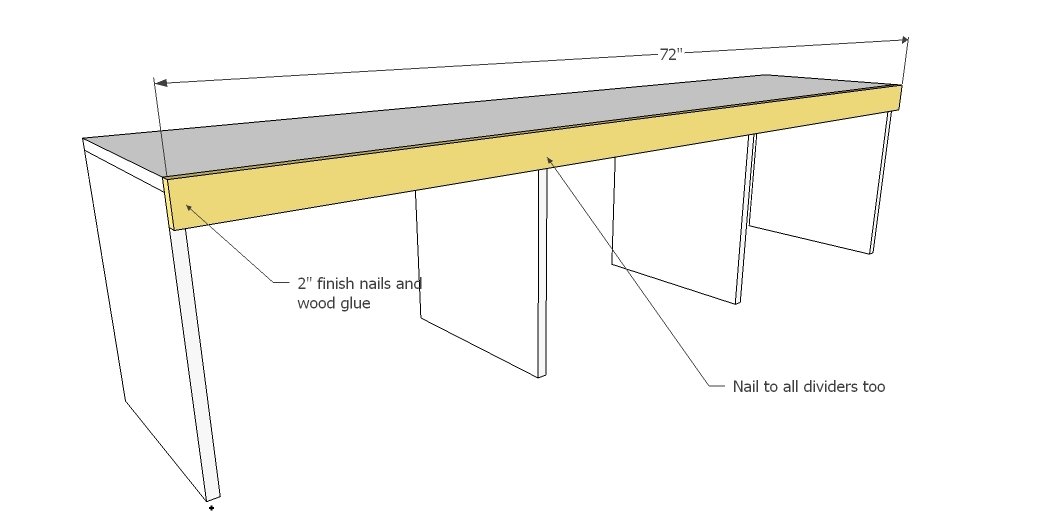
Just the top gets trim. Attach to all dividers for added structure and support.
Step 7
Now trim legs too.
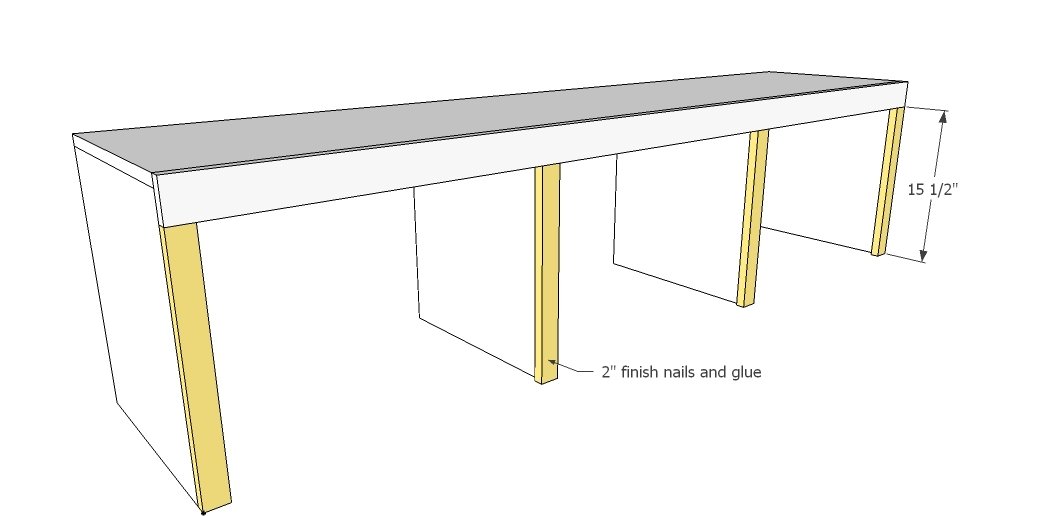
Step 8
Followed by a touch of decorative edge moulding.
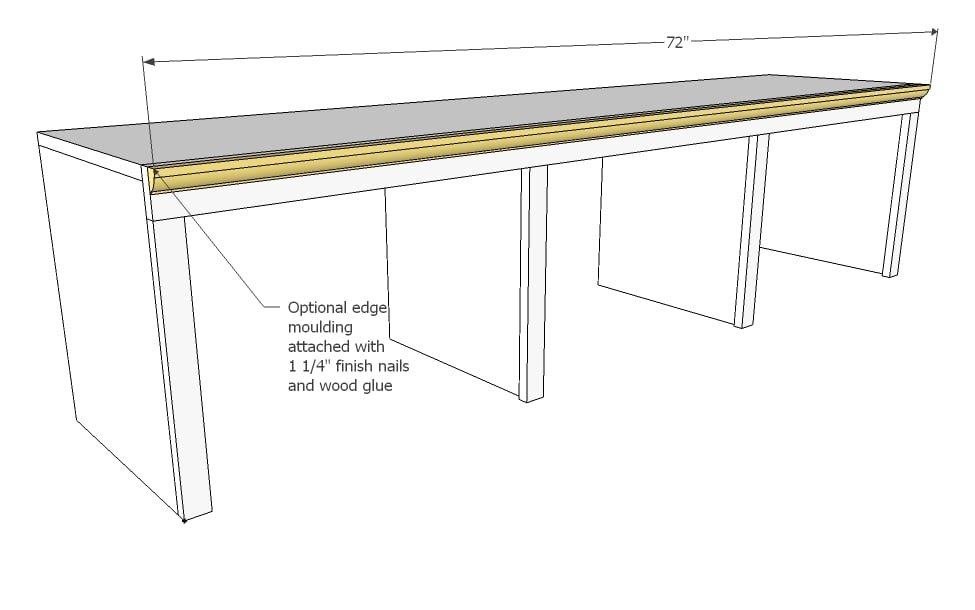
Step 9
Carefully draw out pattern as shown above. Cut with a jigsaw and sand rough edge. Make sure your two match. We actually clamped the two together and cut to ensure a perfect match. Drill pocket holes along the top and bottom edge for assembly.
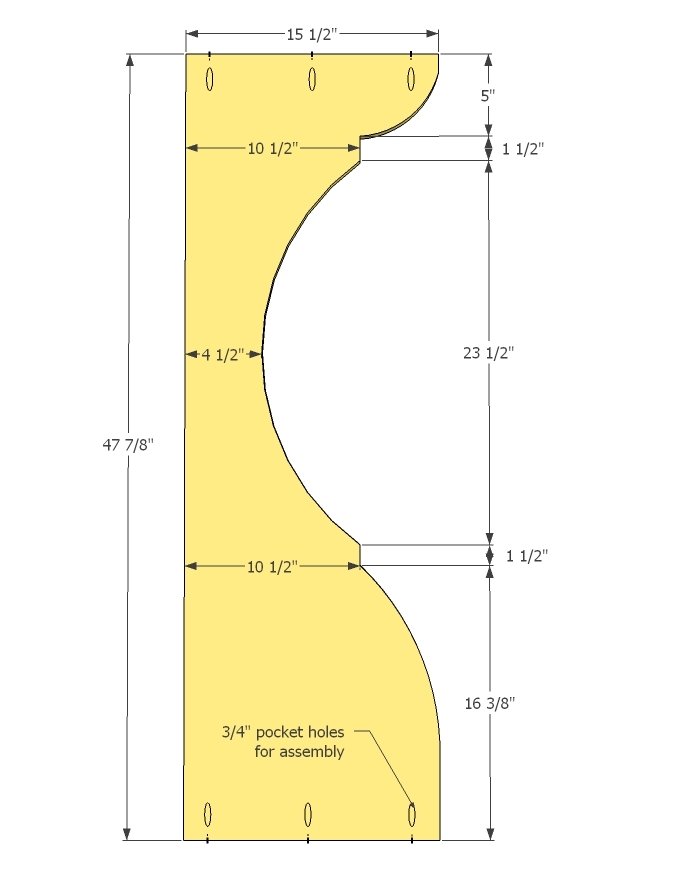
Step 10
Start assembling from the bottom up, installing bench and then dividers and then finally the top. Attach dividers to bench and shelf through pocket holes. For a freestanding mudroom, you can add end dividers but you MUST support that top shelf by hanging it to studs in the wall (see next step).
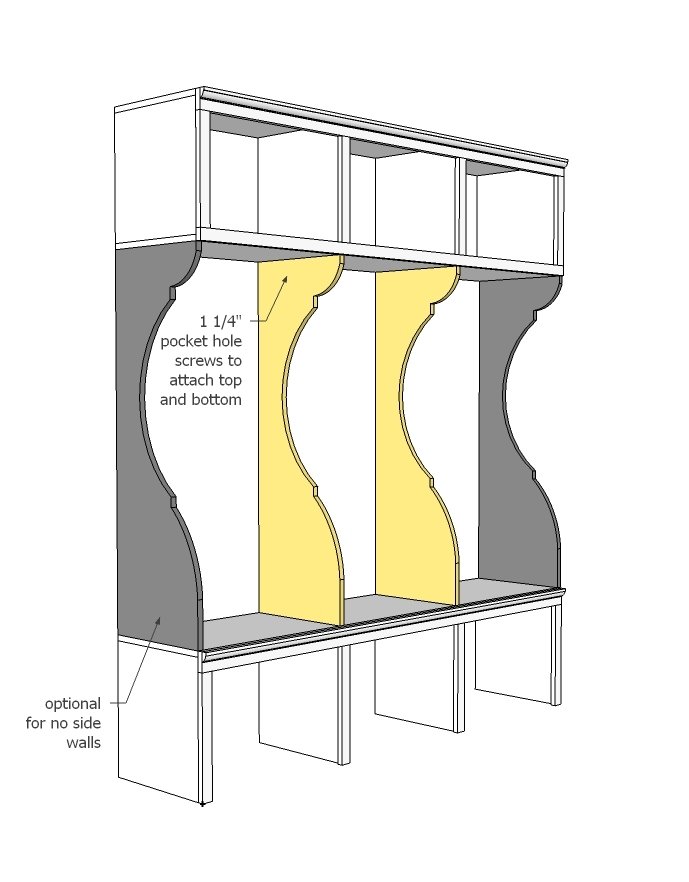
Step 11
Make sure your upper shelf is well supported, screwed to at least two studs in the wall at minimum, on each end. If you used a freestanding design (no side walls) you MUST add blocking as shown above and screw through the blocking. Attach the hook blocking as well. I used pocket holes to attach, and also nails and glue into the wall.
Step 12
And this is just to add a few more hooks. And a little more fancy.
Step 13
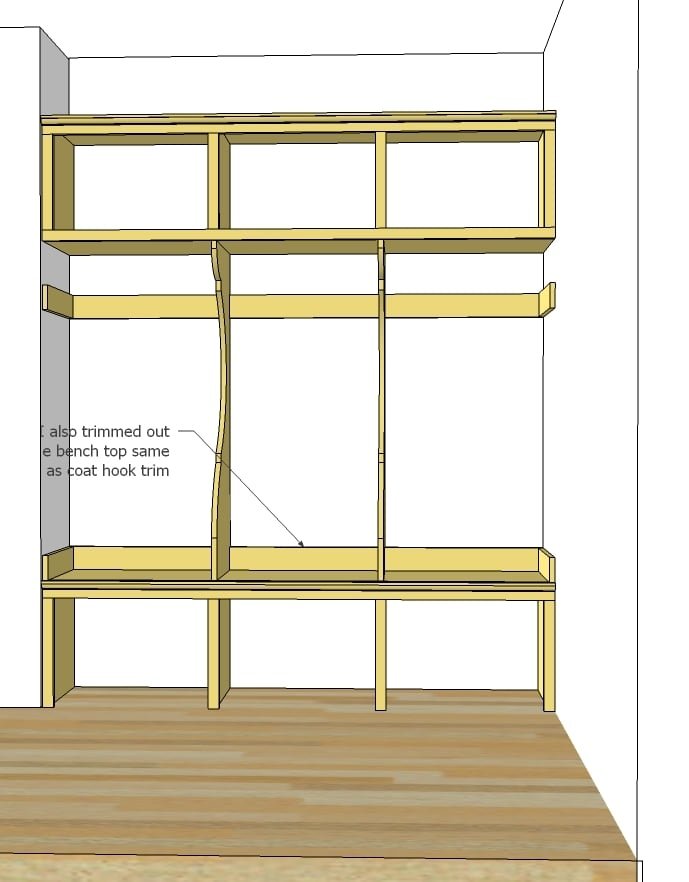
And this is not in the cut list, but with just 1 more 1x3, you could trim out the bench top as I did. Just in case your bench doesn't sit flush to the wall, or for a little extra color.
Finishing
Sand all surfaces, starting with a medium grit and finishing with fine. Wipe off the dust, fill any holes or gaps with wood filler, and sand smooth once dry. Apply primer if you're painting, then finish with your choice of paint or stain and seal with a durable clear topcoat. For outdoor projects, use exterior-rated primer, paint or stain, and sealer so the piece stands up to the weather.
Source (temporary): https://www.ana-white.com/woodworking-projects/modern-cottage-mudroom