Modern Craft Table
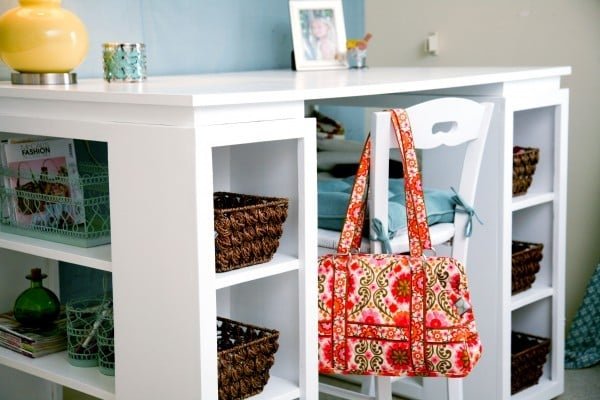
Build your own project table or craft table from Features lots of open storage, a large desktop perfect for crafts, seating on both sides, and a modern design. Step by step plans with diagrams, shopping list and cut list, all free!
Specifications
| Project type | Bookshelf and Bookcase Plans |
|---|---|
| Room | Storage Solutions |
| Style | Modern Style Furniture Plans |
| Difficulty | Intermediate |
| Estimated cost | $100-$150 |
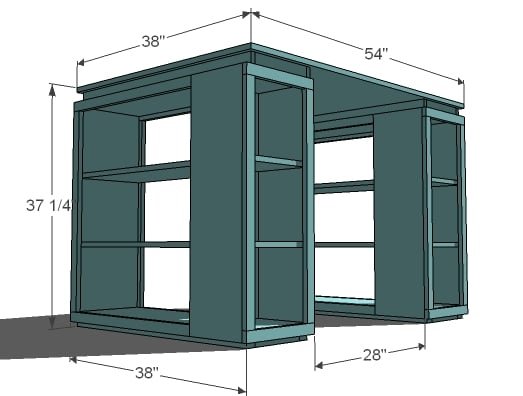
Dimensions
Use the size-specific shopping and cut lists below.
Shopping List
- 1 – Sheet of 3/4″ Plywood or MDF (Can use 1/2 sheet, tabletop will be 6″ narrower) for the tabletop
- 3- 8′ long 1×12 (Tops and Small Shelves/Two Large Shelves and One Bottom)
- 1 – 12′ long 1×12 (Ends, Dividers)
- 1 – 12′ long 1×10 (Small Bookshelf Sides)
- 7 – 8′ long 1×2
- 2 – 8′ long 2×2
- 1-1/4″ brad nails
- 2″ Screws or 1 1/4″ Pocket Hole Screws
- Wood Glue
- Finishing Supplies
Cut List
Cut List for Project Table (Two Bookshelf Bases and One Top)
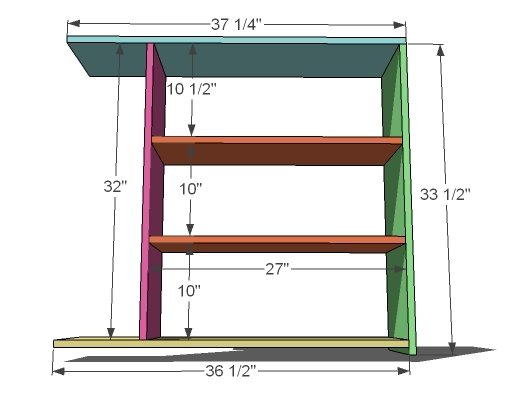
- 2 – 1×12 @ 37 1/4″ (Bookshelf Tops)
- 2 – 1×12 @ 33 1/2″ (Bookshelf Ends)
- 2 – 1×12 @ 32″ (Bookshelf Divider)
- 2 – 1×12 @ 36 1/2″ (Bookshelf Bottom)
- 4 – 1×12 @ 27″ (Large Shelves)
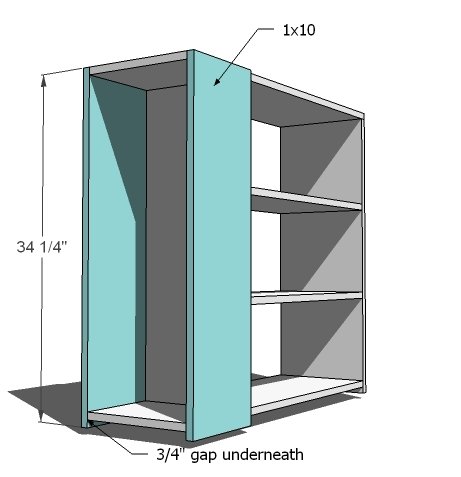
- 4 – 1×10 @ 34 1/4″ (Small Bookshelf Sides)
- 4 – 1×12 @ 8 3/4″ (Small Shelves)
- 8 – 1×2 @ 27 3/4″ (Large Shelf Side Trim)
- 8 – 1×2 @ 31 1/4″ (End Trim)
- 4 – 1×2 @ 13″ (Small Shelf Top and Bottom Trim)
- 4 – 2×2 @ 36 1/2″ (Floating Base Sides)
- 4 – 2×2 @ 8 1/2″ (Floating Base Ends)
- 1 – 3/4″ Plywood or MDF @ 38″ x 54″ (Top) (For 1/2 sheet of plywood, top is 38″ x 48″)
- 4 – 2×2 @ 10″ (Floating Base Ends)
- 4 – 1×2 @ 36 1/2″ (Floating Base Sides)
Tools
- measuring tape
- square
- pencil
- safety glasses
- drill
- sander
Step-by-step Instructions
Step 1
Begin by measuring and cutting all your boards. Mark out all joints before any assembly. If you are using pocket holes, drill all pocket holes. If you are using screws, drill pilot holes. Attach the pieces with 2″ screws and glue or 1 1/4″ pocket holes screws and glue. Keep outside edges flush. You can optionally attach the shelves (orange) with shelf pins to create adjustable shelves
Step 2
This is where that nailer would be handy. Attach with glue and 2″ finish nails the small bookshelf sides. Leave 3/4″ under the bottom and make sure you also attach to the center divider (Back of small bookshelf).
Step 3
You can either place these shelves with shelf pins or use finish nails and glue to secure in place.
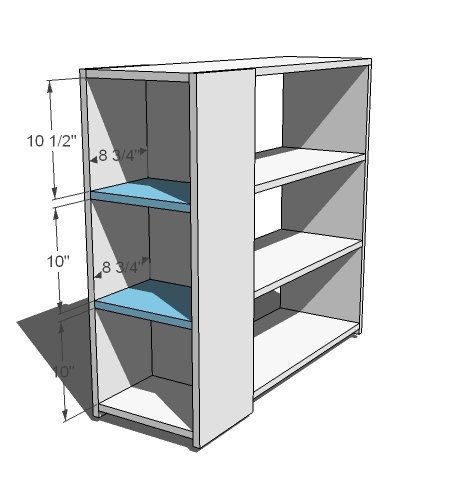
Step 4
Attach the large shelf trim to the sides, keeping top edges flush, with 2″ finish nails and glue. If you are using a Kreg Jig™, build a face frame separately, then attach with 2″ finish nails and glue.
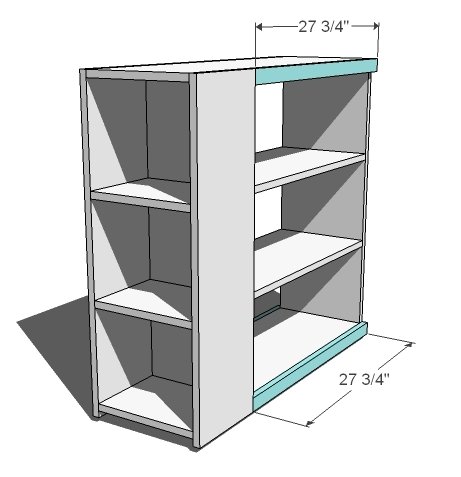
Step 5
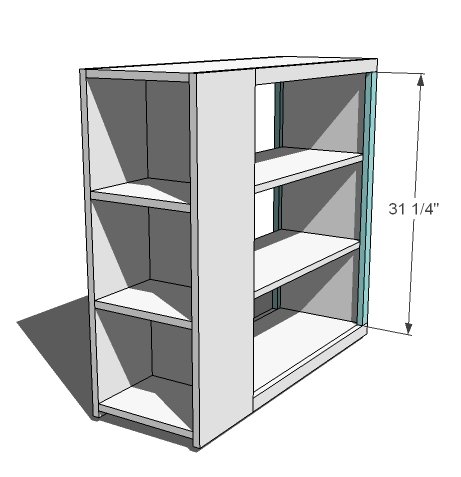
Step 6
If you are using pocket hole screws, build your face frame separately, then attach with 2″ finish nails and glue. Otherwise, nail the trim on with 2″ finish nails and glue.
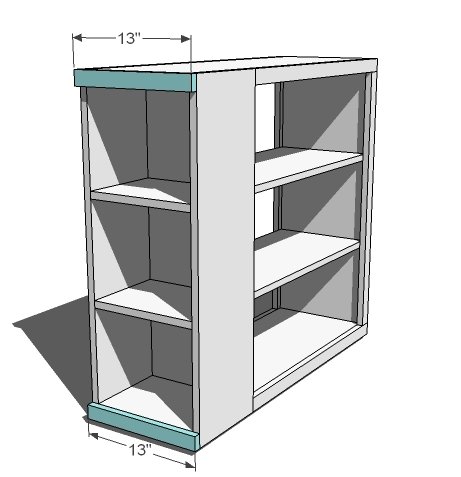
Step 7
Attach the small shelf side trim with 2″ finish nails and glue.
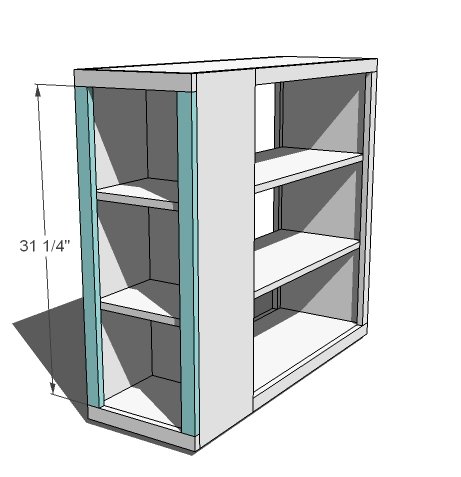
Step 8
Use 2″ screws and glue to attach the floating base sides to the bottom of the bookshelves.
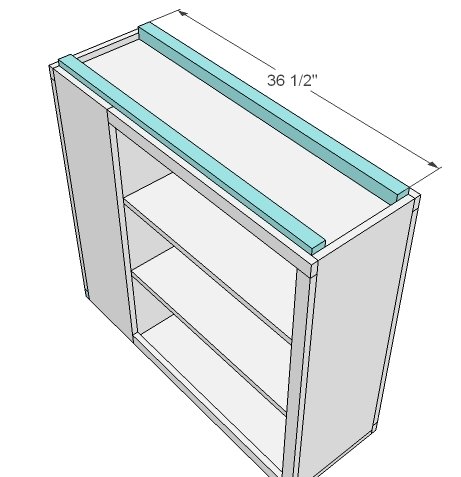
Step 9
Attach the floating base ends to the bookshelf with 2″ screws and glue.
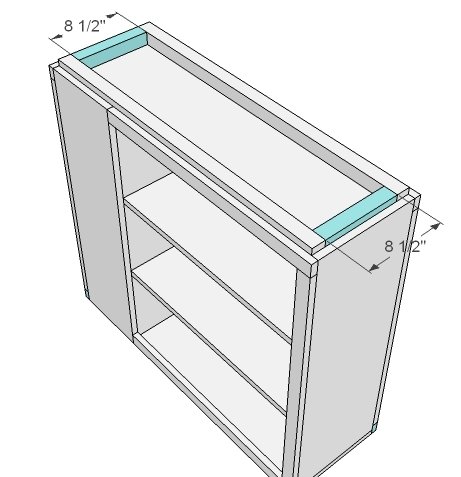
Step 10
Use 2″ screws and glue to attach the floating base ends to the underside of the tabletop. See measurements above for placement.
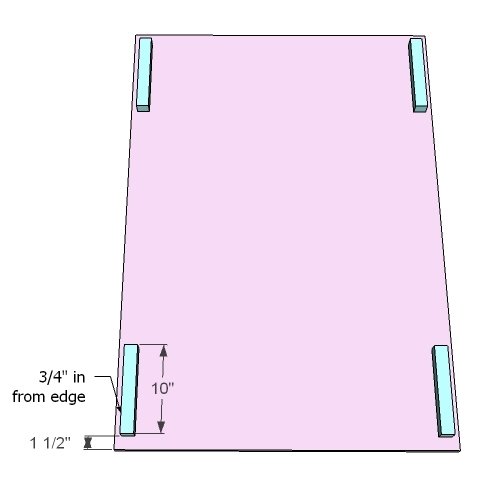
Step 11
Attach the floating base sides to the ends with 2″ finish nails and glue.
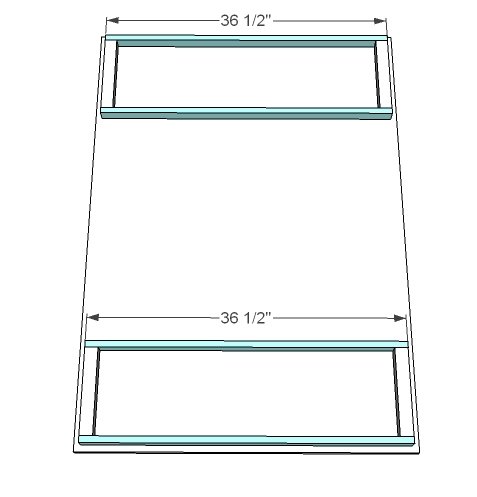
Step 12
From the underside of the bookshelves, screw into the floating base with 2″ screws. You may wish to finish the edges of the tabletop with edge banding or nosing for a more finished look. Finish as desired.
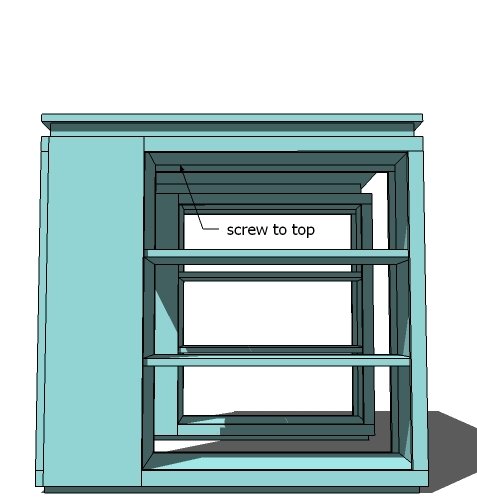
Finishing
Sand all surfaces, starting with a medium grit and finishing with fine. Wipe off the dust, fill any holes or gaps with wood filler, and sand smooth once dry. Apply primer if you're painting, then finish with your choice of paint or stain and seal with a durable clear topcoat. For outdoor projects, use exterior-rated primer, paint or stain, and sealer so the piece stands up to the weather.
Source (temporary): https://www.ana-white.com/woodworking-projects/modern-craft-table