Modern Easy Build Adirondack Chair
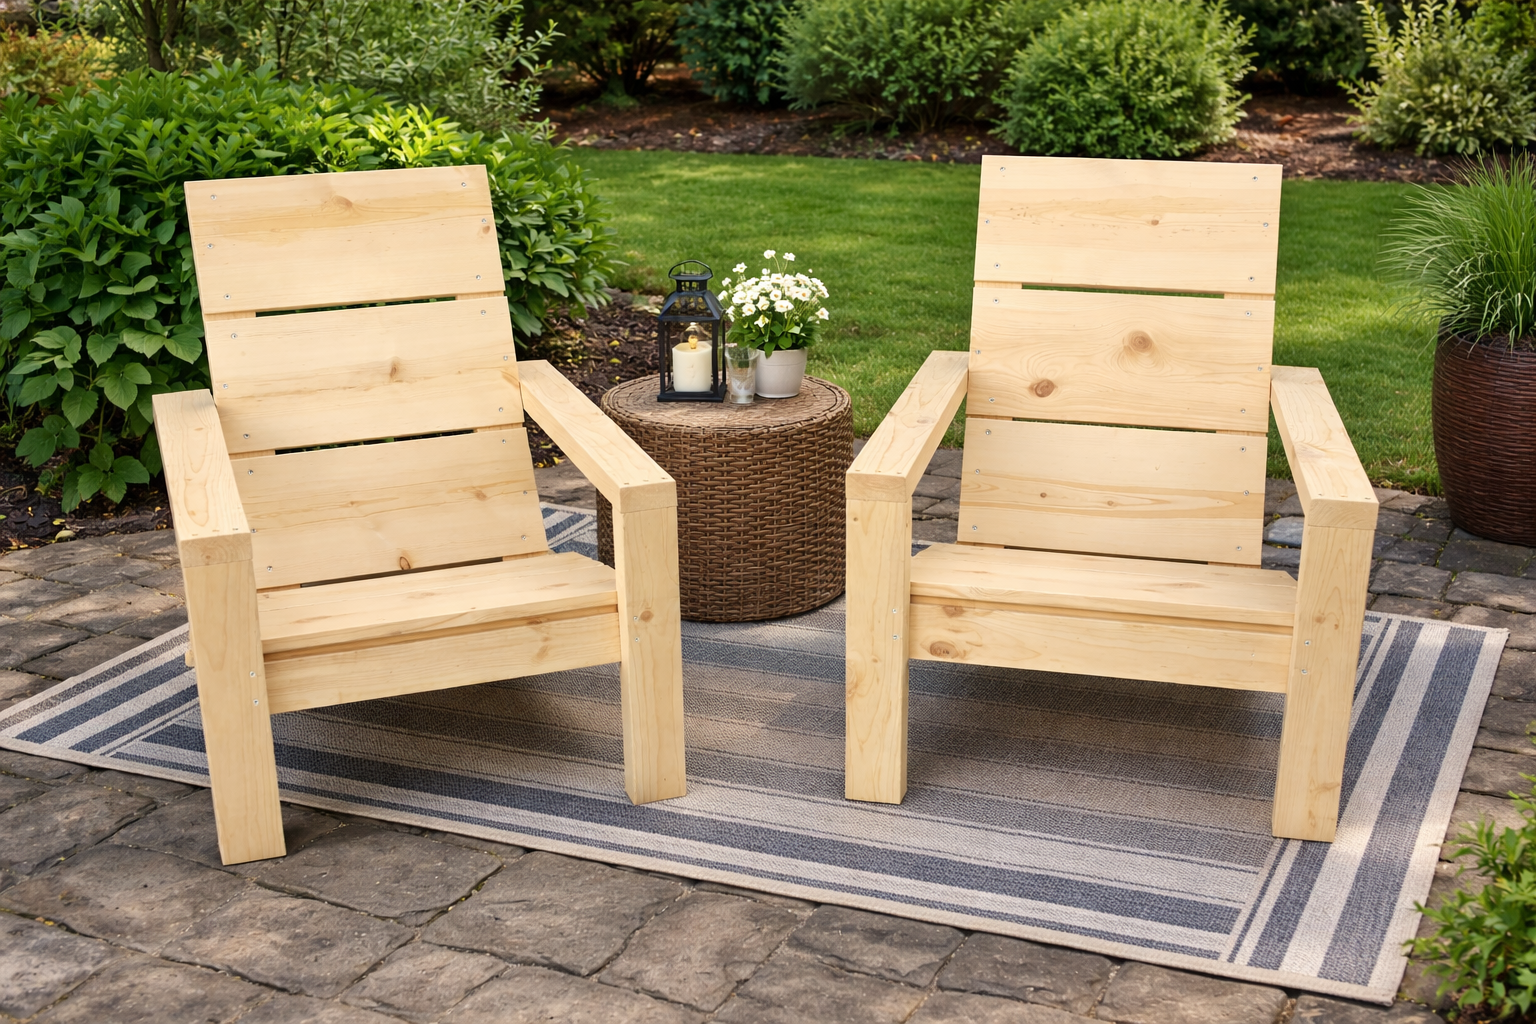
Build the most popular—and most built—Adirondack chair plans on the internet with this modern, easy-to-follow design. Trusted by thousands of DIYers, this chair combines comfort, durability, and simple construction to deliver professional results without complicated woodworking techniques. This modern Adirondack chair features clean lines, wide armrests, and a slightly more upright seating angle for everyday comfort. Unlike traditional designs with complex curves, these plans are built with mostly straight cuts, making them ideal for beginners while still producing a high-end, designer look. Designed to be both strong and long-lasting, the chair uses standard dimensional lumber and exterior-friendly construction methods, so it holds up beautifully outdoors on patios, decks, porches, or around a fire pit. Whether you’re building one chair or a full outdoor set, this plan is optimized for efficiency, helping you save time and reduce material waste. The include step-by-step instructions, detailed diagrams, cut lists, and helpful building tips to guide you through every step—from first cut to final assembly. You’ll also find finishing recommendations to protect your chair and enhance its natural beauty. If you’re looking for an Adirondack chair that’s easy to build, incredibly comfortable, and proven by thousands of successful builds, this is the plan to start with.
Specifications
| Project type | Outdoor Seating, Lounging and Accents |
|---|---|
| Room | Outdoor |
| Style | Modern Style Furniture Plans |
| Difficulty | Intermediate |
Dimensions
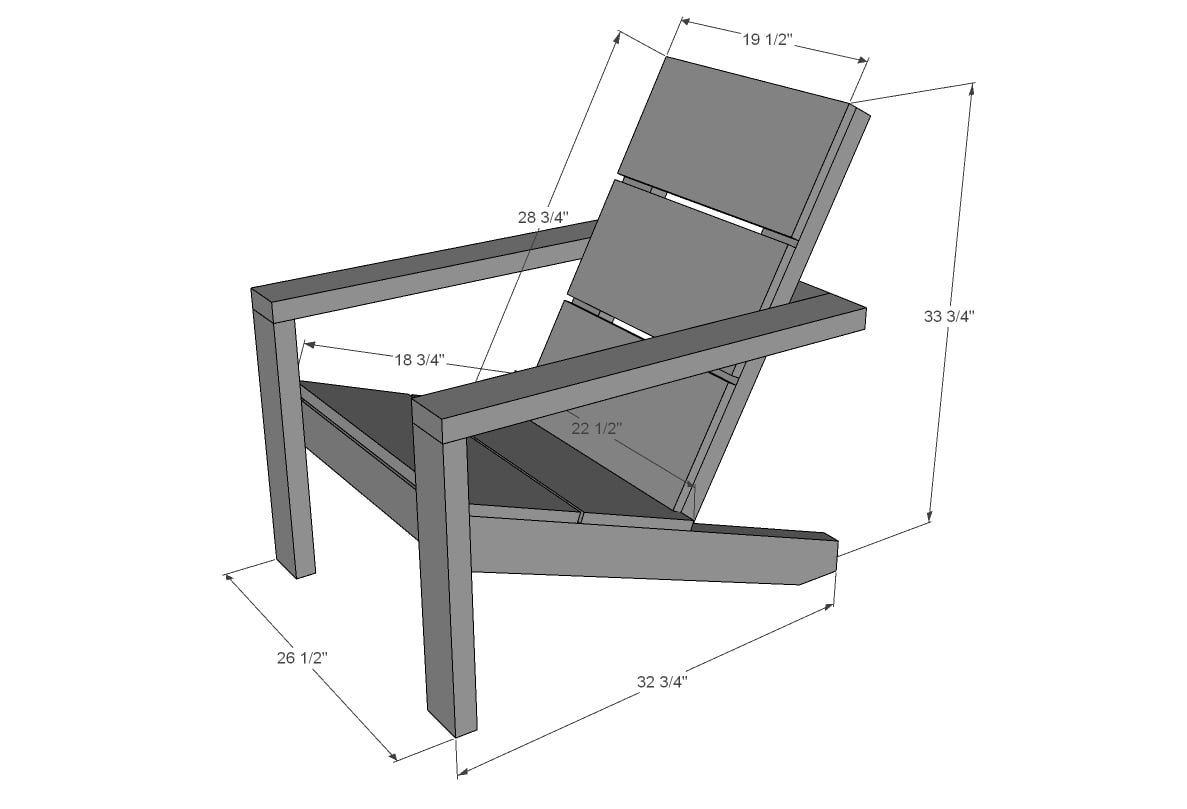
Use the size-specific shopping and cut lists below.
Shopping List
- 3 - 2x4 @ 104-5/8" long (OR 4 - 2x4 @ 8 feet long or 92-5/9" long)
- 1 - 1x10 @ 10 feet long*
- 4 - 2-1/2" Kreg Pocket Hole Screws
- 24 - 2-1/2" long self tapping exterior screws (look for the screws with the star bit heads, can be up to 3" long)
- 30 - 1-1/2" long self tapping exterior screws (same type as the longer screws, can be slightly shorter or longer (up to 2"), these screws are just used to attach the seat boards to the frame)
*If building more than one chair, you only need 9 feet of 1x10 boards per chair. So for two chairs, you could purchase one 8' long 1x10 and one 10' long 1x10.
Cut List
- 5 - 2x4 @ 19-1/2" - legs and horizontal supports
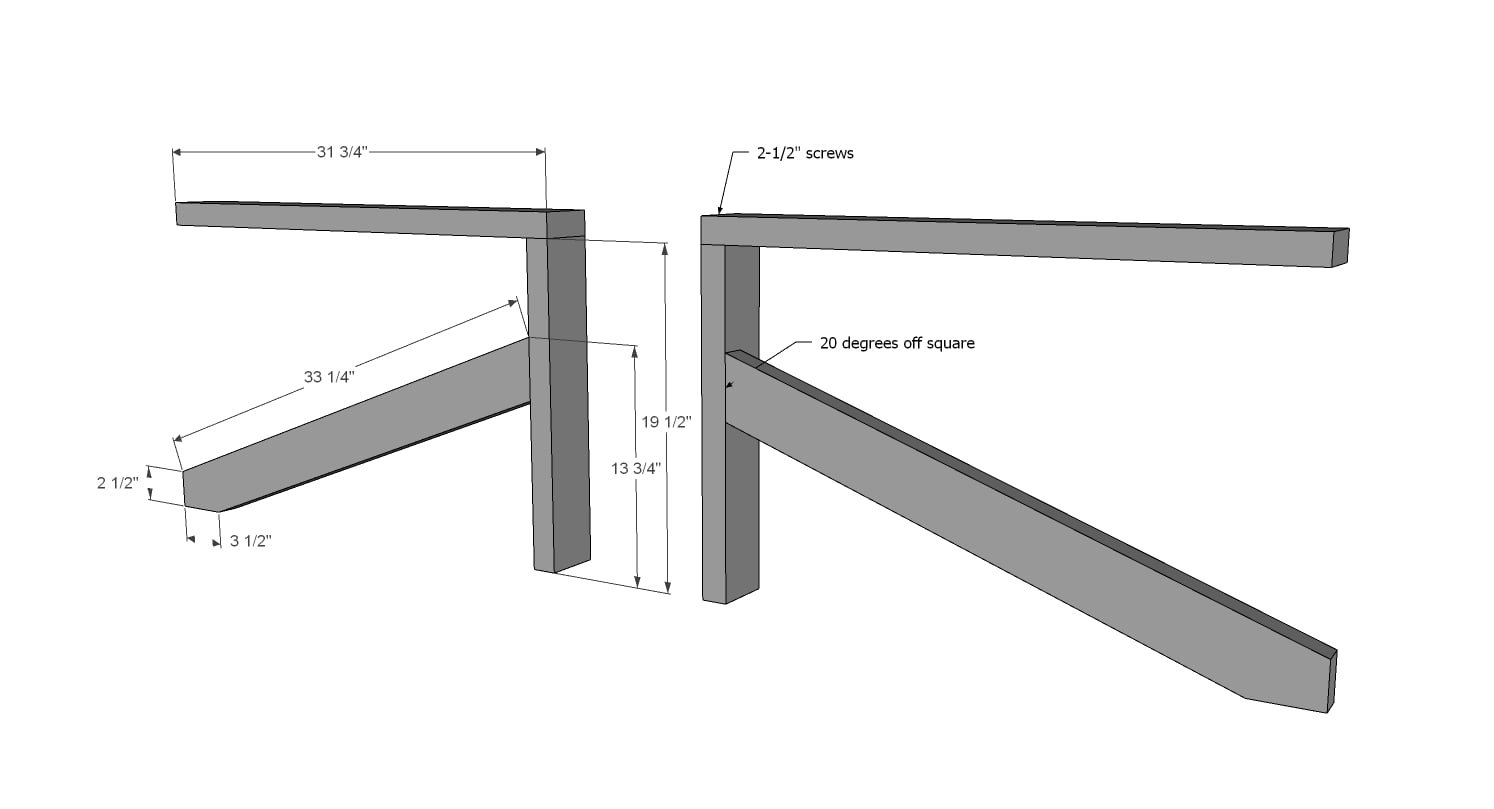
- 2 - 2x4 @ 31-3/4" - arms
- 2 - 2x4 @ 33-1/4" - both ends cut at 20 degrees off square, ends ARE parallel, long point to short point measurement
- 2 - 2x4 @ 32-3/4" - back supports
- 2 - 1x10 @ 22-1/2" - seat
- 3 - 1x10 @ 19-1/2" - back
Tools
- measuring tape
- square
- pencil
- safety glasses
- hearing protection
- kreg-jig
- drill
- circular saw
- compound miter saw
- sander
Step-by-step Instructions
Step 1
As shown in the video, cut the chair stringers at a 90 degree angle at the foot of the stringer with a circular saw. Build the arms with the 2-1/2" long screws and exterior wood glue. Make sure the two arms are built the same but in mirror as shown in the diagram.
Step 2
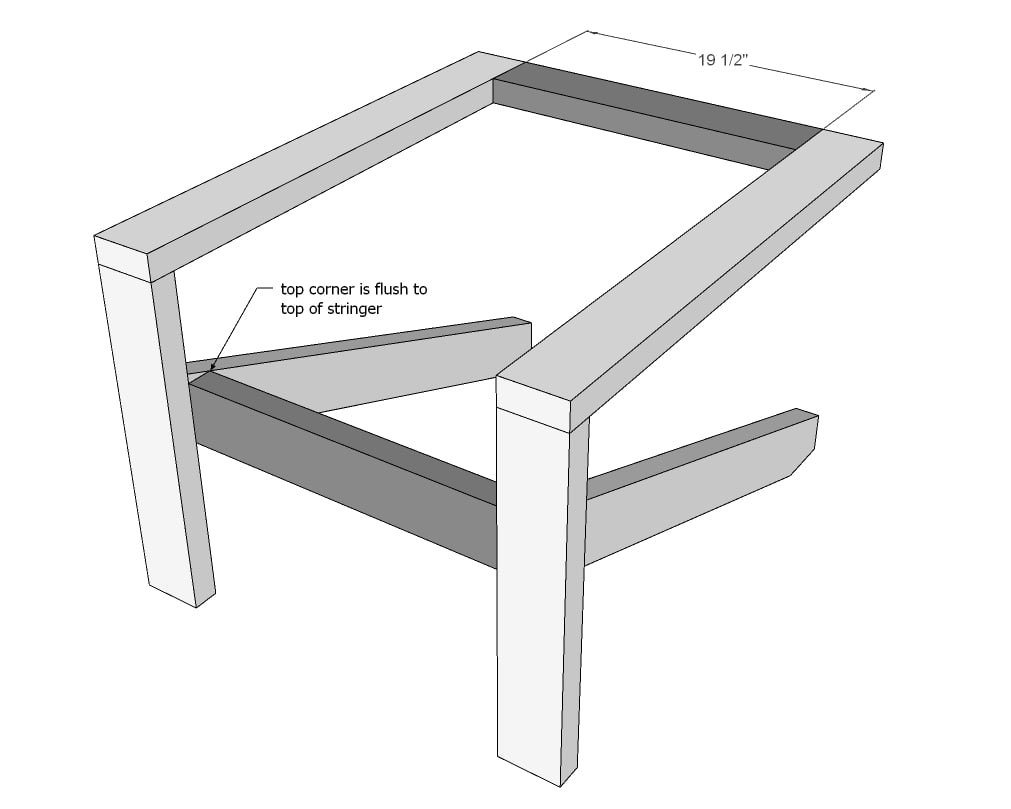
Drill two 1-1/2" pocket holes on both ends of two of the 19-1/2" long 2x4s. Attach with 2-1/2" screws to the Adirondack chair frame.
Step 3
Lay the seat boards on the 2x4 frame and attach with three 1-1/2" long screws per end of each 1x10 to the seat frame. Leave about 1/4" gap in between the seat frame for water drainage.
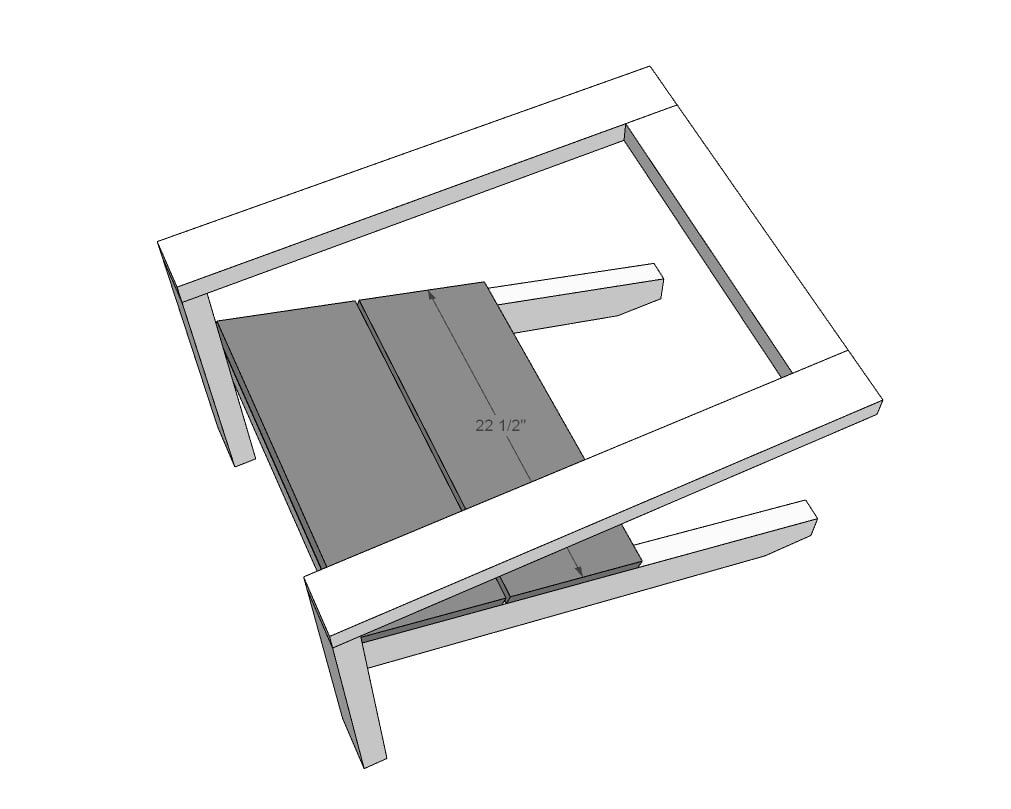
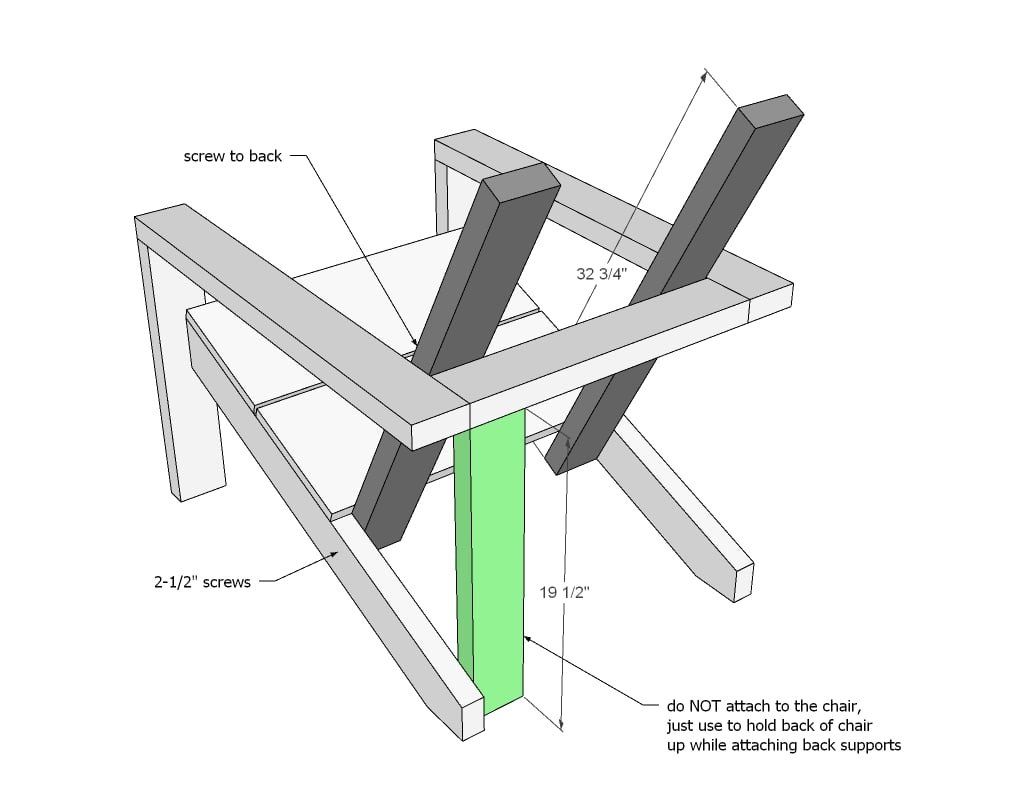
Place the remaining 2x4 @ 19-1/2" long under the back of the chair as shown in the diagram.
Place one seat support in the chair and hold flush to the bottom of the stringer. Attach with screws to the stringer and to the back support. Move to the other side of the chair and repeat with the second back support. Remove the 2x4 @ 19-1/2" long.
Step 5
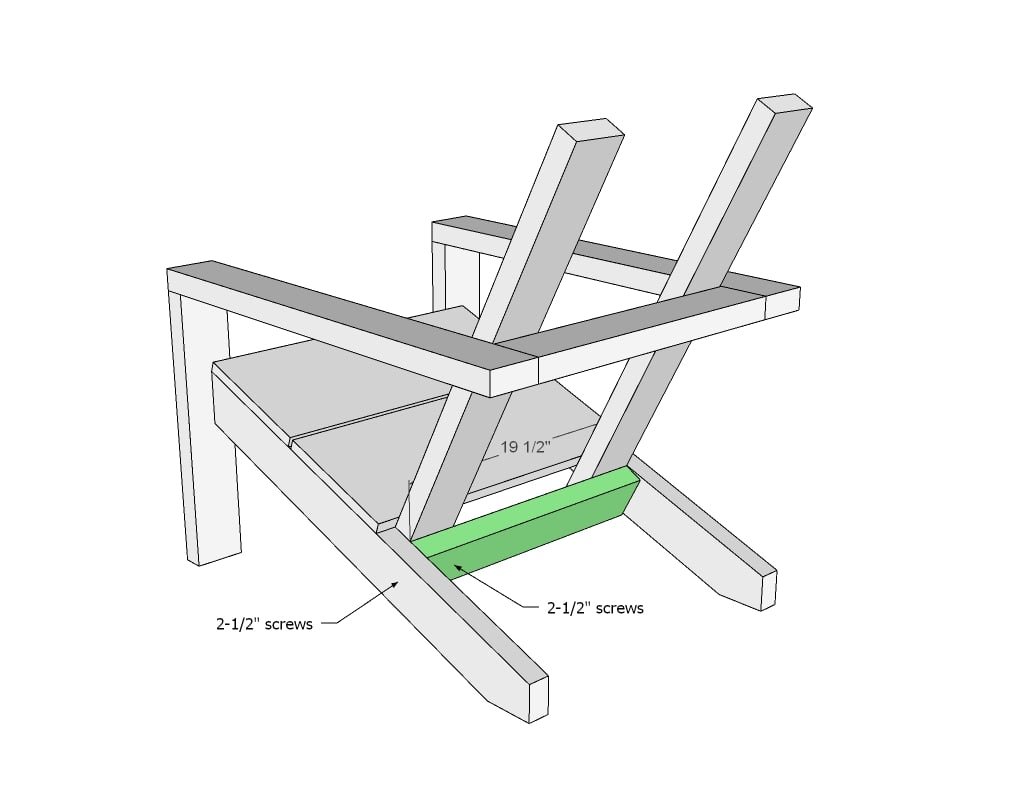
Attach the 2x4 @ 19-1/2" to the base of the chair with screws.
Step 6
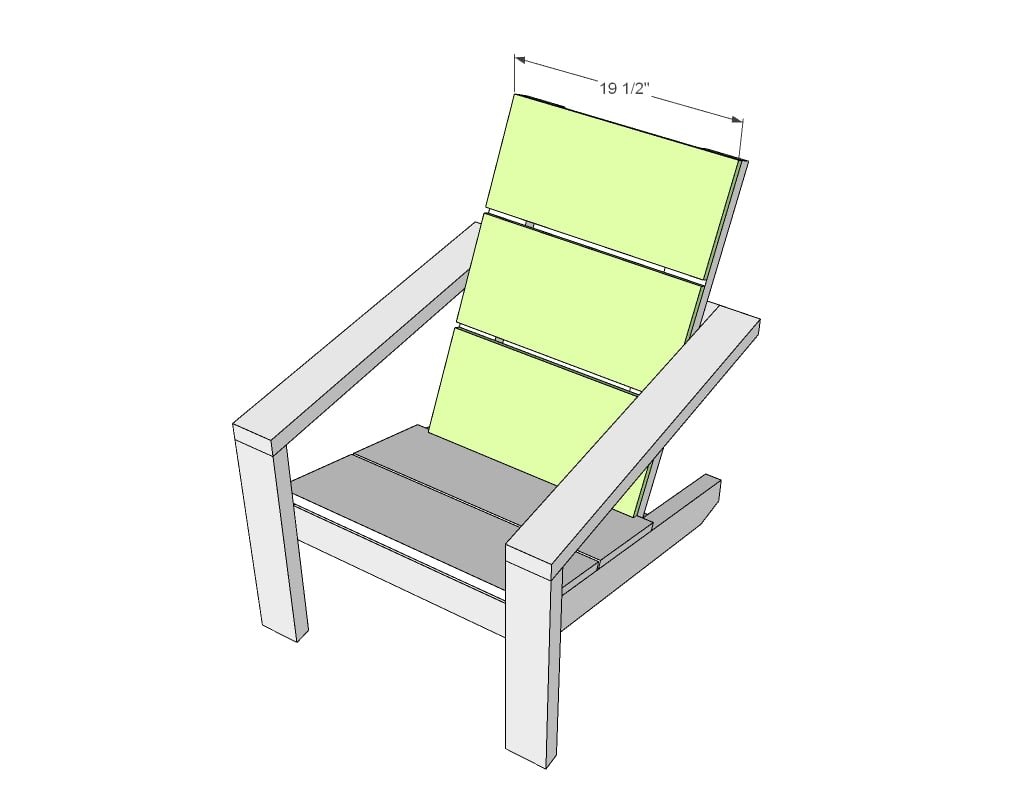
Starting at the top and working downward, attach the seat back boards to the back of the chair. Make sure you leave a gap at the base of the back to allow for good water drainage. Evenly split the gaps for best visual presentation.
Finishing
Sand all surfaces, starting with a medium grit and finishing with fine. Wipe off the dust, fill any holes or gaps with wood filler, and sand smooth once dry. Apply primer if you're painting, then finish with your choice of paint or stain and seal with a durable clear topcoat. For outdoor projects, use exterior-rated primer, paint or stain, and sealer so the piece stands up to the weather.
Source (temporary): https://www.ana-white.com/woodworking-projects/modern-easy-build-adirondack-chair