Modern Farm Table
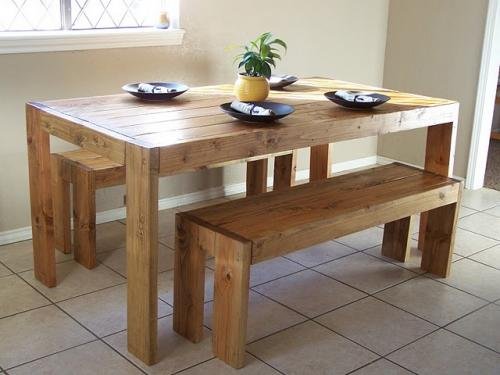
This easy to build modern farm table plan will add that touch of rustic modern to your contemporary space. Plans also available for matching modern farm bench and square modern farm table. By Reader submitted photos.
Specifications
| Project type | Dining Table Plans |
|---|---|
| Room | dining room |
| Style | Modern Style Furniture Plans |
| Difficulty | Beginner Projects |
| Estimated cost | $20 - $50 |
Shopping List
- 6 - 2x6 boards (make sure these boards are VERY straight) (about $2.50 each)
- 5 - 2x2 board (under tabletop supports) (about $1 each)
- 2 - 2x4 boards (about $1 each)
- 2 1/2" wood self tapping screws
- Sandpaper, ranging from coarse to fine
- Wood Filler
- Stain or Paint of choice
Cut List
- A) 4 - 2x6 cut at 30" (Legs)
- B) 2 - 2x2 cut at 33" (Inside End Supports)
- C) 2 - 2x4 @ 63" (Side Apron)
- D) 2 - 2x4 @ 25" (End Apron)
- E) 7 - 2x2 cut at 33" (Under tabletop supports)
- F) 6 - 2x6 cut at 63" (Tabletop pieces)
Tools
- measuring tape
- square
- safety glasses
- hearing protection
- kreg-jig
- drill
- circular saw
- nailer
- sander
Step-by-step Instructions
Step 1
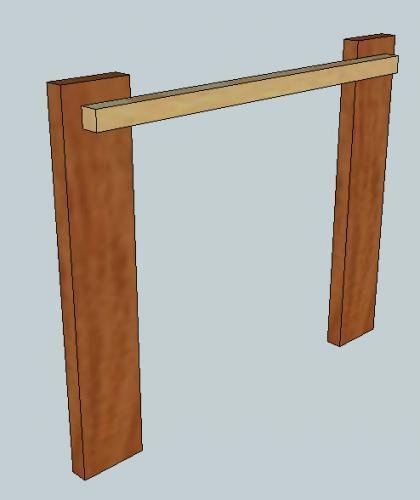
Start by taking 2 of the leg pieces, A and marking 1 1/2" down from the top, and 1 1/2" in from the outer edge. Then screw one of B, the outside end support, to the two legs as shown above. Do the same for the other set of legs.
Step 2
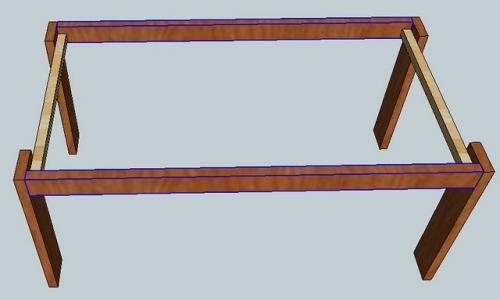
Now add the side aprons, C, as shown above, screwing into the end support, B. Also, screw through the outside of A, the legs, into the end edges of C, the side apron. Now is a good time to check for square. If you do not know how to check for square, see the HOW-TO section for a tutorial.
Step 3
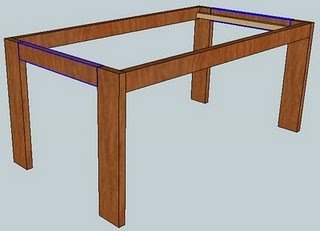
Now add the end aprons, D, screwing into B, the end supports. Again, check for square.
Step 4
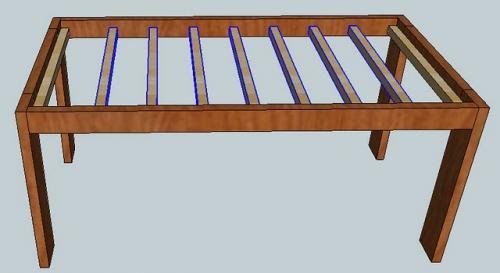
Measure down 1 1/2" down from the top of the side apron, and mark all the way down the length of the apron. This will be the top side of the tabletop support pieces, E. Then mark every 6" and place a board E, keeping the top edge 1 1/2" below the top of the table, as shown above. Do not worry about the last support piece not being exactly 6" from the end - this does not matter. Make sure your project is square.
Step 5
Step 6
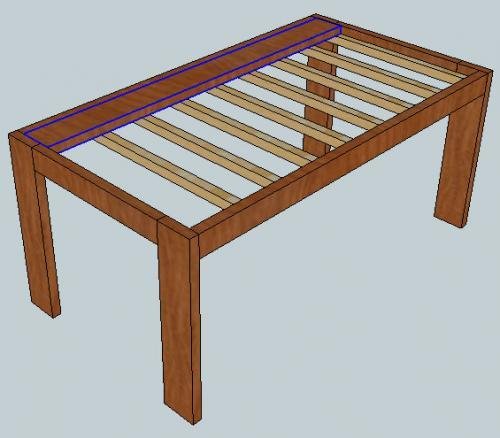
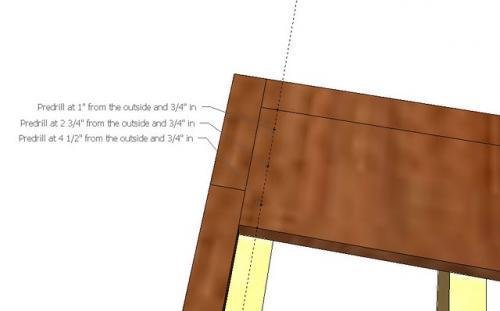
Screw pattern for the tabletop pieces shown above.
Step 7
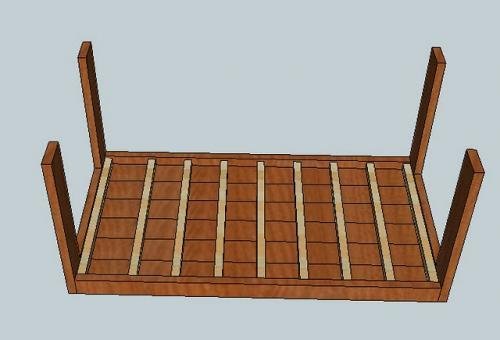
Flip the table over on it's top and predril through all the 2x2 support pieces, drilling two holes per tabletop piece, per support piece. You will drill a total of 108 holes. Screw the top to the 2x2 support pieces through the predrilled holes.
Finishing
Sand all surfaces, starting with a medium grit and finishing with fine. Wipe off the dust, fill any holes or gaps with wood filler, and sand smooth once dry. Apply primer if you're painting, then finish with your choice of paint or stain and seal with a durable clear topcoat. For outdoor projects, use exterior-rated primer, paint or stain, and sealer so the piece stands up to the weather.
Source (temporary): https://www.ana-white.com/woodworking-projects/modern-farm-table