Modern Freestanding Angle Shelf
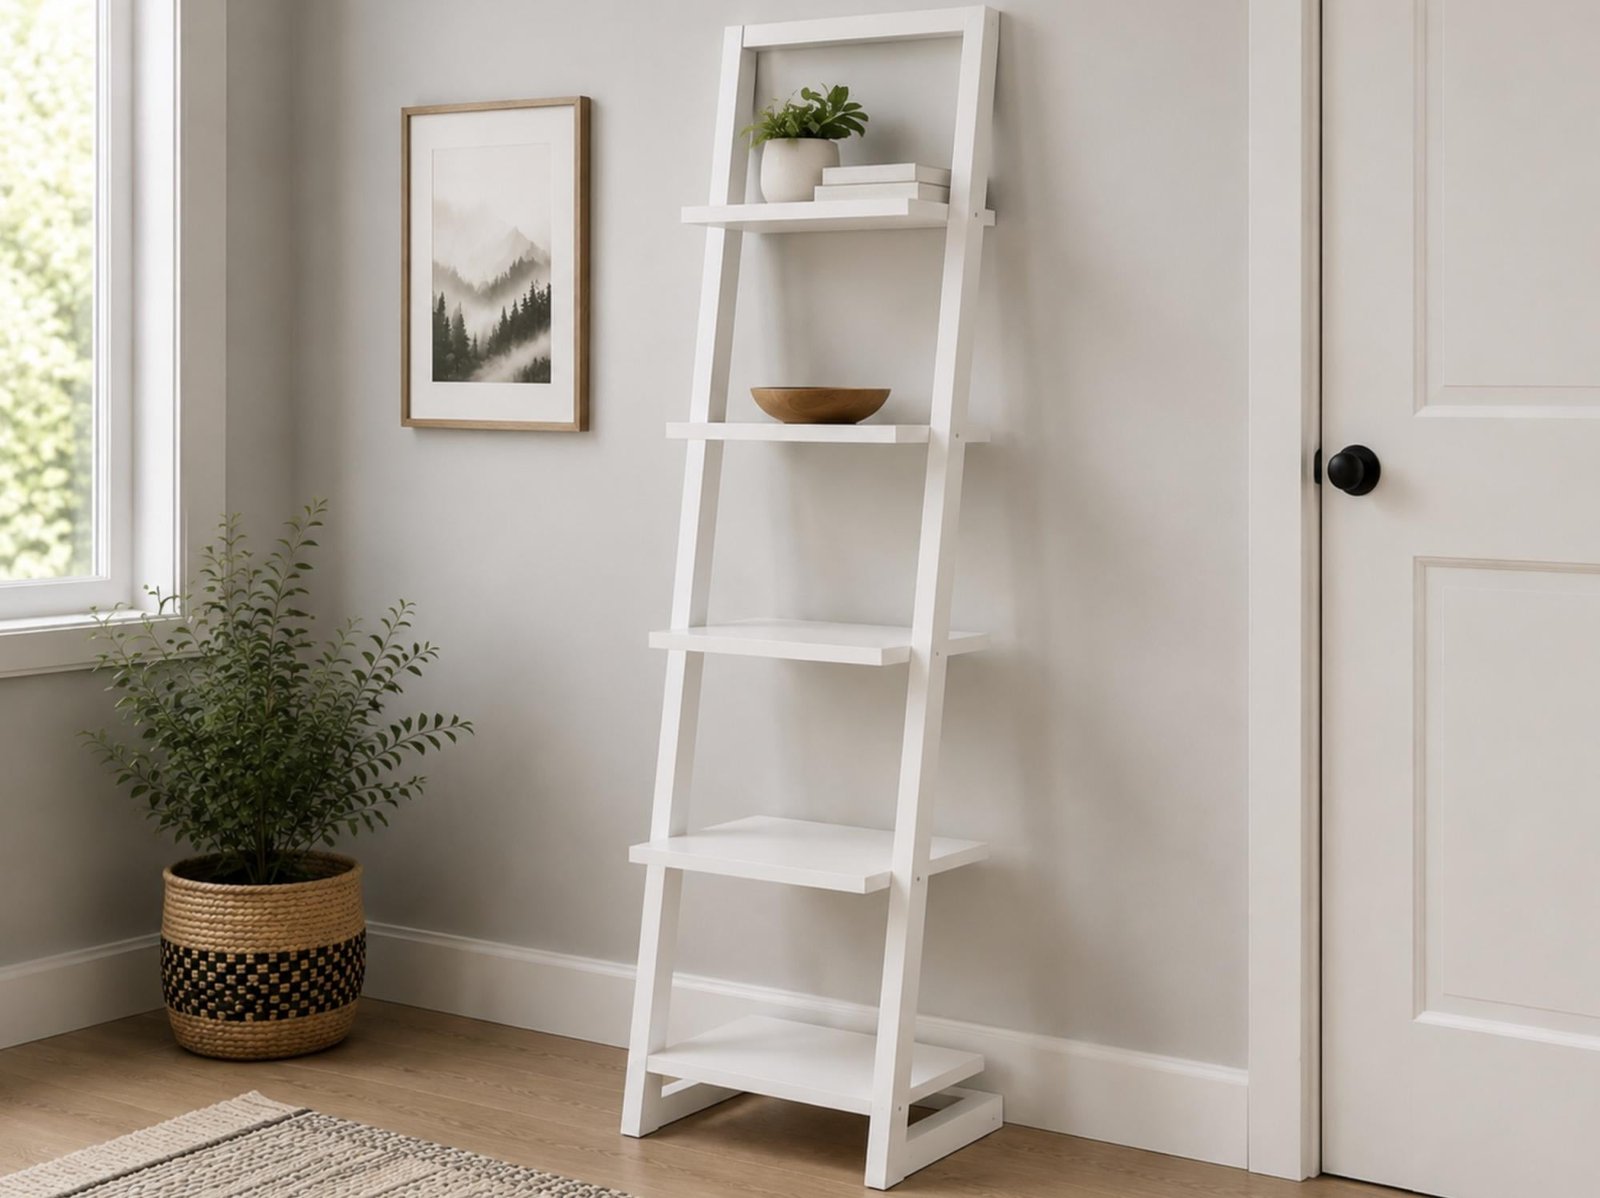
Build a tall, space-saving shoe rack with this easy Z Tower design. Five shelves provide plenty of storage while the narrow footprint makes it perfect for entryways, bedrooms, closets, or small spaces. The simple leaning design is stylish, inexpensive, and easy to build with basic tools. with step by step diagrams from
Specifications
| Project type | Bookshelf and Bookcase Plans |
|---|---|
| Room | Storage Solutions |
| Style | Modern Style Furniture Plans |
| Difficulty | Intermediate |
| Estimated cost | $20 - $50 |
Dimensions
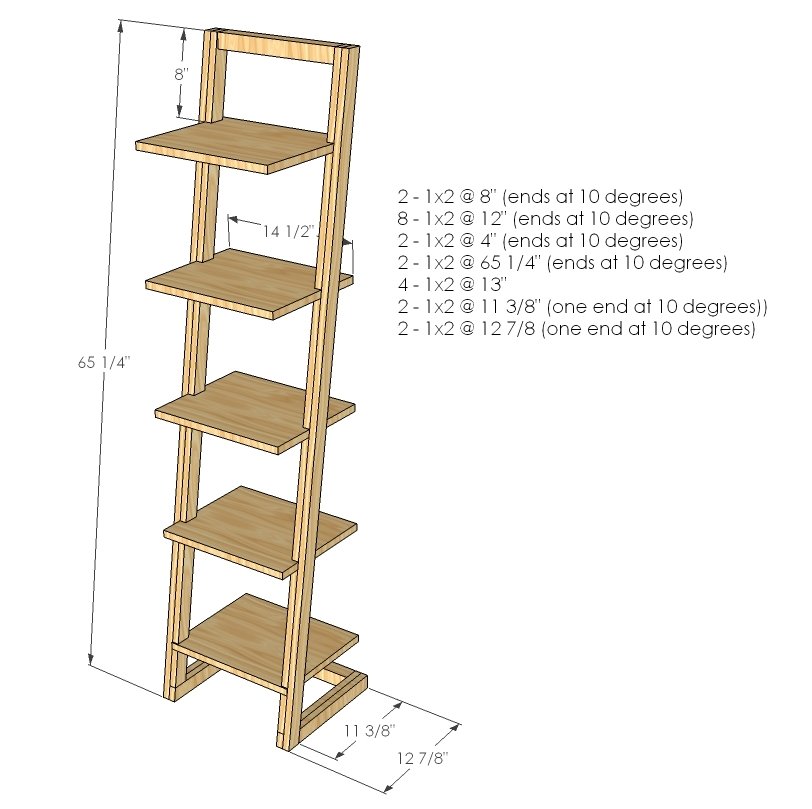
Use the size-specific shopping and cut lists below.
Shopping List
- 1 – 8′ 1×12 board
- 4 – 8′ 1×2 Boards
- 1 1/4″ Screws
- 2″ Screws
- Wood Glue
- Wood Filler
- Paint and Finishing Supplies
Cut List
- 2 – 1×2 @ 8″ (Tops inside supports, both ends at 10 degrees parallel)
- 8 – 1×2 @ 12″ (Shelf Supports, both ends at 10 degrees parallel)
- 2 – 1×2 @ 4″ (Bottom inside supports, both ends at 10 degrees, parallel)
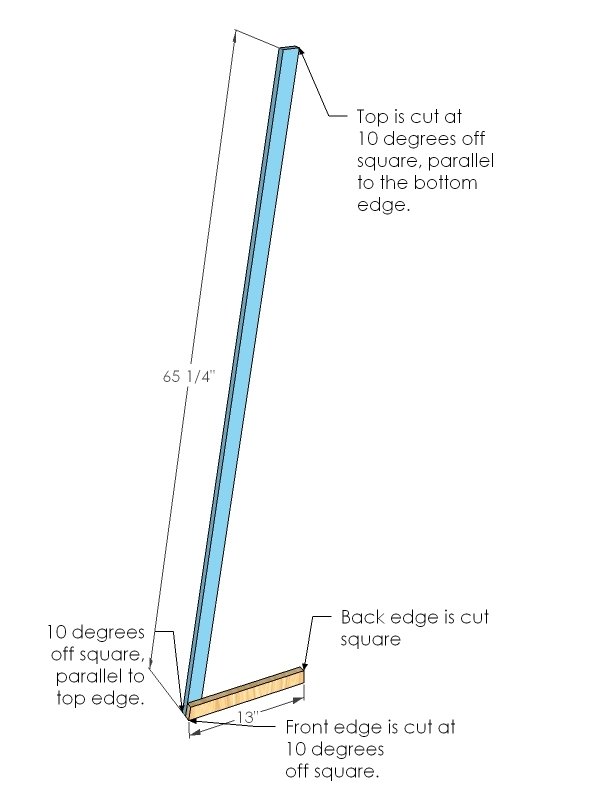
- 2 – 1×2 @ 65 1/4″ (Sides, both ends at 10 degrees parallel to each other)
- 4 – 1×2 @ 13″ (or 2 2x2s @ 13″ – Top and Bottom)
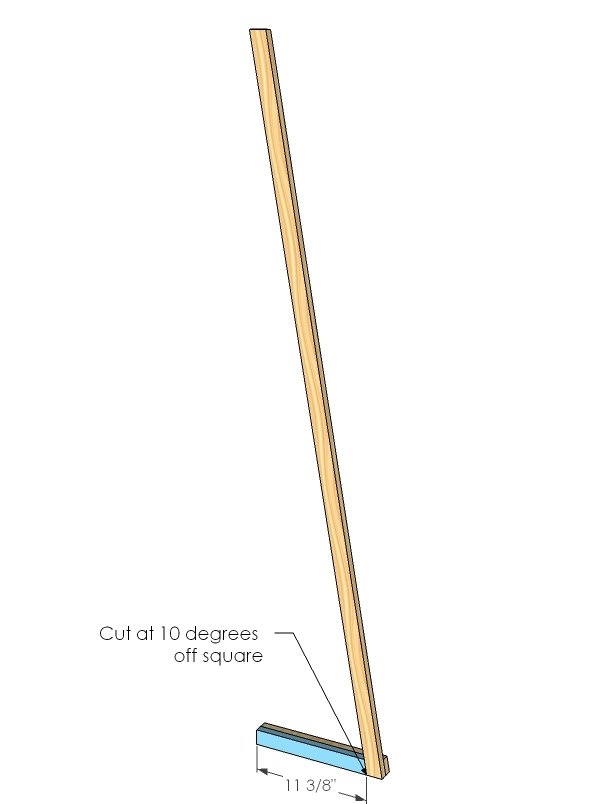
- 2 – 1×2 @ 11 3/8″ (Inside bottom, one end at 10 degrees off square)
- 2 – 1×2 @ 12 7/8 (Outside bottom, one end at 10 degrees off square)
- 5 – 1×12 @ 14 1/2″ (Shelves)
Tools
- measuring tape
- square
- pencil
- safety glasses
- hearing protection
- drill
- compound miter saw
- sander
- level
- countersink drill bit
Step-by-step Instructions
Frame
Use glue and 1 1/4″ screws predrilled from the inside into the leg. Build two of these, but be careful – the sides will be mirror images of each other NOT exact copies.
Step 2: Base Support
Now add the base supports to the outsides, as shown in the diagram. Use 1 1/4″ screws and glue. I also added 2″ screws from the front of the legs into the front edge of the base supports for extra support.
Shelf Supports
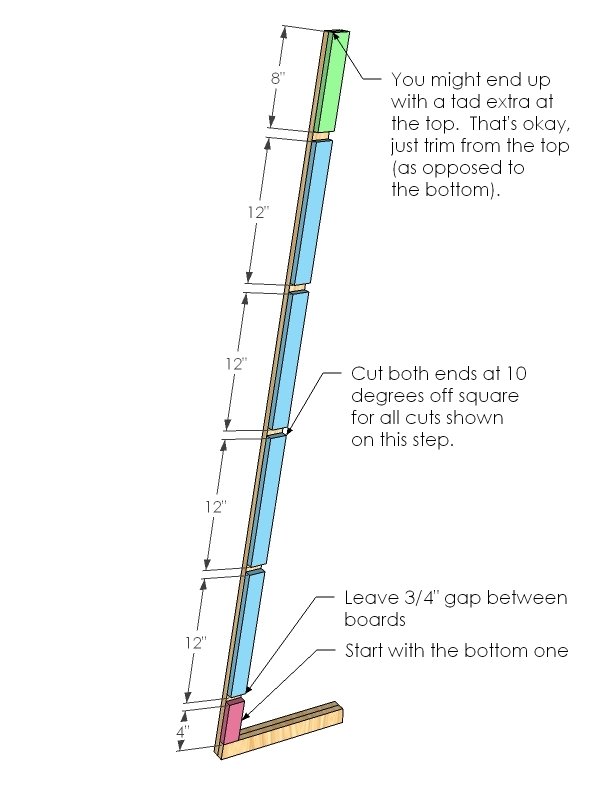
Now add the shelf supports, starting at the bottom and working your way up. If you start at the bottom, you can easily trim excess of the top (I had about 1/4″ excess at the top). Use the shelves (1x12s) as spacers to help you determine the distance between the shelf supports.
Top and Bottom
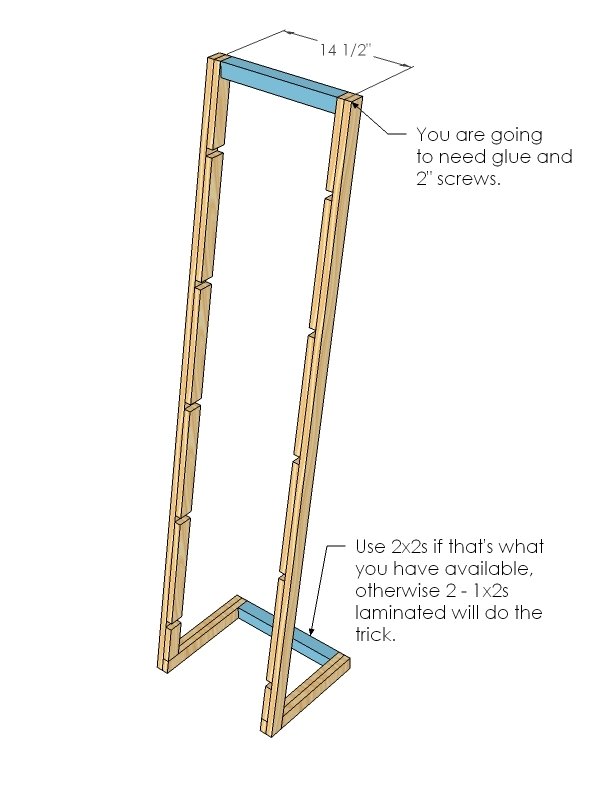
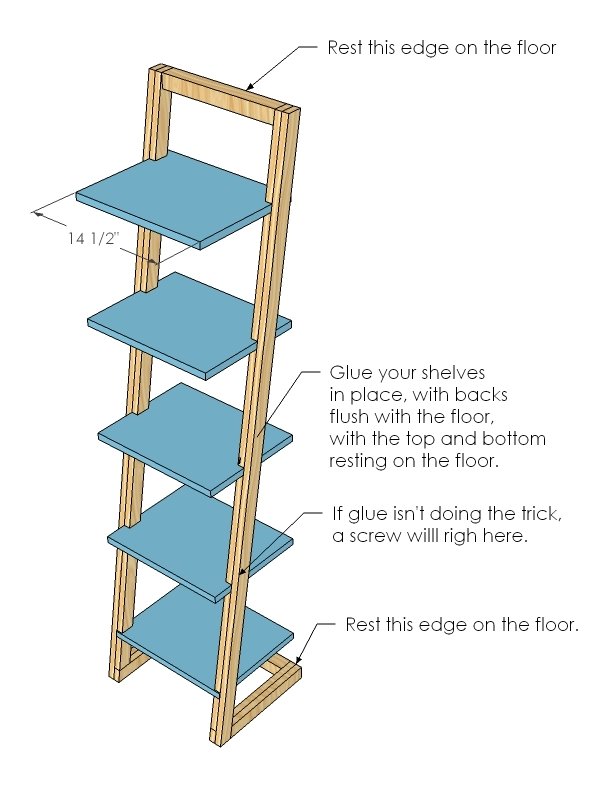
If you have a 2×2, it’ll save you some work. Otherwise, glue and screw with 1 1/4″ screws 1x2s together to make the top and bottoms. Then attach the shelf sides to the top and bottom.
Step 5
Finishing
Sand all surfaces, starting with a medium grit and finishing with fine. Wipe off the dust, fill any holes or gaps with wood filler, and sand smooth once dry. Apply primer if you're painting, then finish with your choice of paint or stain and seal with a durable clear topcoat. For outdoor projects, use exterior-rated primer, paint or stain, and sealer so the piece stands up to the weather.
Source (temporary): https://www.ana-white.com/woodworking-projects/modern-freestanding-angle-shelf