Modern Industrial Bookshelf on Wheels
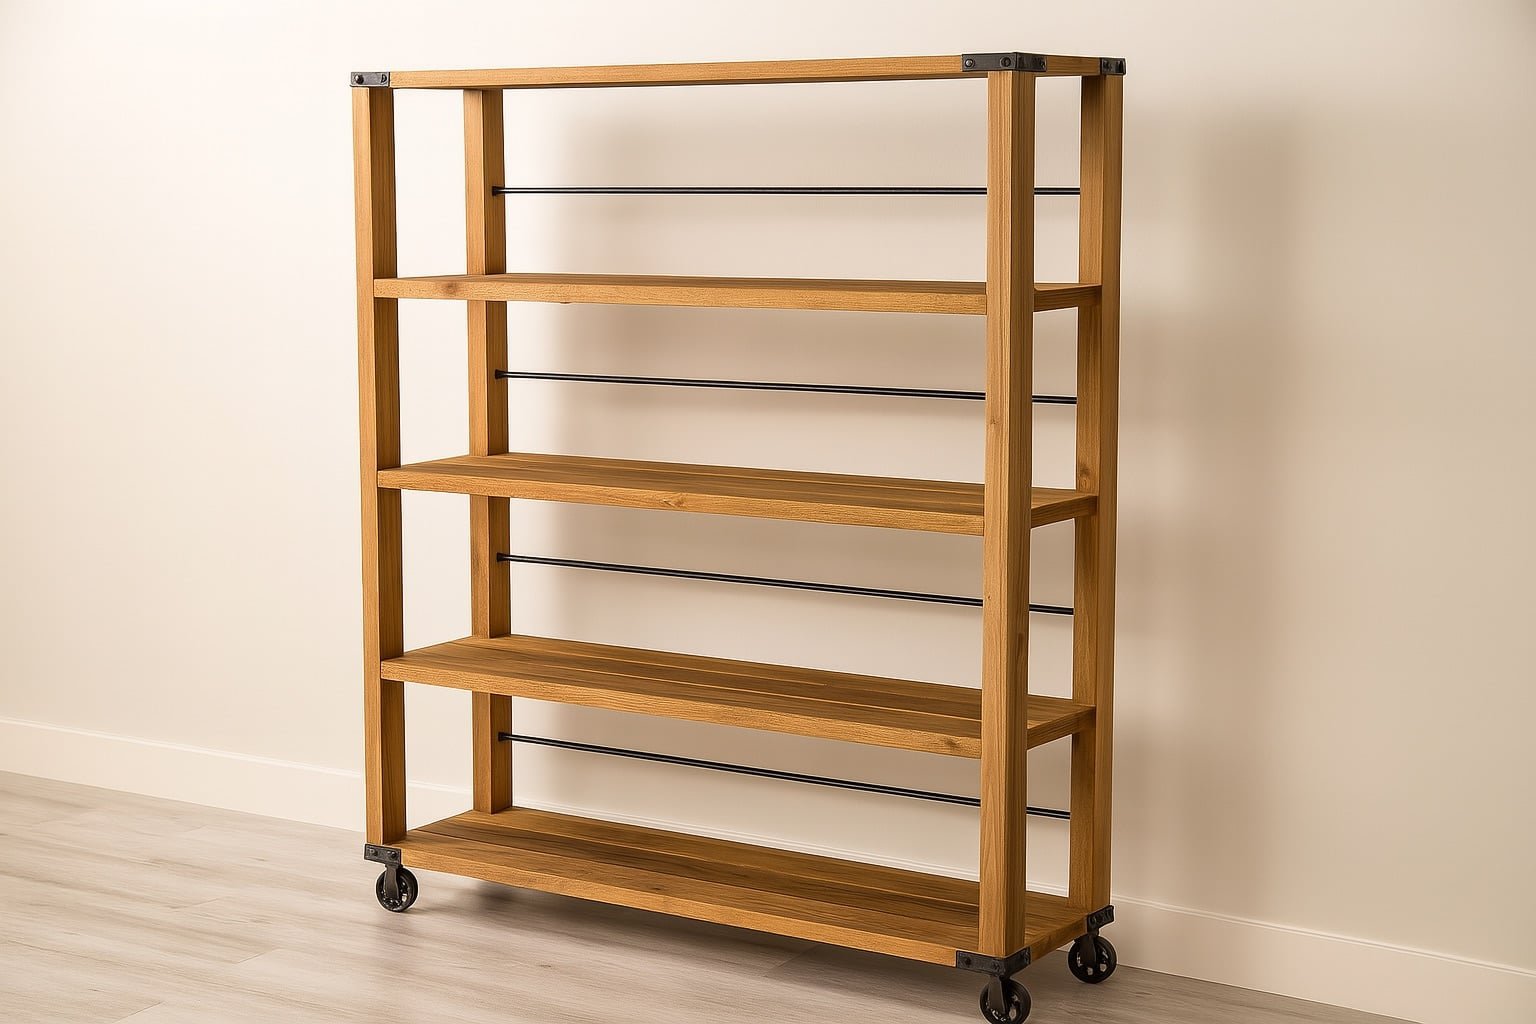
Roll these modern industrial shelves into your dining room or living room for a little extra storage with a lot of style. Features industrial hardware, rustic design, and five large shelves. feature shopping list, cut list, detailed diagrams and reader submitted photos. This is a great bookshelf to use for display, for retail centers or pop up shops. It is solid wood (no plywood) so takes stains and paints well and consistent. Add the hardware detailing to make it even more special.
Specifications
| Project type | Bookshelf and Bookcase Plans |
|---|---|
| Room | Craftroom |
| Style | Farmhouse Furniture |
| Difficulty | Intermediate |
| Estimated cost | $50 - $100 |
Dimensions
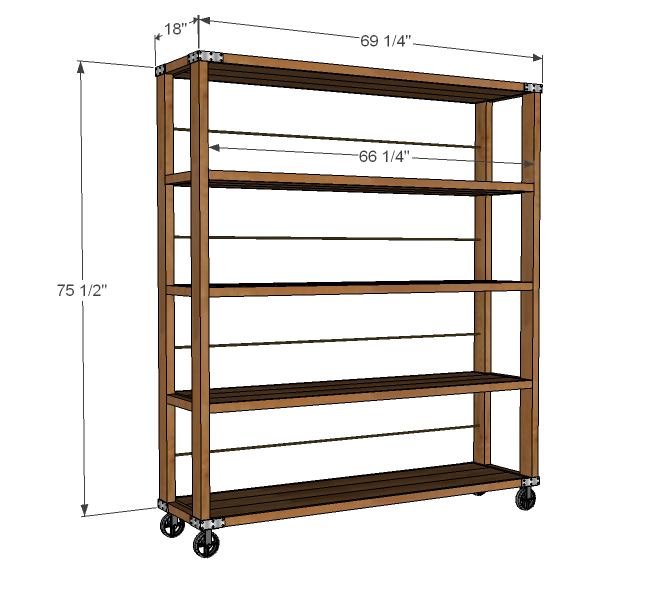
Use the size-specific shopping and cut lists below.
Shopping List
- 15 – 1×6 Pine Boards, 6 foot length
- 4 – 2 x 4 Pine Boards, 8 foot length
- 10 – 1×2 Pine Boards, 6 foot length (again, I’m not sure they come in 6′, if they don’t, you will need to buy the 8 footers!)
- 2 – 1 x 2 Pine Boards, 8 foot length
- 2 – 2 x 2 Pine 8 foot boards
- OPTIONAL: dowel, metal rod or cabling Qty. 4 at 67.25″L
- OPTIONAL: 4 metal angle brackets
- 4 – 4″ to 6″ Caster Wheels (metal ones are best)
- 2″ Screws
- 2″ Finish Nails
- Wood Glue
- Finishing Supplies
Cut List
- 15 – 1×6 @ 64.75″ (Shelves)
- 10 – 1 x 2 @ 66.25″ (Shelves Front Trim)
- 10 – 1 x 2 @ 16.5″ (Shelves Side Trim)
- 10 – 2 x 2 @ 11″ (“Ladder” Sides)
- 4 – 2 x 4 @ 75.5″ (“Ladder” Legs)
- 4 – 67.25″ Dowel or Metal Rod
Tools
- measuring tape
- square
- pencil
- safety glasses
- hearing protection
- kreg-jig
- drill
- circular saw
- sander
- level
- countersink drill bit
Step-by-step Instructions
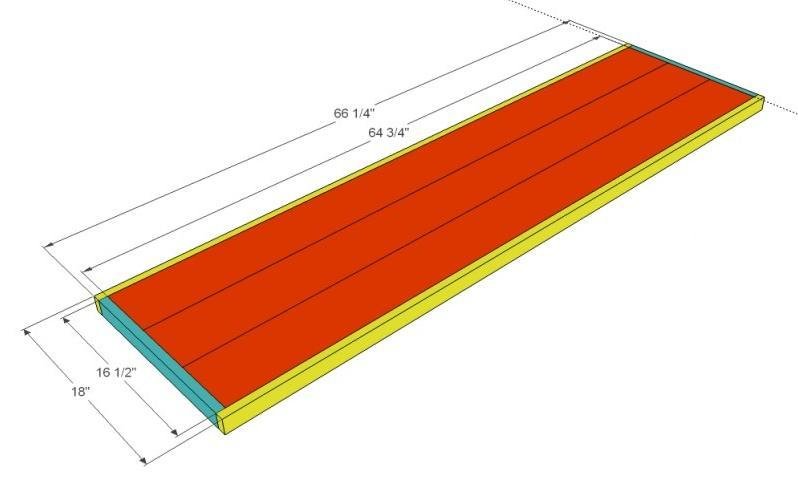
Start by building the FIVE shelves. Measure and cut the 1x2s for a perfect fit.
• Red = 1×6 @64.75″ Shelf board • Blue = 1×2 @16.5″ Shelves Side Trim board • Yellow = 1×2 @ 66.25 Shelves Front Trim board If you have a pocket hole system, attach your 1x6s together using pocket holes first. If not, then end 1×2 (blue) will keep everything together, but there will not be a joint between the 1x6s. An easy work around would be to use wood dowels or small metal brackets on the underside, or glue and clamp.
Step 2
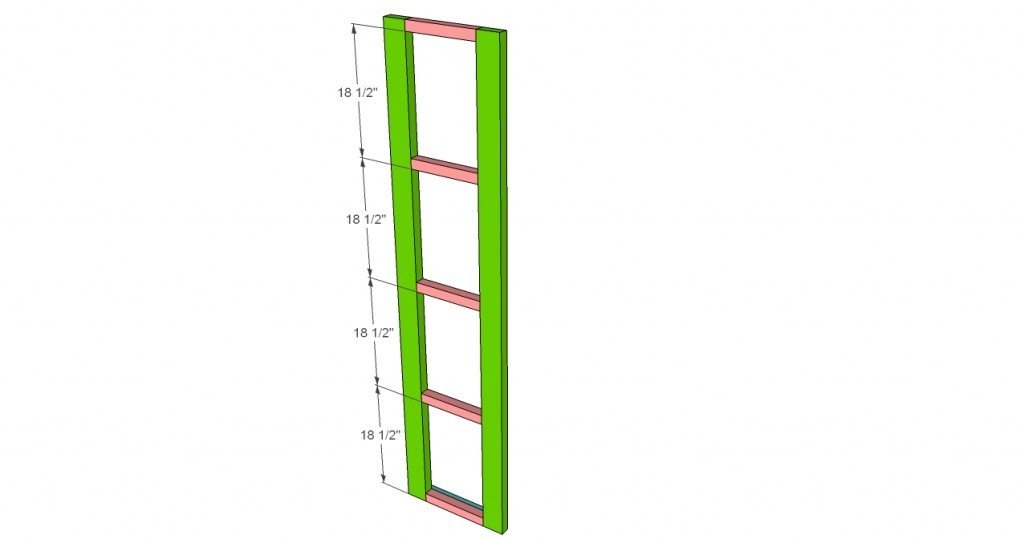
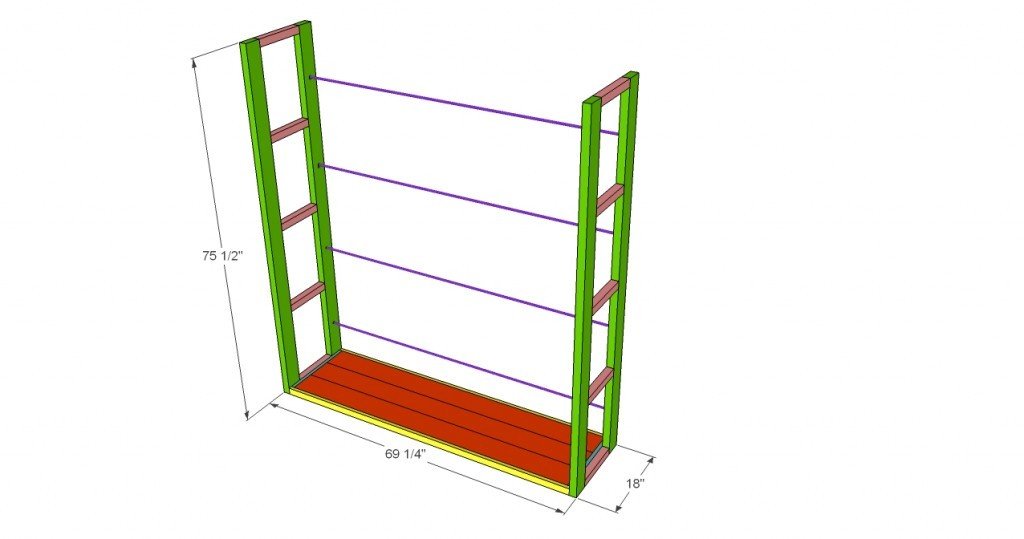
Ends If you have a pocket hole system, attach the 2×2 end trim to the legs. These boards are optional and are not necessary for the structure of the shelf. If you like the looks of the end trim, you can simply add it after you add the shelves. • Green = 2×4 @ 75.5″ “Ladder” legs • Pink = 2×2 @11″ “Ladder” sides
Step 3
Decorative Rods If you choose to use the decorative rods, mark the back legs as shown in the diagram above. Predrill holes with a bit that matches the diameter of your rods (ANA NOTE: I’ve been on enough concrete pours to know exactly what I would use here – Rebar is cheap, easy to cut, and has the rustic, industrial look. Ask for it in the concrete section of your home improvement store) Cut your rods to fit.

Step 4
Assembly Attach the bottom shelve to the side ladders (or legs), as well as gluing all of your dowels into place as you attach the bottom shelve. Continue attaching the shelves with 17″ of space between each one.
Finishing
Sand all surfaces, starting with a medium grit and finishing with fine. Wipe off the dust, fill any holes or gaps with wood filler, and sand smooth once dry. Apply primer if you're painting, then finish with your choice of paint or stain and seal with a durable clear topcoat. For outdoor projects, use exterior-rated primer, paint or stain, and sealer so the piece stands up to the weather.
Source (temporary): https://www.ana-white.com/woodworking-projects/modern-industrial-bookshelf-wheels-free-plans