Modern Kid's Picnic Table and Benches
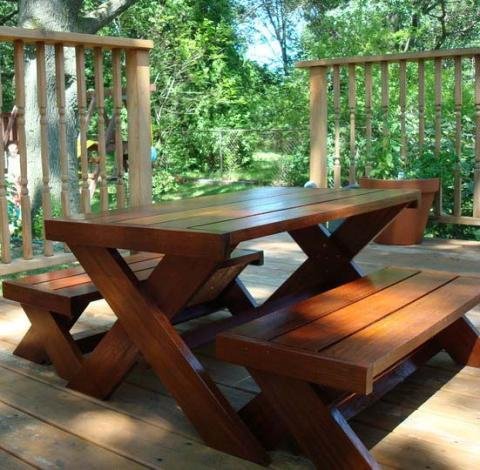
A modern take on the classic picnic table, in a mini size. with diagrams and lots of reader submitted photos from
Specifications
| Project type | Kids Tables and Chairs |
|---|---|
| Room | Kids and Toys |
| Style | Modern Style Furniture Plans |
| Difficulty | Intermediate |
| Estimated cost | Under $20 |
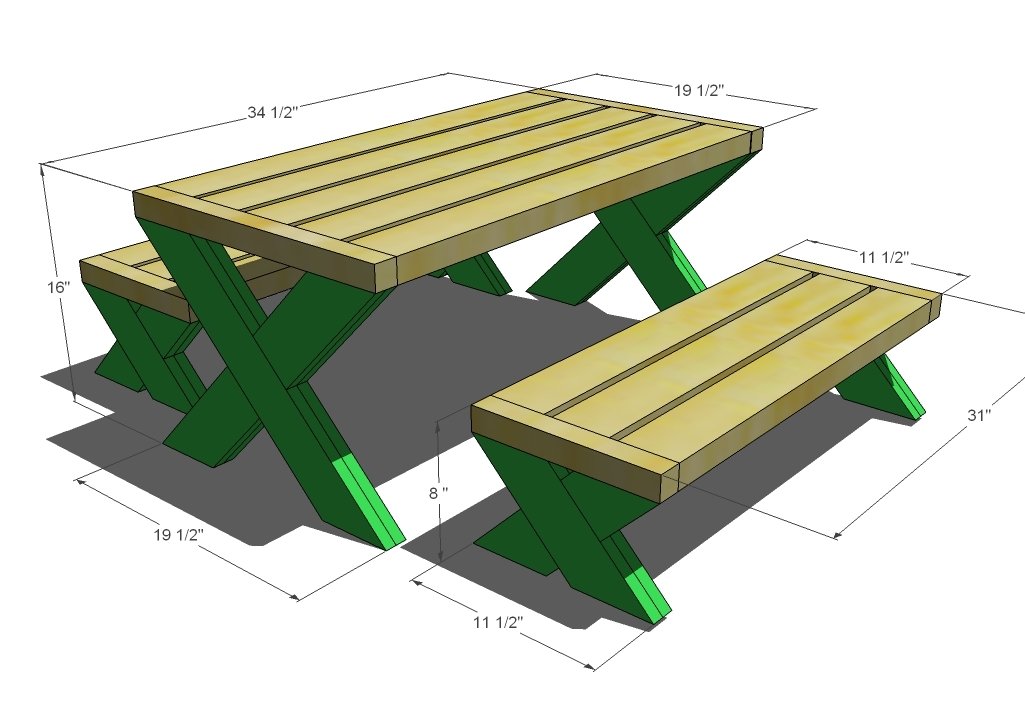
Dimensions
Use the size-specific shopping and cut lists below.
Shopping List
- 4 – 2×4 - 8 feet long
- 1 – 2×2 - 8 feet long
- 3 – 1×4 - 8 feet long
- 1 1/4″ Screws
- 2 1/2″ Screws
- Wood Glue
- Wood Filler
Cut List
Table
- 4 – 1×4 @ 21 1/2″ (DO NOT CUT until reviewing step 1, ends are mitered at 45 degrees)
- 8 – 1×4 @ 10 1/4″ (Cut to measurement, ends mitered down 45 degrees)
- 2 – 2×2 @ 19 1/2″ (Ends of Tabletop)
- 5 – 2×4 @ 31 1/2″ (Tabletop Boards)
Cut List for TWO Benches
- 8 – 1×4 @ 9 1/4″ (Both ends mitered at 45 degrees, review step 4 before cutting)
- 16 – 1×4 @ 4 5/8″ (CUT TO MEASUREMENT One end mitered back at 45 degrees)
- 4 – 2×2 @ 11 1/2″ (Ends of Tabletop)
- 6 – 2×4 @ 28″ (Seat Boards)
Tools
- measuring tape
- square
- pencil
- safety glasses
- drill
- compound miter saw
- sander
- level
Step-by-step Instructions
Step 1
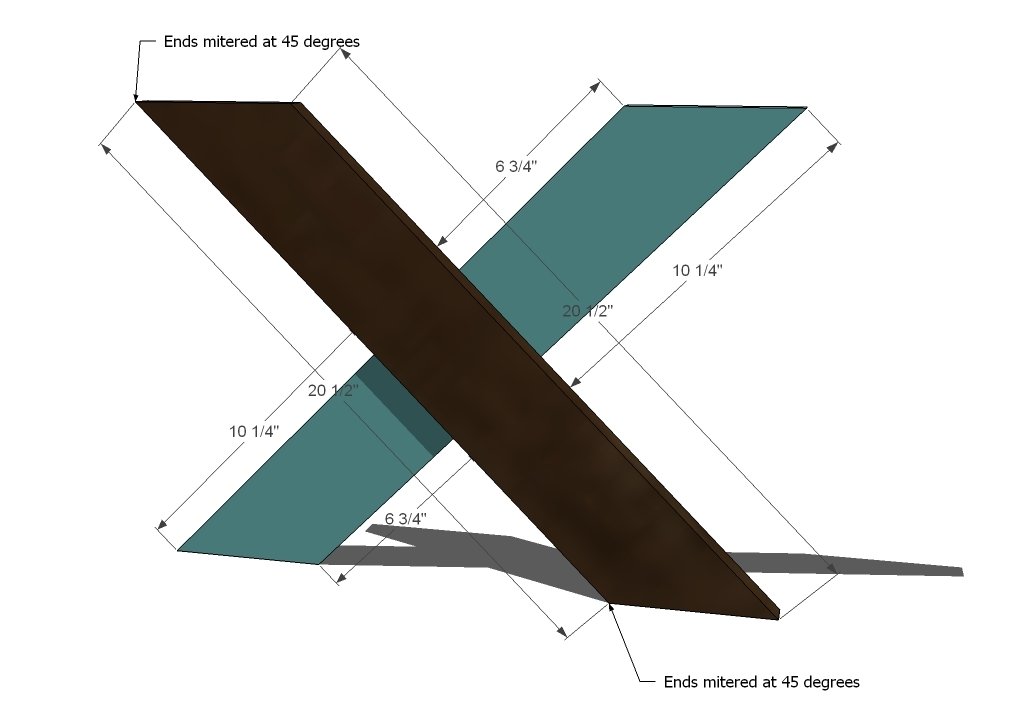
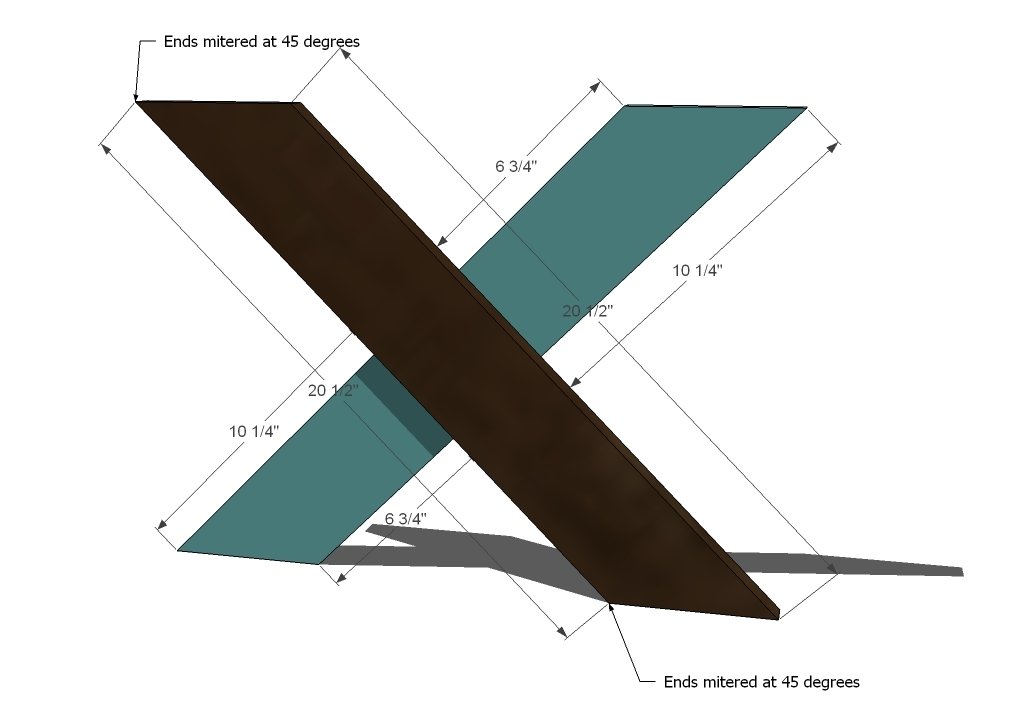
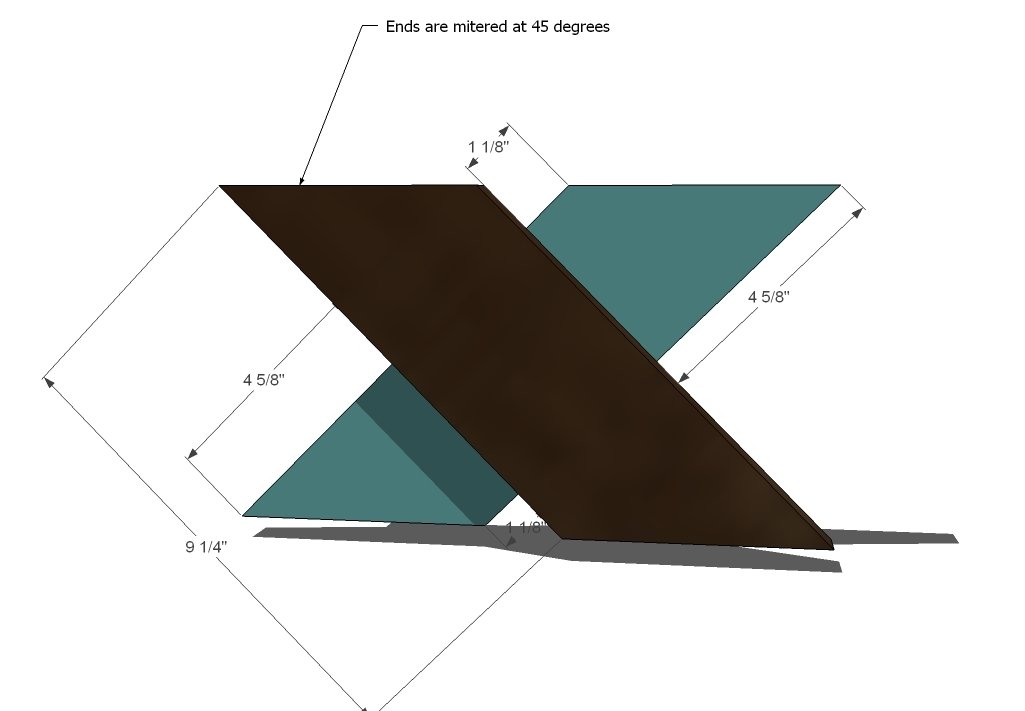
Legs. Cut your legs so that the ends are mitered at 45 degrees, and the short point to long point measurements are 20 1/2″ as shown above. Then mark all four of the legs as shown on the blue leg above. Use the marks to guide you as you fasten with glue and 1 1/4″ screws the two legs together. To hide your screw holes, fasten from the insides of the legs.
Step 2
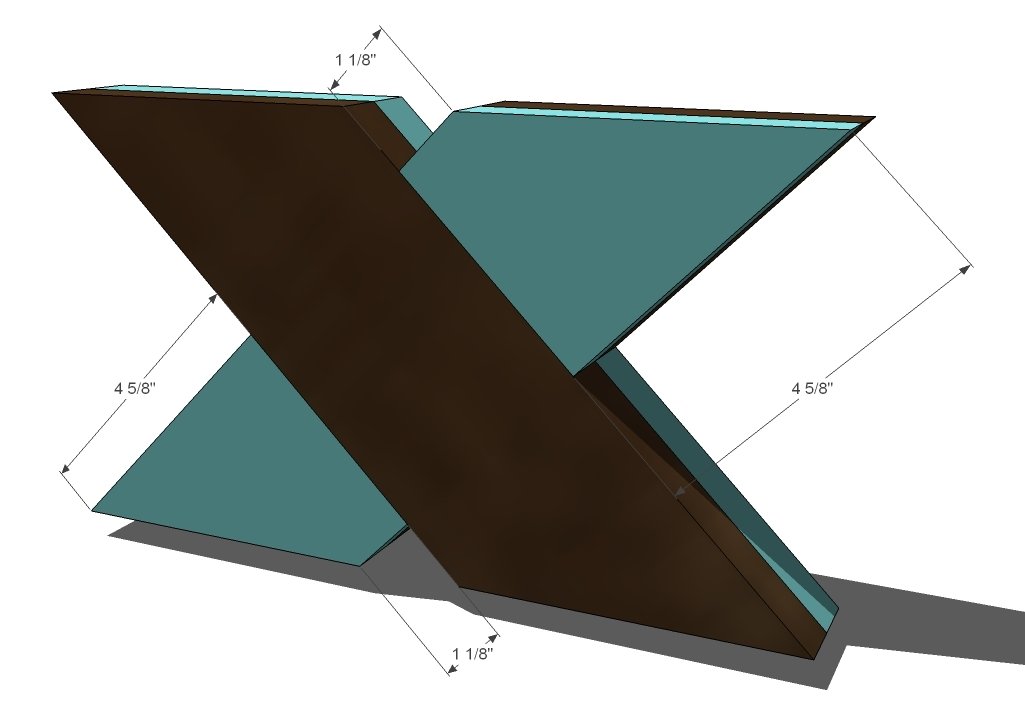
Fill in the Legs. Measure and cut the remaining leg pieces, shown in blue above, to fit the missing pieces on the legs. Use glue and 1 1/4″ screws to fasten together. Hide your screw holes on the inside.
Step 3
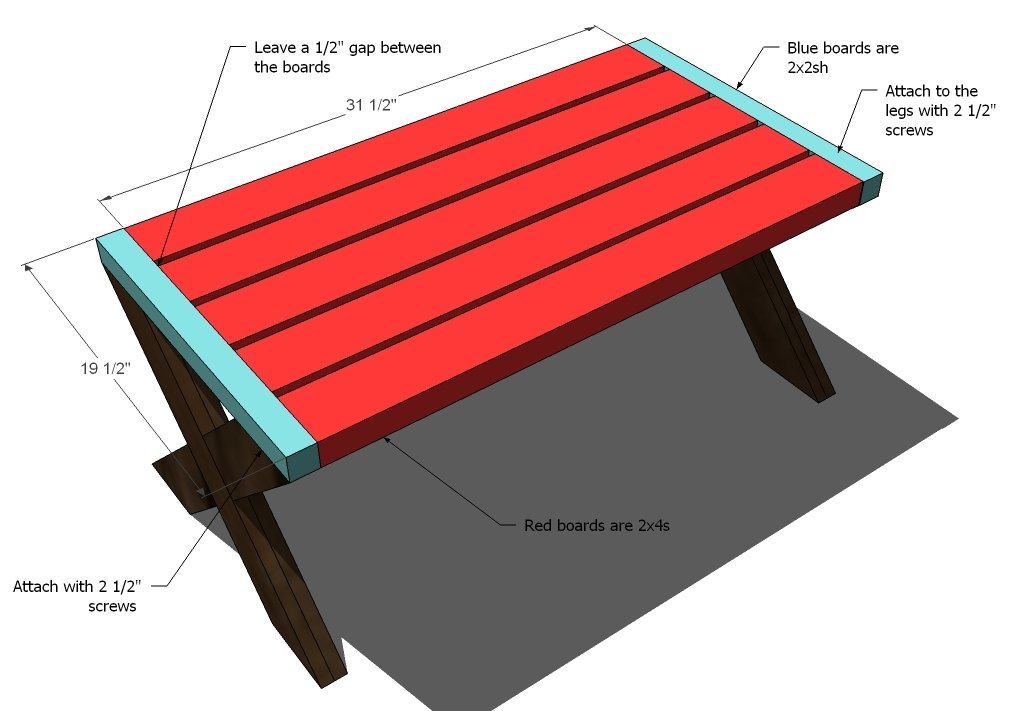
Top. Begin by fastening with glue and 2 1/2″ screws the ends (shown in blue above) to the tabletop boards. Leave a 1/2″ gap between the boards. Then attach the ends to the legs using 2 1/2″ screws. You will notice in this table’s design there is good water drainage and no pockets for water to remain and cause damage.
Step 4
Bench Legs. Build your bench legs as you built your table legs in step 1. Use 1 1/4″ screws and glue on this step.
Step 5
Step 6
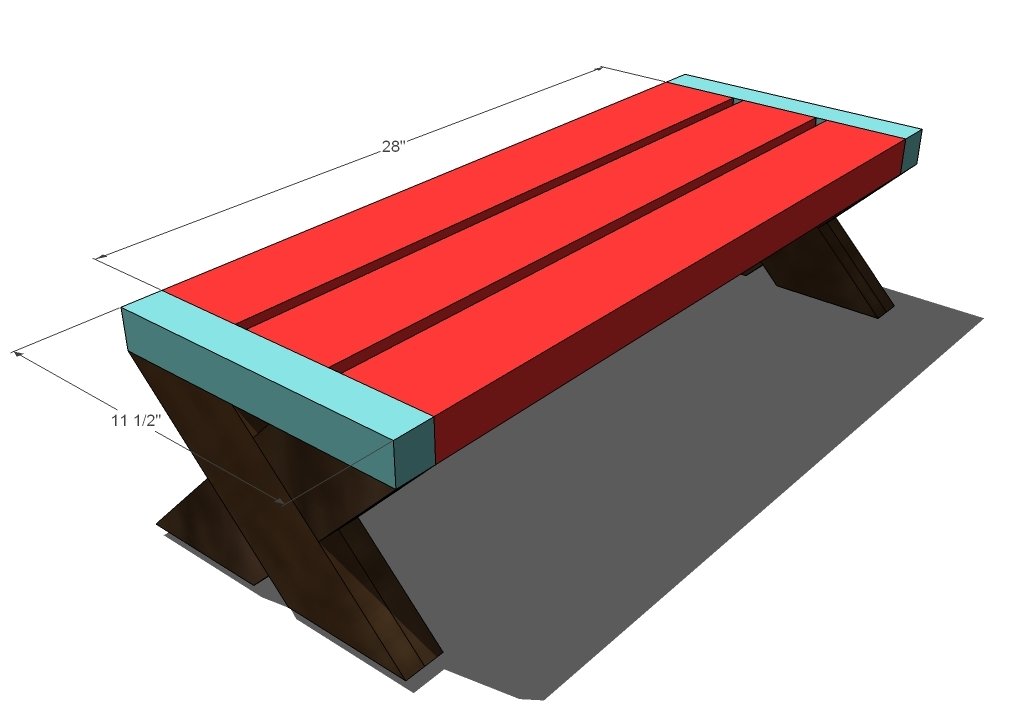
Bench Seats. As you built the tabletop, do the same for the bench seats.
Finishing
Sand all surfaces, starting with a medium grit and finishing with fine. Wipe off the dust, fill any holes or gaps with wood filler, and sand smooth once dry. Apply primer if you're painting, then finish with your choice of paint or stain and seal with a durable clear topcoat. For outdoor projects, use exterior-rated primer, paint or stain, and sealer so the piece stands up to the weather.
Source (temporary): https://www.ana-white.com/woodworking-projects/modern-kids-picnic-table-and-benches