The Modern Minimal Picnic Table
Build your own stylish and sturdy picnic table with this completely! Featuring clean lines and a sleek, minimalist design, this table fits beautifully in any outdoor space. Our step-by-step instructions include easy-to-follow diagrams, a full shopping list, and a precise cut list to help you build with confidence. No guesswork—just grab your tools and get started!
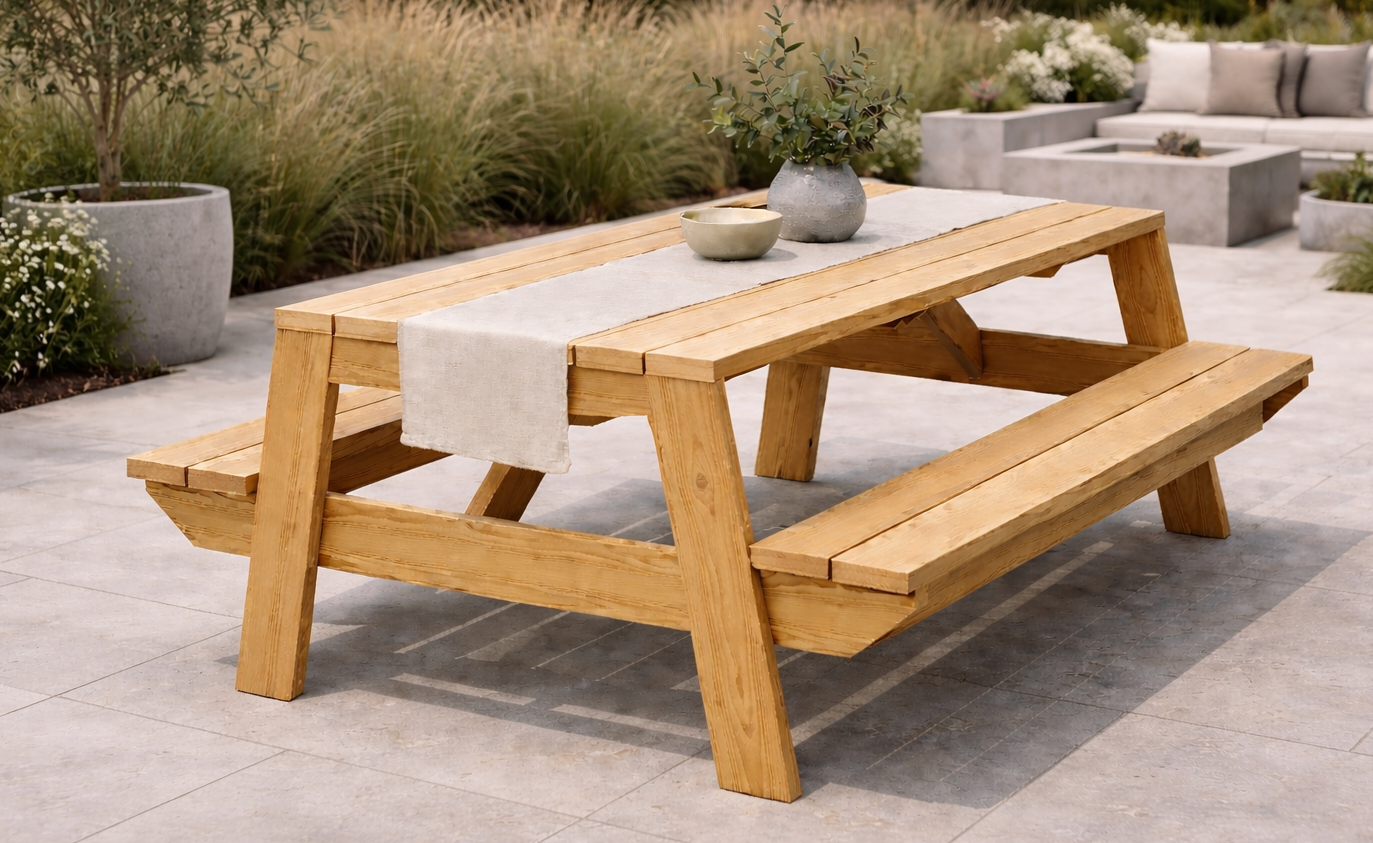
Specifications
| Project type | Outdoor Seating, Lounging and Accents |
|---|---|
| Room | Outdoor |
| Difficulty | Intermediate |
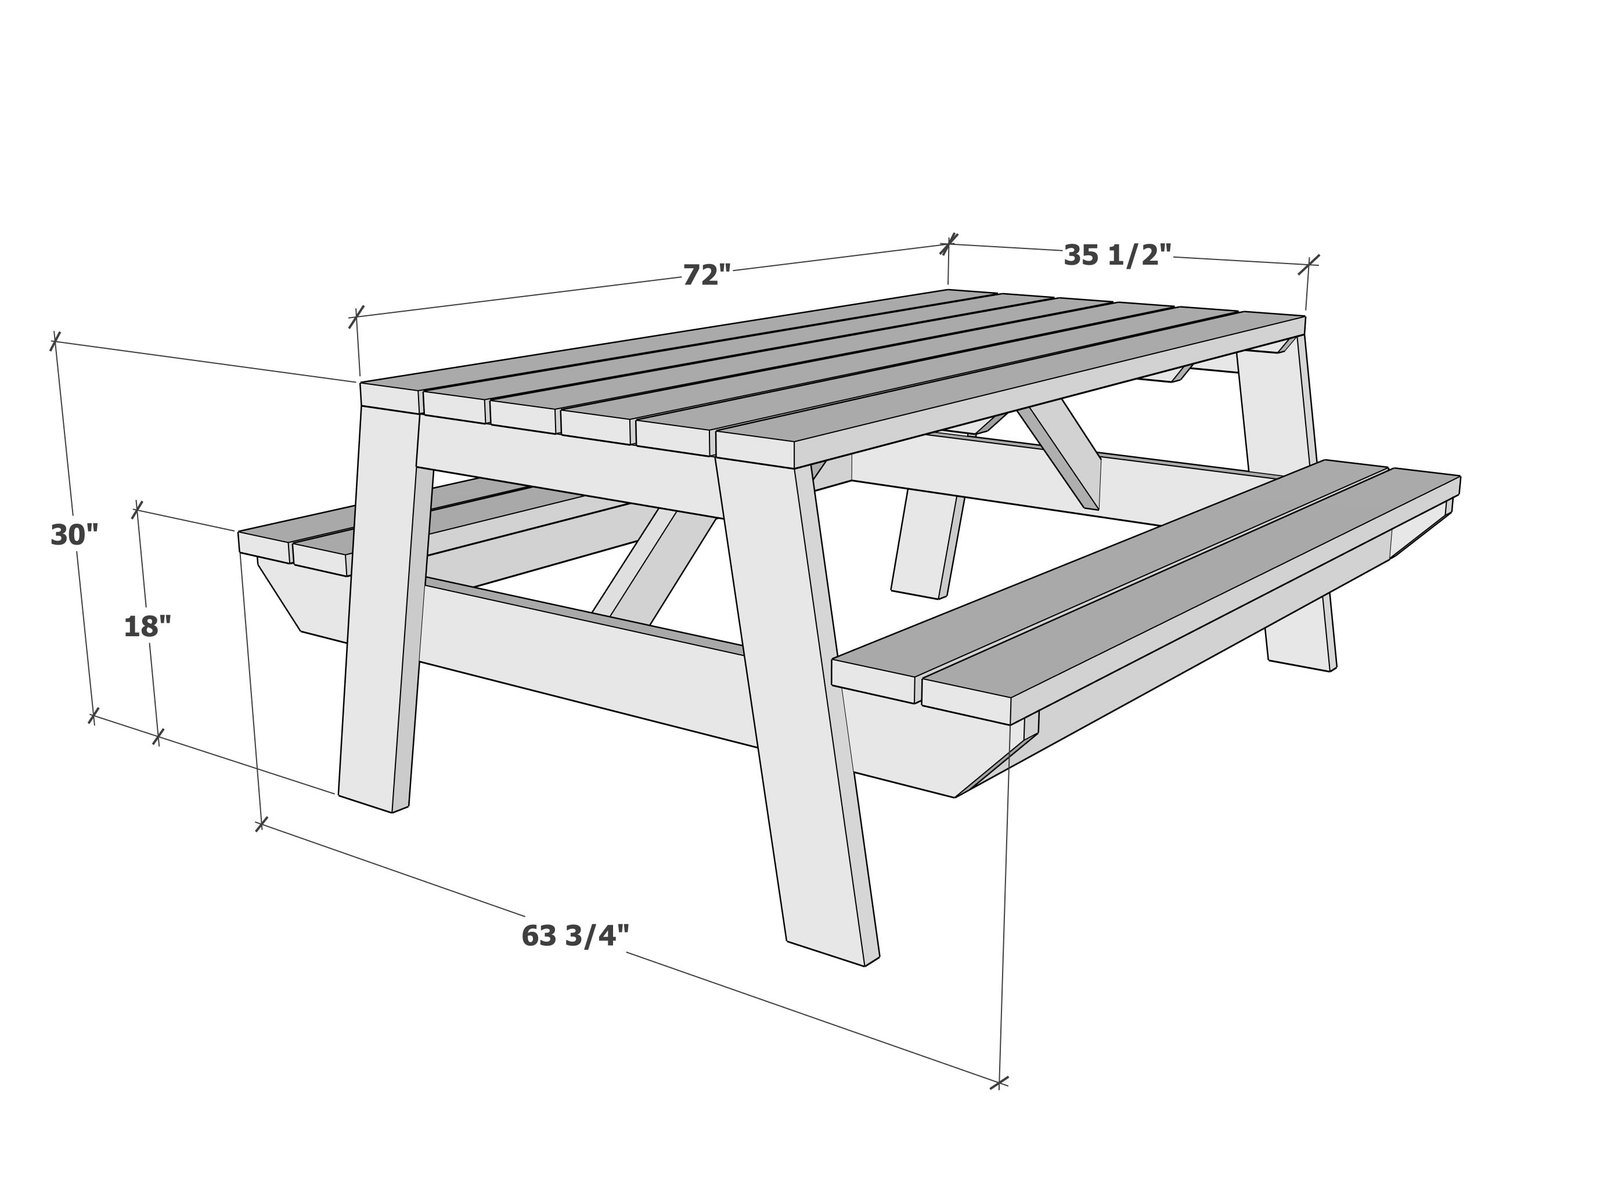
Dimensions
Use the size-specific shopping and cut lists below.
Shopping List
- 8 - 2x6x12 ft
- 1 - 2x4x10 ft
- 2 - 2x2x8 ft
- About 100 2-1/2" self tapping exterior screws
- 8 - 2-1/2" exterior pocket hole screws
2x6 boards can be cut EXACTLY in half for transport
Cut List
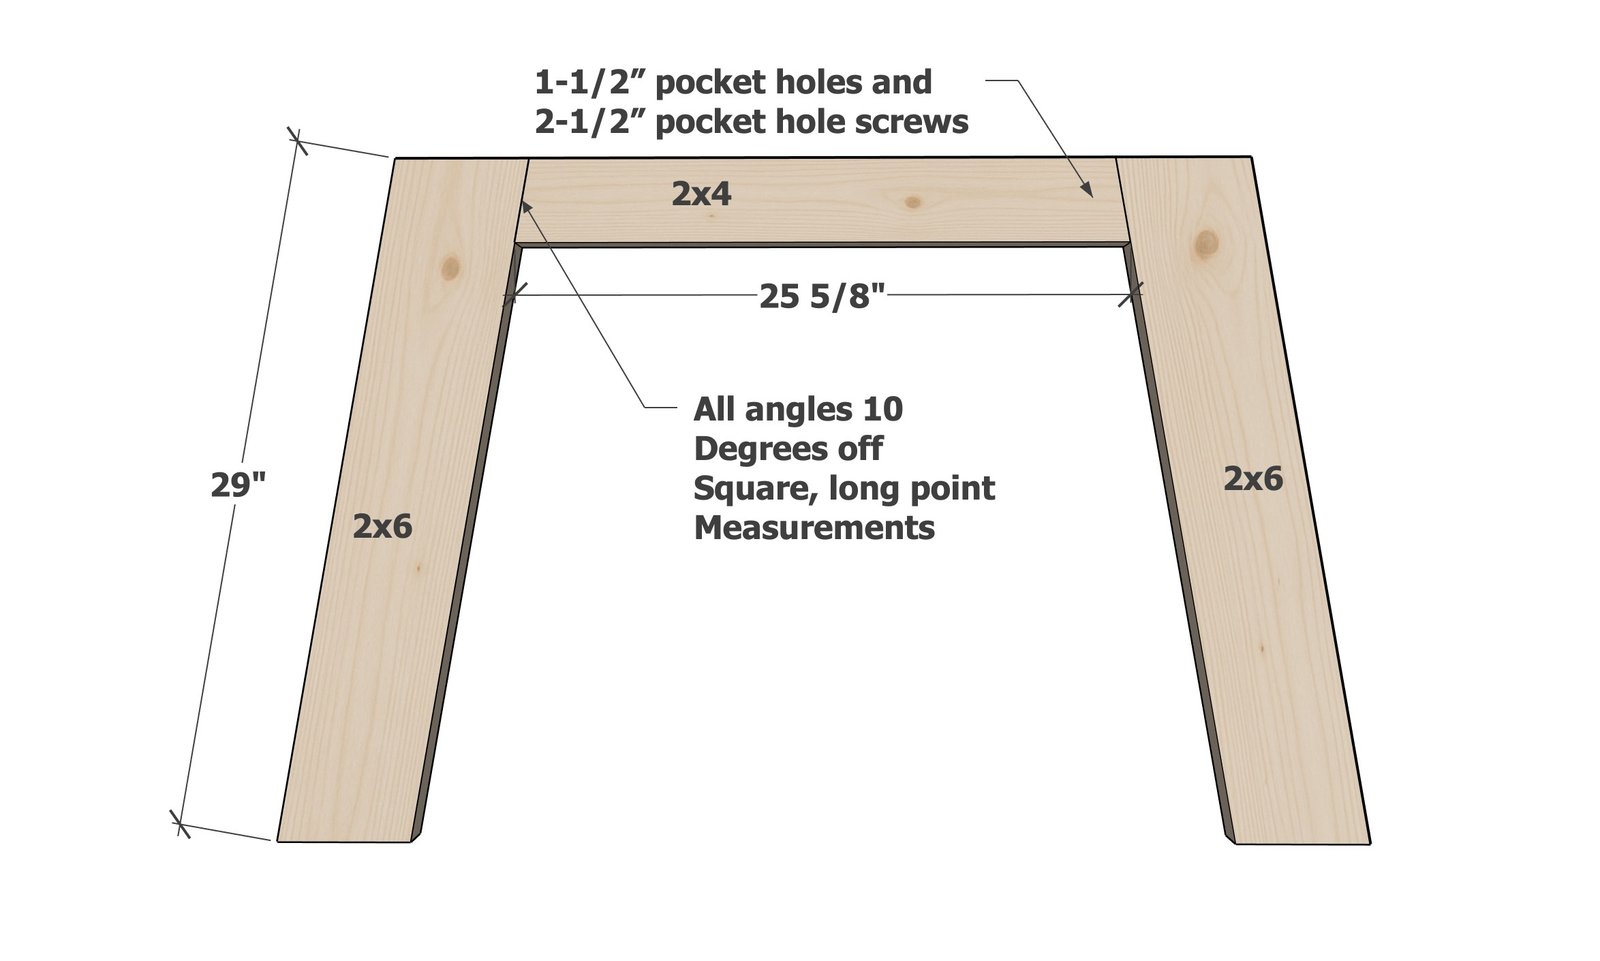
- 4 - 2x6 @ 29" - both ends cut at 10 degrees off square, long point to short point measurement, ends are parallel - legs
- 2 - 2x4 @ 25-5/8" - both ends cut at 10 degrees off square, long point to long point measurement, ends NOT parallel - end aprons
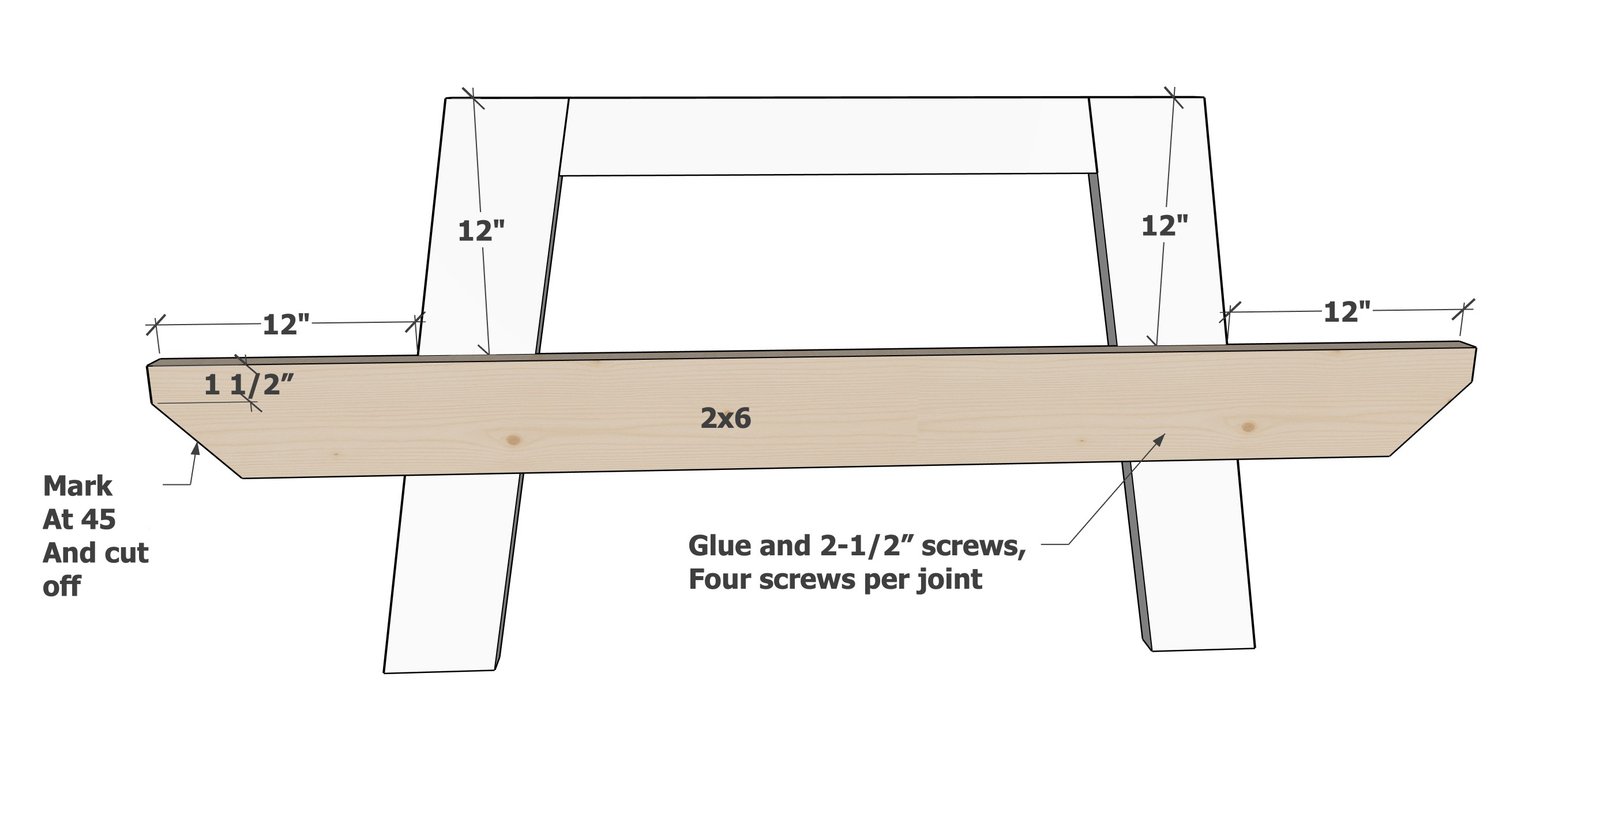
- 2 - 2x6 @ 63-3/4" - ends clipped at 45 degree dogear as shown in plans - seat supports
- 6 - 2x6 @ 71-7/8" - tabletop boards
- 4 - 2x2 @ 35-1/2" - both ends cut at 45 degrees off square, long point to long point measurement, ends NOT parallel - under tabletop cleats
- 2 - 2x4 @ 26-1/4" - both ends cut at 45 degrees off square, long point to long point measurement, ends NOT parallel, one end trimmed back as shown in plans - cross bracing
- 2 - 2x6 @ 65-7/8" - seat supports
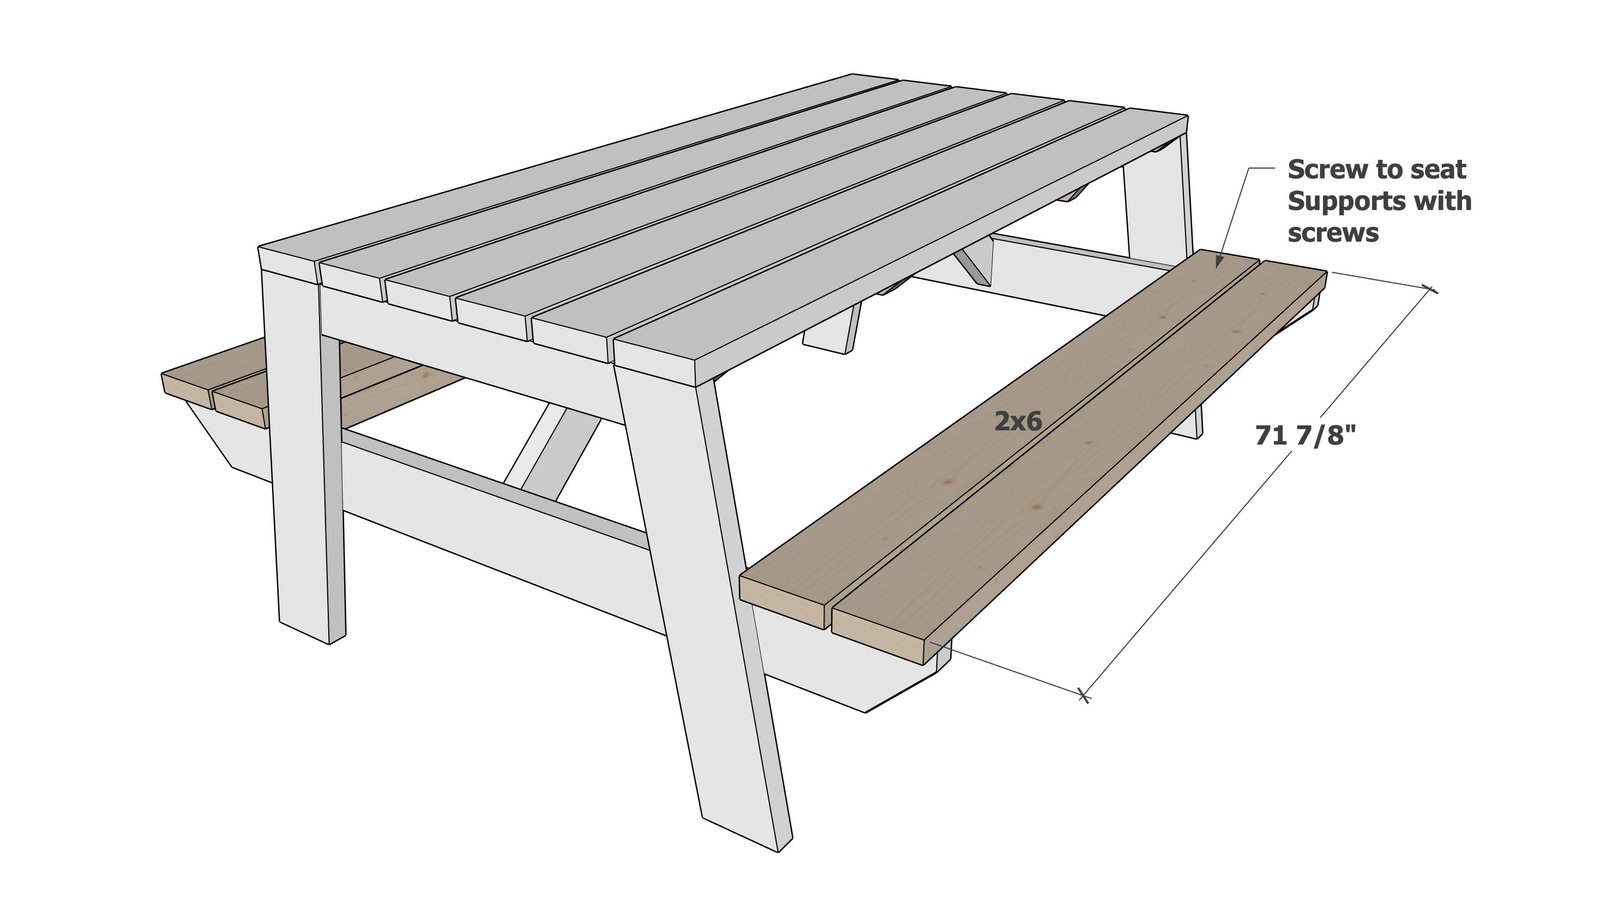
- 4 - 2x6 @ 71-7/8" - seat boards
Tools
- measuring tape
- square
- pencil
- safety glasses
- kreg-jig
- drill
- compound miter saw
- sander
Step-by-step Instructions
Step 1
Build two of the leg sets as shown, using two pocket holes drilled on each end with 2-1/2" pocket hole screws.
Step 2
Measure down from the top edge, and mark 12". Attach the seat support board with 2-1/2" screws and wood glue. Build two leg sets identical.
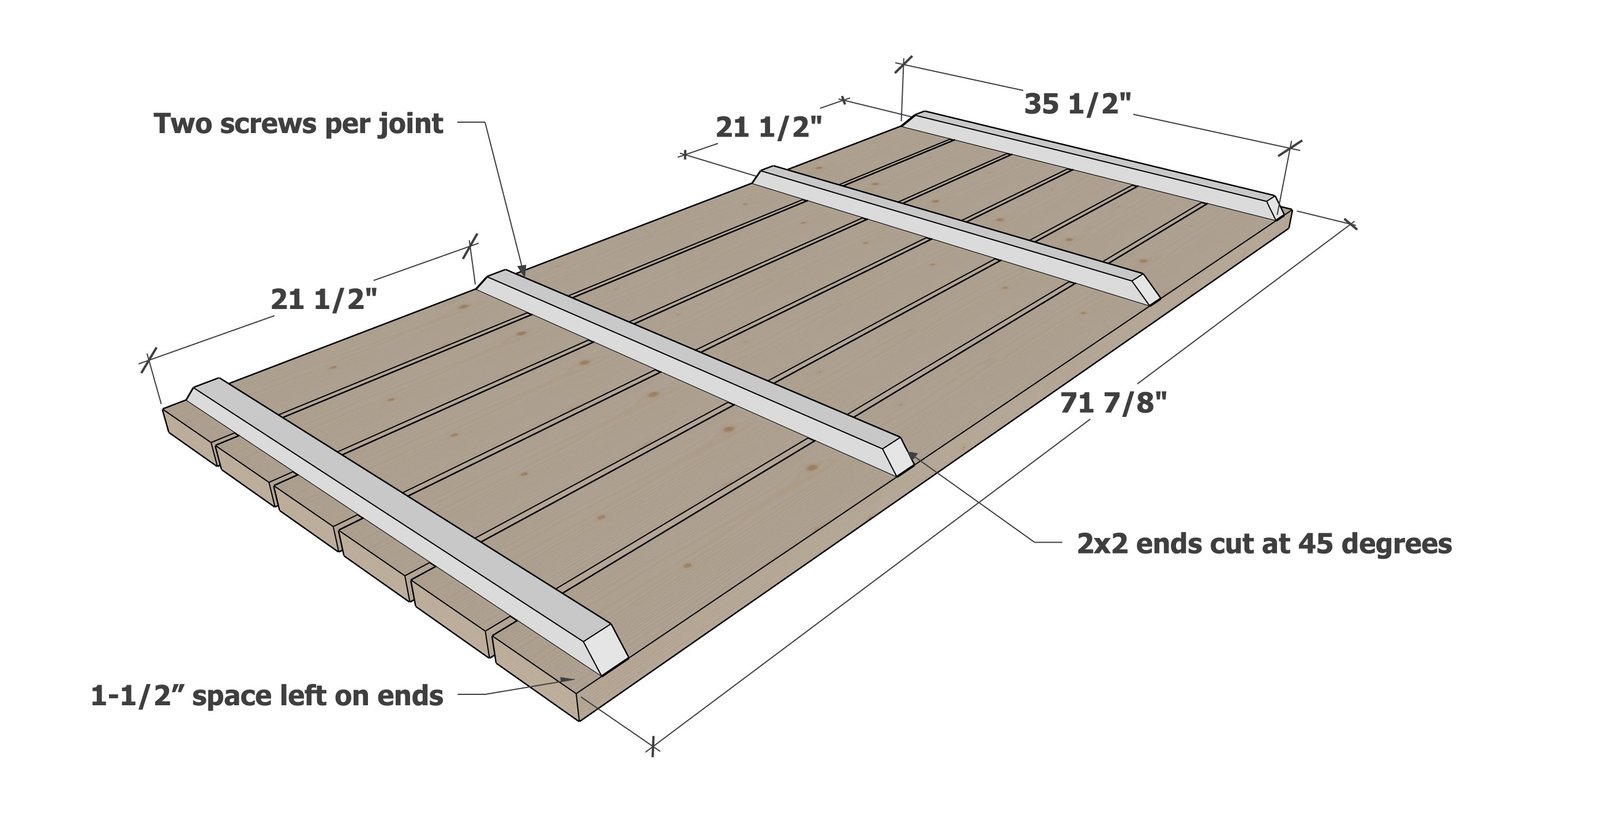
On a flat level surface, layout the tabletop boards square.
Then position the 2x2s as shown and attach with screws and glue. TIP: Attaching with brad nails first can keep everything in place.
Step 4
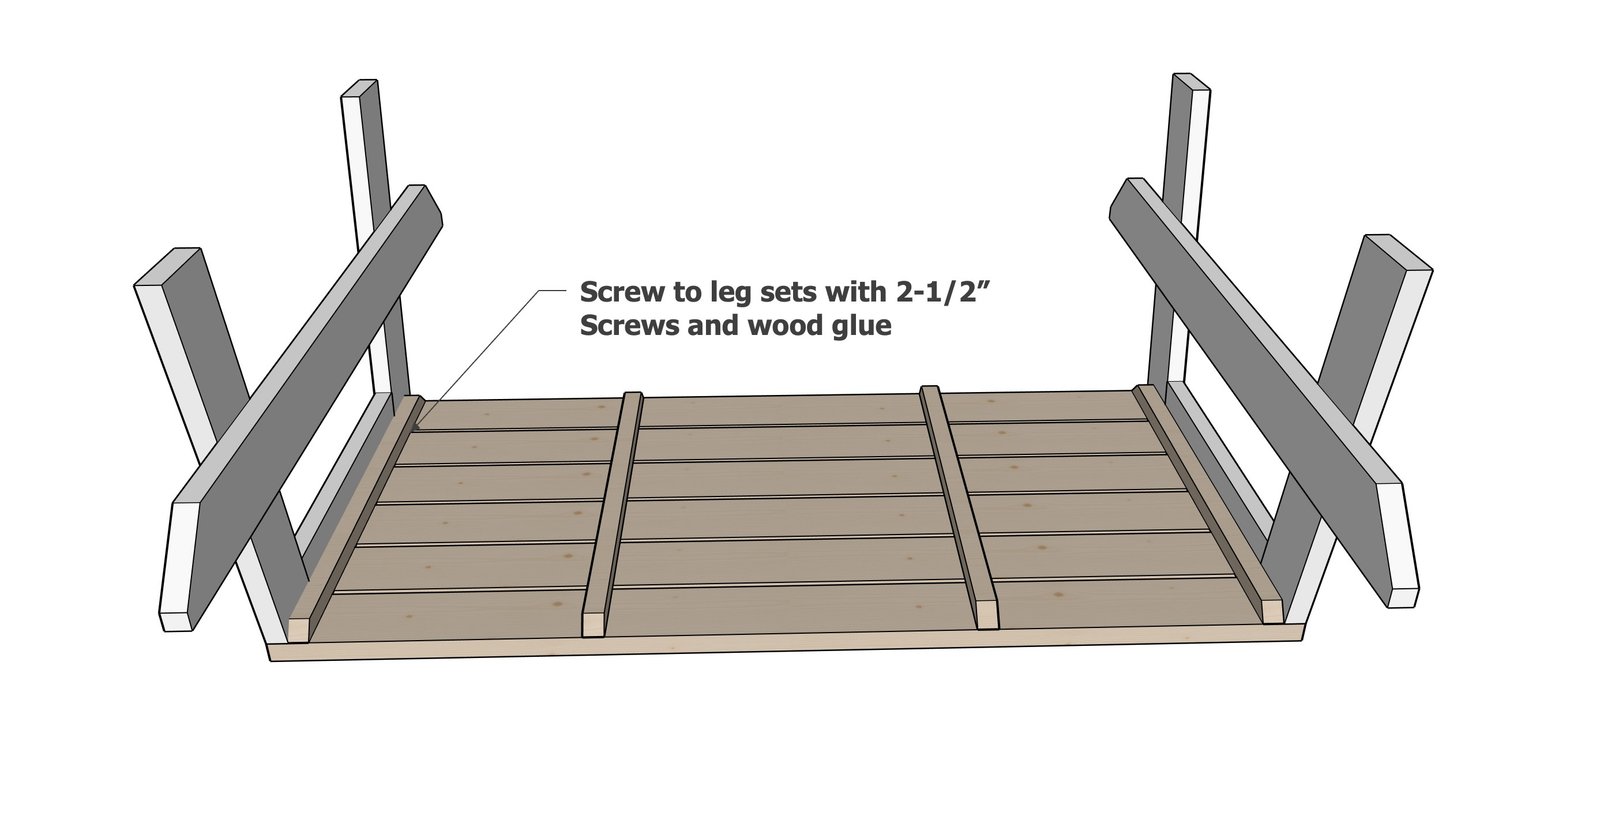
Attach the sides to the tabletop with screws. A couple screws from the top can help but will be visible in the finished product.
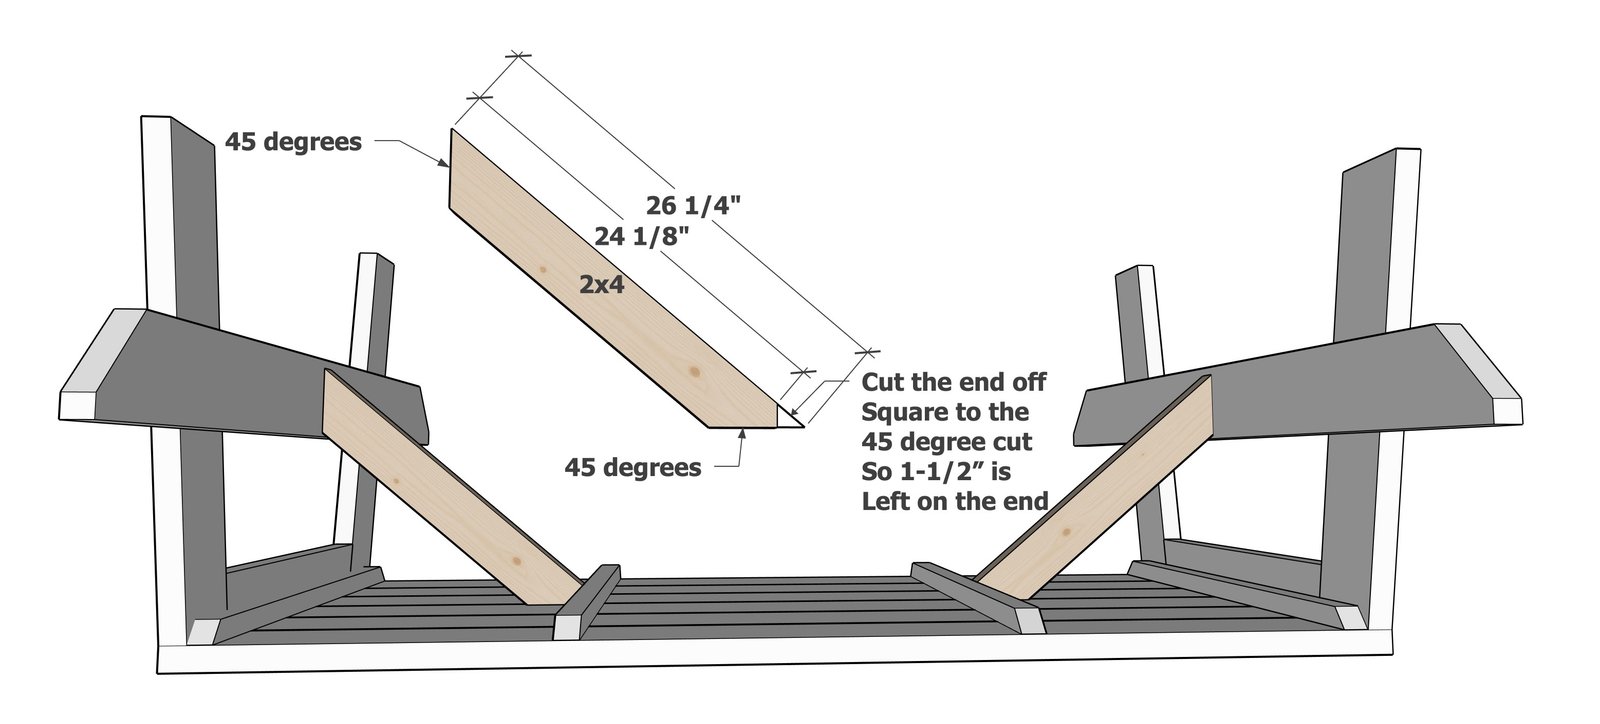
Cut the ends of the cross supports off so 1-1/2" is squared off on the end.
Attach to the tabletop and legs with screws and glue.
Step 6
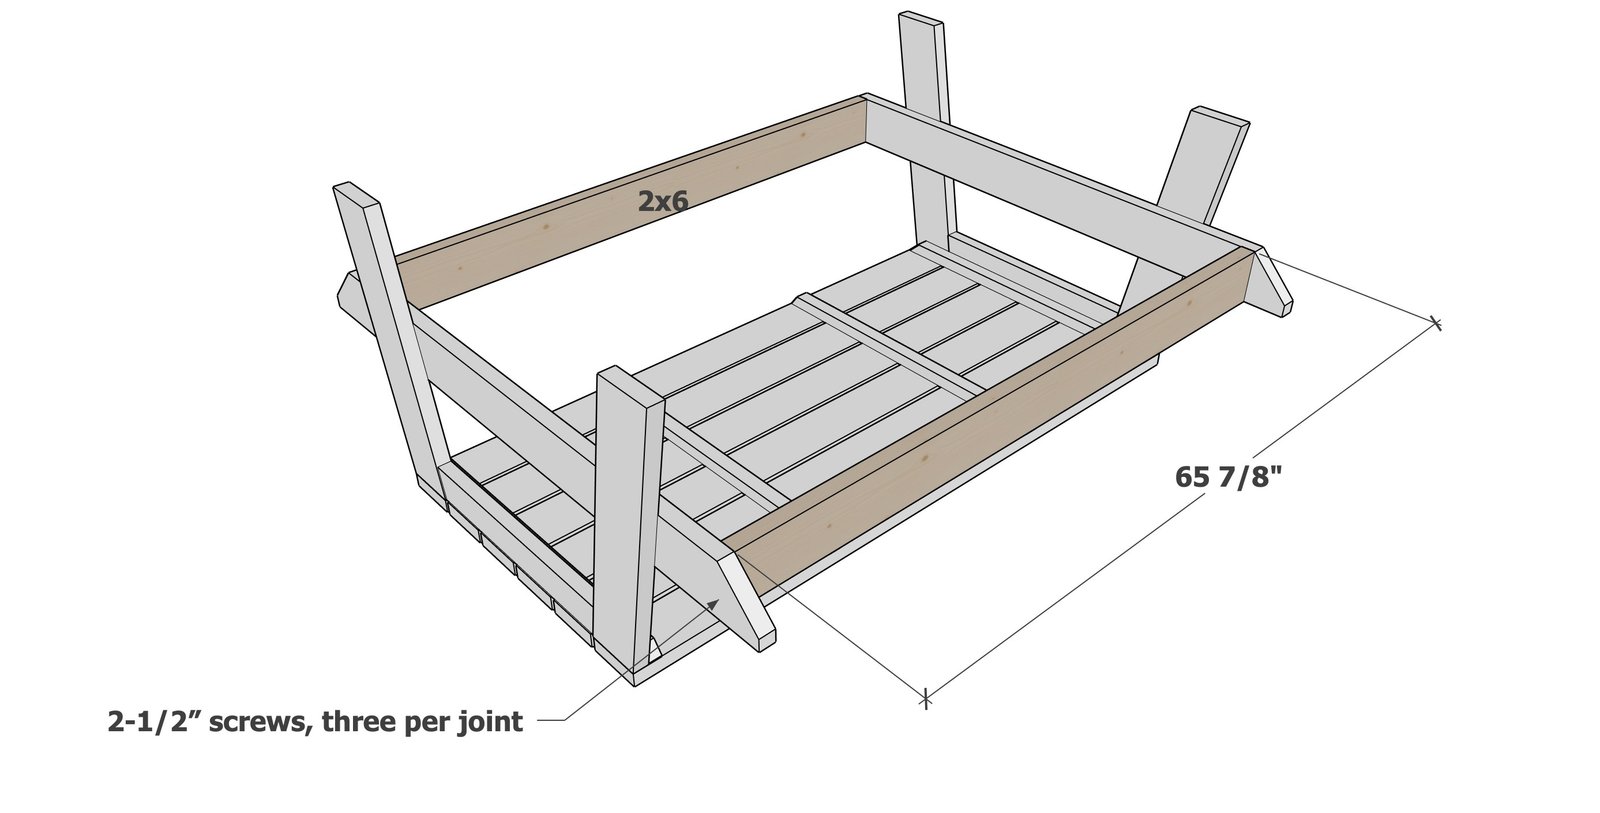
Attach the seat support boards as shown.
Step 7
Attach the seat boards to the seat supports.
Finishing
Sand all surfaces, starting with a medium grit and finishing with fine. Wipe off the dust, fill any holes or gaps with wood filler, and sand smooth once dry. Apply primer if you're painting, then finish with your choice of paint or stain and seal with a durable clear topcoat. For outdoor projects, use exterior-rated primer, paint or stain, and sealer so the piece stands up to the weather.
Source (temporary): https://www.ana-white.com/woodworking-projects/modern-minimal-picnic-table-free-diy-plans