Modern Outdoor Patio Table
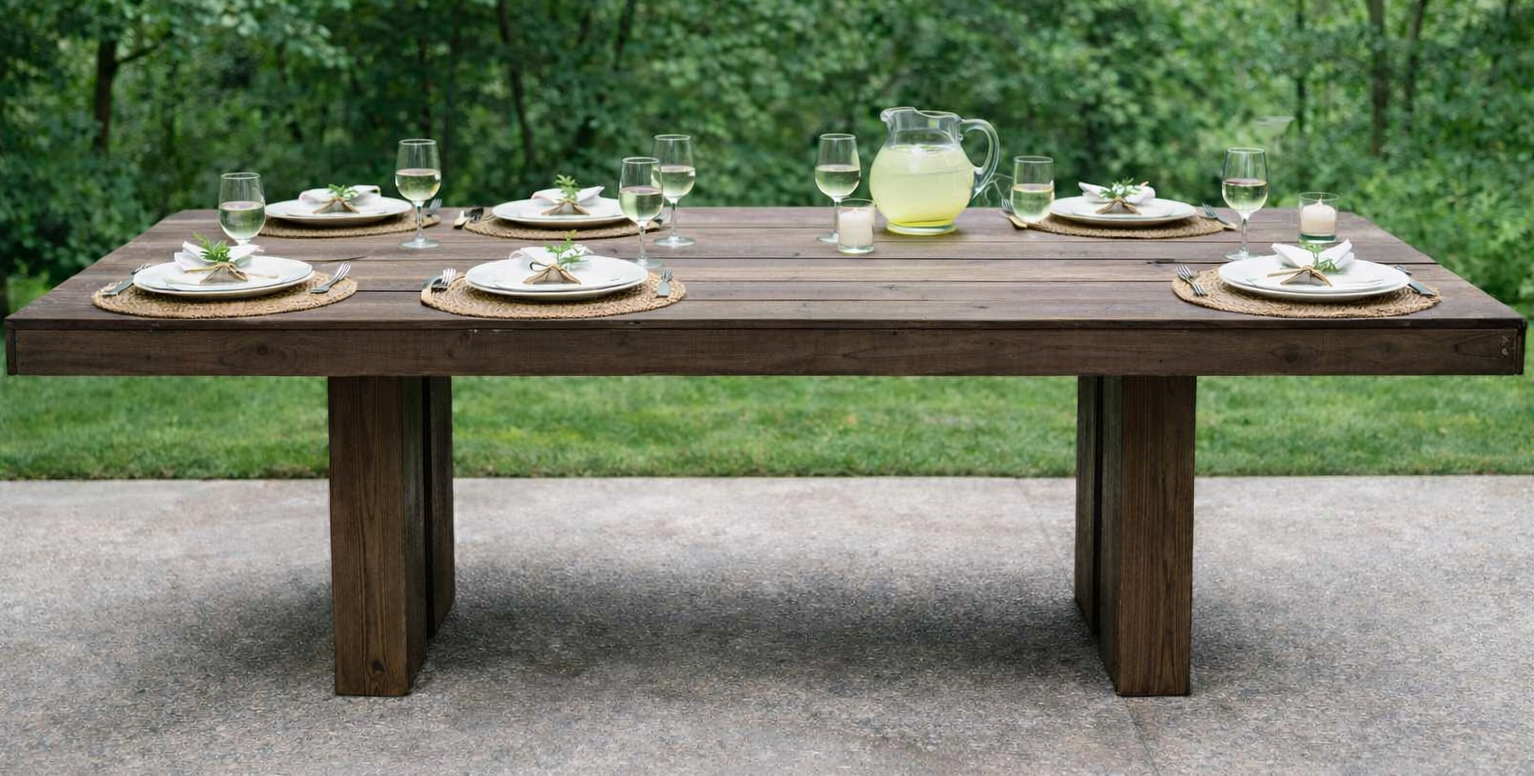
that is easy to build. This table could easily work with benches or chairs. For more information and TONS more photos go to with shopping list and cut list and diagrams.
Specifications
| Project type | Dining Table Plans |
|---|---|
| Room | Outdoor |
| Style | Modern Style Furniture Plans |
| Difficulty | Intermediate |
| Estimated cost | $150 - $200 |
Shopping List
All boards pressure treated
- 2"x4"x8' – 2
- 1"x4"x8' – 3
- 1"x6"x8' – 7
- 6"x6"x8" - 3
- 1 1/4" outdoor screws (if you can find them for the kreg jig they are blue coated, otherwise any other outdoor screws will work)
- Outdoor wood glue (we used Titebond III)
- 3" outdoor screws
Cut List
- 1x4 @ 94.5" - 2
- 1x4 @ 38.5" - 2
- 2x4 @ 37" – 4
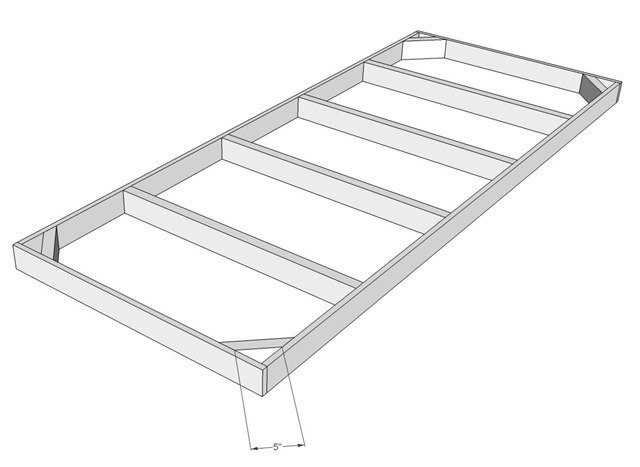
- 2x4 @ 5" - 4 short point measurement, both ends cut out at 45 degrees for corner supports
- 6x6x30" - 8
Tools
- measuring tape
- square
- pencil
- safety glasses
- kreg-jig
- drill
- compound miter saw
- sander
Step-by-step Instructions
Step 1
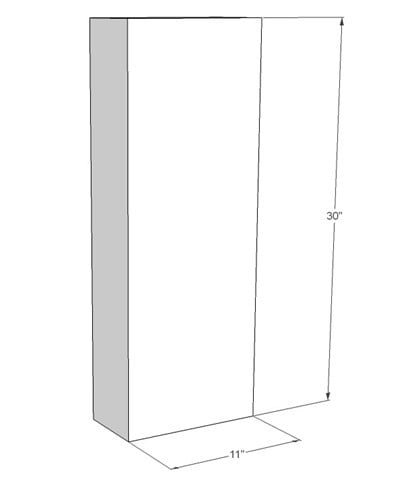
Glue one side of a 6x6 to another 6x6 to make one leg that is 11"x5.5"x30". It is best to clamp these together overnight. If you do not have clamps big enough for these, I think putting something heavy on it will work just fine. Once dried overnight, sand smooth.
Step 2
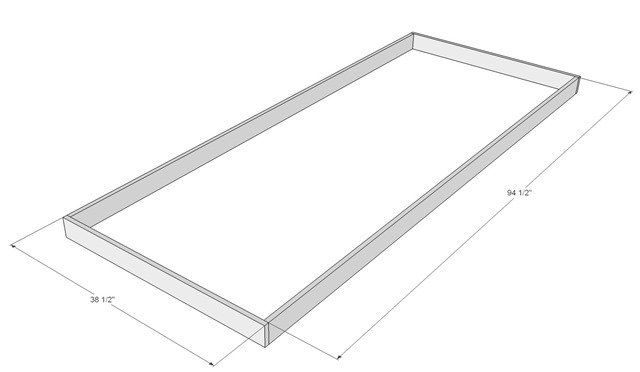
Using pocket hole screws, attach the 94.5" 1x4 to the 38.5” with the 1 1/4" outdoor screws and wood glue (do not use the regular kreg screws as they will rust with the pressure treated wood/weather conditions). If you just have deck screws like I did, just make sure not to screw them too far as they will pop out the other side of the board.
Step 3
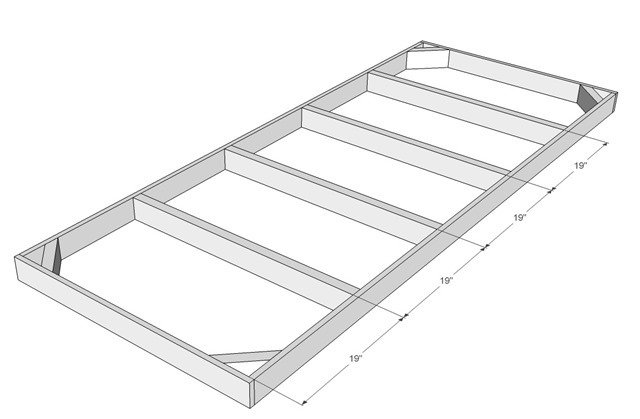
Put the 37" center supports in at 19" intervals using glue, 1 1/4" screws and pocket holes.
Step 4
Drill straight down on the long sides of the corner supports so the hole comes out the middle of the 45 degree cut. Using wood glue and 1 1/4" screws put in all 4 corners.
Step 5
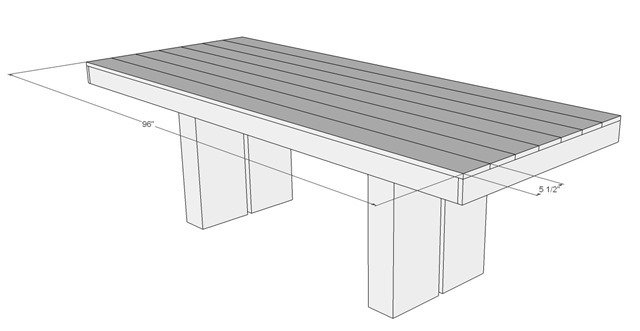
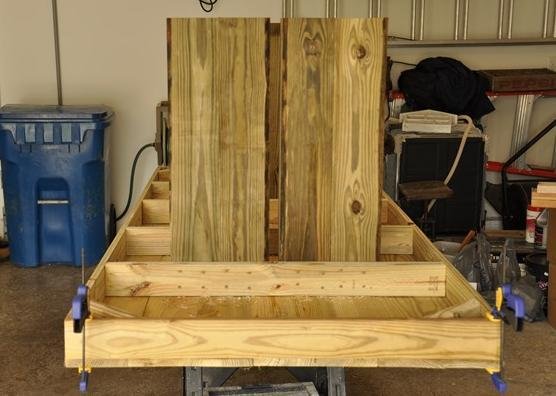
Check to make sure the 1x6 boards are 96" (mine were all uneven lengths longer than 96"). Place 4-5 pocket holes in each board, besides the last one, and using 1 1/4" screws and glue attach boards together for the table top. I found it helpful to have a large clamp to help pull uneven boards together. Flip so top is up, sand out any unevenness. (Ignore the legs in the following photo.)
Step 6
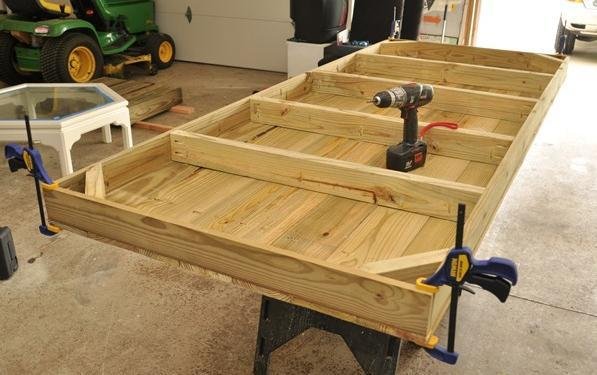
Flip top back over. Put glue on top of the structure built earlier, flip down on top of the table top, screw together to top.
Step 7
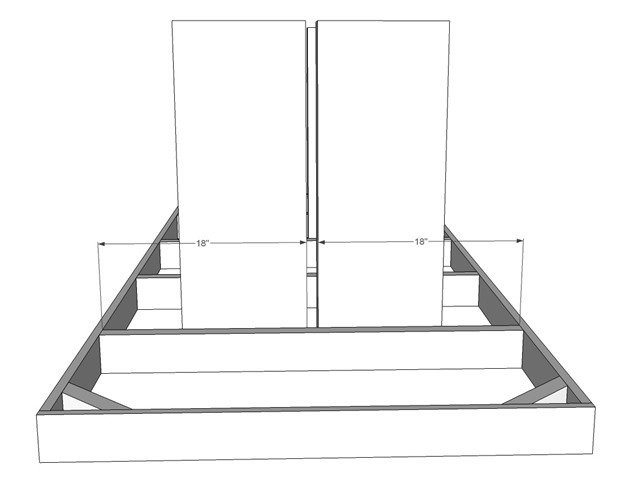
While it still upside-down, on the outside 2x4 supports, measure 18" from each side, this is where the insides of the legs will go. Make sure to mark the side of the board that is closest to the middle.
Step 8
Put pocket holes on the 3 sides of the legs that will not be touching the 2x4 support. Using glue place on the upside down table, using 1 1/4 screws in the pocket holes, and after drilling pilot holes in the 2x4 support (I did 4 in each 6x6, or 8 in each leg) attach with the 3" screws. It might be best to stain the inside of the legs before attaching them as there is only 1" in between, we were able to get it stained with brushes after, but would be much easier before.
Step 9
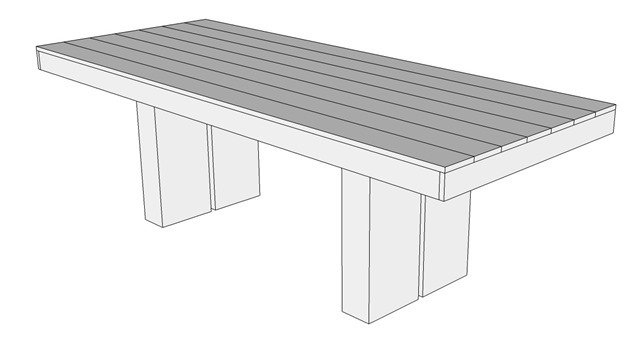
Once all legs are attached, it is time to flip it back over. You will want friends for this as it is heavy and awkward. We had four of us (one on each corner).
Finishing
Sand all surfaces, starting with a medium grit and finishing with fine. Wipe off the dust, fill any holes or gaps with wood filler, and sand smooth once dry. Apply primer if you're painting, then finish with your choice of paint or stain and seal with a durable clear topcoat. For outdoor projects, use exterior-rated primer, paint or stain, and sealer so the piece stands up to the weather.
Source (temporary): https://www.ana-white.com/woodworking-projects/modern-outdoor-patio-table