Modern Single Outdoor Chaise Lounge
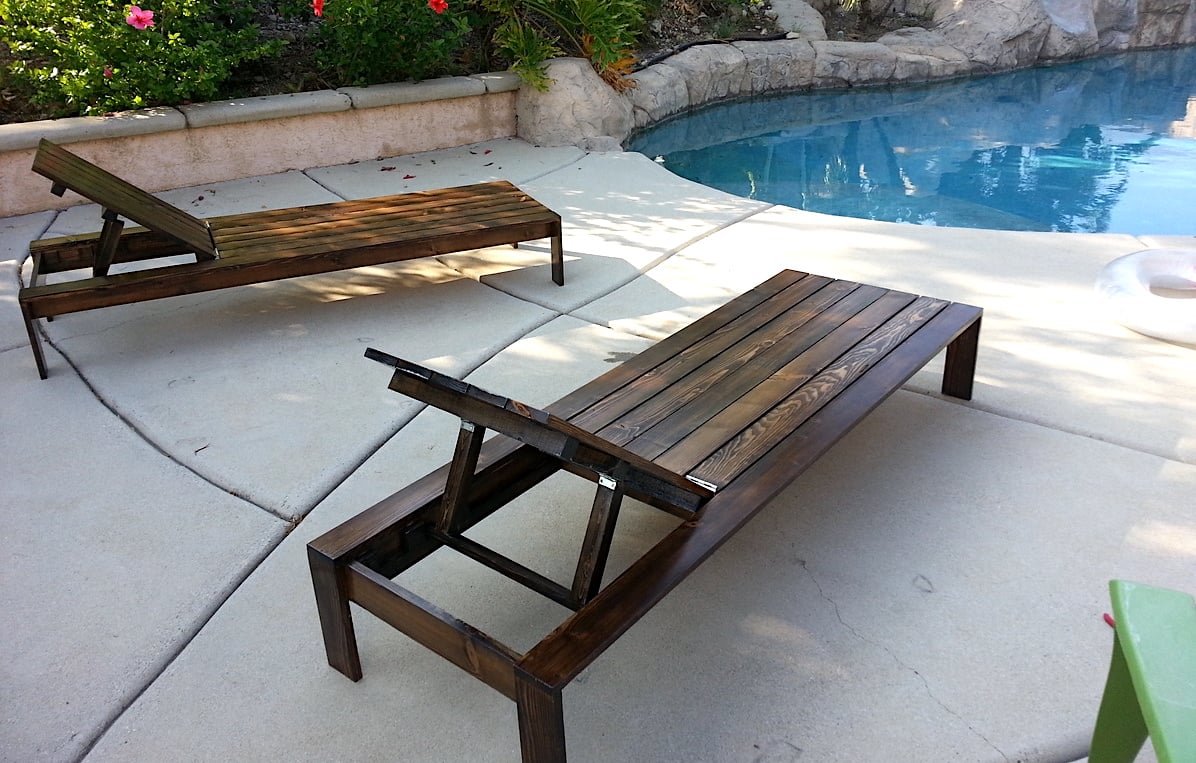
The outdoor chaise lounge gets a modern twist! Build your own and save money, using off the shelf lumber and step by step plans from
Specifications
| Project type | Outdoor Seating, Lounging and Accents |
|---|---|
| Room | Outdoor |
| Style | Modern Style Furniture Plans |
| Difficulty | Advanced |
| Estimated cost | $20 - $50 |
Shopping List
- 3 - 2x4 @ 10 feet long
- 2 - 2x2 @ 8 feet long
- 7 - 1x4 @ 8 feet long
- 2 sets of 3" hinges suitable for exterior use
- 2-1/2" exterior self tapping wood screws
- 2" exterior self tapping wood screws
- Exterior wood glue
Cut List
Main Chair
- 2 - 2x4 @ 75" - frame
- 4 - 2x4 @ 24-1/2" - frame
- 4 - 2x4 @ 11-1/4" - legs
- 2 - 2x2 @ 27" - cleats
- 2 - 1x4 @ 78" - side slats
- 6 - 1x4 @ 48" - main slats
- 6 - 2x2 @ 3" - stop blocks
Back
- 6 - 1x4 @ 30" - back slats
- 4 - 2x2 @ 23-1/2" - back supports
- 2 - 2x4 @ 10" - prop supports
Tools
- measuring tape
- square
- pencil
- safety glasses
- hearing protection
- drill
- circular saw
- sander
Step-by-step Instructions
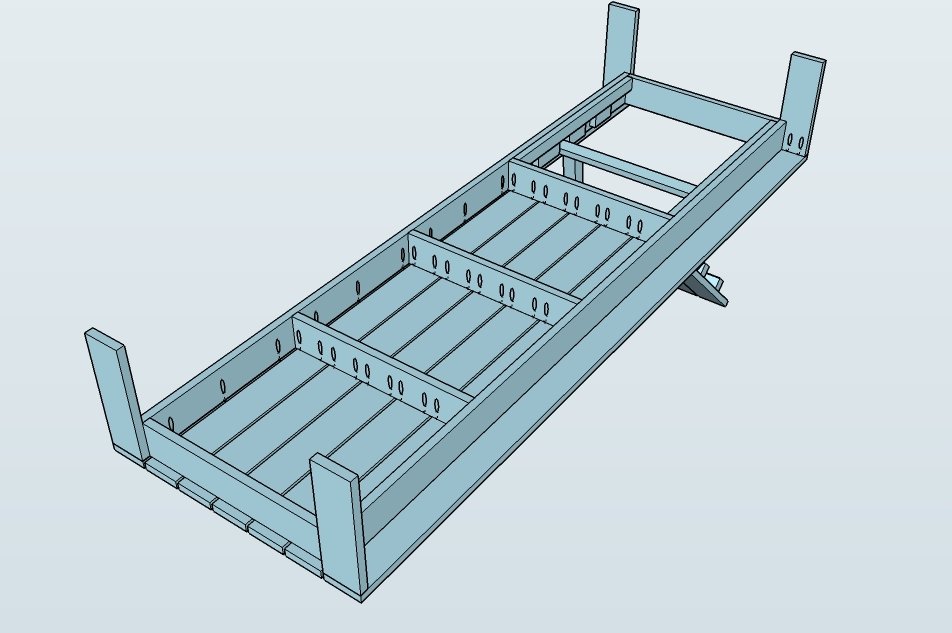
Pocket Holes
To build this lounger, you can either use the Kreg Jig (pocket hole recommendations shown above) or self tapping wood screws. The advantage of pocket holes is no visible fasteners. If you are using a cushion, this will cover all the fasteners, so this may or may not be as important to you. When joining 2x to 2x boards, the setting is 1-1/2" with 2-1/2" pocket hole screws. When joining 2x to 1x boards, use the 3/4" setting and 1-1/4" pocket hole screws. Mark out and drill all pocket holes prior to assembly. The assembly order may differ than shown in diagrams
Step 2
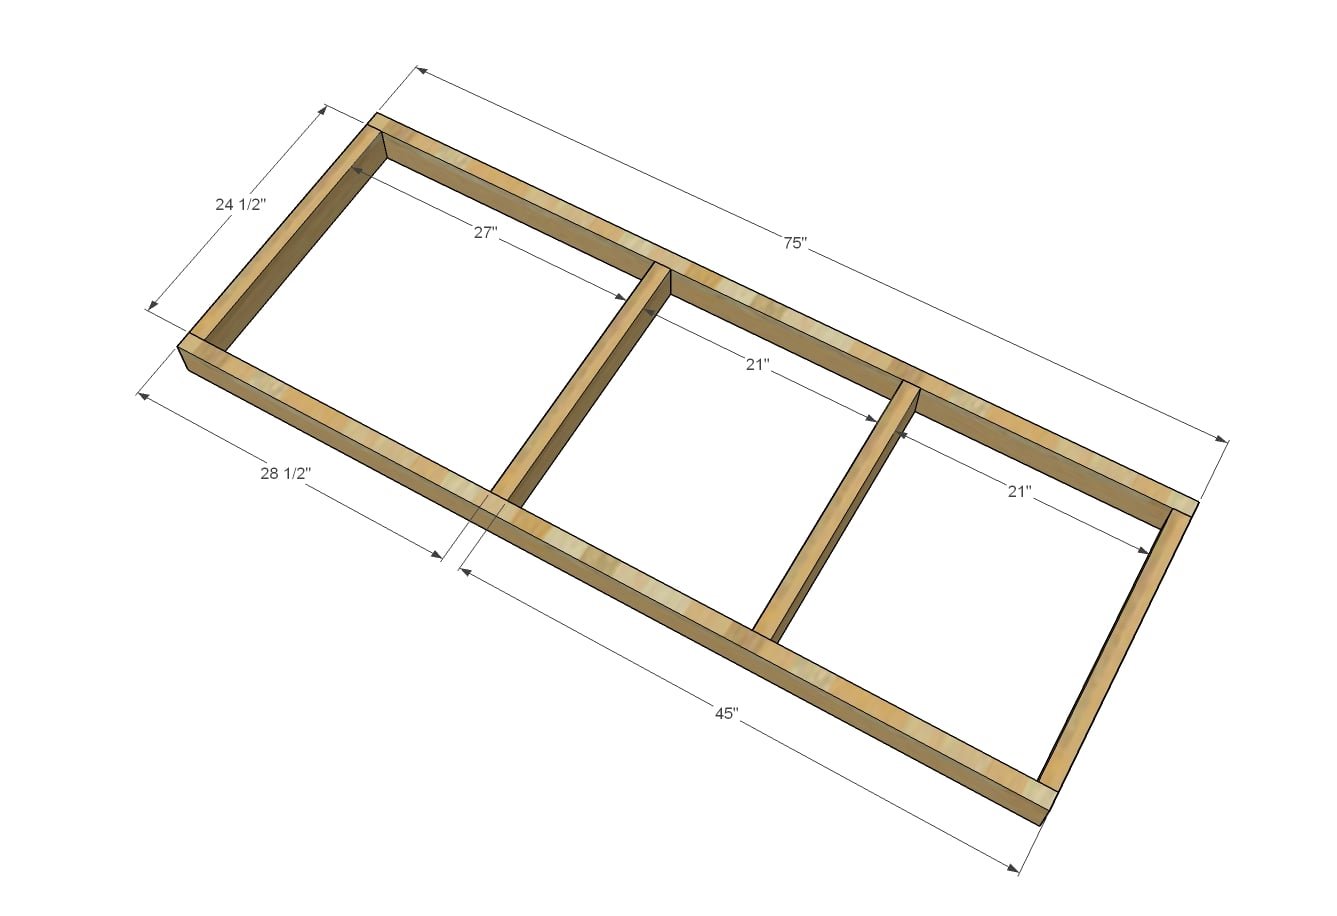
Build the frame, using either 2-1/2" screws or the Kreg Jig. Make sure that the frame is very square.
Step 3
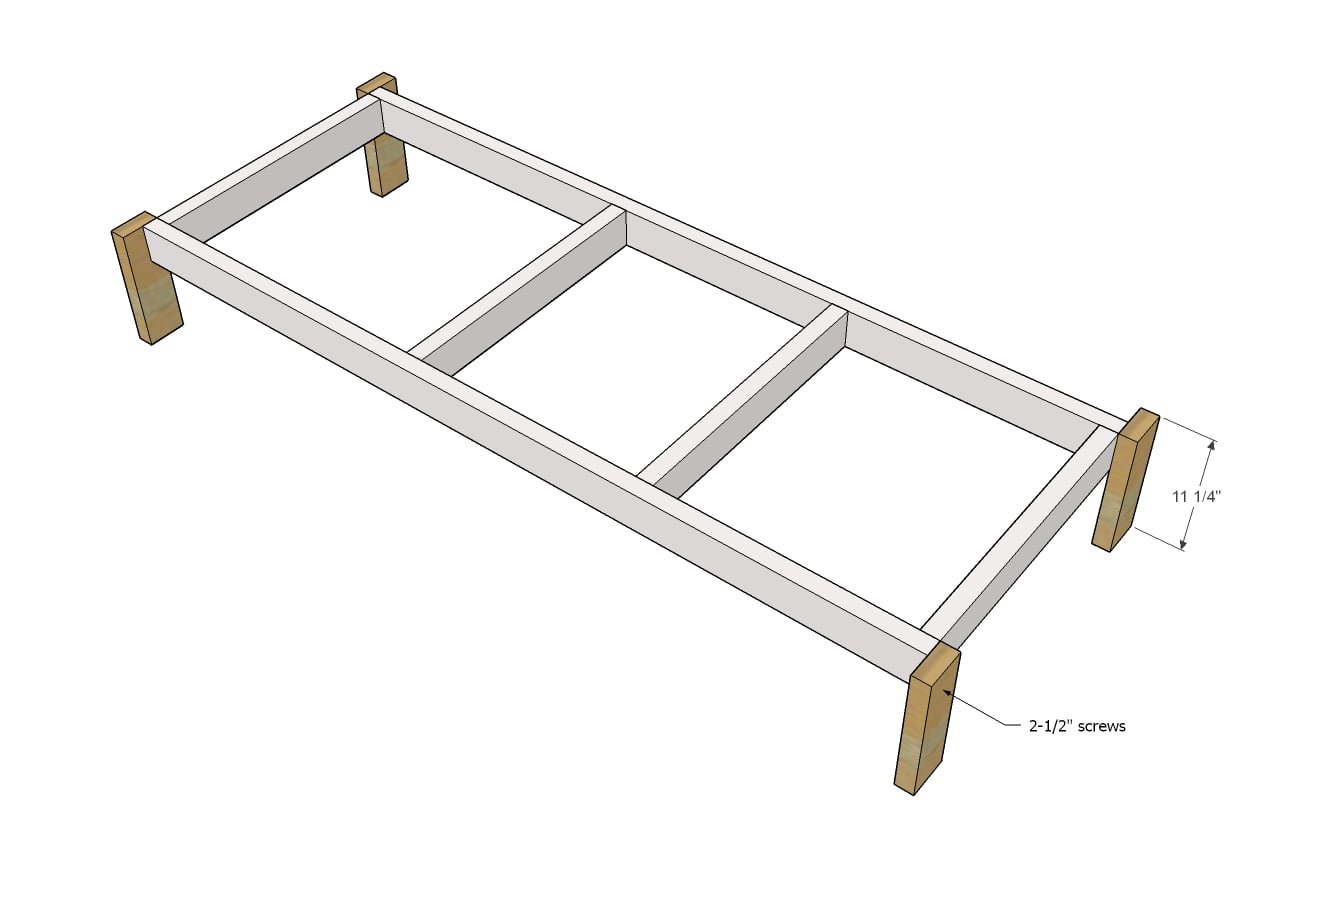
Attach legs to the outside of the frame with 2-1/2" screws.
Step 4
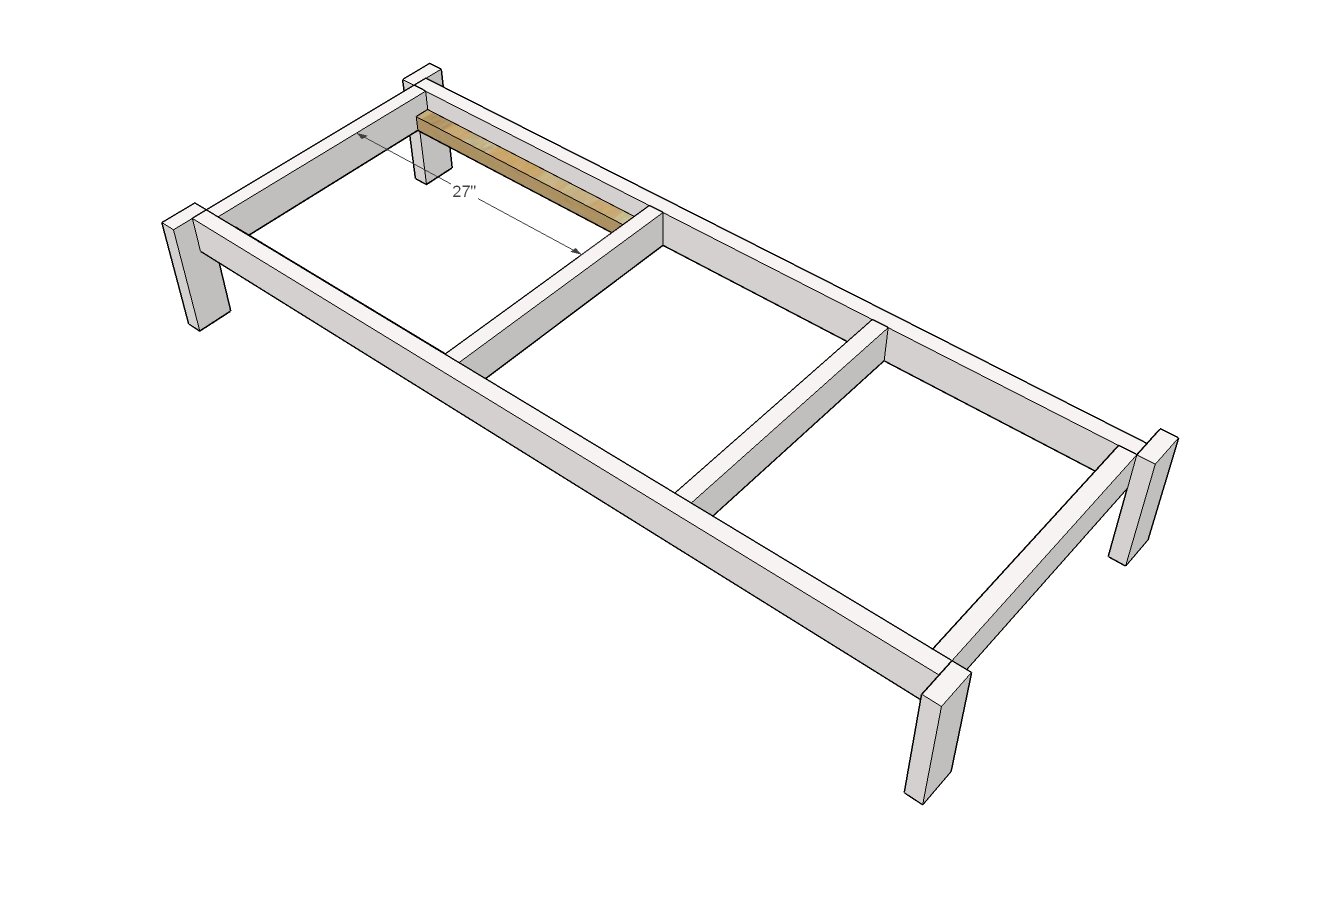
Screw cleats inside the frame, four screws per cleat. 2-1/2" self tapping screws.
Step 5
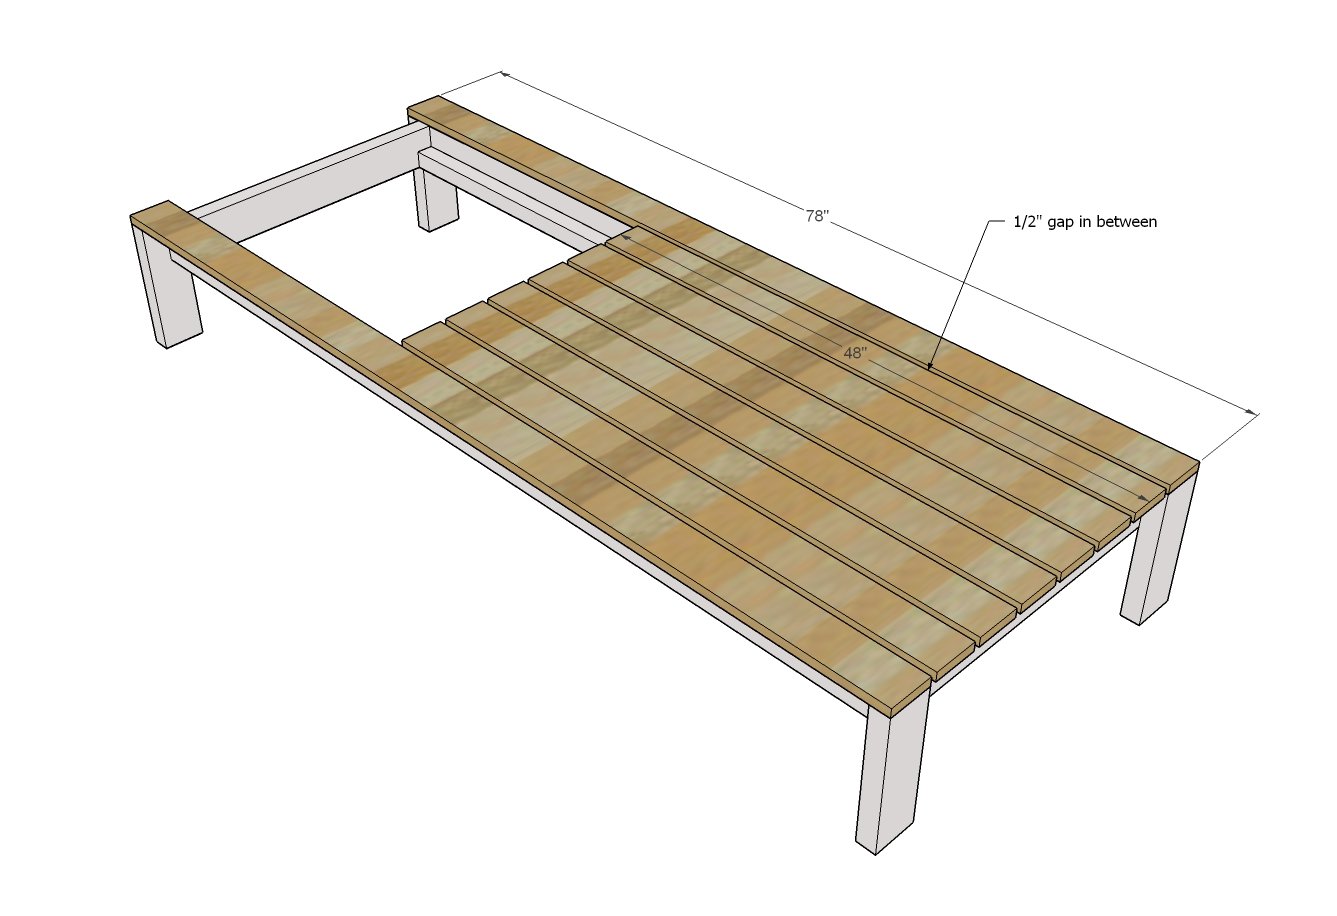
Attach decking to the top of the chaise lounge with 2" self tapping screws.
Step 6
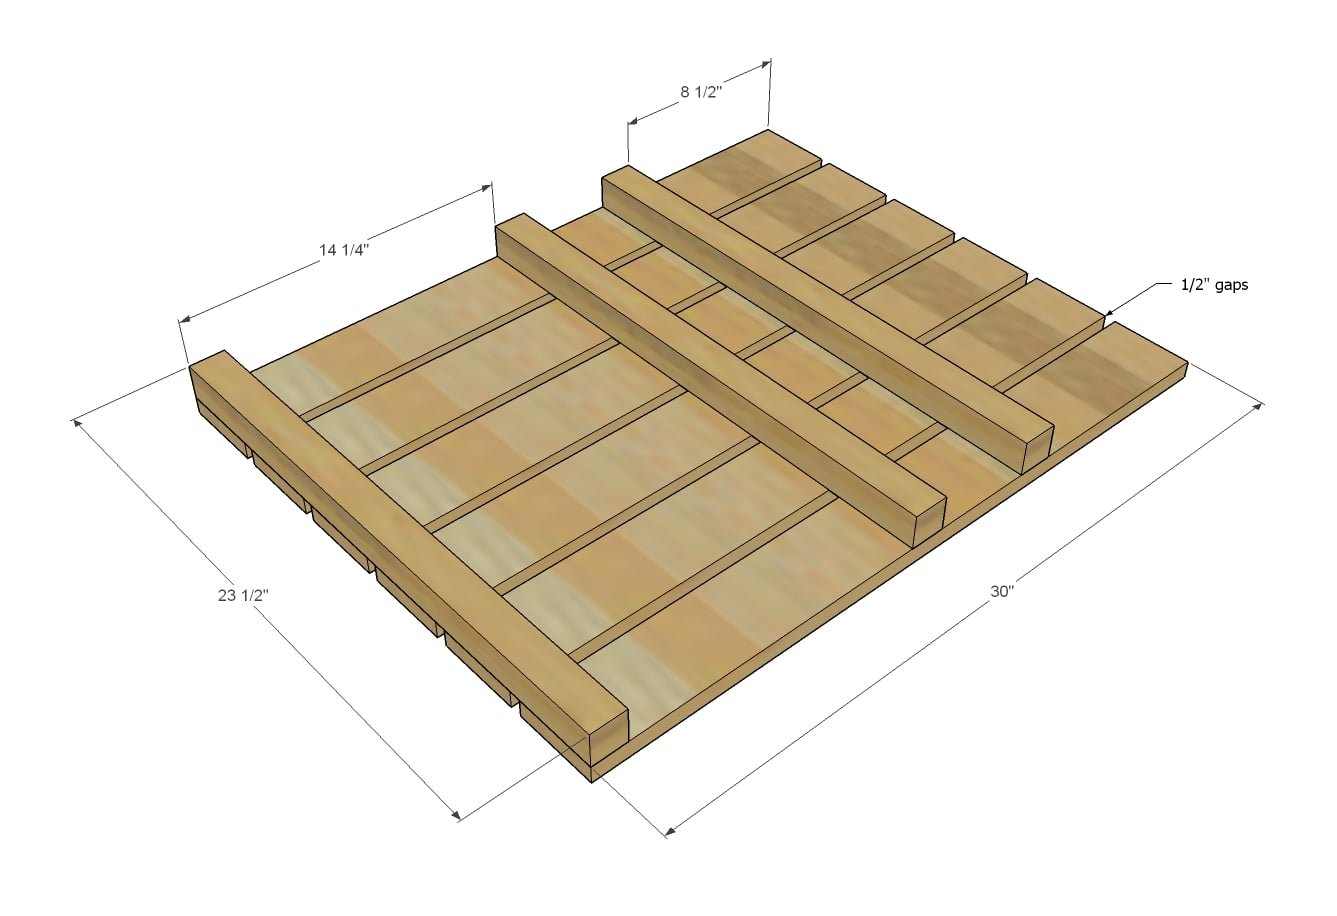
Build the back piece with 2" screws into the backs of the 2x2s.
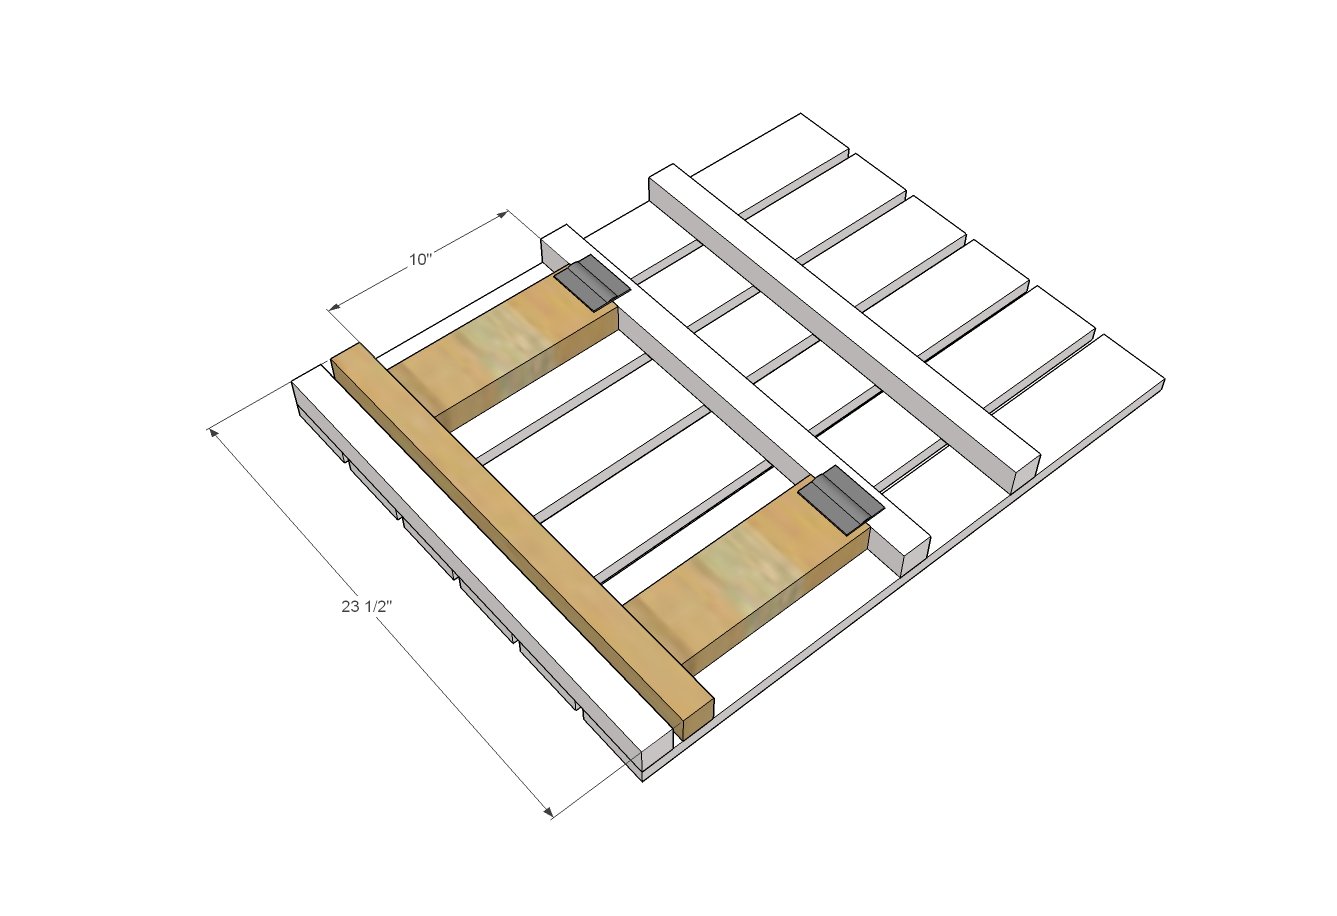
Build the back support as shown. Make sure the 2x4s are set in 2" from the ends of the 2x2s.
Hinge to the back rest.
Step 8
Hinge the entire back piece inside the chaise lounge opening.
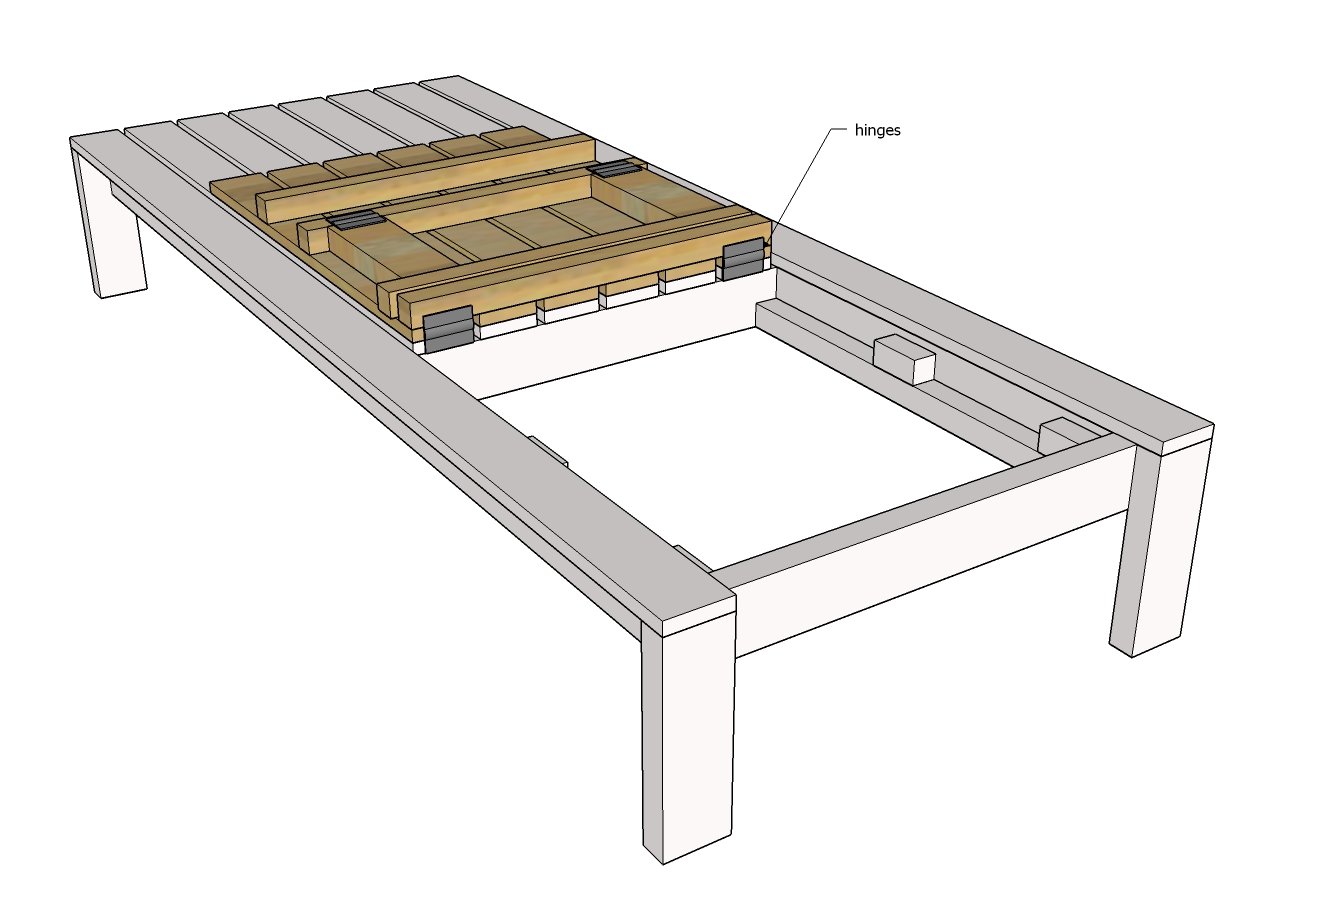
Install the stop blocks as shown.
You can alter the locations, just make sure the stop blocks don't interfere with the back closing flat.
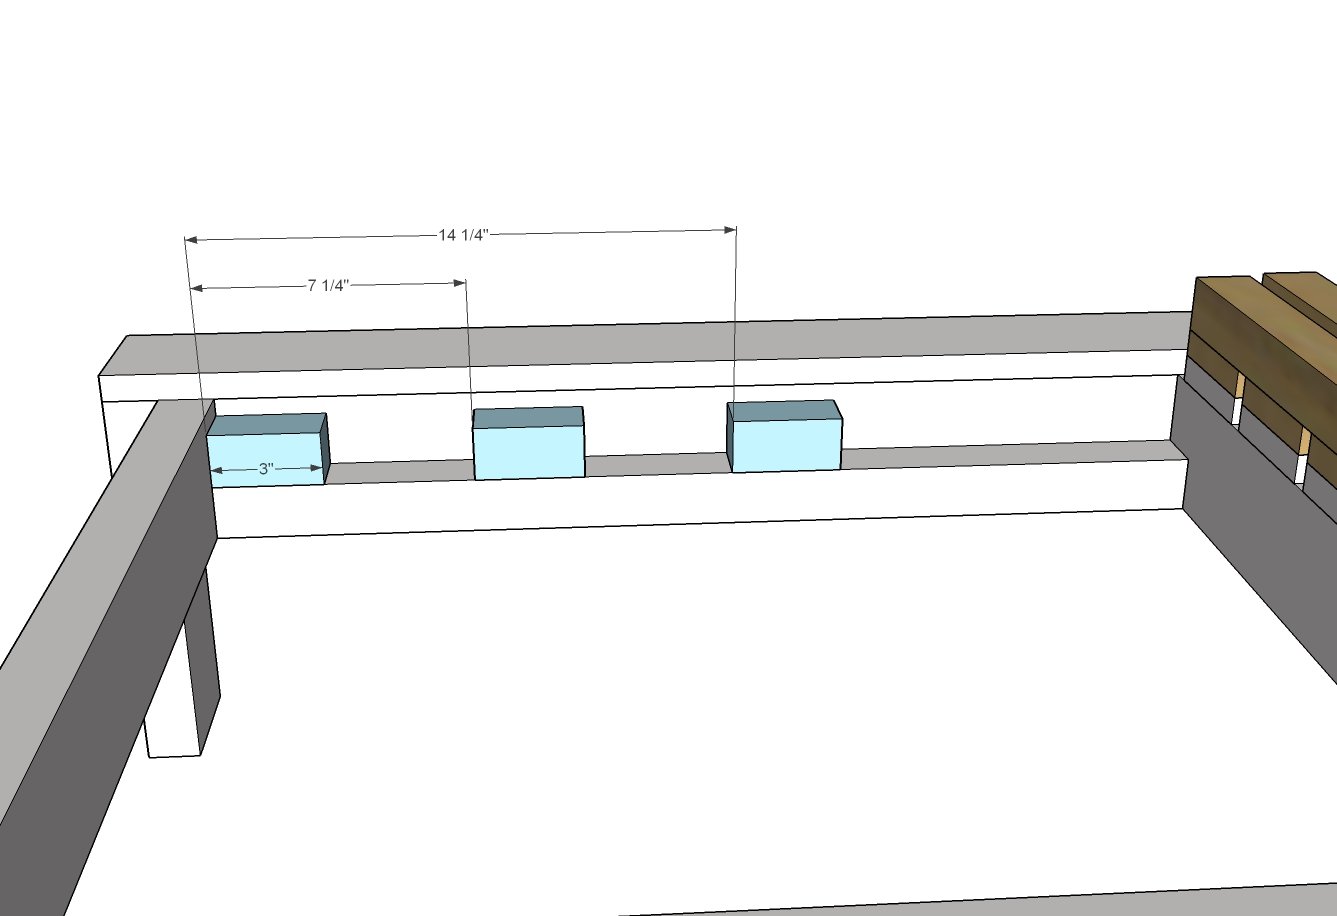
Step 10
Now take some of the 1x2 scraps and create stops as shown above to hold the prop up in place. You can space these at any desired location.
Finishing
Sand all surfaces, starting with a medium grit and finishing with fine. Wipe off the dust, fill any holes or gaps with wood filler, and sand smooth once dry. Apply primer if you're painting, then finish with your choice of paint or stain and seal with a durable clear topcoat. For outdoor projects, use exterior-rated primer, paint or stain, and sealer so the piece stands up to the weather.
Source (temporary): https://www.ana-white.com/woodworking-projects/modern-single-outdoor-chaise-lounge