Modular Bar Wine Grid Hutch
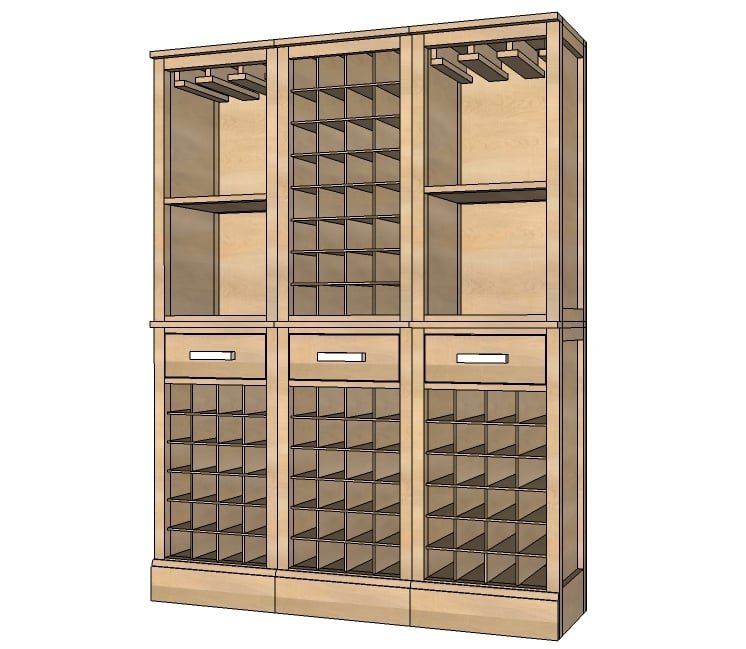
How to build wine grid hutch inspired by Pottery Barn Modular Build Your Own Bar.
Specifications
| Project type | Hutch Plans |
|---|---|
| Room | dining room |
| Style | Cottage Style Furniture Plans |
| Difficulty | Intermediate |
| Estimated cost | $50 - $100 |
Dimensions
Use the size-specific shopping and cut lists below.
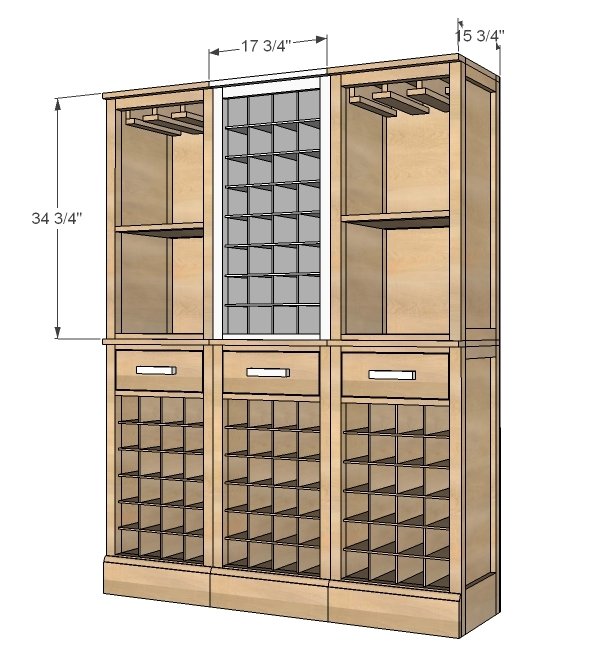
Shopping List
Approximately 1/2 sheet of 3/4" plywood ripped intro strips 11 1/2" wide, referred to as 1x12 boards. Since you will most likely be building the base, you may be able to share plywood with the base.
1 - sheet 1/4" plywood
2 - 2x2 @ 8 feet long
1 - 1x3 @ 2 feet long
1 - 1x2 @ 8 feet long
Cut List
2 - 1x12 @ 34" (sides)
4 - 1x2 @ 11 1/2" (trim)
4 - 2x2 @ 34" (legs)
1 - 1x12 @ 14 3/4" (shelf)
3 - 1x2 @ 14 3/4" (shelf trim and top support)
1 - 1x12 @ 17 3/4" (top)
1 - 1x2 @ 17 3/4" (top trim)
1 - 1x3 @ 17 3/4" (top front trim)
3 - 1/4" plywood @ 13 3/4" x 33 1/4"
7 - 1/4" plywood @ 13 3/4" x 14 3/4"
1 - 1/4" plywood @ 17 3/4" x 34 3/4"
Tools
- measuring tape
- square
- pencil
- safety glasses
- hearing protection
- kreg-jig
- drill
- nailer
- sander
Step-by-step Instructions
Step 1
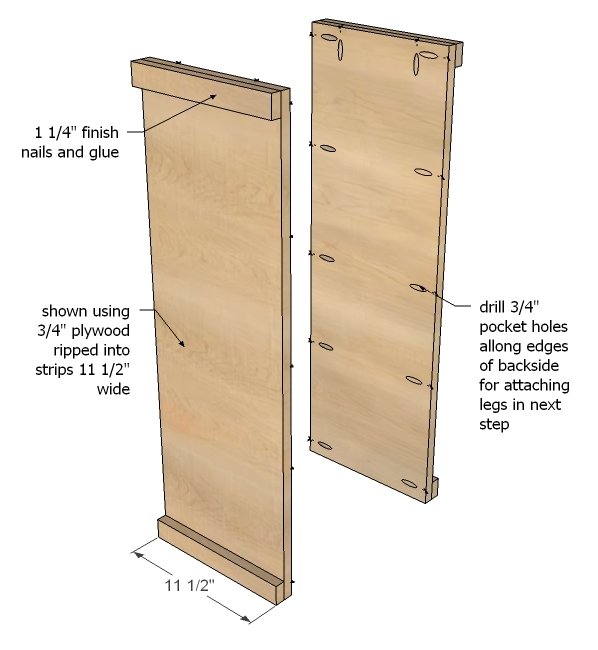
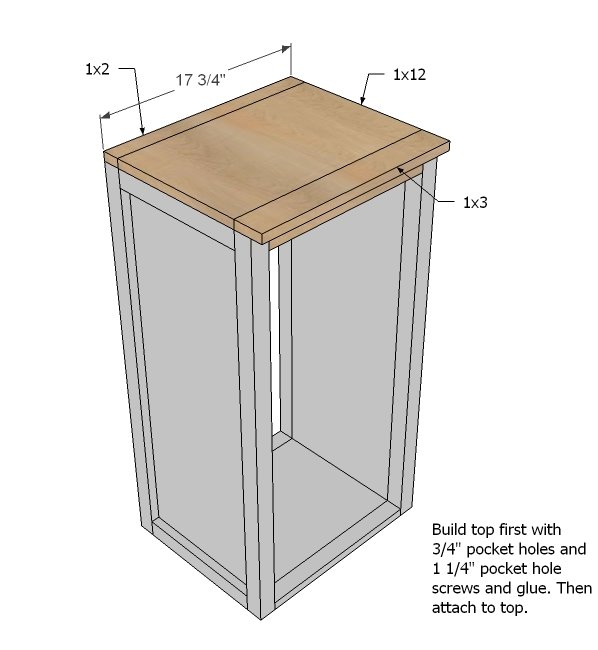
This project is shown in PureBond Formaldehyde Free Hardwood Plywood. Gina's base is also built with PureBond. You can use 1x12s, but it will change the measurements slightly depending on your 1x12 widths. Make sure you measure the width of your 1x12s and adjust accordingly. This plan assumes you have ripped 3/4" plywood into strips 11 1/2" wide. Drill 3/4" pocket holes along side and top edges for attaching top and legs in later steps of side 1x12s. Then on the outsides, nail on 1x2 trim at top and bottom with 1 1/4" finish nails and glue, outside edges are flush.
Step 2
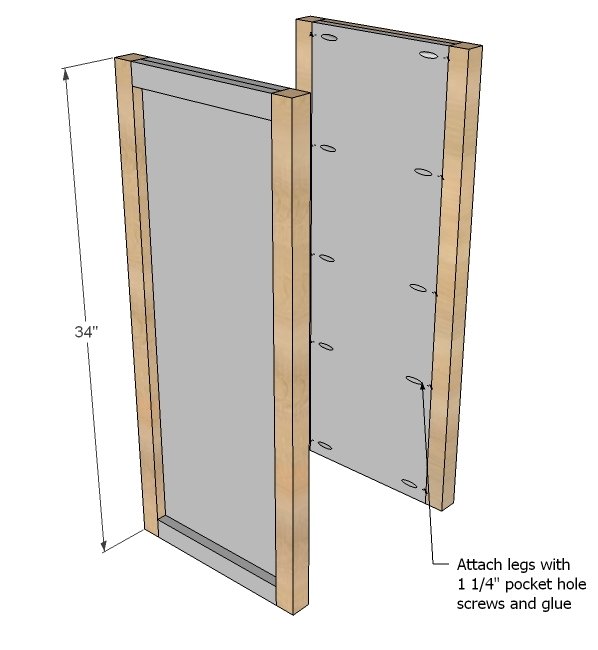
Now attach legs to the sides with 1 1/4" pocket hole screws and wood glue.
Step 3
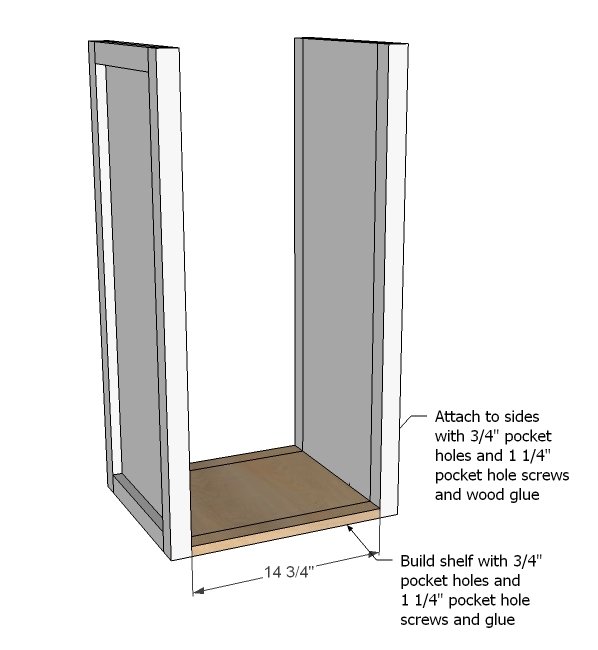
Next, build your bottom shelf with 3/4" pocket holes and attach to sides in the same manner, flush to the bottom.
Step 4
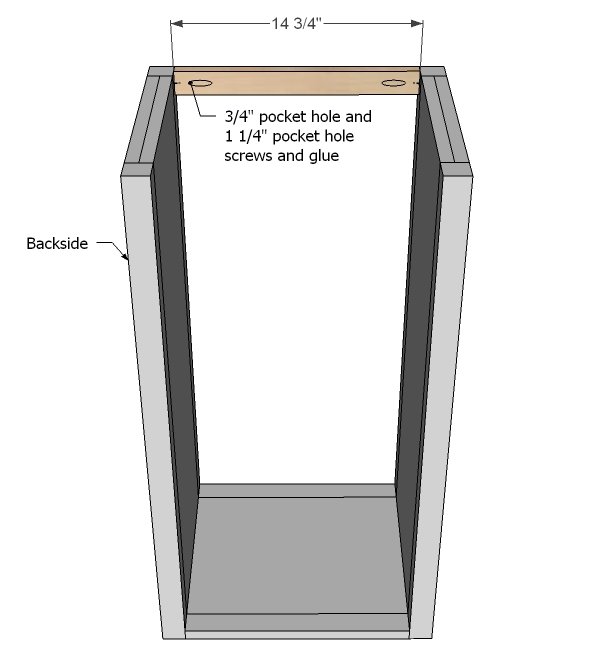
For the header, attach flush to front as shown in diagram.
Step 5
I really liked what Gina did here
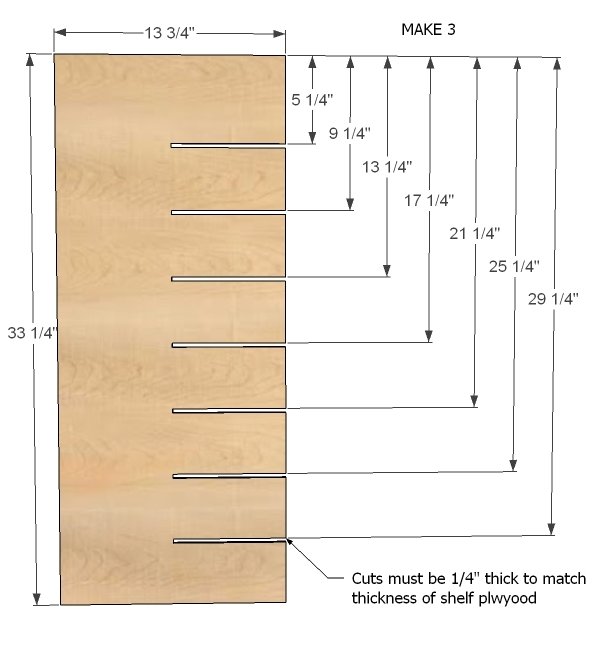
She clamped the wine storage pieces together and cut all at once. Very smart. Remember, you will need to cut three tall dividers.
Step 7
And seven short dividers.
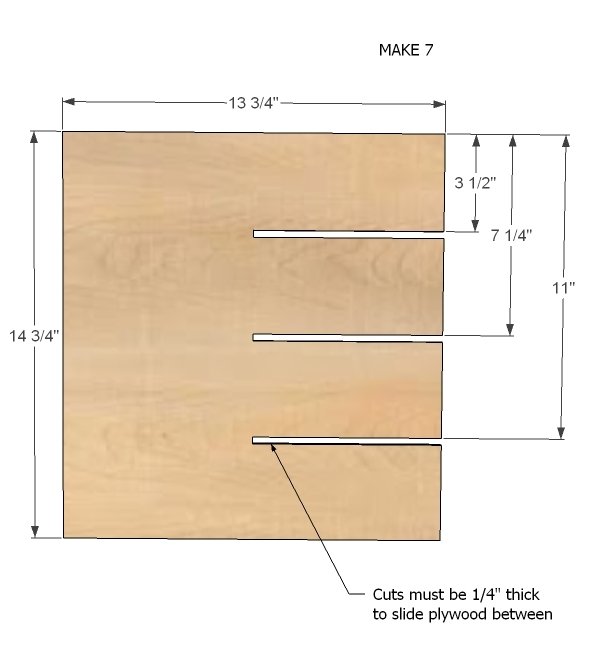
Step 8
Slide together to form your wine grids.
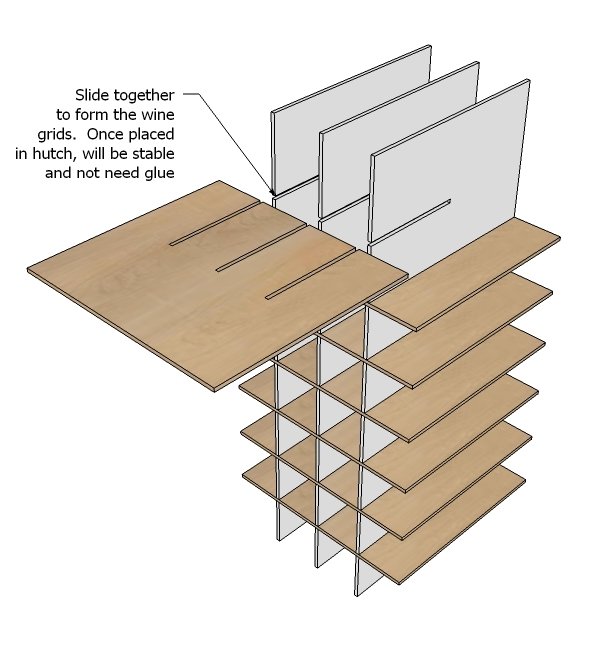
Step 9
Then insert in hutch. To make it easy to remove later on, make the small shelf pieces removeable from the front. Then you can pull the shelves out, collapse the tall dividers and pull out through the front.
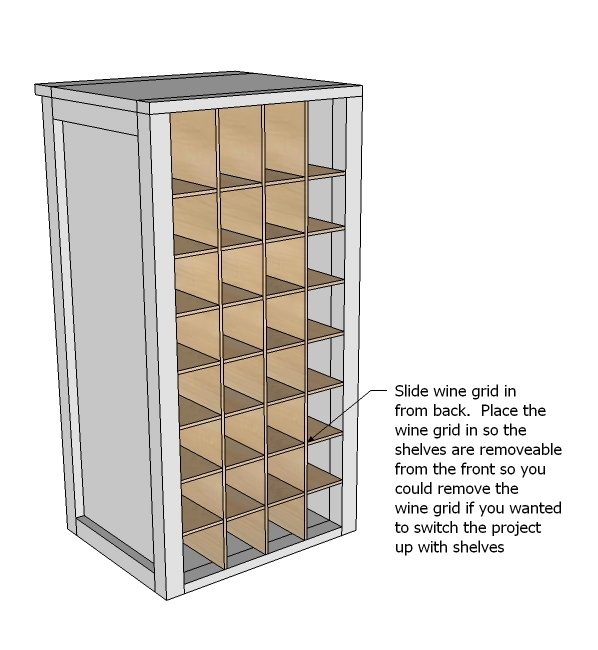
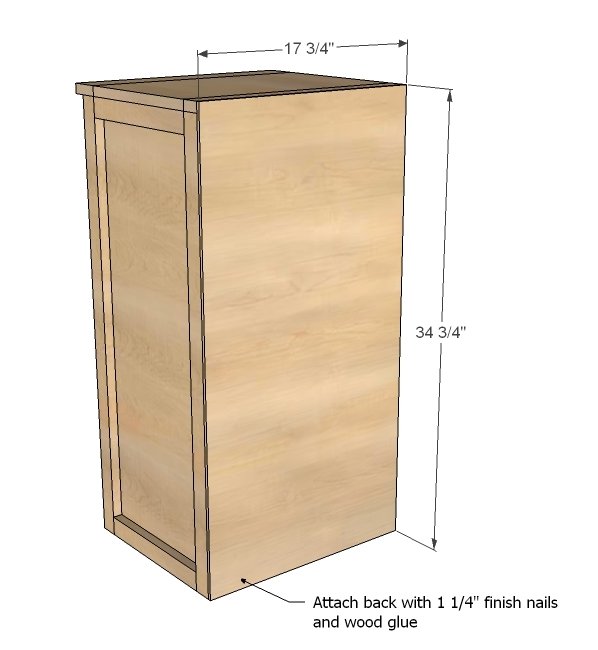
Then finally, nail the back on with glue.
You must secure the hutch to the base to avoid tipping hazards and also a stud in the wall behind the hutch.
Finishing
Sand all surfaces, starting with a medium grit and finishing with fine. Wipe off the dust, fill any holes or gaps with wood filler, and sand smooth once dry. Apply primer if you're painting, then finish with your choice of paint or stain and seal with a durable clear topcoat. For outdoor projects, use exterior-rated primer, paint or stain, and sealer so the piece stands up to the weather.
Source (temporary): https://www.ana-white.com/woodworking-projects/modular-bar-wine-grid-hutch