Modular Office
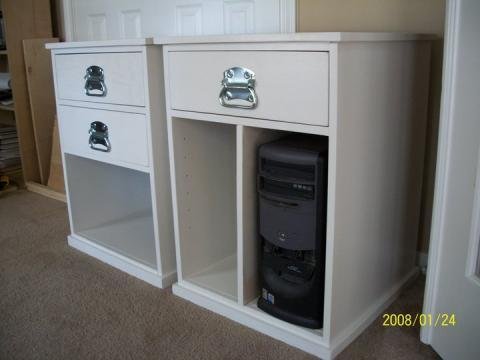
A common home office problem revolves around the CPU for the computer. Instead of fighting it, or fighting accessing it to load DVDs and USB devices, build a beautiful and functional CPU cabinet that matches our Modular Office System. Special thanks to Eric R for sharing his amazing photos.
Specifications
| Project type | Nightstands |
|---|---|
| Room | Storage Solutions |
| Style | Farmhouse Furniture |
| Difficulty | Intermediate |
| Estimated cost | $20 - $50 |
Dimensions
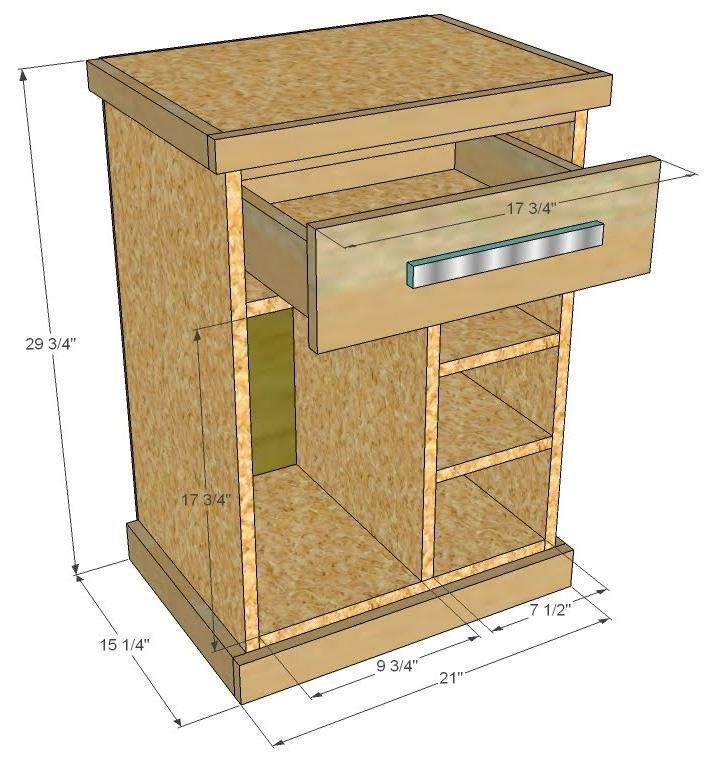
Use the size-specific shopping and cut lists below.
Shopping List
In addition to the materials, supplies and tools from the narrow base, you will need: 1 – 1×6 Piece 18″ Long
1 – 1×4 Board, 8′ Long
1 set of 12″ drawer slides, side mount or undermount (if you choose undermount, you may wish to install before fastening the top in place.
Cut List
Cut List for the Shelves 2 – 1×16 boards @ 7 1/2″ (Shelves)
1 – 1×16 board @ 17 3/4″ (Center Partition)
Cut List for the Drawers
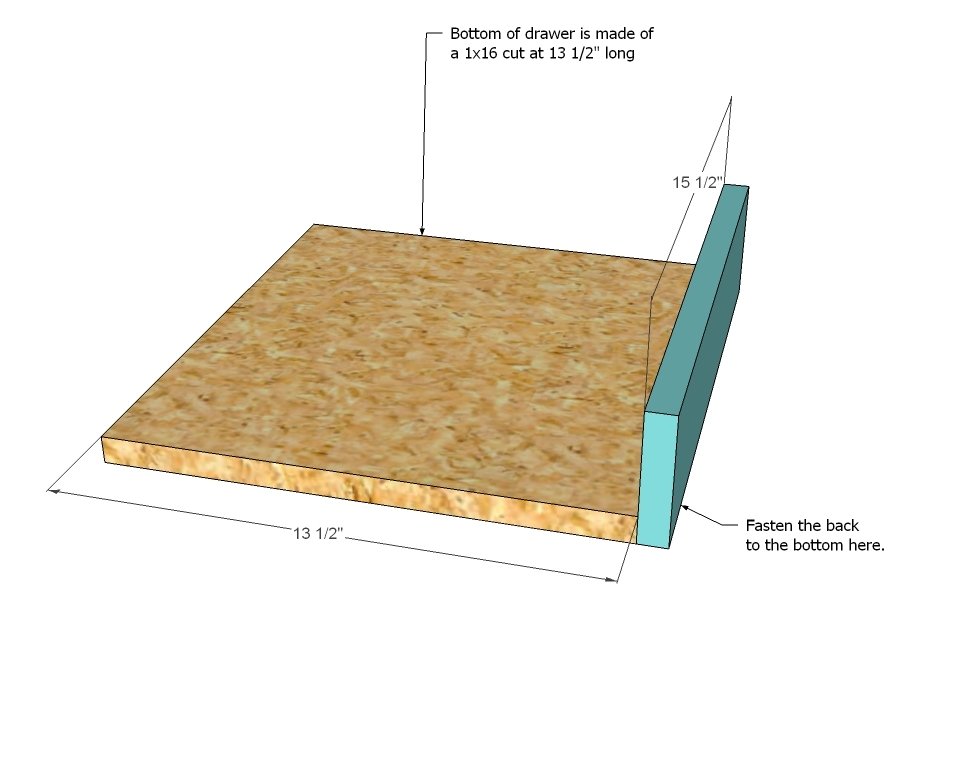
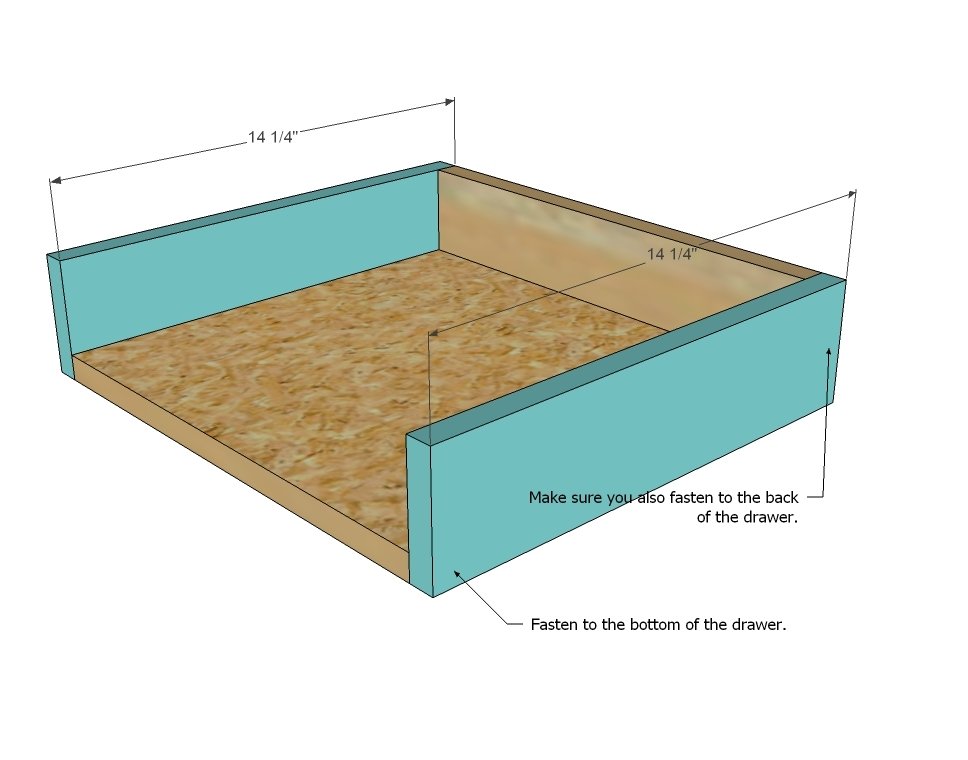
1 – 1×16 @ 13 1/2″ (Drawer Bottom)
1 – 1×4 @ 15 1/2″ (Drawer Back)
2 – 1×4 @ 14 1/2″ (Drawer Sides)
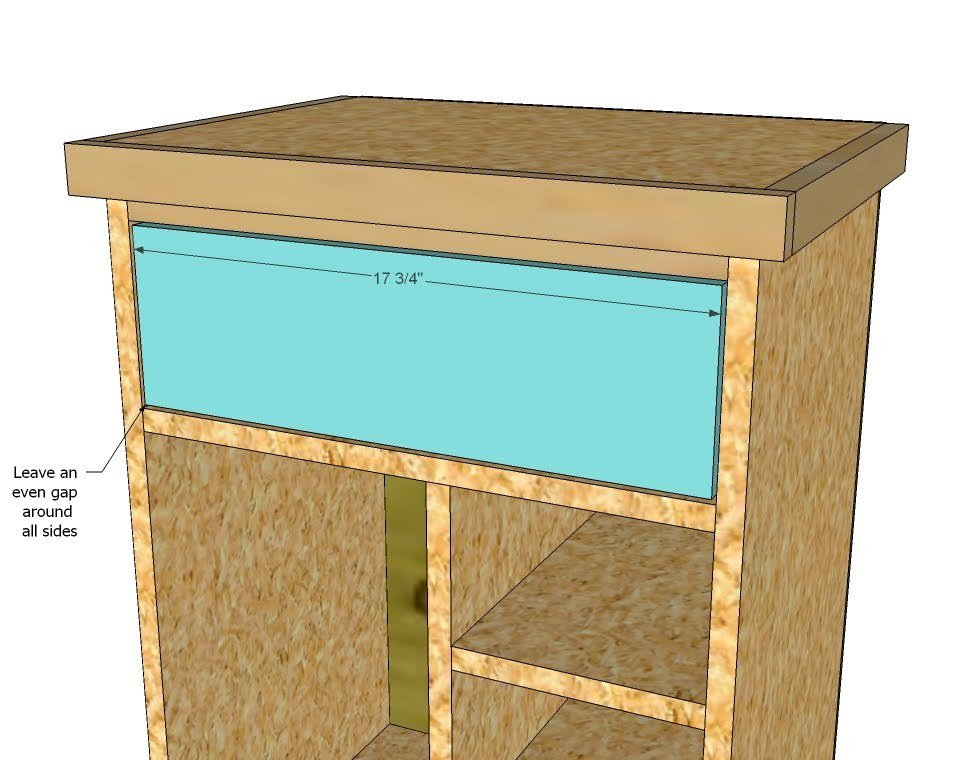
1 – 1×6 @ 17 3/4″ (Drawer Face)
Tools
- measuring tape
- square
- pencil
- safety glasses
- hearing protection
- kreg-jig
- drill
- nailer
- sander
Step-by-step Instructions
Step 1
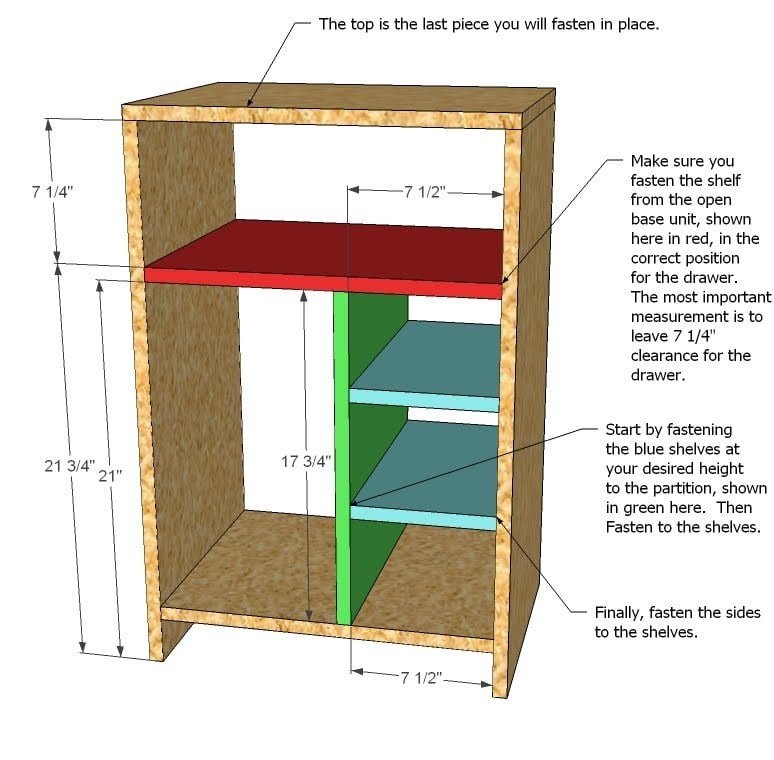
Build the Box. Build the box for the CPU Cabinet as shown above, instead of how the directions are shown in the narrow open file base cabinet from yesterday. Attach bottom footer and top trim as done in the Open Base Plan.
Step 2
Drawer Sides. In the same manner as the drawer back, fasten the drawer sides. But make sure you also fasten to the back, reinforcing the back of the drawer. Use glue.
Step 3
Drawer Slides. Fit the drawer slides into the cabinet. The drawer without the face will sit inset into the drawer 3/4″ for the drawer face. Push the drawer into the cabinet for the next step.
Step 4
Drawer Face. Position the drawer face on the drawer, and fasten in face. Leave an even gap around all sides.
Finishing
Sand all surfaces, starting with a medium grit and finishing with fine. Wipe off the dust, fill any holes or gaps with wood filler, and sand smooth once dry. Apply primer if you're painting, then finish with your choice of paint or stain and seal with a durable clear topcoat. For outdoor projects, use exterior-rated primer, paint or stain, and sealer so the piece stands up to the weather.
Source (temporary): https://www.ana-white.com/woodworking-projects/modular-office-cpu-base-plans