Modular Office Small Desktop
Special thanks to Anna at Take the Side Street for the fabulous photo. Make sure you visit Anne for all the details.
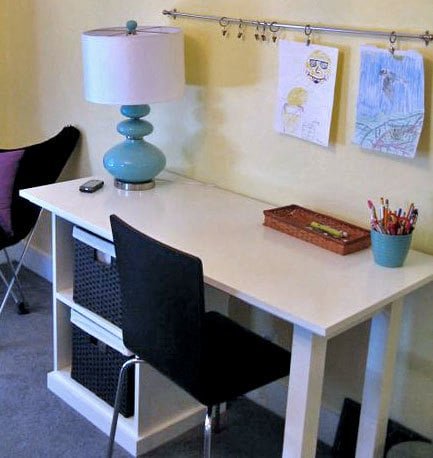
Specifications
| Project type | Desk, Desk Systems and Project Table Plans |
|---|---|
| Room | Storage Solutions |
| Style | Cottage Style Furniture Plans |
| Difficulty | Beginner Projects |
| Estimated cost | $20 - $50 |
Dimensions
Use the size-specific shopping and cut lists below.
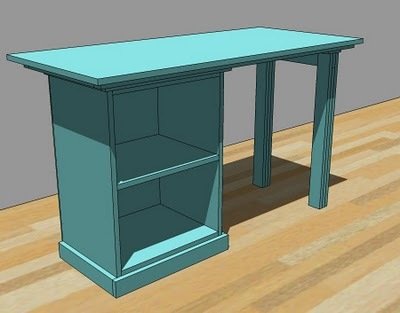
Shopping List
1 – 1×24 52″ in length
2 – 1×2 Boards, 8′ Length
3 – 1×3 Boards, 8′ Length (you actually will only need 2 and a 17″ scrap piece)
1 – 2×4 (You will only need 17″)
1 1/4″ Nails
2″ Nails
2″ Wood Screws (about 5)
3″ Wood Screws (about 5)
Wood Filler
Wood Glue
Finishing Supplies
Cut List
2 – 1×2 @ 16 1/2″ (Side Trim, underside)
2 – 1×2 @ 50″ (Front/Back Trim, underside)
1 – 1×24 @ 52″ (Desktop)
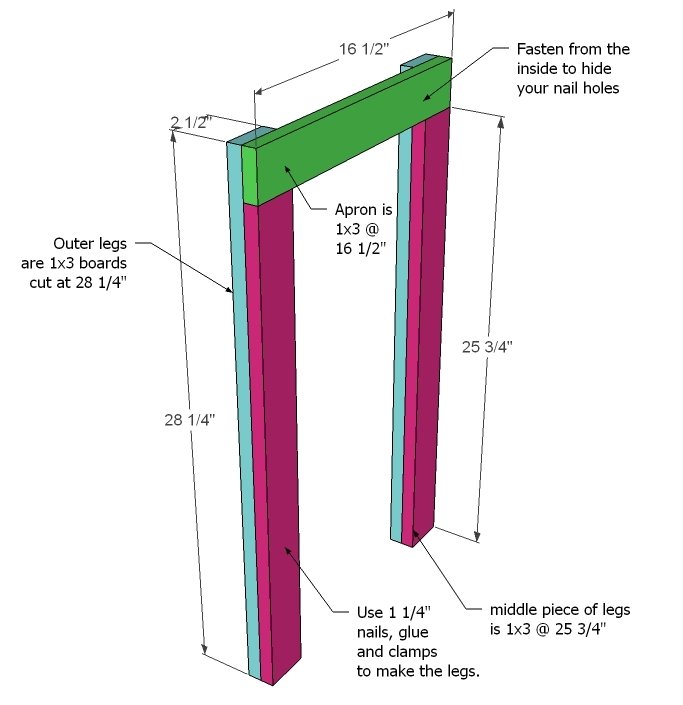
4 – 1×3 @ 28 1/4″ (Outer Legs)
2 – 1×3 @ 25 3/4″ (Middle of the Legs)
1 – 1×3 @ 16 1/2″ (Top Apron)
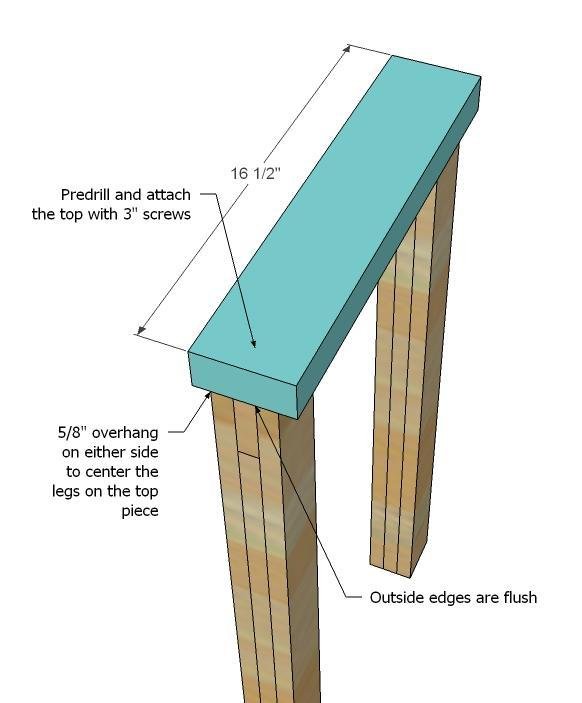
1 – 2×4 @ 16 1/2″ (Top of Leg Unit)
Tools
- measuring tape
- square
- pencil
- safety glasses
- hearing protection
- drill
- nailer
- sander
Step-by-step Instructions
Step 1
This project fits on top of the Narrow Open Base for the Modular Office Collection. You can modify as you see fit.
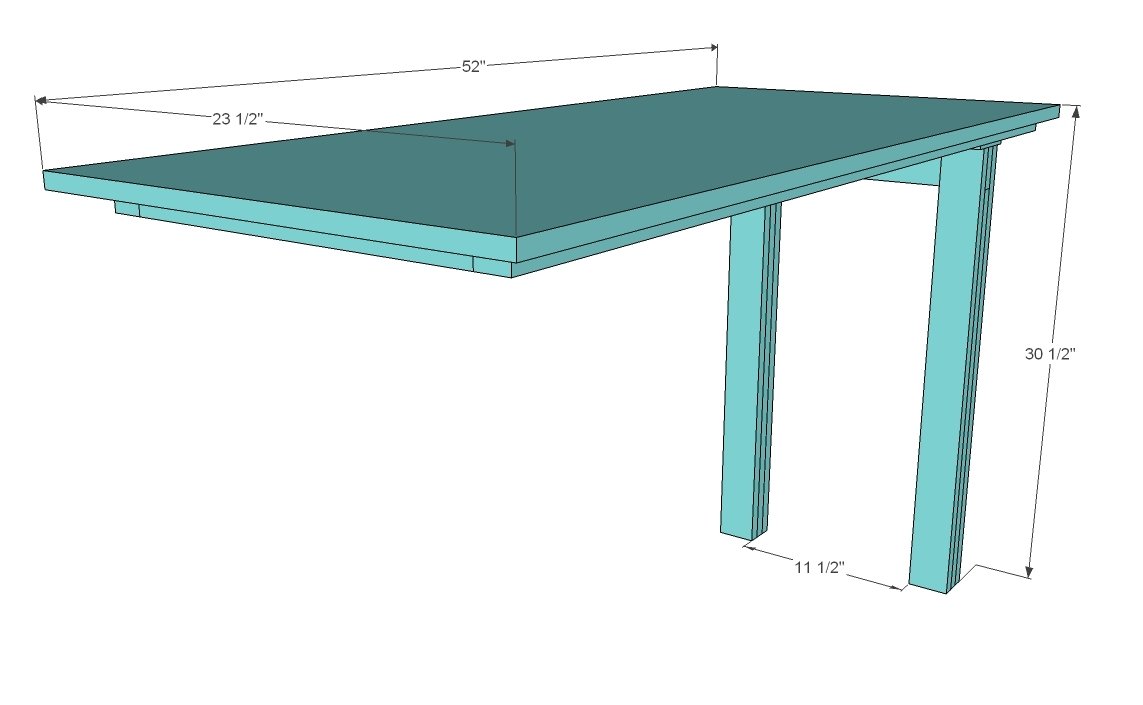
Step 2
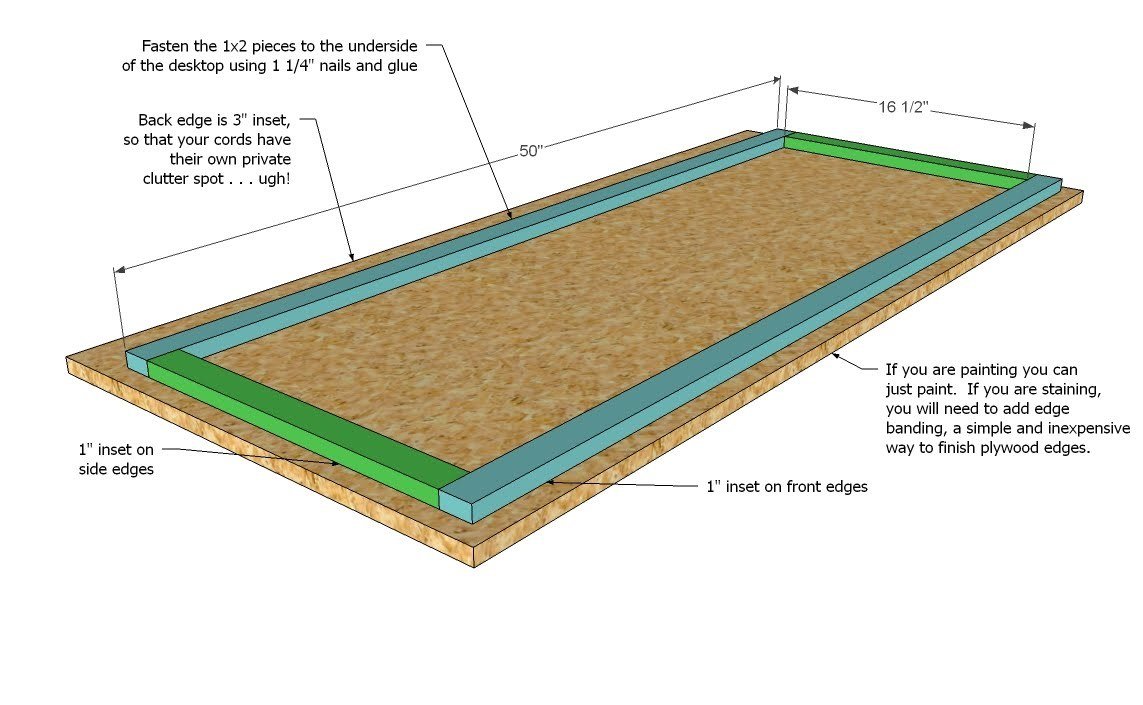
Desktop Construction. Build your desktop as instructed above, using glue and 1 1/4″ nails. Make sure you check for square as you assemble the underside trim boards. You will need to finish the edges with edge banding if you are staining.
Step 3
Leg Construction. Clamp the middle leg piece to the outer leg piece, keeping bottom and outside edges flush. Use glue and 1 1/4″ nails. Keep the outer edge as flush as possible. Do not clamp so tight that you loose all of your glue. Let dry. Then add the top apron piece in the same method. As you add the top apron, check for square. One thing to note if you plan on staining, avoid any glue seeping out, this will cause the stain to discolor.
Step 4
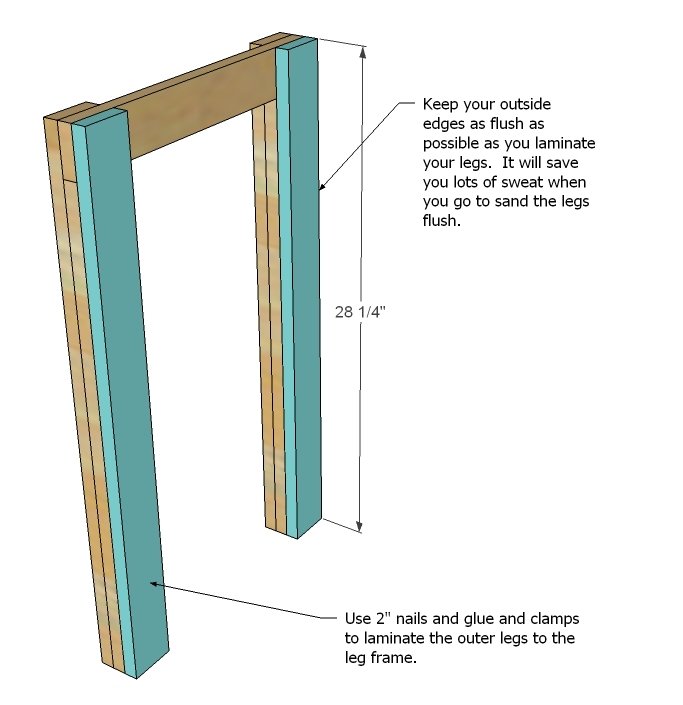
Leg Construction. In the same manner as step 1, assemble the remaining leg piece. This time use the 2″ nails and glue, keeping all outer edges flush. Let dry.
Step 5
Step 6
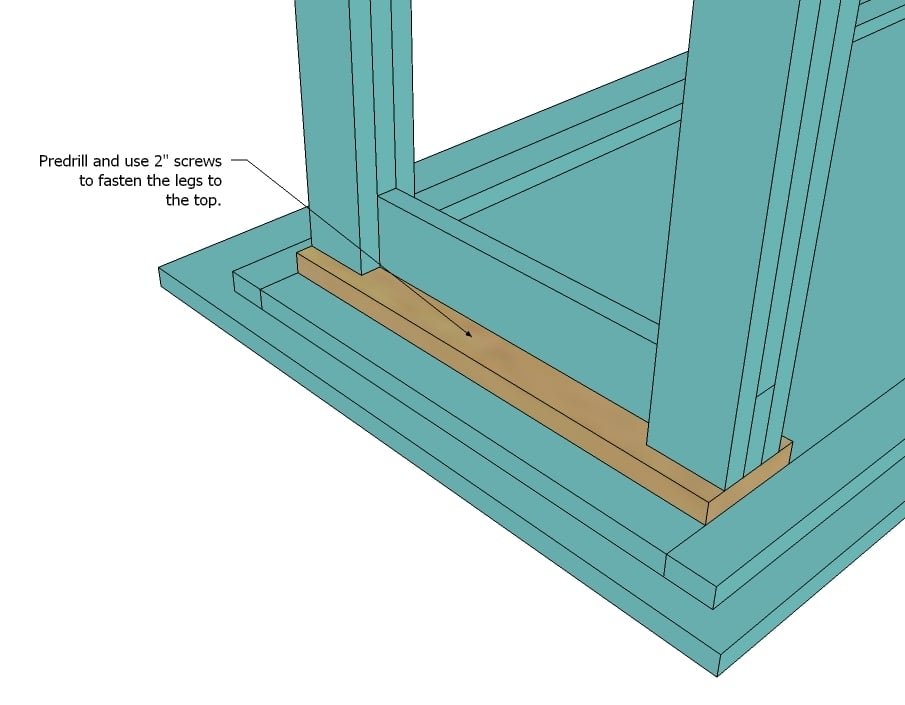
Attaching to Desktop. Attach to the desktop as shown above.
Finishing
Sand all surfaces, starting with a medium grit and finishing with fine. Wipe off the dust, fill any holes or gaps with wood filler, and sand smooth once dry. Apply primer if you're painting, then finish with your choice of paint or stain and seal with a durable clear topcoat. For outdoor projects, use exterior-rated primer, paint or stain, and sealer so the piece stands up to the weather.
Source (temporary): https://www.ana-white.com/woodworking-projects/modular-office-small-desktop