Modular Workbench Sawhorses Countertops
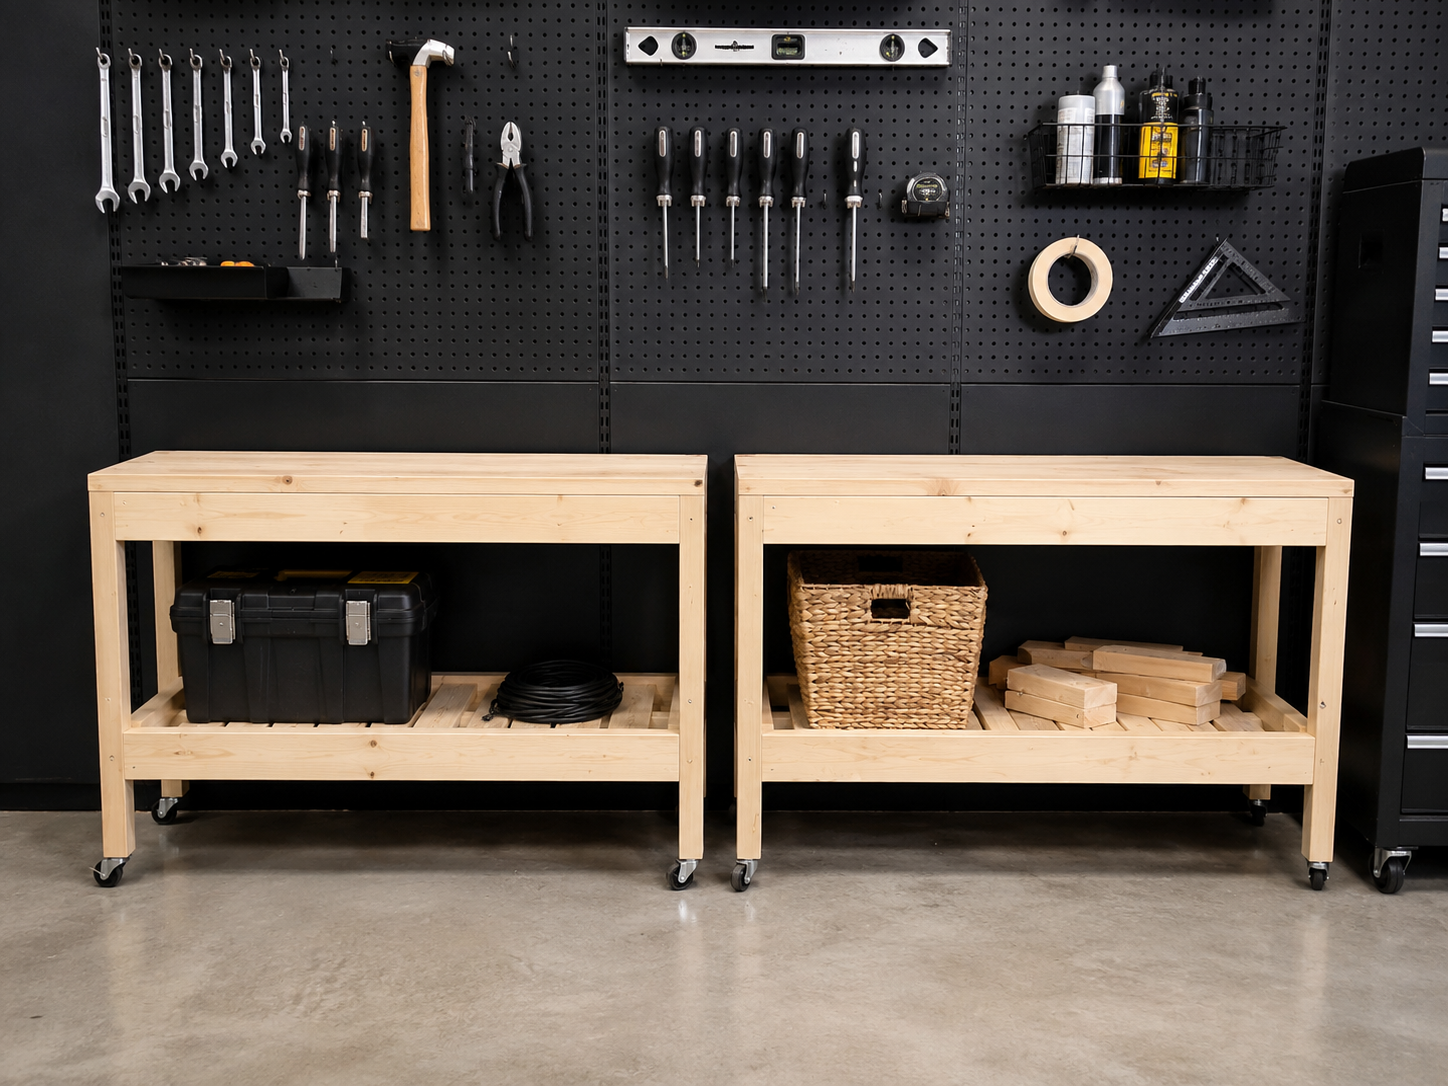
Store them flat against the wall as a countertop, sized the same as standard countertop depth. Pull them out and place together for a generous work surface. Spread apart and use as sawhorses to rip lumber. So easy to build, sturdy and inexpensive, this is a great first project! from
Specifications
| Project type | Workshop and Garage Plans |
|---|---|
| Room | Garage and Workshop |
| Difficulty | Starter Projects |
Dimensions
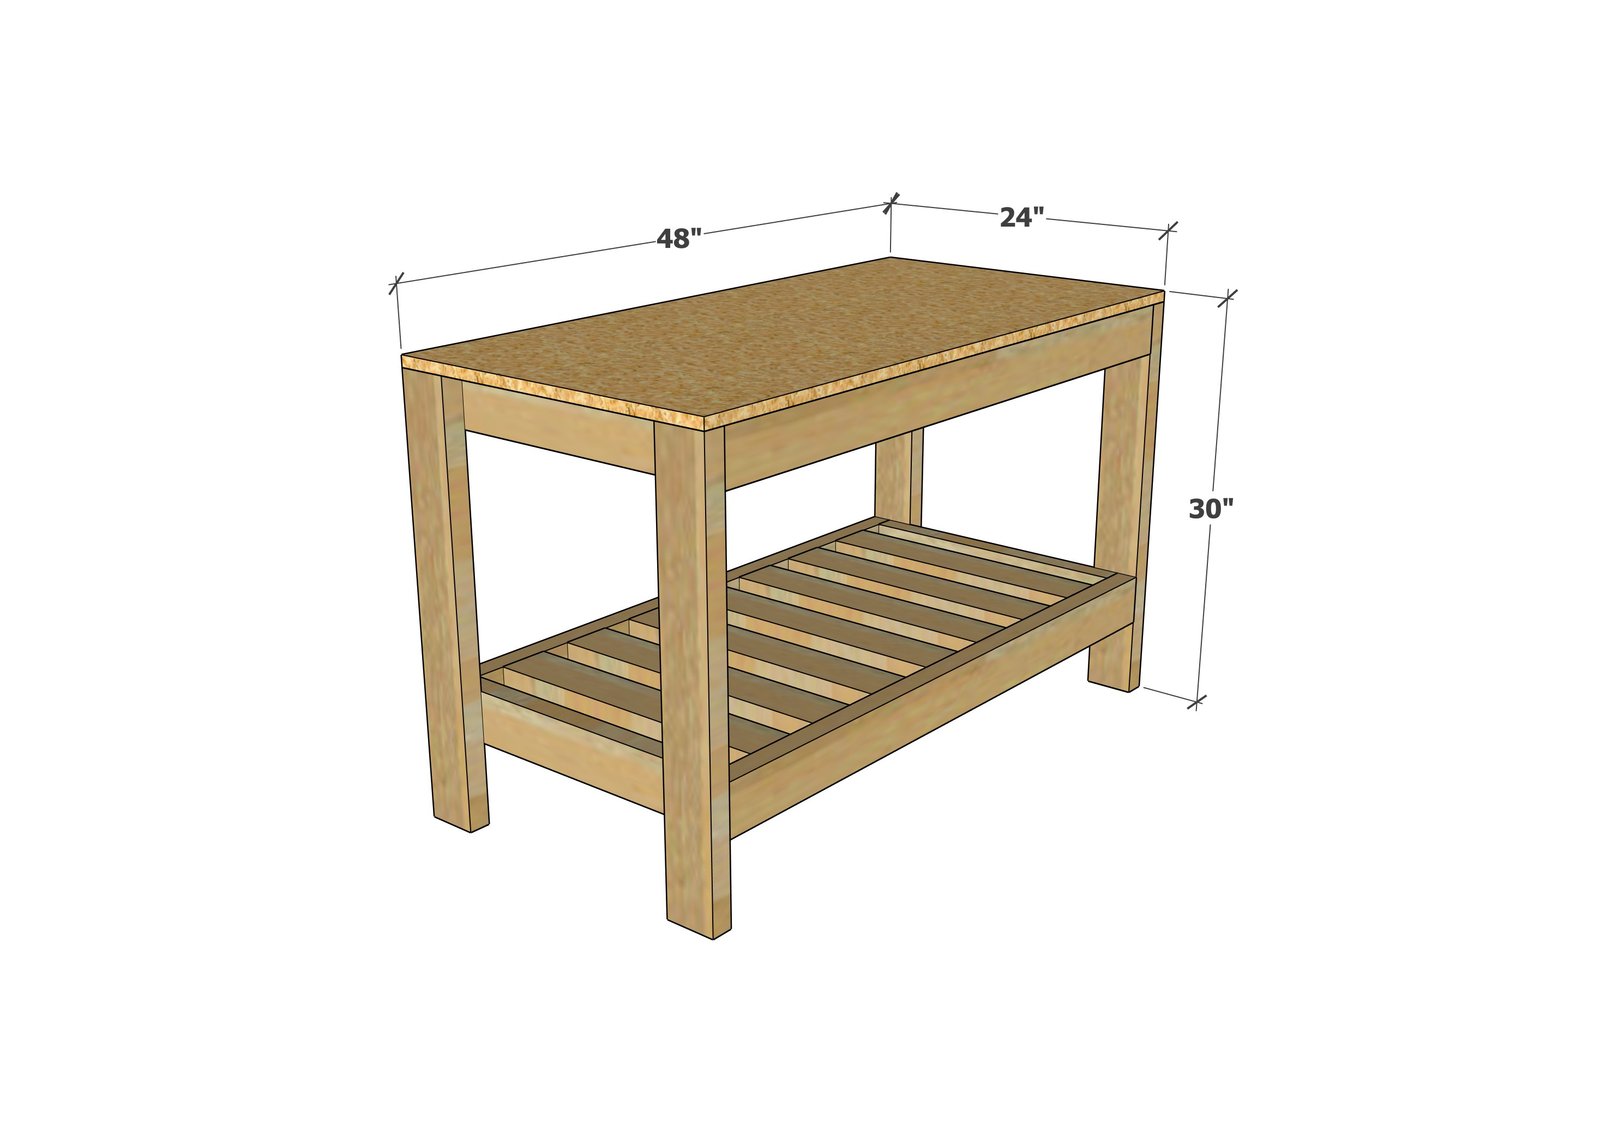
Use the size-specific shopping and cut lists below.
Shopping List
- 5 - 2x4 @ 10 feet long (preferably yellow toned (not red toned))
- 1 - 3/4" plywood panel @ 24" x 48"
- 70 - 2-3/4" self tapping flat head wood screws
- 20 - 1-1/4" self tapping flat head wood screws
Cut List
- 4 - 2x4 @ 29-1/4"
- 4 - 2x4 @ 45"
- 11 - 2x4 @ 21"
- 1 - 3/4" plywood
- panel @ 24" x 48"
Tools
- measuring tape
- square
- pencil
- safety glasses
- drill
- circular saw
Step-by-step Instructions
Step 1
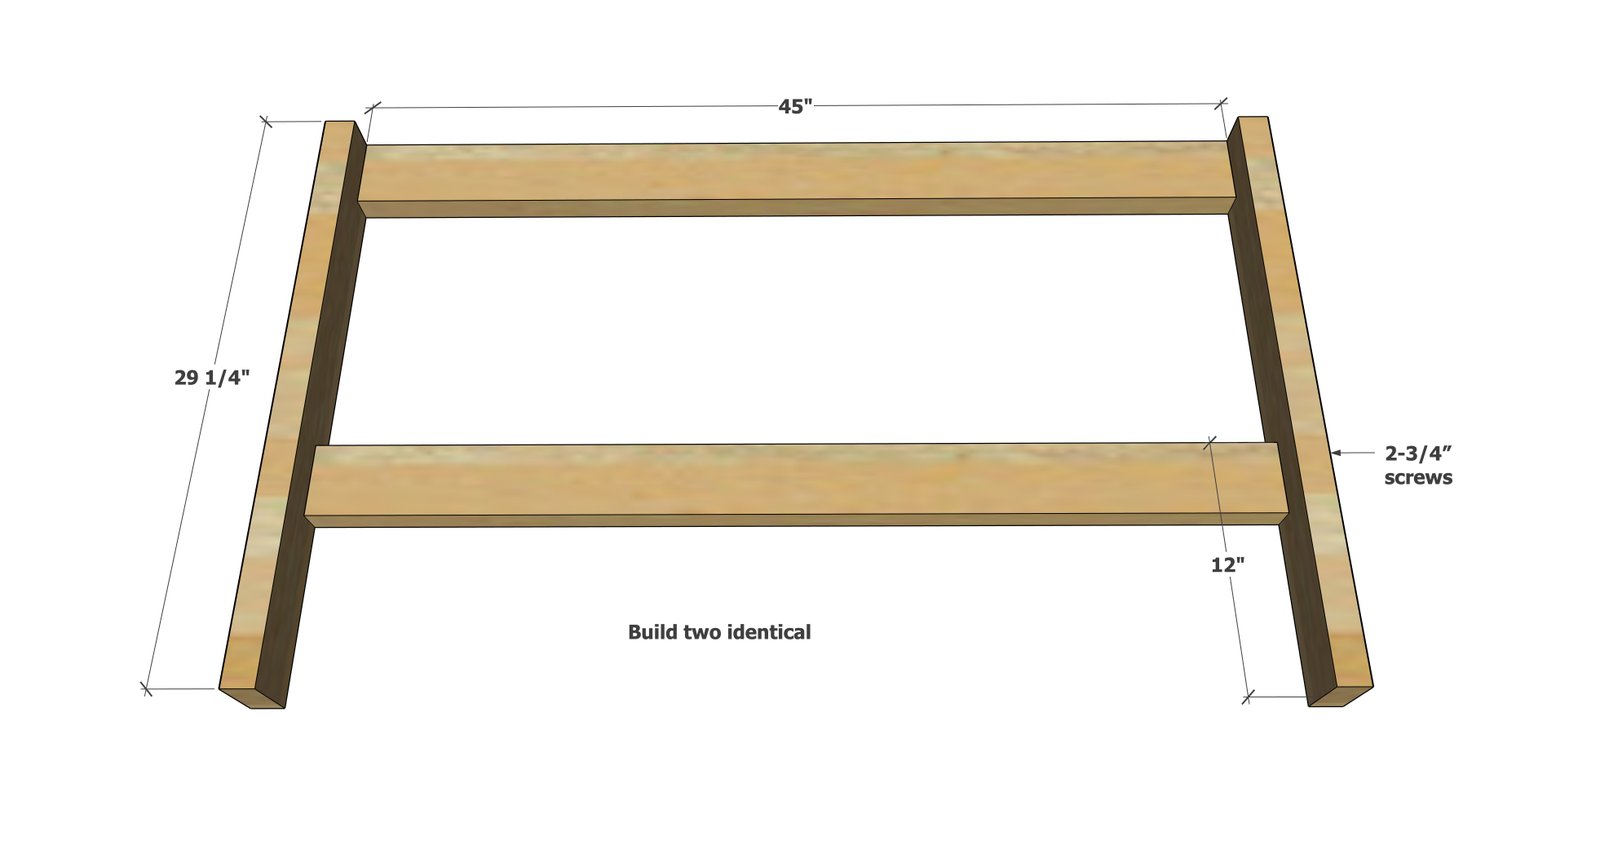
Measure and mark the legs 12" up from the bottom. Use a speed square to transfer mark across. Clamp and attach legs to the 45" 2x4 boards, using 2-3/4" screws. Build two legs sets that are identical.
Step 2
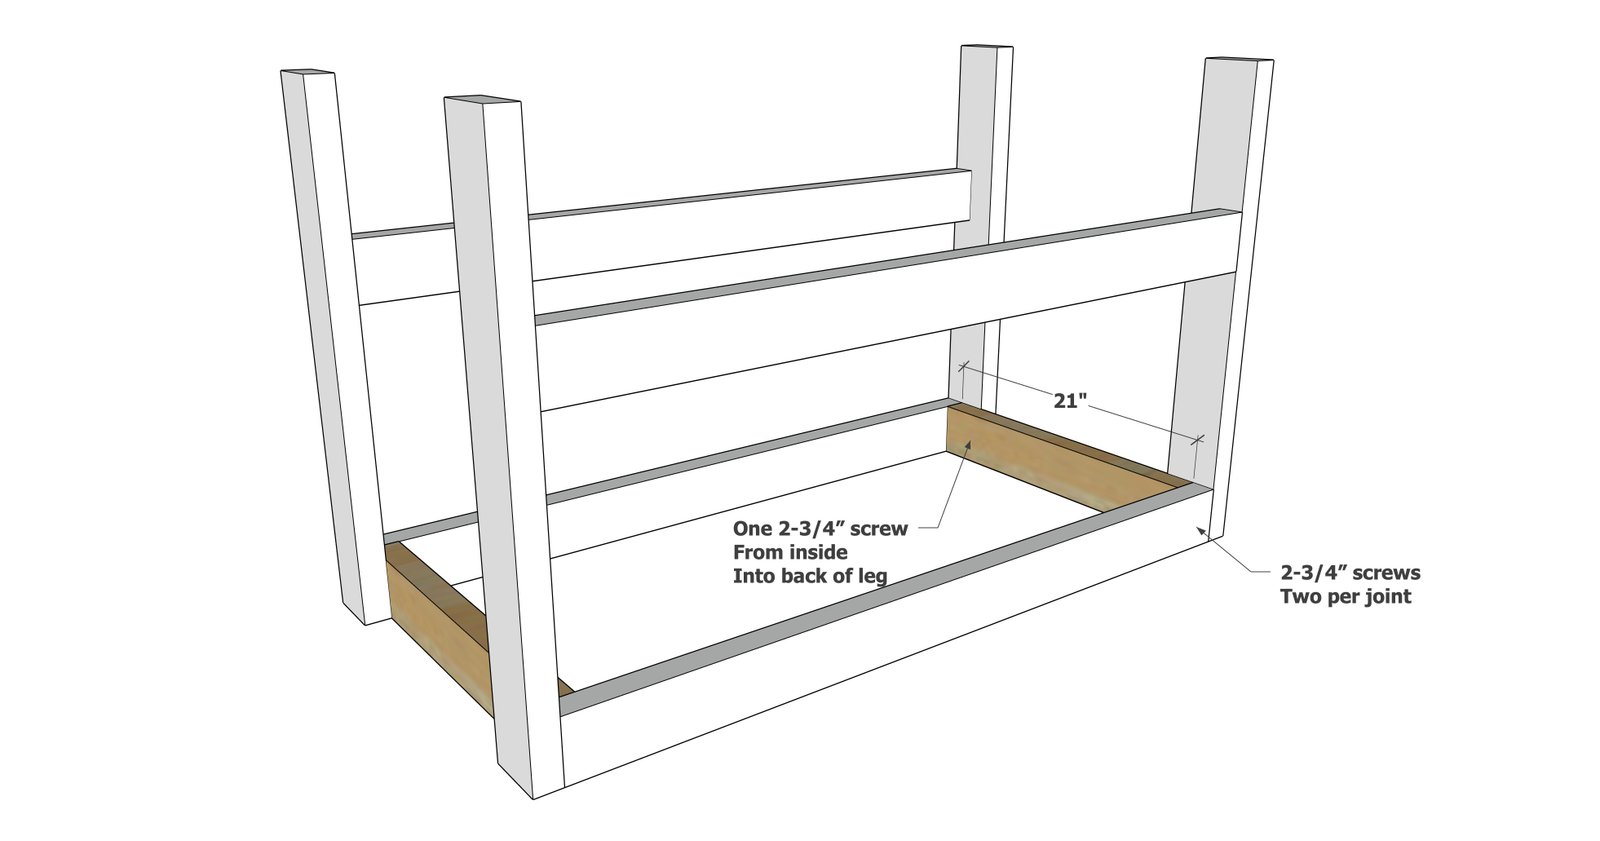
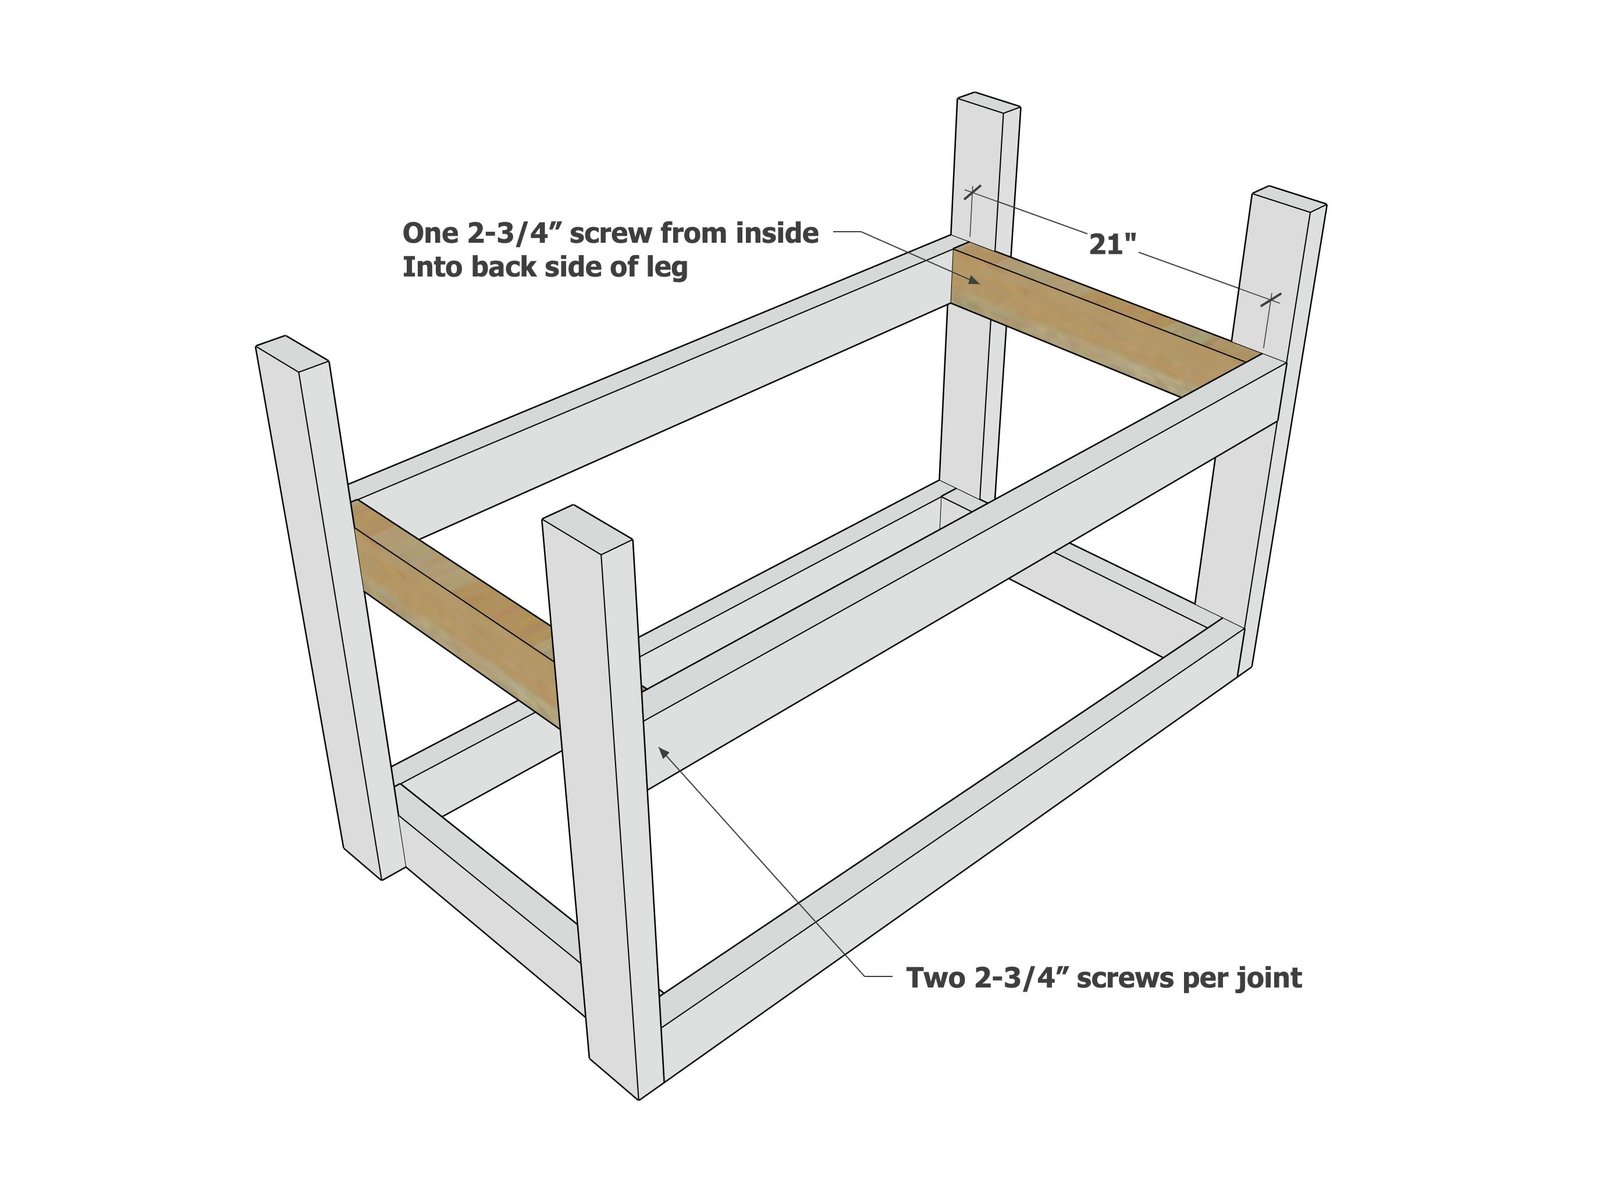
Attach the 2x4s at 21" to the legs sets, to create the top frame, with two screws per joint.
Step 3
Repeat for the bottom frame.
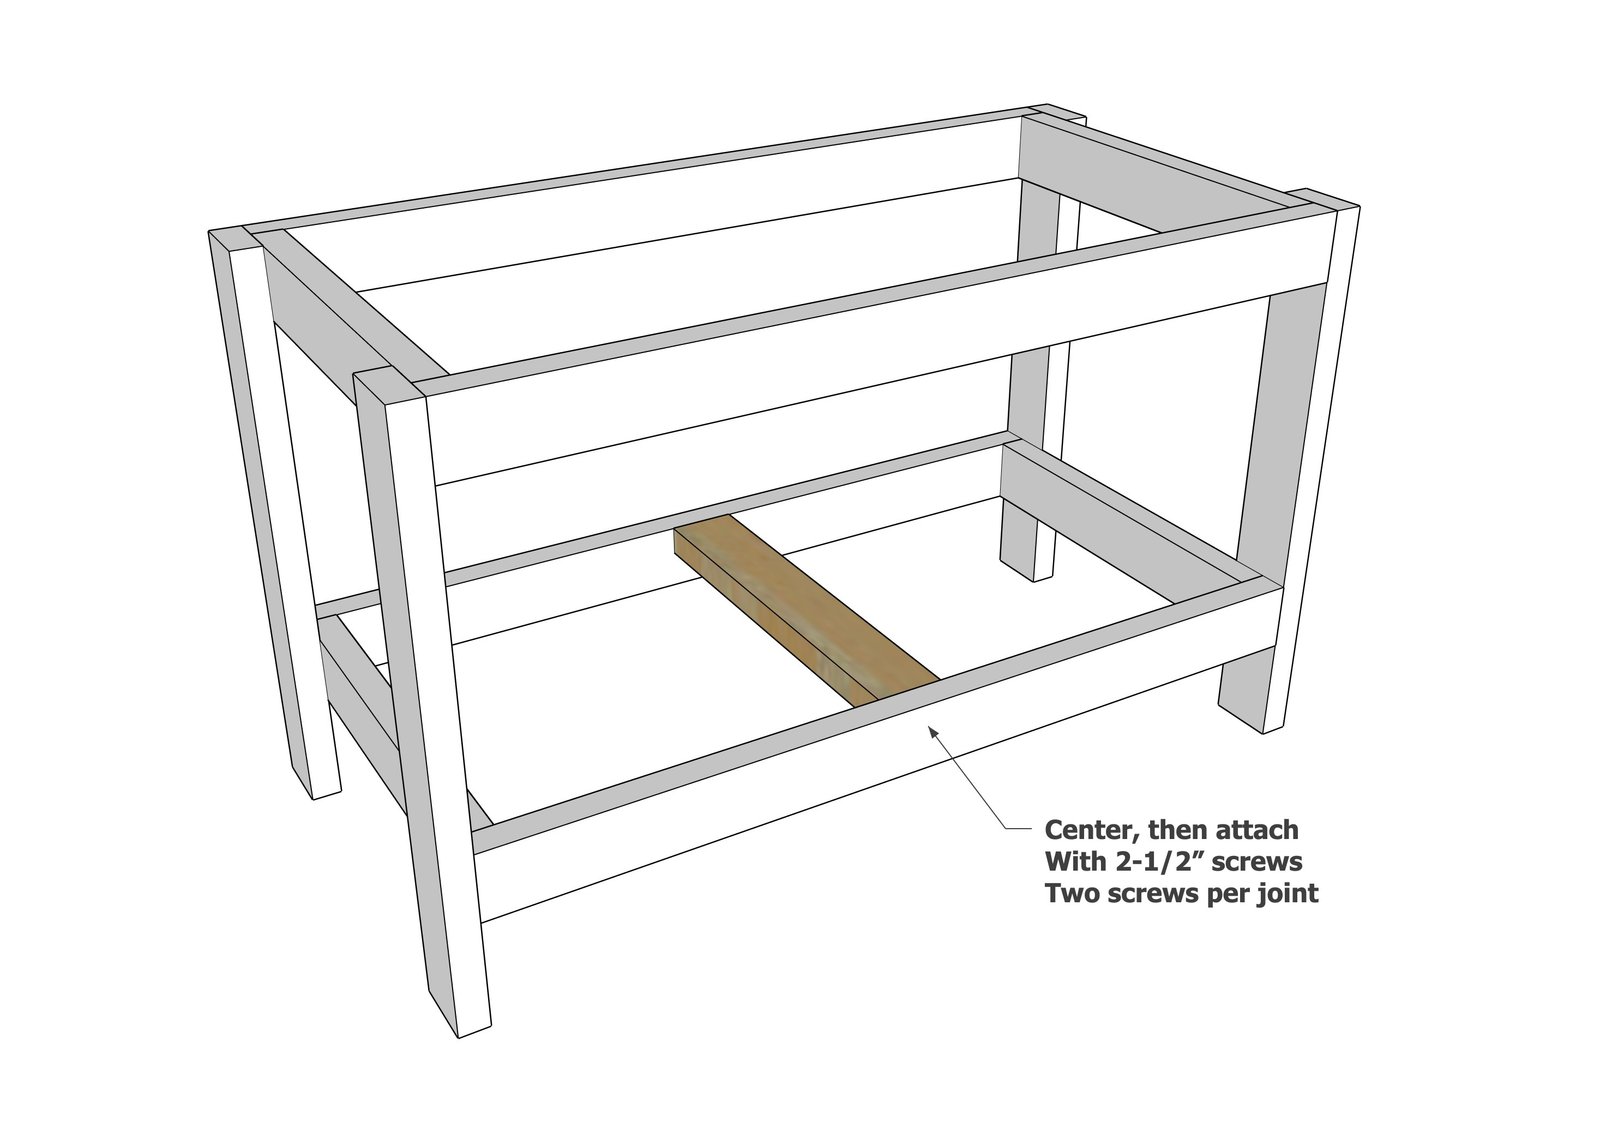
Find the center of the bottom shelf.
Find the center of a 21" 2x4 board. Match centers and attach with 2-3/4" screws, two per joint.
Step 5
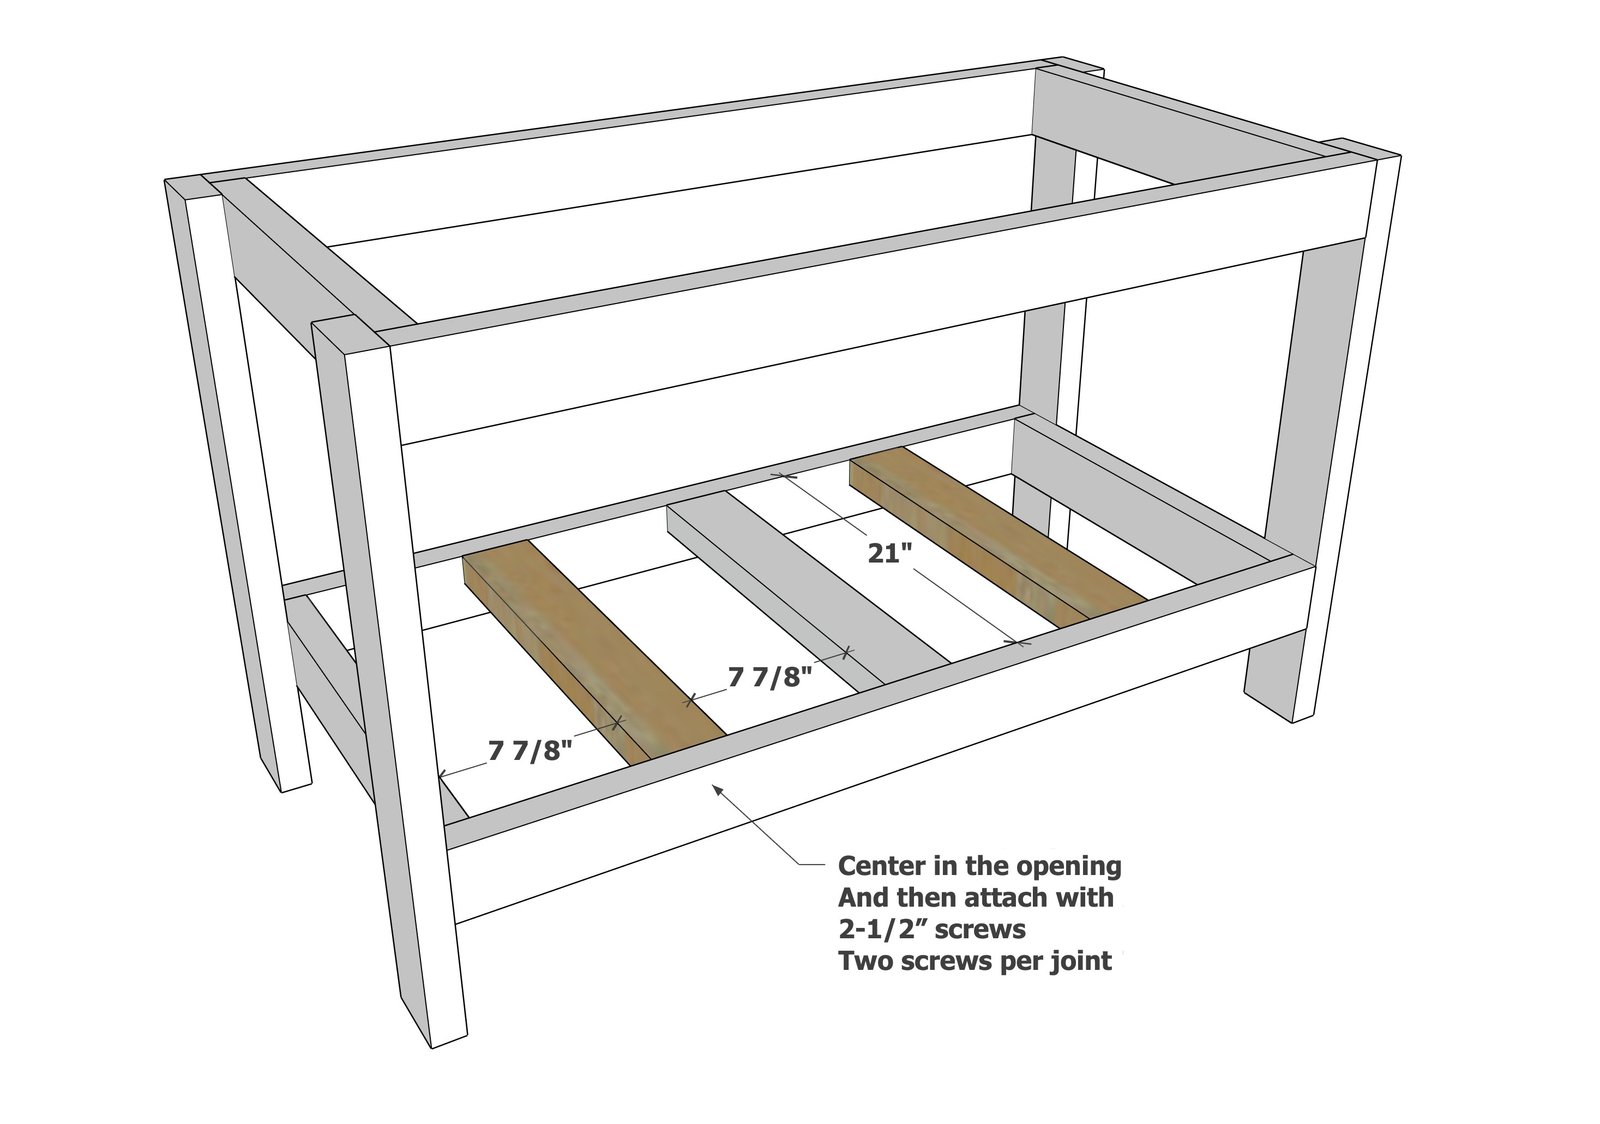
Center two more slats in the bottom shelf, on the openings. Attach with 2-3/4" screws.
Step 6
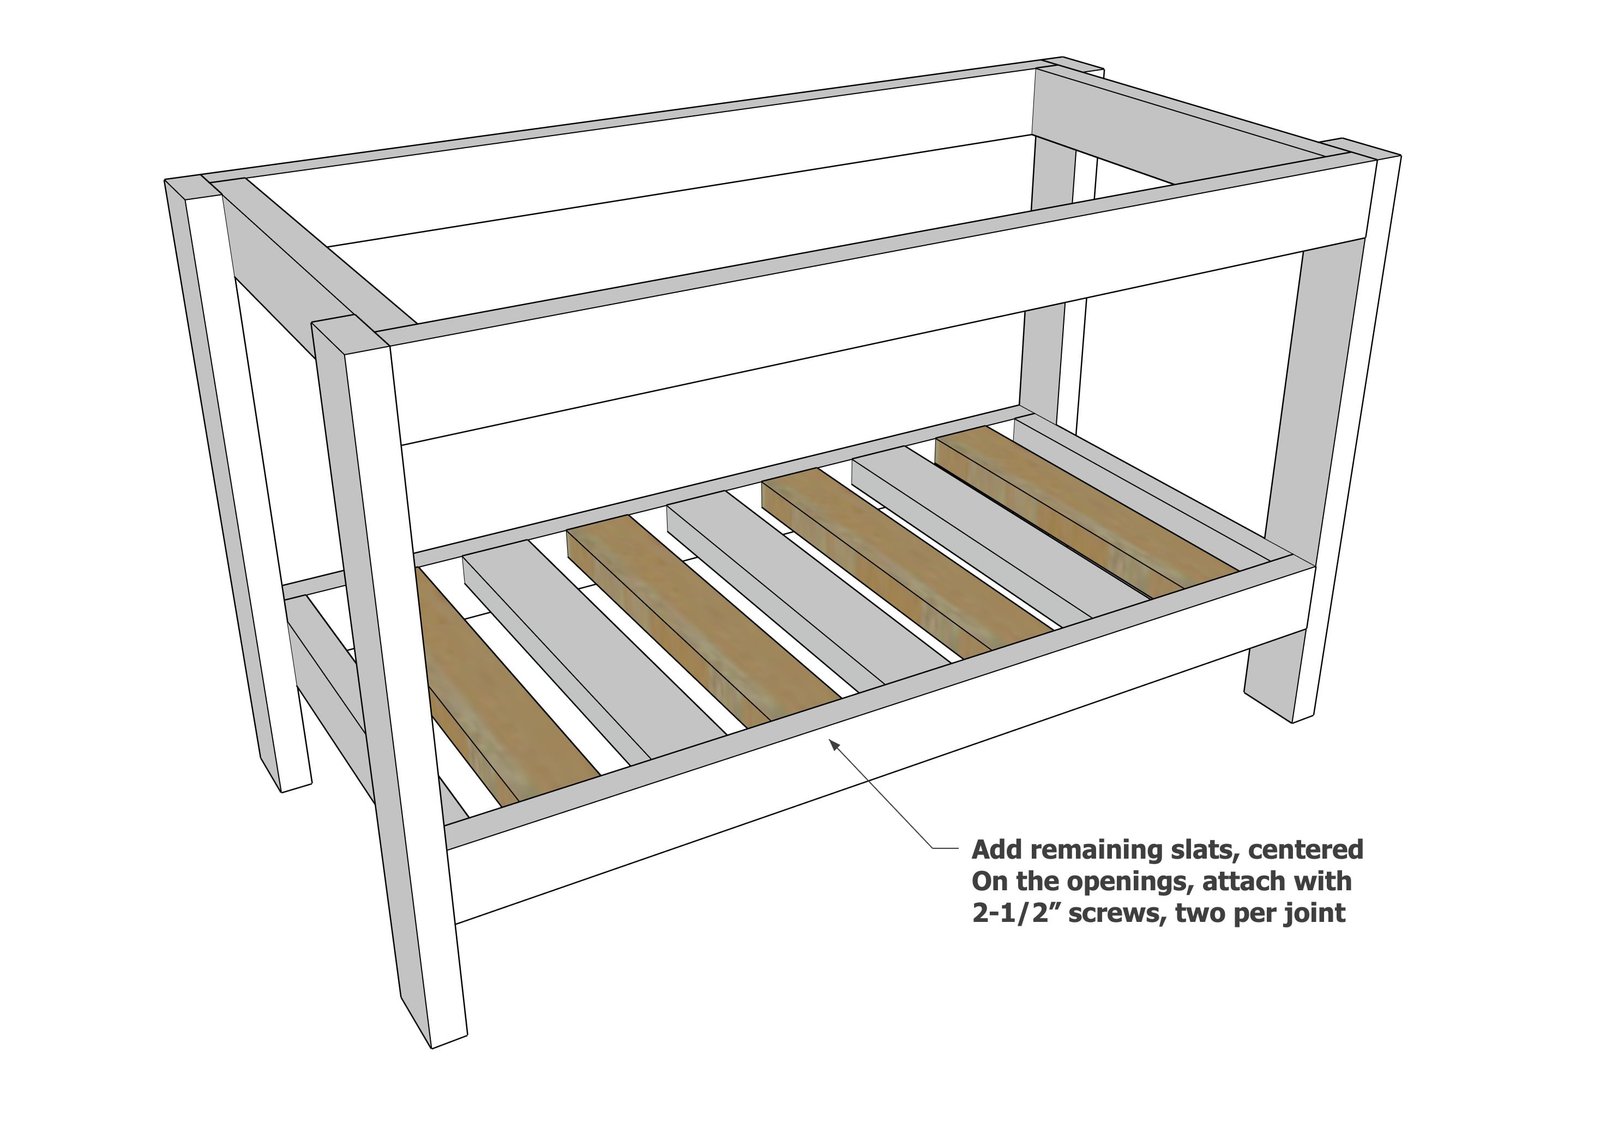
Center the remaining slats in the openings and attach with 2-3/4" screws.
Step 7
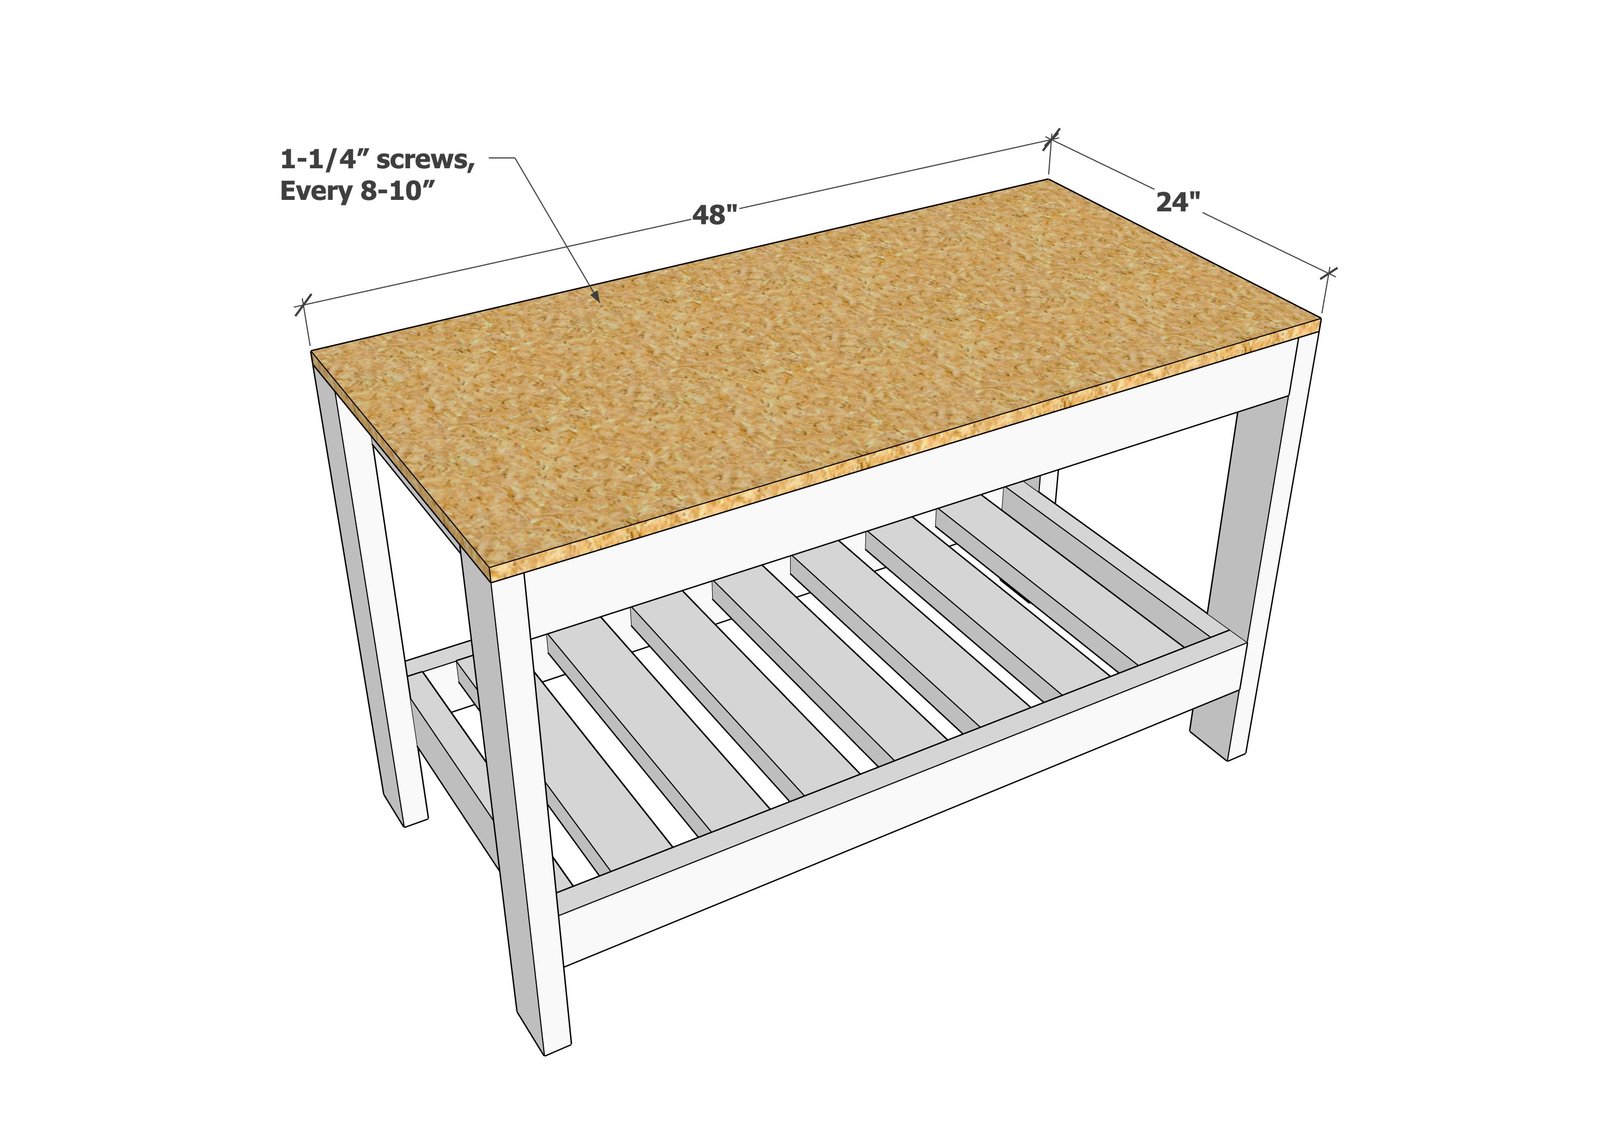
Place the plywood panel on top. Adjust the base so the plywood top matches the base on side edges. Screw down with 1-1/4" screws, every 12".
Step 8
One of the biggest reasons to build your own projects is the ability to customize for your specific needs. Supplies: 2" swivel caster wheels, 1-1/4" screws Measure the caster wheels to determine how much to cut off the legs of the workbench. Mark and cut the legs down on the workbench. Install the caster wheels.
Finishing
Sand all surfaces, starting with a medium grit and finishing with fine. Wipe off the dust, fill any holes or gaps with wood filler, and sand smooth once dry. Apply primer if you're painting, then finish with your choice of paint or stain and seal with a durable clear topcoat. For outdoor projects, use exterior-rated primer, paint or stain, and sealer so the piece stands up to the weather.
Source (temporary): https://www.ana-white.com/woodworking-projects/modular-workbench-sawhorses-countertops